
Table of Contents >> Show >> Hide
- Before You Hide It: Make Sure It’s a “Minor Cut”
- Way #1: The “Heal-It-While-You-Hide-It” Cover (Bandage or Hydrocolloid Patch)
- Way #2: Makeup Camouflage (Only After the Skin Is Closed)
- Way #3: Strategic Distraction (Hair, Accessories, Angles, and Low-Key Confidence)
- Bonus: Help It Heal Nicely (So You Don’t Have to Hide It for Long)
- Conclusion
- Extra: Real-World “Been There” Experiences and Practical Lessons (500+ Words)
A face cut has a special talent: it shows up exactly when you’ve got a big meeting, a date, family photos,
or that one friend who says “OMG what happened?!” loud enough for nearby strangers to join the conversation.
The good news: if the cut is minor, you can make it far less noticeablewithout making it angry, infected,
or turning it into a lifelong autobiography in scar form.
This guide covers three simple, realistic options: (1) the “heal it while hiding it” cover, (2) a makeup method
that won’t betray you in sunlight, and (3) low-effort distraction tactics that work surprisingly well.
We’ll also talk about when you should skip the DIY route and get medical care.
Before You Hide It: Make Sure It’s a “Minor Cut”
If you’re dealing with anything deep, gaping, heavily bleeding, or close to the eye, the priority is treatmentnot
camouflage. Makeup and clever styling are great, but they’re not a substitute for stitches or medical evaluation.
Get checked urgently if any of this is true
- The bleeding won’t stop after steady pressure.
- The cut is deep, jagged, or the edges won’t stay together.
- It’s from an animal/human bite or something dirty/rusty.
- It’s near your eye, on your eyelid, or you’re having vision changes.
- You see signs of infection (increasing warmth, spreading redness, pus, fever, worsening pain).
If none of that applies and the cut is truly minor, you’ve got options. Let’s hide it the smart waymeaning:
you still treat your skin like it’s the VIP here (because it is).
Way #1: The “Heal-It-While-You-Hide-It” Cover (Bandage or Hydrocolloid Patch)
This is the simplestand often the safestway to hide a facial cut, especially in the first 24–48 hours.
The goal is to keep it clean, protected, and not dried out. When a wound is protected and kept gently moist,
it typically heals more smoothly than when it’s left to crust over like a tiny desert.
Best for
- Fresh cuts that are still tender, pink, or trying to scab
- Anyone who doesn’t want makeup near a healing wound
- Busy days: travel, sports, work shifts, and “I don’t have time for blending” moments
How to do it (fast, neat, and face-friendly)
-
Stop bleeding first. Use gentle, steady pressure with clean gauze or a clean cloth until bleeding
stops. -
Rinse with clean water. If you need soap, use it around the areanot packed into the cut.
Pat dry (don’t rub like you’re trying to erase your past). -
Apply a thin protective layer. A small amount of petroleum jelly can help keep the surface from
drying out. -
Cover it.
- Option A: Small sterile bandage. Choose one that fits the area and won’t slide around.
-
Option B: Hydrocolloid patch. These are often used for acne, but the material is also used
in wound dressings. Pick one that fully covers the cut and sticks well to clean, dry skin.
How to make it less noticeable
- Choose a skin-toned bandage (they exist!) or a low-profile clear/neutral patch.
- Place it cleanly and commit. A crooked bandage draws attention; a crisp one looks intentional.
-
Make it a vibe. If someone asks, a simple “Oh, I nicked myselfalready healing” ends the
conversation. Most people don’t actually want details. They just panic-hug their empathy and move on.
Pro tip: Avoid harsh antiseptics that can irritate healthy tissue. When in doubt, gentle cleaning
and protection usually beat “nuke it from orbit” solutions.
Way #2: Makeup Camouflage (Only After the Skin Is Closed)
Makeup can hide a facial cut impressively wellbut timing matters. If the cut is open, weeping, or actively
bleeding, makeup is more likely to irritate it or increase infection risk. The sweet spot is when the skin has
closed and you’re dealing with redness, a flat healing line, or a stable scab that isn’t raw.
Best for
- Healed-over cuts that are flat or lightly scabbed
- Redness around the cut
- Photos, events, interviews, and “I need to look awake and uninjured” situations
The “less is more” product checklist
- Gentle moisturizer (to prevent makeup from grabbing onto dry texture)
- Primer (optional, but helpful for smoothing edges)
- Color corrector (green for redness; peach/orange for darker discoloration depending on skin tone)
- High-coverage concealer (cream or liquidbuildable, not slippery)
- Setting powder (tiny amount) and/or setting spray
Step-by-step technique that won’t scream “I’m wearing concealer!”
- Prep gently. Light moisturizer, then wait a minute. If the area is shiny, blotdon’t pile on powder.
-
Correct the color first. Use the smallest amount possible:
- Red cut line? Tap on a whisper of green corrector.
- Purplish or brownish mark? Tap on peach/orange corrector (shade depends on your skin tone).
-
Conceal with tapping, not rubbing. Put a small dot of concealer on the area and
press it in with a clean fingertip, small brush, or sponge tip. Keep most coverage directly on the cut,
and blend only the edges. -
Let it set for a few seconds. This is the secret sauce. If you immediately drag product around,
you’ll remove coverage from the spot you’re trying to hide. -
Feather outward. Blend the outer edge into surrounding skin so it disappears naturally.
Think “soft fade,” not “fresh drywall patch.” -
Lock it inlightly. Use a tiny dusting of setting powder on the edges (not a heavy bake),
or a setting spray if powder makes the area look drier.
Common problems (and the quick fixes)
-
It looks flaky: You need more hydration, less powder, and thinner layers. Heavy product
clings to texture like gossip. - It looks gray: Wrong undertone. Add a touch of corrector or switch concealer shades.
-
It keeps sliding off: Try a tackier primer, apply less skincare right before makeup,
and press product in rather than swiping. -
The scab is raised: Don’t try to flatten it with makeup. You’ll just build a tiny makeup mountain.
Consider Way #1 (patch) or Way #3 (distraction).
Reality check: The goal isn’t “make it vanish under a microscope.” It’s “people don’t notice it
in normal conversation.” That’s a much easier winand your skin will thank you.
Way #3: Strategic Distraction (Hair, Accessories, Angles, and Low-Key Confidence)
Sometimes the easiest way to hide a cut on your face is to stop trying to cover it directly and instead
redirect attention. Humans are adorable: our eyes automatically go to contrast, symmetry, and whatever you’ve
made “the main character.” You can use that.
Best for
- Raised scabs or textured healing spots that makeup won’t smooth
- Days when your skin is sensitive and you want zero product on it
- Situations where you can control lighting or your look (work calls, photos, meetings)
Quick distraction tactics that actually work
-
Hair placement: A side part, a swoop of bangs, or a slightly different style can hide a cut near
the forehead or temple instantly. - Glasses (even non-prescription): Frames draw focus to eyes and away from cheek or nose marks.
- Face-friendly accessories: A hat brim, a beanie, or a headband can cover upper-face cuts without touching them much.
-
Camera angles for Zoom calls: Raise your camera slightly above eye level, turn your “good side”
toward the light, and avoid harsh overhead lighting. - Soft lighting: Diffuse light reduces shadows and texture. (Translation: your bathroom lighting is not your friend.)
If you must be in photos
- Stand with the cut away from the key light so it doesn’t cast a texture shadow.
- Avoid heavy shimmer near the areashine highlights bumps.
- Don’t over-correct with thick makeup that cracks. Natural skin beats cakey cover every time.
And yes, confidence is part of this method. Not in a “love yourself” poster waymore like:
if you treat it like it’s no big deal, most people will follow your lead.
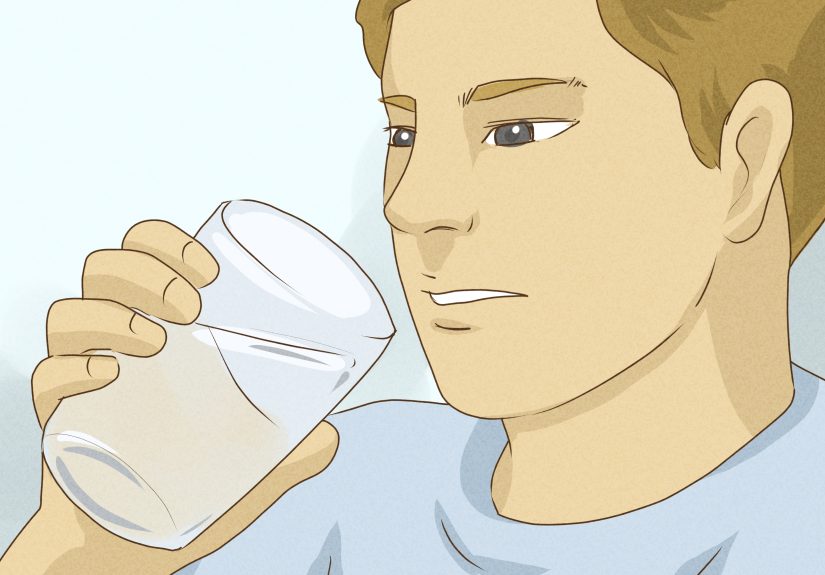
Bonus: Help It Heal Nicely (So You Don’t Have to Hide It for Long)
If your real mission is “hide this cut today,” your long game is “make sure it heals well this week.”
A few smart habits can reduce redness and the chance of a noticeable scar later.
Simple healing habits
- Keep it clean and protected. Change dressings if they get dirty or wet.
- Keep it gently moist. A thin layer of petroleum jelly can prevent excessive drying.
- Don’t pick. Picking turns a small cut into a longer story.
- Watch for infection signs. Increasing warmth, pain, swelling, spreading redness, pus, or fever deserve medical advice.
- Sun protection matters. Once the skin has healed over, protecting the area from sun can help reduce lingering discoloration.
If you’re unsure whether you’re in “safe to cover” territory, choose the conservative route (Way #1) until the skin is clearly closed and calm.
Conclusion
Hiding a cut on your face doesn’t have to mean smothering it in product or pretending you lost a battle with a rogue cabinet door.
Start with the safest optionclean, protect, and cover. If the skin is closed and stable, you can use targeted color correction and
gentle concealer tapping for a natural finish. And when makeup isn’t cooperating, strategic distraction (hair, glasses, angles, lighting)
is the underrated MVP.
Most importantly: if the cut is deep, keeps bleeding, is near the eye, or shows signs of infection, get medical care.
The best cover-up is a properly healed wound.
Extra: Real-World “Been There” Experiences and Practical Lessons (500+ Words)
Facial cuts rarely happen at convenient times. They happen when you’re rushing, cooking, shaving, wrangling kids, playing sports,
moving furniture, or doing that heroic move where you try to catch something falling off a shelf (and the shelf wins).
Here are a few common scenariosand what tends to work best in each.
1) The morning shaving nick before an important meeting
This is the classic: a tiny cut that won’t stop looking shiny and obvious. The temptation is to bury it under foundation.
Usually, the cleaner move is to stop bleeding fully, keep it protected, and go with a small, neat cover (Way #1) until it calms down.
If it’s truly closed by meeting time, use the lightest possible concealer and pressdon’t swipe. In real life, a heavy base
often turns into a cracked patch by lunchtime, which somehow highlights the exact area you wanted invisible.
2) The “I walked into something” forehead cut before photos
Forehead cuts are dramatic because they sit in a high-visibility zone with lots of movement. Makeup can cling to texture there,
especially if you raise your eyebrows a lot (or if your face is expressive enough to be its own sitcom).
A trick that tends to help: adjust hair first. A subtle side part or a soft fringe can cover more than you’d expect.
For photos, soft light is everythingavoid harsh overhead lighting that turns every bump into a mountain range.
If you’re doing makeup, focus on blending the edges around the spot rather than building thickness on top of it.
3) The sports scratch on the cheek that’s red but flat
When a cut is flat and mostly just red, makeup is in its element. This is where color correction shines:
a tiny tap of green corrector, then a thin layer of concealer that matches your skin tone.
The biggest mistake people make is applying too much too fast. In everyday life, thin layers look natural,
and you can add a second micro-layer only if you still see redness.
If you’re going to be sweating, set the edges lightly and avoid rubbing the areafriction is the enemy of both healing and coverage.
4) The scab that looks “textured” no matter what you do
Texture is the moment makeup artists quietly sigh and reach for patience. If a scab is raised, makeup can’t truly flatten it;
it can only change the color. That means you’ll still see it under strong light. In these cases, people often get better results
by switching strategies: a hydrocolloid patch or small bandage (Way #1), or distraction (Way #3).
Oddly enough, when you stop fighting the texture and start controlling the overall vibeglasses, hair, calmer makeup everywhere else
the scab becomes less interesting to the human eye.
5) The “everyone keeps asking about it” situation
Sometimes the best hack is a script. A simple, friendly line“Minor cut, already healing”ends most conversations.
If you act like it’s a normal Tuesday (even if you feel like a movie extra from an action scene), people usually move on.
And if someone doesn’t move on, that’s not a cut problemthat’s a boundaries problem.
Bottom line: the easiest cover-up depends on the cut’s stage. Fresh and tender? Protect it. Closed and flat? Conceal it.
Textured and stubborn? Distract and let healing do its thing. Your face is resilientgive it a little help, not a full-on battle plan.


