
Table of Contents >> Show >> Hide
- Why Washing Brussels Sprouts Matters (Even If You’re Cooking Them)
- Before You Start: What Not to Do
- Step-by-Step: The Best Way to Wash Brussels Sprouts
- Special Scenarios and Shortcuts
- Food Safety Side Quest (Keep Your Kitchen from Becoming a Germ Theme Park)
- Troubleshooting: Common Washing Problems
- After Washing: How to Store Them So They Stay Fresh
- Quick FAQ
- Conclusion
Brussels sprouts are basically tiny cabbages with big opinions. Sometimes they show up pristine and smug in a plastic bag. Sometimes they arrive wearing a gritty little “farm necklace” of dirt, sand, and the occasional stowaway bug who absolutely did not pay rent. Either way, if you want sprouts that roast crisp, sauté beautifully, or shave into a salad without crunching on “mystery gravel,” washing matters.
This guide will walk you through how to wash Brussels sprouts the right wayquickly, safely, and without turning your kitchen into a damp produce spa. We’ll cover the simple rinse, the “help, mine are sandy” soak, how to dry them so they actually caramelize, and what to do with pre-shredded and frozen sprouts.
Why Washing Brussels Sprouts Matters (Even If You’re Cooking Them)
Brussels sprouts grow close to the ground, and their layered leaves are excellent at holding onto dirt, fine sand, and debris. A good wash helps remove surface grime and lowers the amount of bacteria that may be hanging out on the outside. It won’t sterilize your sprouts (nothing short of a lab setup will do that), but it does make them cleaner, safer, and way more pleasant to eat.
Before You Start: What Not to Do
Let’s get the “please don’t” list out of the way:
- Don’t use soap, detergent, bleach, or commercial “produce wash.” Produce can absorb residues, and these products aren’t recommended for washing fruits and vegetables.
- Don’t soak forever. A short soak can loosen dirt; an epic soak can waterlog leaves and invite soggy-roast sadness.
- Don’t wash them days ahead “to be responsible.” Washing adds moisture, and moisture is how sprouts go from “fresh” to “why is this slimy?”
Step-by-Step: The Best Way to Wash Brussels Sprouts
If your goal is clean sprouts with minimal fuss, follow this sequence. It works for roasting, sautéing, steaming, air-frying, or shaving raw.
1) Inspect and Sort
Dump your sprouts onto a cutting board and do a quick visual scan. You’re looking for: yellowed leaves, black spots, mushy areas, or anything that smells like it’s already made peace with compost. Toss truly bad sprouts; trim minor bruises.
2) Trim the Stem End (Just a Little)
The stem end can dry out and turn woody in storage. Use a paring knife to slice off a thin diskjust enough to remove the brown, dried portion. Don’t amputate half the sprout unless you enjoy chasing runaway leaves around your sink.
3) Peel Off the “Sad Outer Leaves”
Outer leaves take the brunt of travel from field to store to your refrigerator. If they’re loose, wilted, bruised, or insect-nibbled, pull them off. If you trimmed the stem end properly, a few outer leaves may fall away on their own. That’s normal. It’s also deeply satisfying.
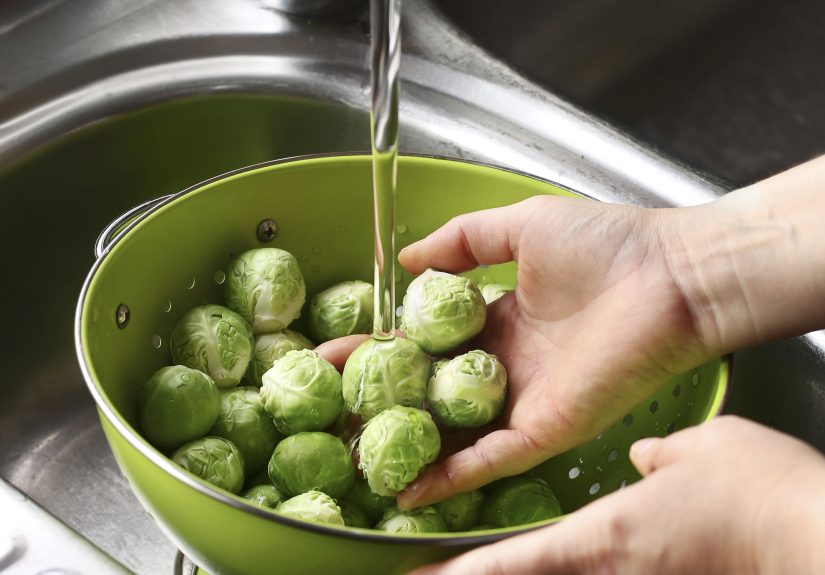
4) Rinse Under Cool Running Water
Put sprouts in a colander and rinse under cool running water. Use clean hands to gently rub and rotate them, like you’re giving each sprout a tiny car washminus the wax upgrade. Focus on the stem end and any creases where grit hides.
If your sprouts look pretty clean, you can stop here. For most grocery-store Brussels sprouts, a thorough rinse is enough.
5) Optional Soak for Extra Gritty (or Buggy) Sprouts
If you’ve got sprouts that are visibly dirty, straight from a farmers’ market, or suspiciously “crunchy” in the wrong way, use the soak method:
- Fill a large bowl with cool water.
- Submerge the sprouts and swish them around for 30 seconds like you’re panning for gold (but with fewer dreams of early retirement).
- Let them sit for 3–5 minutes so sand sinks to the bottom.
- Lift sprouts out into a colander (don’t dump the bowlleaving grit behind is the whole point).
- If the water looks like a snow globe, repeat with fresh water.
Want a little extra help? Some cooks add a pinch of salt to the soak. It can encourage debris to release and may help chase out tiny hitchhikers. It’s optional, not mandatory, and definitely not a magical bitterness eraseryour cooking method will do more for flavor than your soak ever will.
Shortcut: a salad spinner works beautifully here. Fill the spinner bowl with water, dunk sprouts, swirl, lift the basket, and you’ve basically invented “Brussels Sprouts Jacuzzi, but make it efficient.”
6) Rinse Again After Halving or Slicing
Cutting sprouts can expose inner layers where a little grit might still be hiding. If you’re halving, quartering, or shaving sprouts, give them a quick final rinse in a colanderespecially if you soaked them or saw sandy bits.
7) Dry Like You Mean It
Drying is the difference between crispy roasted Brussels sprouts and “steamed on a sheet pan.” Shake the colander well, then:
- For roasting/air-frying: pat dry with a clean kitchen towel or paper towels. Drier sprouts brown better.
- For salads: use a salad spinner to get them truly dry so dressing clings instead of sliding off.
- For sautéing: towel-dry, then let them sit 5 minutes so surface moisture evaporates.
Special Scenarios and Shortcuts
Brussels Sprouts on the Stalk
Sprouts on the stalk are dramatic (in a good way). You can store the stalk as-is, then pull off what you need. When you’re ready to cook: remove sprouts from the stalk, trim stem ends, peel sad outer leaves, rinse, and dry. If they’re extra dirty, soak briefly before the final rinse.
Pre-Shredded or Bagged Brussels Sprouts
Bagged shaved sprouts are a gift to weeknight cooking. Here’s the rule: if the package says “ready-to-eat” or “pre-washed”, you typically don’t need to rewash and rewashing can actually increase cross-contamination if your sink, hands, or counters aren’t spotless. If there’s no label and you want to rinse, do it quickly in a colander and dry well (especially for salads).
Frozen Brussels Sprouts
Frozen sprouts usually don’t need washing. They’ve typically been cleaned and often blanched before freezing. Your real job is drying the surface: roast them straight from frozen on a hot pan so moisture evaporates fast. (Frozen sprouts love to release water. It’s their hobby.)
Food Safety Side Quest (Keep Your Kitchen from Becoming a Germ Theme Park)
Clean sprouts are great. Clean sprouts on a cutting board that just hosted raw chicken? Less great. Basic produce safety is simple:
- Wash hands with soap and warm water before and after handling produce.
- Use clean knives and cutting boards; keep produce separate from raw meat, poultry, and seafood.
- Rinse produce under running water; skip soap and chemical cleaners.
- Dry produce with a clean towel or paper towel to reduce what’s left on the surface.
Troubleshooting: Common Washing Problems
“Why do I still taste sand?”
You likely need the soak-and-lift method. Halve a few sprouts and check inner leaves. If you see grit, do a second quick rinse after cutting. Also: dry, then cook hothigh heat helps drive off remaining moisture.
“My leaves are falling off everywhere.”
You may be trimming too much stem. Take off just the browned end. If outer leaves are loose, remove them intentionally, then proceed. Loose leaves aren’t a tragedythey’re a bonus. Toss them in the pan to get extra crispy “sprout chips.”
“They smell strong… are they bad?”
Brussels sprouts have a natural sulfurous note (cruciferous family, doing cruciferous things). But if they smell rotten, are slimy, or have widespread dark spots, discard them.
After Washing: How to Store Them So They Stay Fresh
Best practice: store Brussels sprouts unwashed in the refrigerator and wash right before cooking. Moisture trapped in a bag can speed spoilage, even in the fridge. Keep them whole if possible; cutting or shredding shortens their life.
Storage tips:
- Refrigerate in a breathable bag or container in the crisper drawer.
- Remove yellow/wilted leaves before storing.
- If you need extra freshness insurance, a lightly damp paper towel in a ventilated bag can help balance humidity (not soaking-wet, just barely damp).
Quick FAQ
Do I need to wash organic Brussels sprouts?
Yes. “Organic” doesn’t mean “immune to dirt, bugs, or handling.” Wash them the same way.
Is vinegar or baking soda better for washing?
For everyday home cooking, plain running water and gentle rubbing is the standard recommendation. If you’ve seen viral “vinegar baths,” know that official food-safety guidance still generally emphasizes water-only washing for produce at home.
Should I wash sprouts before roasting?
Yeswash, then dry thoroughly. Water left on the surface can slow browning and make sprouts steam instead of crisp.
Can I wash them ahead of time to meal prep?
You can, but it’s not ideal. If you must, dry them extremely well, then store in the fridge with a paper towel to absorb moisture. Use within 1–2 days for best texture. For longer storage, keep them unwashed until the day you cook.
Conclusion
Washing Brussels sprouts doesn’t need to be complicated: trim a little, peel the sad leaves, rinse under cool running water, and dry thoroughly. If your sprouts are gritty or straight from the market, give them a quick soak, lift them out (leave the dirt behind), then rinse again after cutting. The payoff is huge: cleaner flavor, better texture, and roasted sprouts that actually get crisp instead of sulking in steam.
Experience Notes (Extra )
The first time I “washed” Brussels sprouts, I did what many well-meaning people do: I splashed them with water for seven seconds, declared victory, and shoved them into a hot oven. Twenty minutes later, they looked finegolden edges, a little char, the promise of greatness. Then I took a bite and realized I had roasted a small collection of pebbles. Not a lot of pebbles. Just enough to make me feel like I’d paid extra for the “rustic crunch” upgrade. That was my introduction to the truth: Brussels sprouts can hide grit like it’s a competitive sport.
After that, I became a convert to the soak-and-lift method. It’s oddly satisfying: you swish the sprouts in a bowl, wait a few minutes, and then lift them out like you’re rescuing tiny green planets from a muddy galaxy. The bowl water tells the story. If it’s clear, you’re done. If it looks like someone rinsed off hiking boots in it, congratulationsyou just avoided eating trail mix without the mix.
I also learned (the hard way) that drying is not optional when roasting. Once, I rinsed sprouts and tossed them straight onto a sheet pan because I was “in a hurry.” Reader, they did not roast. They steamed. They softened. They got pale. They developed the vibe of a vegetable that had been disappointed in me personally. Now I treat drying like a non-negotiable: colander shake, towel pat, a few minutes of air time, and only then do we add oil and heat. Crispy edges return. Peace is restored.
My favorite “real life” trick is using a salad spinner, because it feels like cheating. Dunk the sprouts, swish them around, lift the basket, spin, and suddenly you’ve got clean, drier sprouts with almost no effort. It’s especially great when you’re shaving sprouts for saladwet shreds clump together and dilute dressing, but spun-dry shreds stay fluffy and soak up flavor like they were born for it.
Finally, I stopped washing sprouts as soon as I got home from the store. I used to do it to feel virtuous, like I was the kind of person who labels jars and owns matching containers. All it did was speed up spoilage. Now I store them unwashed, then wash right before cooking. It’s less “Pinterest,” more “practical,” and my sprouts last longerwhich means I’m more likely to actually cook them instead of quietly donating them to the back of the fridge.


