
Table of Contents >> Show >> Hide
- The Core Cleaning Toolkit (What You Actually Need)
- Microfiber cloths: the MVP of modern cleaning
- Scrubbers: sponges, scrub pads, and brushes
- Dusting tools: reach high, go low, don’t redecorate with dust
- Floor tools: vacuum, broom, and mop (the holy trinity)
- Window and glass tools: squeegee + a lint-free cloth
- Protective gear: the underrated cleaning tool
- How to Use Cleaning Tools Like a Pro (Without Making It Complicated)
- Start with the rule that saves the most time: top to bottom
- Dust first or vacuum first?
- Cleaning vs. disinfecting: don’t skip the “clean” part
- The “contact time” trick that most people miss
- Microfiber technique: damp beats drenched
- Vacuum technique: slow passes, edges first
- Mopping technique: less soap, more strategy
- Tool Maintenance: Clean Your Cleaning Tools (So They Don’t Betray You)
- Cleaning Safety: What Not to Do (Seriously)
- Room-by-Room Tool Strategy (So You’re Not Running Laps)
- Troubleshooting: Common Tool Problems (and the Fix)
- A Simple 10-Minute Reset Routine (Tools Included)
- Everyday Experiences That Make Cleaning Tools Click (Extra )
- Experience #1: The mystery streak window saga
- Experience #2: The “why does my clean sink smell… not clean?” moment
- Experience #3: The vacuum that “stops trying”
- Experience #4: The mop that makes floors dirtier (somehow)
- Experience #5: The dust that returns five minutes later
- Experience #6: The “too many products” trap
- Conclusion: Build a Toolkit You’ll Actually Use
- SEO Tags
If cleaning feels like a never-ending side quest, the problem might not be your motivationit might be your tools.
The right cleaning tools don’t just make chores faster; they make them less annoying, more effective, and way less likely to leave you
staring at a streaky window whispering, “I thought we were friends.”
This guide breaks down the essential cleaning tools worth having, the correct ways to use them (yes, there are wrong ways),
how to maintain them so they don’t become the mess, and the safety tips that keep “fresh and clean” from turning into “why does it smell like a science experiment?”
Expect practical examples, a few hard-earned lessons, and a strategy that works whether you’re a daily tidy-up person or a “company’s coming in 30 minutes” sprinter.
The Core Cleaning Toolkit (What You Actually Need)
You don’t need 47 specialty gadgets. A smart, flexible toolkit covers most homes, most messes, most days.
Here’s the “use-it-every-week” lineup.
Microfiber cloths: the MVP of modern cleaning
Microfiber cloths trap dust and grab grime better than many paper towelsand they’re reusable.
Keep a small stack and assign them by “zone” (kitchen, bathroom, general).
Pro move: fold one cloth into quarters so you get eight clean wiping sides before you need a new cloth.
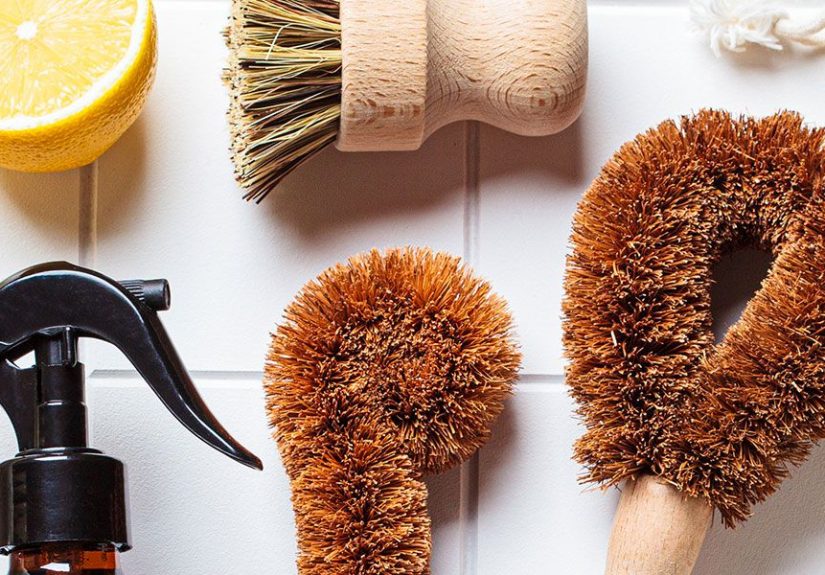
Scrubbers: sponges, scrub pads, and brushes
Use the right scrubber for the job:
- Non-scratch sponge or soft pad for countertops, sinks, and dishes.
- Medium scrub pad for tougher grime on durable surfaces (avoid delicate finishes).
- Small detail brush / grout brush for corners, seams, and textured areas.
- Dish brush for quick daily cleaning (and less “wet sponge smell” drama).
Dusting tools: reach high, go low, don’t redecorate with dust
A good duster saves you from balancing on chairs like you’re auditioning for a home-improvement circus.
Look for an extendable handle, a flexible head, and a washable microfiber attachment.
Pair it with a microfiber cloth for wiping after dusting (especially on glossy shelves and electronics stands).
Floor tools: vacuum, broom, and mop (the holy trinity)
Floors collect everything: crumbs, dust, pet hair, mystery grit from shoes, and that one Lego your foot will find at midnight.
A solid setup includes:
- Vacuum with attachments (crevice tool, upholstery tool, brush) for edges, corners, and furniture.
- Broom and dustpan for quick sweeps and bigger debris that clogs vacuums.
- Mop suited to your floor (microfiber pads for many sealed floors, sponge mops for smooth surfaces, steam mops where appropriate).
Window and glass tools: squeegee + a lint-free cloth
If you want streak-free windows, a squeegee is the cheat code. A simple handheld squeegee plus a microfiber cloth for edges
beats “spray and pray” nearly every time.
Protective gear: the underrated cleaning tool
Gloves protect your skin from irritation (and from touching things you’d rather not think about).
If you’re using stronger products, open a window or run a fan. Clean should never mean “burning eyes.”
How to Use Cleaning Tools Like a Pro (Without Making It Complicated)
Start with the rule that saves the most time: top to bottom
Dust and debris fall. So clean higher surfaces first (shelves, fans, frames), then work your way down to floors.
That way, you don’t vacuum first… only to redecorate your floors with a fresh sprinkle of shelf dust.
Dust first or vacuum first?
In most homes, dusting before vacuuming makes sense because dust gets knocked down and settles.
If you have heavy pet hair tumbleweeds, a quick vacuum pass first can keep hair from hitchhiking onto your duster and spreading everywhere.
Either way, end with the flooryour future self will thank you.
Cleaning vs. disinfecting: don’t skip the “clean” part
Cleaning removes dirt and reduces germs. Disinfecting uses chemicals to kill germs more thoroughly.
If you need to disinfect (like when someone is sick or higher-risk), clean firstgrime can block disinfectants from working properly.
And when you disinfect, follow the label directions so the surface stays wet long enough for it to work.
The “contact time” trick that most people miss
Disinfectants aren’t instant. Many require the surface to stay visibly wet for a set period (often several minutes).
If you wipe it dry too soon, you’ve basically done the chemical version of “almost.”
Read the label, keep the surface wet for the required time, then let it air-dry or wipe as directed.
Microfiber technique: damp beats drenched
For most dusting and wiping, slightly damp microfiber works better than soaking wet.
Too much water dilutes cleaners and can leave streaksespecially on stainless steel and glass.
Spray your cloth (not the surface) for better control and less overspray on nearby items.
Vacuum technique: slow passes, edges first
A vacuum works best when it has time to lift debris. Move slowly, overlap passes, and do a quick edge-and-corner pass with the crevice tool.
For allergies, a vacuum with effective filtration can help reduce fine particles that love to float around the house like they pay rent.
Mopping technique: less soap, more strategy
The biggest mopping mistake is using too much cleaner. Excess product leaves residue, which attracts dirt, which makes you mop more,
which creates the kind of cycle that makes people “accidentally” start new hobbies instead of cleaning.
- Pre-sweep or vacuum so you’re not pushing grit around.
- Use the right mop for your floor type (microfiber pads are great for many sealed hard floors).
- Change pads/water when it starts looking dirtydirty water is not a cleaning product.
- Skip harsh DIY mixes on sensitive floors; some surfaces don’t love vinegar or bleach.
Tool Maintenance: Clean Your Cleaning Tools (So They Don’t Betray You)
The fastest way to make cleaning harder is to use dirty tools. You’ll spread grime, create odors, and wonder why everything looks dull.
Here’s how to keep tools workingand not turning into a biology exhibit.
How to wash microfiber cloths (without ruining them)
Microfiber works because of its tiny fibers. Fabric softener can coat those fibers and make them less effective.
Bleach can damage them. For best results:
- Shake cloths out before washing to release dust and debris.
- Wash separately from linty items (like cotton towels) to prevent lint cling.
- Use cold or warm water and a mild detergent; skip fabric softener and bleach.
- Air-dry or tumble dry lowhigh heat can shorten their life.
Mop heads and pads: wash, dry, replace
Reusable mop pads can usually be machine washed. Let them dry completely before storing to prevent odors and mildew.
If a mop head stays funky even after washing, it’s time to replace it. Some battles are not worth fighting.
Vacuum care: the four-step “make it last” routine
Vacuums lose power when airflow is blocked. A simple maintenance loop keeps them running well:
- Don’t overfill the bag/canisterempty it before it’s packed tight.
- Clean or replace filters as recommended by the manufacturer.
- Clear the brush roll (hair and thread wrap like they’re building a nest).
- Check for clogs in the hose and attachments if suction drops.
Brushes, sponges, and the “gross but true” section
Dish brushes and scrub brushes can often be cleaned in the dishwasher (if they’re dishwasher-safe).
Sponges, however, are notorious germ collectors. If yours smells, looks rough, or has lived a long and questionable life, replace it.
A simple habit is rotating sponges and swapping them out regularly so your “cleaning” tool isn’t the dirtiest object in the kitchen.
Squeegee care: one tiny step for streak-free glass
After using a squeegee, wipe the blade with a clean cloth and let it dry. A nicked blade can cause streaks, so replace blades when needed.
Store it so the rubber edge isn’t bentbent rubber equals bent results.
Cleaning Safety: What Not to Do (Seriously)
Never mix cleaning products
This is not a “maybe.” Some combinations can create dangerous fumes. Avoid mixing:
- Bleach + ammonia
- Bleach + acids (including vinegar in many cases)
- Hydrogen peroxide + vinegar (not together in the same container)
If you want to use different products in the same area, rinse and ventilate between steps and follow label directions.
When in doubt: use one product at a time.
Use products as directed (especially disinfectants)
Labels aren’t decoration. They tell you dilution, where the product is safe to use, and how long it needs to stay wet.
That “time on surface” piece is what turns “I wiped it” into “it actually worked.”
Match the tool and product to the surface
Stone, sealed wood, stainless steel, glass, laminate, and tile all behave differently.
Using the wrong cleaner can dull finishes, strip sealants, or leave residue that looks worse than the original mess.
If you’re unsure, test on a small hidden area first and choose products designed for that surface.
Room-by-Room Tool Strategy (So You’re Not Running Laps)
Kitchen: grease, crumbs, and constant reappearances
- Microfiber cloths (separate set for kitchen)
- Non-scratch sponge + dish brush
- Degreasing-friendly cleaner (or a mild dish soap solution for daily wipe-downs)
- Small detail brush for grout lines, faucet bases, and appliance seams
Example: For greasy stove splatter, apply cleaner to a cloth (not directly onto knobs), let it sit briefly, then wipe.
Follow with a damp cloth to remove residue, then dry for shine.
Bathroom: soap scum and “why is it like this?”
- Bathroom-only microfiber cloths
- Scrub brush for tile/grout
- Toilet brush (and a holder that can be cleaned)
- Squeegee for shower doors/walls
Example: To reduce soap scum, squeegee shower walls/doors after showers. It’s 20 seconds that saves 20 minutes later.
Living areas: dust, upholstery, and floors
- Extendable duster for shelves, vents, and fan blades
- Vacuum upholstery tool for couches and pet hair
- Microfiber cloth for screens and glossy surfaces (use minimal moisture)
Floors: the “finish strong” zone
- Vacuum or broom for debris
- Mop matched to floor type
- Extra mop pads so you can swap instead of spreading dirty water
Troubleshooting: Common Tool Problems (and the Fix)
“My windows are streaky”
- Use a squeegee and wipe the blade after each pass.
- Don’t overuse producttoo much cleaner can streak.
- Finish edges with a dry microfiber cloth.
“My microfiber cloths don’t grab dust anymore”
- Stop using fabric softener or dryer sheets with microfiber.
- Wash them separately from linty cotton items.
- Replace cloths that are permanently coated or worn down.
“My vacuum smells or doesn’t pick up well”
- Empty the canister/bag before it’s crammed full.
- Clean filters and remove hair from the brush roll.
- Check for clogs in the hose and attachments.
“My mop leaves haze on the floor”
- Use less cleaner (residue causes haze).
- Swap dirty water/pads more often.
- Rinse with a lightly damp pad, then dry if needed.
A Simple 10-Minute Reset Routine (Tools Included)
This is for daily or “weekday survival mode” cleaning. Set a timer and do what you can.
- 2 minutes: Grab clutter and return items to their spots (basket method helps).
- 2 minutes: Quick dust of high-touch surfaces with a microfiber cloth (coffee table, counters).
- 2 minutes: Kitchen sink reset (dish brush + quick wipe around faucet and rim).
- 2 minutes: Bathroom swipe (wipe sink and faucet; quick toilet exterior wipe if needed).
- 2 minutes: Floor pass in the highest-traffic zone (vacuum or broom).
The goal isn’t perfectionit’s keeping mess from gaining momentum like it’s training for the Olympics.
Everyday Experiences That Make Cleaning Tools Click (Extra )
People don’t fall in love with cleaning tools because they read a manual. They fall in love with them because a tool saves them
from a recurring problem that’s been quietly ruining their mood for months. Here are common “real life” momentsminus the fluffwhere the right tool (or the wrong one) changes everything.
Experience #1: The mystery streak window saga
A classic scenario: someone sprays glass cleaner, wipes with a paper towel, and the window looks worse than before.
Then comes the second wipe. Then the third. Then the sunlight hits and reveals a modern art masterpiece titled “Smears.”
The fix is usually simple: swap paper towels for microfiber and use a squeegee. The squeegee does the heavy lifting, and the microfiber handles edges.
Suddenly it’s not a 20-minute argument with a windowit’s a two-minute victory.
Experience #2: The “why does my clean sink smell… not clean?” moment
Many households unknowingly use a sponge past its prime. It starts small: it’s a little softer, a little uglier.
Then one day you pick it up and it smells like it applied for a job at a landfill. That’s when a dish brush and a sponge rotation plan feel less like “extra”
and more like emotional self-care. A brush dries faster, doesn’t stay soggy, and handles daily cleaning with less funk.
Keeping two or three sponges in rotation (and replacing them regularly) keeps the sink from becoming the place you avoid making eye contact with.
Experience #3: The vacuum that “stops trying”
A vacuum that suddenly feels weak is often a vacuum that’s suffocating: the canister is packed, the filter is dusty, the brush roll is wearing a hair sweater,
or the hose has a surprise clog. The experience is familiar: you vacuum, nothing changes, and you start questioning reality.
Maintenance isn’t glamorous, but it’s the difference between a vacuum that glides and one that just makes noise.
Five minutes of filter cleaning and brush clearing can bring back the suction you forgot you had.
Experience #4: The mop that makes floors dirtier (somehow)
This happens when the mop pad is overdue for washing or the bucket water is basically a soup of yesterday’s dirt.
The floor dries with haze, footprints reappear instantly, and the whole effort feels like performance art.
The “aha” is swapping pads more often, using less cleaner, and letting pads fully dry after washing.
Having extra pads is a surprisingly powerful upgradelike having backup batteries, but for your sanity.
Experience #5: The dust that returns five minutes later
Dry dusting can toss particles into the air where they settle right back downsometimes onto the exact surface you just cleaned.
People often notice this when cleaning shelves or fans: they wipe, step back, and the dust looks like it regenerated.
A slightly damp microfiber cloth (not wetjust damp) grabs dust instead of launching it.
Pair that with a top-to-bottom routine and dust stops feeling like a prank.
Experience #6: The “too many products” trap
It’s easy to buy a cleaner for every surface. It’s also easy to get overwhelmed, over-spray, and create residue that attracts more dirt.
Many people find the sweet spot is fewer, better tools and simple product choices used correctly: microfiber for wiping, a brush for details,
a good vacuum for floors, and surface-appropriate cleaners used sparingly. When tools do more of the work, your cleaning routine becomes simpler
and you stop collecting half-used bottles like they’re rare antiques.
Conclusion: Build a Toolkit You’ll Actually Use
The best cleaning setup isn’t the biggestit’s the one that matches your home and your habits.
A handful of reliable tools (microfiber cloths, a solid vacuum, a floor-appropriate mop, a couple of brushes, and a squeegee)
can tackle most messes faster, with better results, and with fewer “why is this not working?” moments.
Use the top-to-bottom method, clean first before disinfecting when needed, respect contact time, andpleasedon’t mix chemicals.
Maintain your tools like you maintain your phone battery: a little attention keeps performance high.
Do that, and cleaning becomes less of a punishment and more of a quick reset that actually feels satisfying.


