
Table of Contents >> Show >> Hide
- Why a Live Edge Side Table Works So Well
- Before You Start: Choose a Slab That Won’t Betray You
- Tools and Materials
- Step-by-Step: How to Build a DIY Live Edge Wood Side Table
- Step 1: Plan the top and mark your “show face”
- Step 2: Decide what to do with bark (spoiler: remove it)
- Step 3: Flatten the slab (the part nobody posts on Instagram)
- Step 4: Fill cracks and voids (optional, but very satisfying)
- Step 5: Sand like you mean it
- Step 6: Choose a finish (and match it to how you live)
- Finish option A: Hardwax oil (natural look, easy repair)
- Finish option B: Wipe-on varnish/poly (high protection, still DIY-friendly)
- Finish option C: Oil + topcoat system (looks warm, adds durability)
- Finishing rules that save your sanity
- Step 7: Attach the legs the right way (wood movement is real)
- Step 8: Level it, pad it, and call it done
- Common Problems (and How to Fix Them Without Crying)
- Budget and Timeline
- Care and Maintenance
- of “Experience” You’ll Probably Earn on Your First Build
A live edge side table is the woodworking equivalent of showing up to a party in a perfectly wrinkled linen shirt:
effortless, charming, and somehow it makes your other furniture feel underdressed.
The best part? You don’t need a full-blown cabinet shop to build oneyou need a reasonably flat slab, a plan for
wood movement (yes, wood has opinions), and the patience to sand like you’re trying to erase your browser history.
This guide walks you through the process step-by-step, with practical options for beginners and plenty of “don’t do
what I did” prevention built in. By the end, you’ll have a sturdy DIY live edge wood side table that looks custom,
feels smooth, and won’t split the first time your home humidity changes its mood.
Why a Live Edge Side Table Works So Well
Side tables are small enough to be manageable, but big enough to show off what makes live edge special:
natural curves, color variation, knots, and little “birthmarks” that scream real wood in a world of
suspiciously perfect rectangles.
- Fast payoff: You can build one in a weekend (plus finish curing time).
- Lower risk: A small top is less likely to warp than a giant dining table slab.
- Big visual impact: The edge does most of the design work for you.
Before You Start: Choose a Slab That Won’t Betray You
The #1 reason live edge projects go sideways isn’t toolsit’s wood that isn’t dry, stable, or suitable for indoor
furniture. A gorgeous slab can still be a future potato chip.
Pick the right size and thickness
A classic side table top is roughly 16–22 inches wide and 16–22 inches deep.
Height usually lands around 20–24 inches (aim near the height of your sofa arm).
For thickness, 1.25–2 inches is a sweet spot: substantial without becoming a back injury.
Moisture content matters (more than vibes)
For indoor furniture, you generally want a slab that’s properly dried and acclimated to an indoor environment.
If you have access to a moisture meter, use it. If you don’t, buy oneor at least purchase from a supplier who
can document that the slab is furniture-dry.
Inspect for structural drama
- Checks and cracks: Some are fine; long cracks that run deep may need stabilization.
- Punky spots: If the wood feels soft or crumbly, you’ll need to remove and stabilize it.
- Severe twist/cup: You can flatten it, but it may become thinner than you planned.
Tools and Materials
You can build this table with either “I own a shop” tools or “I own a small toolbox and optimism” tools.
Here are common options:
Essential tools
- Random orbital sander + sanding discs (coarse to fine grits)
- Drill/driver + drill bits
- Measuring tape, pencil, straightedge
- Clamps (helpful even when you think you won’t need them)
Nice-to-have tools
- Router + flattening sled (or access to a planer/jointer)
- Angle grinder with a sanding/conditioning wheel for edge cleanup
- Moisture meter
- Shop vacuum or dust extractor
Materials
- Live edge slab (or “cookie” slice if you want a round top)
- Legs/base hardware (hairpin legs, metal base, or wood legs)
- Fasteners that allow wood movement (important!)
- Finish (hardwax oil, wipe-on varnish/poly, or oil + topcoat system)
- Optional: epoxy for filling voids, painter’s tape, mixing cups, gloves
- Felt pads for the feet
Safety gear (non-negotiable)
- Eye protection
- Hearing protection for power tools
- Respiratory protection when sanding or using finishes
- Nitrile gloves for finishing and epoxy work
Step-by-Step: How to Build a DIY Live Edge Wood Side Table
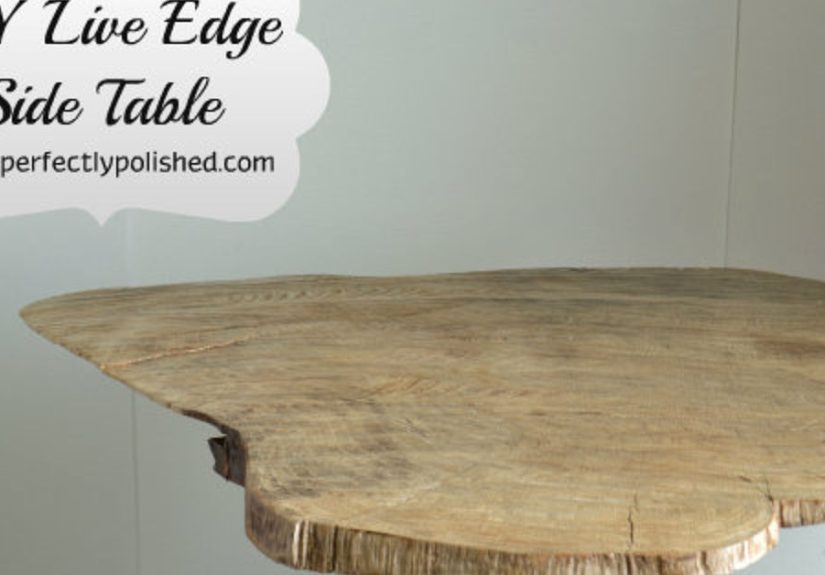
Step 1: Plan the top and mark your “show face”
Set the slab on sawhorses and decide which side will be the top. Look for the face with the best grain,
fewer defects, and the most pleasing live edge curve. Mark the underside with painter’s tape so you don’t
get turned around later (it happens more than you’d think).
If your slab is oversized, trim it to final dimensions now. Keep it simple: a rectangle with one live edge,
or a more organic outline if you enjoy tracing shapes like a kindergarten Picasso.
Step 2: Decide what to do with bark (spoiler: remove it)
Bark looks cool… until it falls off on your rug like a flaky croissant. Most builders remove bark and clean the
cambium layer underneath to reveal a stable edge that can actually hold finish.
One common approach is gently removing bark with a chisel, then smoothing the edge with sanding or a grinder
attachment. Take your timegouges are forever.
Step 3: Flatten the slab (the part nobody posts on Instagram)
Your legs can’t fix a wobbly top. If the slab rocks on a flat surface, you’ll want to flatten it before finishing.
Options:
- Router sled: Great for slabs; slow but effective.
- Planer/jointer: Fast, but only if your slab fits and isn’t too wild on the live edge.
- Hand tools: Totally doable with a hand plane and patience (and possibly a dramatic playlist).
Tip: flatten the underside enough for stable leg mounting, then flatten the top for looks. You don’t need
aerospace tolerancesjust stable and smooth.
Step 4: Fill cracks and voids (optional, but very satisfying)
Small cracks can be left as character. Larger voids can catch crumbs, snag sleeves, or collect mystery gunk
that future historians will study.
If you want a smooth, durable surface:
- Clean loose debris from voids (compressed air helps).
- Seal the underside with tape or a temporary dam so epoxy doesn’t escape.
- Mix epoxy carefully (correct ratios, slow stirring).
- Pour in thin lifts for deeper voids, letting bubbles rise.
- Use gentle heat (like a heat gun, used carefully) to help pop surface bubbles.
- Let it fully cure, then sand flush.
If you don’t need a glass-flat fill, tinted epoxy can highlight defects like design features rather than
“oops holes.”
Step 5: Sand like you mean it
Sanding is where the table becomes “furniture” instead of “wood that has big dreams.”
A practical grit path is:
- Start: 60–100 grit (only as coarse as needed to remove milling marks)
- Middle: 120 → 150 → 180
- Finish: 220 for many film finishes; hardwax oils may have their own preferred final grit
Go up gradually, and don’t move on until the scratches from the previous grit are gone. Use a bright light at a
low angle to spot swirl marks. That light will be rude, but helpful.
Also: break sharp edges slightly. A tiny chamfer or round-over makes the table feel finished and helps prevent
splintering.
Step 6: Choose a finish (and match it to how you live)
This is the fork in the road where you decide whether your table is a delicate art piece or a hardworking
coaster-free warrior.
Finish option A: Hardwax oil (natural look, easy repair)
Hardwax oils tend to keep wood looking “like wood” rather than “like wood under plastic.” They’re popular for
live edge projects because they highlight grain and are easy to spot-repair.
Tradeoff: they may require more care against standing water and heat compared with a thick film finish.
Finish option B: Wipe-on varnish/poly (high protection, still DIY-friendly)
A wipe-on film finish gives strong protection against water rings and wear, especially for a side table that
might hold drinks, plants, or that one candle you swear you’ll never leave unattended.
It can take multiple thin coats, with light sanding between coats for best smoothness.
Finish option C: Oil + topcoat system (looks warm, adds durability)
Some builders like an oil to pop the grain, then a protective topcoat for durability. This can look fantastic,
but it increases steps and requires careful compatibility between products and cure times.
Finishing rules that save your sanity
- Finish both sides: Coat the underside too. It helps balance moisture exchange.
- Thin coats win: Thick coats sag, wrinkle, and make you question your life choices.
- Respect cure time: “Dry to touch” is not the same as “ready for a potted plant.”
- Ventilation matters: Your lungs are not a finish-filtering accessory.
Step 7: Attach the legs the right way (wood movement is real)
Wood expands and contracts across the grain as humidity changes. If you screw legs straight into the underside
with no allowance, the top can crack, warp, or splitoften months later, right when you’re bragging about it.
Better options:
- Figure-8 or tabletop fasteners: allow slight pivot/movement so the top can breathe.
- Z-clips (tabletop clips): sit in a groove and slide as the top moves.
-
Elongated holes: if you’re screwing through a bracket, elongate the holes across the grain
so screws can shift slightly.
For hairpin legs specifically: place them in from the edges a bit for stability and aesthetics. As a starting
point, inset each leg plate about 1–2 inches from the edges, then adjust so it looks balanced.
If your slab is narrow, consider a three-leg layout (triangles are famously good at not wobbling).
Step 8: Level it, pad it, and call it done
Add felt pads or adjustable feet so the table doesn’t scratch floors or rock on uneven surfaces.
Then step back and admire your work. Take a picture. Post it. Accept compliments.
Pretend sanding was fun.
Common Problems (and How to Fix Them Without Crying)
“My finish feels rough.”
Usually dust nibs. Lightly scuff-sand (very fine grit or a finishing pad), remove dust thoroughly, and apply
another thin coat. Also check airflowfans can blow dust onto wet finish.
“I can still see sanding scratches.”
Go back one grit (or two) and sand evenly. Scratches don’t disappear under finish; they get highlighted like
neon signs.
“My slab cupped after I brought it inside.”
That’s usually moisture and acclimation. Let the wood sit in the space where it will live, then re-flatten if needed.
On small tables, you can often flatten and stabilize the underside and still end up with a great result.
“Epoxy looks cloudy or full of bubbles.”
Cloudiness can come from moisture or incomplete mixing; bubbles can come from vigorous stirring or air escaping
from porous wood. Use careful mixing, consider a sealing step on porous areas, and apply heat gently to pop
surface bubbleswithout scorching anything.
Budget and Timeline
Costs vary wildly based on slab species and leg choice, but a realistic DIY range is:
- Budget build: $60–$150 (small slab + simple legs + basic finish)
- Mid-range: $150–$350 (nicer slab, better legs, upgraded finish)
- “I’m making a heirloom”: $350+ (premium slab, custom base, epoxy work, premium finish)
Build time: 4–10 hours of active work spread across a couple days. Finishing adds waiting time between coats and
cure time afterward. The table can look done quickly, but treat it gently until fully cured.
Care and Maintenance
- Use coasters if your finish isn’t a thick film.
- Wipe spills quickly (water is sneaky).
- Avoid leaving rubber or vinyl items on fresh finishes (they can mark some coatings).
- For hardwax oils, occasional refresh coats keep it looking new.
of “Experience” You’ll Probably Earn on Your First Build
Here’s the funny thing about building a DIY live edge wood side table: you start out thinking the live edge is
the hard part. Then you spend an hour staring at a tiny scratch that only appears when the light hits at 37
degrees, and you realize the real opponent was sanding all along.
The first “aha” moment most people report is that wood doesn’t behave like a static material. You flatten a slab,
it sits perfectly, and then you bring it into a warmer room andsurpriseit develops a subtle cup. That’s not the
slab being “bad.” That’s the slab being wood. The practical takeaway is to let the slab acclimate where it will
live and to avoid rushing from “garage cold” to “living room warm” and expecting perfection.
The second lesson is that your finish is basically a truth serum. If you missed swirl marks at 120 grit, your
finish will point at them and shout, “LOOK EVERYONE, THIS PERSON STOPPED SANDING EARLY.” The trick is building a
repeatable sanding routine: same pressure, overlapping passes, and checking under raking light. Many makers also
discover that the edge takes longer than the face. Those curves and little dips can hide roughnessuntil your
hand finds them instantly.
Next comes the “hardware reality check.” Hairpin legs look simple, but placement matters a lot for wobble.
If you mount them too close to the center, the table can feel tippy. If you mount them too close to the edge on
an uneven live edge, the leg plate might not sit flat. A common win is making a paper or cardboard template of
the leg plate and moving it around until it looks balanced and feels stable. That tiny planning step can save you
from drilling “decorative” extra holes later.
Then there’s epoxy, which is either a magical void-filling wizard or a sticky reminder that chemistry is real.
People often learn that bubbles aren’t a moral failure; they’re physics. Pouring slowly, mixing gently, and
letting bubbles rise before you start blasting heat like you’re trying to toast a marshmallow usually produces
better results. And if you do end up with a few tiny bubbles? Most of the time, they disappear once you sand and
re-coatso don’t panic and start chiseling like you’re excavating dinosaur bones.
Finally, there’s the “grown-up” lesson: cure time is not optional. A surface can feel dry and still be soft
underneath. That’s how people end up with a permanently embossed coaster ring or a plant pot “signature.”
Treat the table gently at first, and you’ll get a finish that stays beautiful for years instead of weeks.
In short: the project teaches patience, process, and the humility to accept that the most powerful tool in your
shop might be… waiting.


