
Table of Contents >> Show >> Hide
- What Does “Flip Your Old Baseboards” Actually Mean?
- Why Reuse Old Baseboards Instead of Replacing Them?
- When Flipping Baseboards Works Best
- Safety First: Check for Lead Paint in Older Homes
- Tools and Materials You Will Need
- Step-by-Step Guide: How to Flip Your Old Baseboards
- Step 1: Inspect the Baseboards
- Step 2: Score the Caulk Line
- Step 3: Remove the Boards Carefully
- Step 4: Label Each Piece
- Step 5: Pull Nails Through the Back
- Step 6: Test the Flip
- Step 7: Clean, Fill, and Sand
- Step 8: Prime Problem Areas
- Step 9: Reinstall the Baseboards
- Step 10: Caulk the Top Seam
- Step 11: Paint for a Fresh Finish
- Design Ideas for Flipped Baseboards
- Common Mistakes to Avoid
- Is Flipping Baseboards Worth It?
- Real-World Experience: What You Learn When You Actually Flip Baseboards
- Conclusion
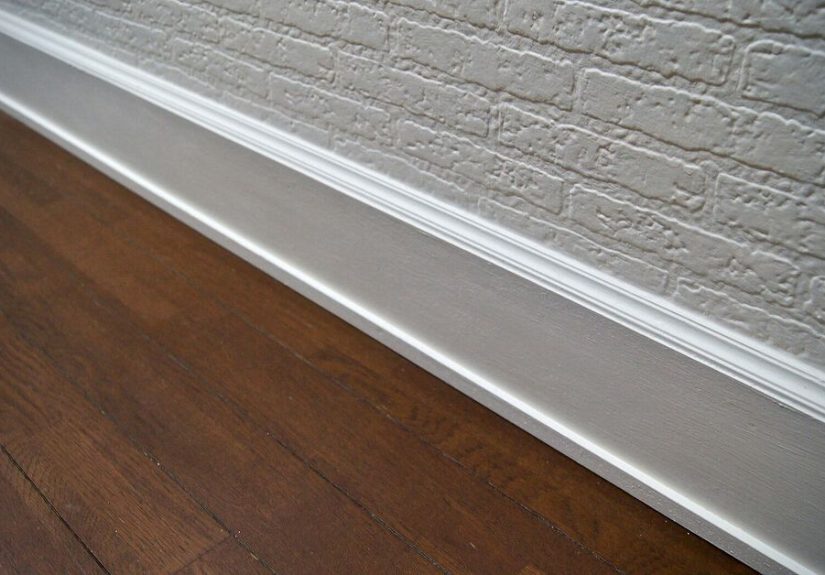
Old baseboards are easy to ignore until one day you look down and realize they have been living a full-contact sport lifestyle. Scuffs from shoes, mystery dents from furniture, paint drips from three owners ago, and enough caulk buildup to qualify as geological historyyour baseboards have seen things.
But before you rip them out and spend money on brand-new trim, consider a smarter, thriftier, and surprisingly satisfying DIY move: flip your old baseboards. In many rooms, existing baseboards can be removed, cleaned up, turned, reworked, repainted, and reinstalled for a fresh look without buying all-new molding. It is part budget makeover, part renovation magic trick, and part “why didn’t I think of this sooner?” moment.
Flipping old baseboards is not always as simple as rotating a board and calling it a day. Some profiles work better than others. Some pieces need sanding, filling, or recutting. Some older homes require lead-paint caution before any scraping or sanding begins. But when the conditions are right, this project can refresh a room, hide worn edges, and give tired trim a second life.
What Does “Flip Your Old Baseboards” Actually Mean?
In DIY terms, flipping baseboards can mean a few related things. The most common version is removing existing baseboard trim and reinstalling it with a different edge or side showing. Sometimes homeowners turn the baseboard upside down to create a cleaner, simpler profile. In other cases, they reverse the face if the board has a usable back side, though this depends heavily on the trim style and condition.
Another version is “flipping” in the renovation sense: saving, repairing, repainting, and reinstalling the same baseboards instead of throwing them away. Even if the boards cannot literally be turned upside down, you may still be able to reuse them in a way that looks brand new.
The goal is simple: keep useful material out of the landfill, save money, and make your room look more polished. A baseboard may be only a few inches tall, but visually it frames the entire room. When it looks clean, straight, and freshly painted, the space instantly feels more finished.
Why Reuse Old Baseboards Instead of Replacing Them?
New baseboards can be affordable per linear foot, but costs add up fast when you include waste, tools, fasteners, caulk, paint, corner blocks, shoe molding, and the occasional “oops, I cut that backward” replacement piece. Reusing what you already have can be a budget-friendly shortcut, especially in bedrooms, hallways, closets, laundry rooms, and rental-friendly refreshes.
1. You Save Money
If your baseboards are solid wood or good-quality MDF, they may still have years of life left. Instead of buying new trim, you can spend your money on paint, caulk, wood filler, sandpaper, and a better brush. That is the DIY version of ordering water at a restaurant so you can afford dessert.
2. You Keep the Room’s Original Character
Older homes often have trim profiles that are hard to match. Removing and replacing one wall of molding can create a “new haircut, old outfit” situation where the trim no longer matches the rest of the house. Reusing the old baseboards helps maintain continuity.
3. You Reduce Waste
Good trim does not need to become trash just because it has scuffs, nail holes, or an old paint color. Sanding, patching, and repainting can transform it. For homeowners who like sustainable home improvement, this is a small project with a satisfying eco-friendly bonus.
4. You Can Get a Custom Look
Some baseboards look dated because of how they are installed, not because the material is bad. Flipping, stacking, adding shoe molding, or painting them in a crisp semi-gloss finish can make basic trim look more intentional.
When Flipping Baseboards Works Best
This project works best when the boards are structurally sound. Look for trim that is straight, dry, and not crumbling at the ends. Solid wood is usually the easiest to save because it can tolerate sanding and minor repairs. MDF can also be reused if it has not swollen from moisture.
Flipping is especially useful when the bottom edge is beat up but the top or back side is cleaner. It can also work when you are changing flooring and the old caulk line or paint ridge no longer lines up nicely. Instead of replacing everything, you may be able to reposition the old boards for a cleaner reveal.
However, not every baseboard is a good candidate. If the profile only looks correct in one direction, flipping it upside down may look awkward. If the back is unfinished, grooved, adhesive-covered, or damaged, reversing it may require more work than it is worth. And if the baseboard is water-damaged, moldy, badly split, or heavily warped, replacement is usually the better choice.
Safety First: Check for Lead Paint in Older Homes
Before you sand, scrape, or pry painted trim in an older home, pause. If your house was built before 1978, there is a chance old paint layers may contain lead. Disturbing lead-based paint can create hazardous dust, especially during sanding, cutting, or demolition.
For pre-1978 homes, consider using an EPA-recognized test kit or hiring a certified lead inspector before you begin. If lead is present, do not dry-sand or aggressively scrape the trim. Follow lead-safe renovation practices or hire a certified professional. A baseboard makeover is not worth turning your living room into a science experiment with bad vibes.
Tools and Materials You Will Need
You do not need a contractor’s truck full of equipment for this project, but the right tools make the difference between “professional refresh” and “crime scene with caulk.” Gather these basics before you start:
- Utility knife
- Painter’s tape
- Putty knife or trim puller
- Flat pry bar
- Hammer or rubber mallet
- Pliers or nail puller
- Pencil and painter’s tape for labeling pieces
- Wood filler or spackling compound
- Sandpaper, usually 100- to 150-grit for smoothing
- Caulk labeled paintable
- Primer, especially for bare wood, patched areas, or stained trim
- Trim paint in semi-gloss, satin, or gloss finish
- Finish nails or brad nailer
- Miter saw, miter box, or oscillating tool if recuts are needed
Step-by-Step Guide: How to Flip Your Old Baseboards
Step 1: Inspect the Baseboards
Start by walking the room and studying the trim. Look for cracks, swollen areas, loose sections, bad seams, or old caulk lines. Decide whether the boards are worth saving. If only one or two pieces are damaged, you may be able to replace those sections and reuse the rest.
Step 2: Score the Caulk Line
Use a sharp utility knife to cut along the top seam where the baseboard meets the wall. This breaks the bond between paint, caulk, and drywall. Do not skip this step. Pulling trim without scoring the seam can tear wall paint and paper, leaving you with a drywall repair project you did not invite to the party.
Step 3: Remove the Boards Carefully
Slide a putty knife or trim puller behind the baseboard, then gently work a pry bar into the gap. Move slowly along the wall instead of yanking from one spot. The goal is to loosen the entire piece evenly. If you plan to reuse the trim, patience is cheaper than replacement boards.
Step 4: Label Each Piece
As each board comes off, label the back with its location: “north wall,” “left of closet,” “under window,” and so on. Baseboards are often cut to fit imperfect walls, and pieces that look interchangeable may not be. Labeling saves you from playing a very boring puzzle game later.
Step 5: Pull Nails Through the Back
If nails remain in the boards, do not hammer them backward through the finished face. That can splinter the visible surface. Instead, grip the nail from the back with pliers and pull it through. The resulting hole is usually easier to fill and hide.
Step 6: Test the Flip
Now comes the fun part. Hold a board in its possible new orientation. Try it upside down, reversed, or repositioned slightly higher or lower on the wall. Does the profile still look intentional? Does it sit flat? Does it cover old flooring gaps or paint lines? If it looks strange now, it will look stranger after paint. Trust the test fit.
Step 7: Clean, Fill, and Sand
Vacuum dust from the boards, wipe them clean, and fill nail holes, dents, and small chips. Once the filler dries, sand the surface smooth. For glossy old trim, scuff-sanding helps primer or paint adhere better. Wipe away sanding dust with a damp cloth or tack cloth before painting.
Step 8: Prime Problem Areas
Prime bare wood, patched spots, stained trim, or areas where the finish has been sanded down. Primer helps create a consistent surface and reduces the chance of flashing, where repaired spots show through the final paint. If the trim is already painted and in good shape, full priming may not be necessary, but spot-priming repairs is still smart.
Step 9: Reinstall the Baseboards
Place each piece back in its labeled location. Nail into studs where possible, or into the wall’s bottom plate if the layout allows. Keep the board snug to the wall and floor, but do not force warped pieces into submission like you are negotiating with a stubborn suitcase. If there are small gaps, caulk can help. If there are huge gaps, recutting or replacing that section may be better.
Step 10: Caulk the Top Seam
Run a thin bead of paintable caulk along the top edge where the baseboard meets the wall. Smooth it with a damp finger or caulk tool. Use less than you think you need. Caulk is like hot sauce: excellent in the right amount, regrettable when overused.
Step 11: Paint for a Fresh Finish
Use a high-quality angled brush and apply paint in long, even strokes. Trim paint in satin, semi-gloss, or gloss is popular because it is easier to wipe clean than flat paint. Let the first coat dry fully before deciding whether a second coat is needed. For most refreshed baseboards, two thin coats beat one thick, gloopy coat every time.
Design Ideas for Flipped Baseboards
Create a Taller-Looking Baseboard
If your baseboards are short, you can reinstall them slightly higher and add a thin strip of molding or caulked paint treatment below to create the illusion of taller trim. This works best when done consistently around the room and painted the same color.
Add Shoe Molding or Quarter Round
If flipping exposes a gap near the floor, shoe molding or quarter round can hide uneven edges. Shoe molding has a slimmer profile, while quarter round has a more rounded traditional look. Paint it to match the baseboard for a seamless finish or stain it to coordinate with wood flooring.
Go Bold With Color
White trim is classic, but flipped baseboards can also look fantastic in soft black, warm greige, deep green, navy, or a color matched to the walls. Painting baseboards the same color as the wall can create a modern, streamlined effect, especially in small rooms.
Use Flipped Baseboards for Accent Walls
Saved baseboards can become part of board-and-batten, picture-frame molding, or accent-wall projects. Short leftover pieces are useful for small wall details, closet trim, mudroom hooks, or decorative caps. The old trim may not return to the floor at allit may graduate to wall art with a tool belt.
Common Mistakes to Avoid
Skipping the Test Fit
Baseboards can look completely different when flipped. Always test several pieces before committing to the full room. What looks clever on one wall may look upside-down in the “the furniture is judging me” sense on another.
Using Non-Paintable Caulk
Silicone caulk has its place, but paint generally does not bond well to pure silicone. For interior trim, choose paintable acrylic latex or a paintable trim caulk.
Over-Sanding Old Paint
Sanding is useful, but aggressive sanding can damage details, flatten profiles, or create dust hazards. Use the least aggressive method that gets the surface clean and smooth.
Forgetting About Corners
Inside corners, outside corners, and long runs may need miter cuts, coped joints, or scarf joints. If the old pieces return to their original locations, you may avoid many recuts. If you change the layout, expect some cutting and fitting.
Painting Too Soon After Caulking
Caulk needs time to cure before paint. Follow the product label. Painting too soon can lead to cracks, tackiness, or a finish that looks like it had a rough morning.
Is Flipping Baseboards Worth It?
For many homeowners, yes. Flipping old baseboards is worth it when the trim is in decent shape, the profile still works, and you want a low-cost room refresh. It is especially appealing if you enjoy hands-on projects and do not mind a little sanding dust in exchange for the smug joy of saving money.
However, replacement makes more sense when the boards are badly damaged, too short for new flooring, water-swollen, moldy, or made from low-quality material that breaks during removal. Sometimes the most budget-friendly decision is knowing when not to rescue something.
Real-World Experience: What You Learn When You Actually Flip Baseboards
The first thing you learn is that baseboards are secretly holding a diary of the house. Behind them you may find old paint colors, forgotten wallpaper edges, pet hair from a pet nobody remembers, and at least one nail that seems emotionally committed to staying in the wall forever. This is normal. Renovation always includes a small archaeology phase.
In practice, the best results come from treating the project like restoration, not demolition. The homeowners who get a polished finish are usually the ones who move slowly during removal, label every piece, and resist the temptation to pry from one spot too aggressively. A wide putty knife behind the pry bar helps protect the drywall, and working in small sections reduces cracking. When a board starts to flex too much, stop and loosen another area before continuing.
Another lesson: paint hides many sins, but it does not hide laziness. If a nail hole is lumpy before painting, it will still be lumpy after paintingjust shinier and more confident. The same goes for old caulk ridges. Scrape them down, sand them smooth, and wipe away dust before primer. Trim lives at eye level only for toddlers and dogs, but adults still notice sloppy edges more than they think.
Flipping also teaches you to respect the profile. Some baseboards look surprisingly modern upside down, especially simple flat boards with a small beveled edge. Others look like they got dressed in the dark. A traditional ogee profile may feel visually top-heavy when reversed. Before reinstalling the whole room, prop a sample against the wall and look at it from the doorway. If it looks good from there, it will probably work. If you have to tilt your head and convince yourself, it probably will not.
The most satisfying part is the final caulk-and-paint stage. That is when old trim suddenly stops looking reused and starts looking intentional. A thin, clean caulk line along the wall, filled nail holes, smooth corners, and fresh trim paint can make even older boards look crisp. The room feels cleaner because the edges are cleaner. It is the home-improvement equivalent of trimming a beard: same face, much better presentation.
One practical tip from experience is to paint the baseboards before reinstalling, then touch up after caulking and nailing. Painting flat boards on sawhorses or a worktable is easier on your back and knees. After installation, fill nail holes, caulk the top seam, and apply a final light coat or touch-up. This approach gives you better coverage and fewer awkward brush angles.
Another tip is to keep a “problem piece” pile. Not every board will survive removal gracefully. Some will split at the end, lose a chunk, or reveal a back side that looks like it fought a raccoon. Save those pieces for closets, short returns, or test cuts. Use the best pieces in the most visible areas, such as entryways and long walls.
Finally, remember that flipping baseboards is not about perfection. It is about smart improvement. A room does not need brand-new trim to feel refreshed. Sometimes it just needs the old trim cleaned up, turned around, reinstalled with care, and given a fresh coat of paint. Your baseboards already did the hard work of existing. You are simply giving them a second actand maybe a little applause.
Conclusion
Flipping your old baseboards is one of those DIY projects that feels small until you see the finished room. Clean trim sharpens the edges of a space, makes wall color look fresher, and helps flooring feel more complete. Whether you literally flip the boards, reuse them in their original position, or repurpose leftover pieces for another trim project, the idea is the same: do not underestimate what you already have.
With careful removal, smart prep, paintable caulk, smooth filler, and a durable trim paint, old baseboards can look surprisingly new. Just remember to test the orientation, label every piece, check for lead-paint risks in older homes, and avoid rushing the finish work. The difference between “DIY charm” and “DIY chaos” is usually one extra afternoon of prep.
So before you toss those scuffed boards into the renovation graveyard, give them a second look. They may be dusty. They may be dented. They may have once been painted a color best described as “landlord beige.” But with a little patience, your old baseboards can flip the whole room from tired to tidy.


