
Table of Contents >> Show >> Hide
- The Big Idea: Control the Heat, Don’t Chase It
- Choose Your Grill Style: Gas vs. Charcoal (and Why It Matters)
- Grill Safety Basics (Because Dinner Shouldn’t Come with a Fire Report)
- Heat 101: Direct vs. Indirect (The Skill That Unlocks Everything)
- Lid Up or Lid Down: A Simple Rule That Prevents Chaos
- Preheating and Clean Grates: The “Stop Food from Sticking” Combo
- The Most Important Tool: A Food Thermometer (Yes, Even for “Experts”)
- Safe Internal Temperatures (and the Ones People Guess Wrong)
- Resting: The Final (Delicious) Step
- Food Prep That Makes Grilling Easier (and Tastier)
- Classic Grilling Plays (With Specific Examples)
- Flare-Ups, Sticking, and Other Grilling Plot Twists
- A Simple “Level-Up” Practice Plan (Three Cookouts)
- Conclusion: Great Grilling Is Calm Grilling
- Real-World Grilling Experiences (What You Learn After the Manuals Stop Helping)
Grilling is basically cooking with a tiny, controlled sun. Done right, you get smoky flavor, crisp edges, and juicy centers.
Done wrong, you get “charcoal” in the emotional sense. The good news: great grilling isn’t magicit’s heat management,
smart prep, and food safety you can actually remember.
This guide covers the fundamentals for charcoal and gas grills, with practical examples you can copy-paste into your next cookout.
(Safety note: grills are powerful heat sources. If you’re a teen or new to live-fire cooking, have a responsible adult handle lighting,
fuel connections, and any flare-up emergenciesand always follow your grill’s manual.)
The Big Idea: Control the Heat, Don’t Chase It
Beginners often grill like they’re playing whack-a-mole with flamesmoving food constantly, guessing doneness by vibes,
and hoping the lid thermometer is telling the truth. A calmer approach works better:
- Create zones: a hot area for searing and a cooler area for finishing.
- Preheat: a properly heated grill is less sticky and more predictable.
- Cook to temperature: not “until it looks done.”
- Rest: so juices don’t sprint out the moment you slice.
Choose Your Grill Style: Gas vs. Charcoal (and Why It Matters)
Gas grills
Gas grills are convenient, quick to heat, and easy to adjustgreat for weeknights and “I have guests in 12 minutes” situations.
They’re also excellent for indirect cooking with the lid closed, because you can dial the heat and keep it steady.
Charcoal grills
Charcoal brings the classic grilled flavor and can hit serious searing heat. The trade-off is that you manage heat with
coal placement and airflow (vents), not a knob. That sounds intimidating… until you learn the zone setup below.
Either way, your goal is the same: direct heat for browning, indirect heat for doneness.
Grill Safety Basics (Because Dinner Shouldn’t Come with a Fire Report)
Grilling safety is mostly about location, attention, and cleanliness.
Keep these non-negotiables in mind:
- Grill outdoors only and keep it well away from anything that can burn (home, railings, eaves, branches).
- Give it space: many safety guides recommend at least 10 feet from buildings for gas grills.
- Never leave a grill unattended. “I’ll be right back” is how flare-ups become stories.
- Keep kids and pets back from the grill zone (think: a no-go bubble around the heat).
- Start clean: grease buildup is a big flare-up triggerclean grates and drip areas regularly.
- Keep a basic safety plan: long tongs, a clear landing spot for hot tools, and a way to handle a grease flare.
If you ever smell gas or a flame goes out on a gas grill, don’t “try again immediately.”
Follow the manufacturer’s instructions; many safety recommendations advise turning off gas and waiting before relighting.
Heat 101: Direct vs. Indirect (The Skill That Unlocks Everything)
Direct heat
Food sits over the flame (gas) or coals (charcoal). This is where browning happens: sear marks, crisp skin, caramelized edges.
Use direct heat for thinner foods and quick cooks (burgers, hot dogs, sliced veggies, shrimp).
Indirect heat
Food sits away from the flame/coals with the lid closed, so the grill acts like an oven. Indirect is perfect for thicker items
that need time to cook through without burning (bone-in chicken, thick steaks after searing, pork chops, whole fish, larger vegetables).
The two-zone setup (your best friend)
Two-zone cooking means you always have a “hot side” and a “cool side.” You sear on the hot side, then slide food over to finish gently.
It’s the simplest way to avoid burnt outsides and raw centers.
Example: Thick chicken thighs
- Sear skin-side (or presentation-side) on the hot zone until nicely browned.
- Move to the cooler zone, close the lid, and let them cook through evenly.
- Check temperature; pull when they hit the safe internal temp.
Lid Up or Lid Down: A Simple Rule That Prevents Chaos
Think of the lid as a heat tool, not a decoration.
Lid open is best for fast, high-heat searing and managing flare-ups as you watch the action.
Lid closed traps heat and creates convectionhelpful for indirect cooking and thicker cuts that need more even heat.
Preheating and Clean Grates: The “Stop Food from Sticking” Combo
A properly preheated grill does two important things:
it helps the grate release food more easily, and it gives you real searing power.
Many grill guides recommend preheating with the lid closed for about 10–15 minutes.
Once hot, brush the grates, then lightly oil the grates (or the food).
If you oil the food, you reduce flare risk and avoid over-oiling the grill.
The Most Important Tool: A Food Thermometer (Yes, Even for “Experts”)
Color is not a food safety strategy. A thermometer gives you control, consistency, and confidence.
Use it like this:
- Insert into the thickest part of the food.
- Avoid bone and big fat pockets (they skew readings).
- Start checking early, especially with thicker cuts.
Safe Internal Temperatures (and the Ones People Guess Wrong)
These are common U.S. food safety targets. When in doubt, follow current government guidance and your recipe’s instructions.
A few big ones to remember:
- Poultry (chicken/turkey): 165°F
- Ground meats (like burgers): 160°F
- Whole cuts (steaks, chops, roasts): 145°F (often paired with a short rest time)
Practical tip: If you’re cooking burgers for a crowd, thermometer-check one from each “batch”
(especially if patty thickness varies). It’s the easiest way to avoid serving a tray with mixed doneness surprises.
Resting: The Final (Delicious) Step
When you pull meat off the grill, it doesn’t instantly stop cooking. Heat continues moving inward (“carryover cooking”),
and resting helps juices redistribute instead of spilling onto your cutting board like a tiny crime scene.
- Small items (burgers, thin chops): a short rest is still worth itthink a few minutes.
- Large items (big steaks, roasts): rest longer, and consider pulling a few degrees early so carryover lands you at the target.
Food Prep That Makes Grilling Easier (and Tastier)
Pat dry for better browning
Surface moisture slows browning. For better sear and less sticking, pat meats dry before they hit the grate.
If your marinade is sugary, letting excess drip offand even gently blottingcan help prevent scorching.
Salt early or salt smart
Salt helps flavor penetrate and can improve browning. For thick cuts, salting ahead of time can be a game-changer.
For quick items, salting right before grilling still worksjust don’t forget it while you’re admiring the flames.
Marinade safety (don’t accidentally make a bacteria smoothie)
- Marinate in the refrigerator, not on the counter.
- Don’t reuse a marinade that touched raw meat unless it’s boiled first (and it’s often smarter to reserve a “clean” portion ahead of time).
- Use clean plates and clean utensils: never put cooked food back on a plate that held raw meat.
Classic Grilling Plays (With Specific Examples)
1) Burgers that stay juicy (and safe)
Use direct heat for a good crust, then slide to the cooler zone if the outside is browning too fast.
Cook ground beef to 160°F. If you add cheese, do it near the end and close the lid briefly to melt it.
2) Chicken that isn’t dry
Chicken is where two-zone cooking shines. Sear for color, then move to indirect heat with the lid down to cook through.
Pull at 165°F. If you’re using a sweet glaze, apply it late so it doesn’t burn before the chicken is done.
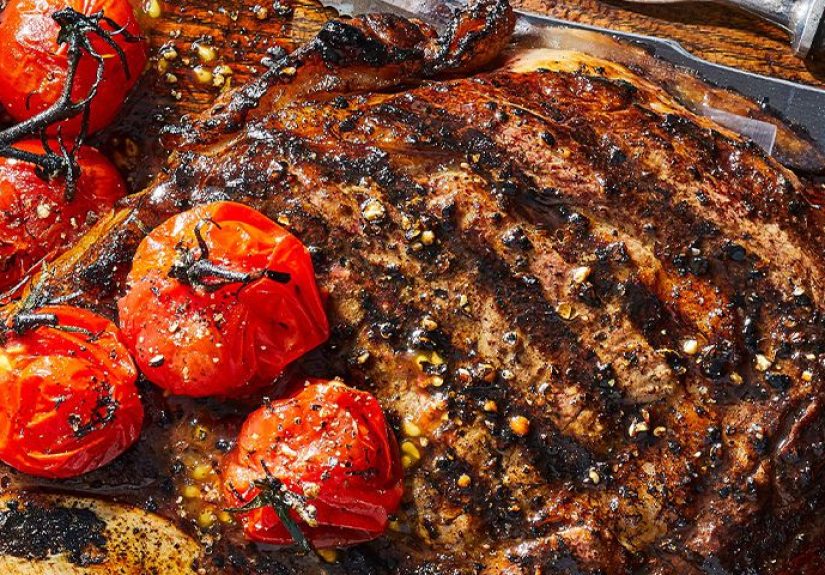
3) Steaks with great crust and even doneness
Thick steaks do well with a “sear + finish” approach:
quick browning on the hot zone, then a gentle finish on the cooler side to hit your preferred doneness without charring the exterior.
Rest before slicing.
4) Vegetables that taste like more than “a side quest”
Veggies love high heat and a little oil. Try direct grilling for fast char on items like asparagus, peppers, onions, zucchini,
and corn. For thicker vegetables (like halved romaine or large portobellos), use indirect heat to soften, then finish over direct
heat for color.
Flare-Ups, Sticking, and Other Grilling Plot Twists
If flare-ups happen
- Move food to the cooler zone.
- Close the lid briefly to reduce oxygen (on many grills, this helps calm flames).
- Trim excess fat on meats when possible; dripping fat is flare-up fuel.
If food sticks
- Preheat longer and clean the grates while hot.
- Oil the food or grates lightly.
- Don’t force itmany proteins release naturally once properly seared.
If the outside is done but the inside isn’t
That’s a sign you need indirect heat. Slide the food to the cooler zone, close the lid, and let convection do the work.
(This is also why two-zone setups feel like cheatingin a good way.)
A Simple “Level-Up” Practice Plan (Three Cookouts)
Cookout #1: Master heat zones
Grill burgers and veggies using a hot zone and a cooler zone. Focus on moving food intentionally, not constantly.
Cookout #2: Thermometer confidence
Grill chicken thighs or pork chops and rely on temperature, not timing. Note how much carryover happens during resting.
Cookout #3: Timing + saucing
Add a glaze or sauce late in the cook to avoid burning sugars. Practice sear-then-finish on a thicker cut.
Conclusion: Great Grilling Is Calm Grilling
The best grilling skill isn’t flipping fastit’s thinking ahead. Build heat zones, preheat, cook to temperature, and rest your food.
Keep raw and cooked foods separate, handle marinades safely, and treat the grill like the powerful tool it is.
Once those basics become habit, you’ll stop “hoping” dinner turns out and start knowing it will.
Real-World Grilling Experiences (What You Learn After the Manuals Stop Helping)
The first real grilling lesson most people get is not “how to sear,” but “how quickly time gets weird outside.”
Indoors, you can hear a pan, see the flame, and adjust instantly. On a grill, heat is spread out, wind is messing with it,
and the lid thermometer is basically giving you an inspirational quote instead of a fact. That’s why the two-zone setup feels
like the moment you switch from guessing to driving. The first time you sear on the hot side and slide food to the cool side,
you realize you don’t have to fight the grillyou can organize it.
Another “aha” moment is learning what patience looks like on the grate. When food sticks, the instinct is to pry it up,
which usually tears the surface and leaves half your dinner behind like a sad science experiment. After a few tries, you notice
a pattern: when the grill is properly preheated and the food has time to brown, it releases on its own. It’s less like peeling tape
and more like opening a door that was stuckforce makes it worse, timing makes it easy. That one habit (preheat + don’t rush)
upgrades almost everything you cook.
Sauces teach another lesson: sugar is delicious… and also a tiny arsonist. If you brush a sweet glaze on too early, it can darken fast,
then go from “caramelized” to “burnt” while the inside is still catching up. The fix isn’t to abandon sauceit’s to change the timing.
Finish with sauce near the end, use indirect heat when you need more time, and keep a cooler zone available so you can dodge flare-ups
without panic. People who “never have flare-ups” aren’t blessed by the barbecue gods; they just built a safer place to move the food.
Thermometers deserve their own real-world shout-out. Many grillers start using one after a single bad experience: chicken that looks
perfect outside but isn’t done inside, or burgers that dry out because you cooked them until they “felt” safe. The first time you cook
to temperature and pull the food exactly when it hits the target, it feels like you just unlocked a cheat code. You also start noticing
carryover cookinghow food keeps rising a few degrees while it rests. That turns resting from a polite suggestion into part of the plan.
You pull slightly early, rest, and suddenly your “timing” gets better without you changing anything else.
Finally, there’s the unglamorous experience that makes everything better: cleaning. Nobody daydreams about scraping grates. But once you’ve
dealt with sticky fish, bitter smoke from old grease, or a flare-up that makes you do a little backyard ballet, you learn that a clean grill
is a calmer grill. It heats more evenly, it sticks less, and it’s less likely to surprise you. The best part is that good habits compound:
preheat, brush, zone your fire, use a thermometer, restrepeat. After a few cookouts, you’re not “trying to grill.” You’re just grilling.


