
Table of Contents >> Show >> Hide
- What Is a Hanging Pulley Photo Display?
- Why This Project Works (Even If You’re Not “Crafty”)
- Materials and Tools
- Step-by-Step: How to Make a Hanging Pulley Photo Display
- Step 1: Pick the “board” and plan your layout
- Step 2: Add a backing (optional, but it helps the piece feel finished)
- Step 3: Attach the display surface to the backing
- Step 4: Add your photo clips
- Step 5: Prep the rope (and prevent fraying)
- Step 6: Thread the rope through the pulley
- Step 7: Attach the rope to the back of the board
- Step 8: Mount the pulley safely (wall or ceiling)
- Placement and Styling Ideas
- Easy Upgrades and Variations
- Troubleshooting (Because Rope Has Opinions)
- Care and Photo Rotation Tips
- DIYer Experiences: What People Love (and What They’d Do Differently)
- Conclusion
A pulley in your house usually means one of two things: (1) your garage door is about to get dramatic, or (2) you’re
about to make very cute decor with suspiciously “thrift-store chic” energy. Today we’re going with option #2.
This DIY “Hanging Pulley Photo Display” is a rustic, farmhouse-leaning way to show off photos without committing to a full
gallery wall (a.k.a. the thing you swear will be “quick,” and then you’re measuring for three hours and whispering,
“Why are none of these frames the same size?”).
The basic idea: you build a small display board (pallet-style, placemat-style, or reclaimed-wood style), clip photos to the front,
and hang the whole piece using rope threaded through a pulley. It feels vintage, practical, and a little bit like your wall decor
could lift a tiny bucket of apples if it had to.
What Is a Hanging Pulley Photo Display?
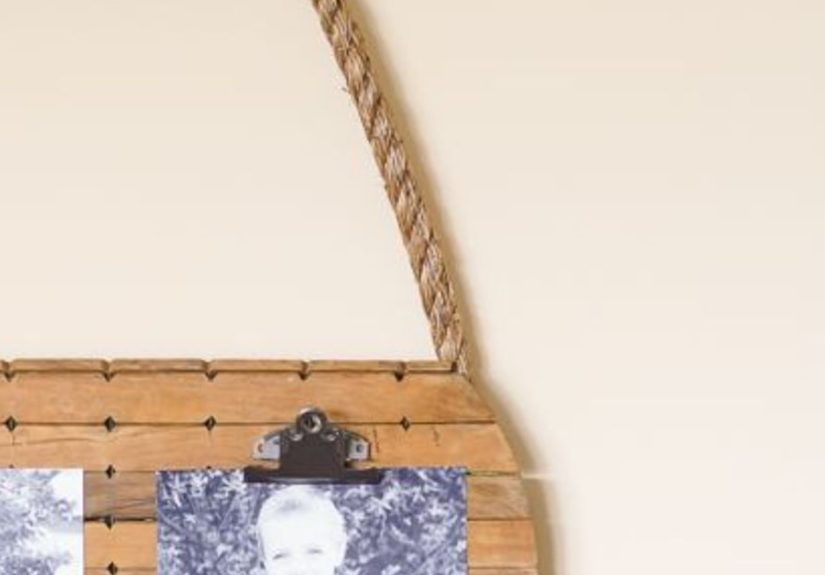
A hanging pulley photo display is a photo holder suspended by rope (or twine) that runs through a pulley mounted on the wall or ceiling.
The pulley can be purely decorative (the display hangs at one fixed height), or it can be functional (you can raise/lower the board,
like a mini indoor clothesline for memories).
The Hometalk-style charm comes from mixing everyday materialswood, rope, simple clipswith an interesting hardware piece (the pulley),
often found secondhand. It’s the DIY equivalent of wearing jeans with a great vintage belt: easy, but it looks like you tried.
Why This Project Works (Even If You’re Not “Crafty”)
- Instant character: A pulley adds texture and a storyespecially if it’s vintage or antique-style.
- Swap-friendly: Clips let you update photos in seconds (seasonal, family, travel, kids’ art, you name it).
- Small-space win: You get a focal point without taking over an entire wall.
- Budget-flexible: You can thrift the pulley, repurpose wood, and use inexpensive rope and clips.
- Custom vibe: Rustic farmhouse, coastal, industrial, minimalistthis can swing a lot of directions.
Materials and Tools
The version below is inspired by a popular thrifted-upcycle approach: a “board” on the front, a backing piece behind it, rope through the pulley,
and cute clips for photos. Substitute freelyDIY is basically legal plagiarism with hot glue.
Materials
- Pulley: vintage, antique-style, or new decorative pulley
- Rope: sisal, jute, or cotton rope (thicker rope reads more rustic; thinner rope reads more airy)
- Display surface: small pallet board, wood slats, a wooden placemat, or a reclaimed board
- Backing piece (optional): thin wood round, plaque, board, or even a sturdy serving tray backing
- Photo holders: clipboard clips, small binder clips, mini clothespins, or bulldog clips
- Fasteners: screws appropriate for your surface; wall anchors if needed
- Adhesive (optional): wood glue + hot glue for quick hold (or clamps if you’re patient and professional)
- Finish (optional): paint, stain, wax, or a clear sealer
- Photos: printed photos, postcards, kids’ art, ticket stubsanything flat-ish
Tools
- Stud finder (helpful if mounting to studs/joists)
- Drill + bits
- Screwdriver
- Measuring tape
- Level
- Pencil
- Scissors or utility knife (for rope)
- Hot glue gun (optional)
- Clamps (optional)
Step-by-Step: How to Make a Hanging Pulley Photo Display
Step 1: Pick the “board” and plan your layout
Start by choosing the front display surface. A small pallet board looks rustic. A wooden placemat looks tidy and intentional.
Reclaimed wood looks like you own a charming cabin (even if you absolutely do not).
Decide how many photos you want visible at once. Two or three clips is a sweet spot: enough to feel curated, not so many that your board
looks like it’s applying for a job as a bulletin board.
Picture tip: Take a “before” photo of your thrifted pieces and a quick layout photo of where the clips will go.
Step 2: Add a backing (optional, but it helps the piece feel finished)
A backing piece can make your display look more substantial and hide rope attachments on the back. Many DIYers use a thin board, a plaque shape,
or another sturdy base. If you’re repurposing a tray or round backing, lightly sand glossy finishes so glue and paint can grip better.
Step 3: Attach the display surface to the backing
Use wood glue for strength and hot glue for quick “hold it right now” convenience. Press firmly, clamp if you can, and let it cure according to
the adhesive instructions. If your display surface wraps around the edges of the backing, that extra contact area can make it feel sturdier.
Picture tip: Snap a close-up of the glue/clamp setupthese are the satisfying “progress pics” people love.
Step 4: Add your photo clips
For a clean look, place two clips evenly spaced across the front. Clipboard clips look charming and intentional; mini clothespins give a lighter,
casual vibe; binder clips work in a pinch (and can look surprisingly modern).
- For screws: Pre-drill tiny pilot holes to avoid splitting thin wood.
- For adhesive: Use a strong glue rated for wood/metal contact, but be honest about weightclips get tugged a lot.
Step 5: Prep the rope (and prevent fraying)
Cut rope long enough to thread through the pulley and reach your board with extra for knots. If you’re using sisal or jute, wrap tape around the cut
line before trimming, or lightly seal the ends so they don’t unravel into a tiny rope tumbleweed.
Step 6: Thread the rope through the pulley
Thread the rope through the pulley wheel. Decide whether you want:
- Decorative mode: the board hangs at one fixed height; the pulley is mainly for looks.
- Functional mode: the rope actually lets you raise/lower the board (requires more thoughtful mounting and a cleat or tie-off point).
Step 7: Attach the rope to the back of the board
You can staple the rope ends to the back (best with heavy-duty staples into solid wood), tie knots through eye screws on the back,
or screw in small D-rings/eyelets to tie onto. The goal: secure attachment points that won’t loosen when you swap photos.
If the board tilts forward, try adding felt pads at the lower back corners, or shift attachment points slightly higher so the board hangs flatter.
Step 8: Mount the pulley safely (wall or ceiling)
Here’s the truth: the pulley can be lightweight decor… but you still don’t want it falling like a dramatic stage prop.
Choose a mounting method based on your setup.
Option A: Mount to a wall stud (simple and sturdy)
- Locate a stud (stud finder, magnet method, or other stud-finding techniques).
- Mark the center and pre-drill if needed.
- Screw the pulley bracket into the stud with appropriate screws.
- Hang the rope/board and level it.
Option B: Mount to a ceiling joist (only if you’re truly ceiling-hanging)
If you’re installing into the ceiling, you want the pulley hardware anchored into a joist (not just drywall).
Use a stud finder rated for joists or other reliable methods to locate framing, and pre-drill for screw hooks/eye bolts when required.
If you can’t hit framing exactly where you want, consider adding blocking (a reinforcement strategy) rather than gambling with drywall alone.
Option C: No stud where you need it? Use the right anchor
For wall mounting when a stud isn’t available, use a drywall anchor rated for the load and wall type. For heavier decor, toggle-style anchors or
robust hollow-wall anchors are often used. Follow packaging ratings, and remember that anchors are sensitive to wall condition and installation quality.
Important: Avoid relying on adhesive hooks for framed, heavier, or sentimental items. Humidity and temperature changes can cause failures over time
and nobody wants their family photos performing a surprise swan dive.
Picture tip: Photograph the pulley mounted (wide shot) and the final display with photos clipped in.
Placement and Styling Ideas
Entryway “Welcome Home” moment
Hang it near your entry with a rotating set of family photos, seasonal postcards, or a mini “today’s wins” display (yes, adults deserve gold stars too).
Kitchen memory lane
Use it for recipe cards, farmers market finds, or black-and-white family photos. Keep it away from heavy steam zones unless your rope enjoys frizz.
Kids’ art gallery (without the tape residue)
Clip up new drawings weekly. Your fridge can finally retire. Let it rest. It’s been through a lot.
Office inspiration board
Swap in goal reminders, mini mood boards, and “I paid my bills on time” brag documents. (Frame optional; pride mandatory.)
Easy Upgrades and Variations
- Add a mini ledge: Attach a thin strip of wood at the bottom for small prints or a tiny plant (lightweight!).
- Make it seasonal: Paint the backing a neutral color and swap ribbon/rope accents by season.
- Double the clips: Two rows of clips turns it into a mini photo wall in one piece.
- Chalk label area: Add a small chalkboard strip for dates, captions, or “Vacation 2025.”
- Upgrade the rope: Cotton rope looks cleaner; sisal/jute reads rustic; black cord looks industrial.
- Go functional: Add a cleat on the wall to tie off rope if you want true raise/lower action.
- Mix materials: Pair an iron pulley with a stained board, or a wooden pulley with whitewashed slats.
Troubleshooting (Because Rope Has Opinions)
My board hangs crooked
- Re-check that rope lengths are equal on both sides.
- Move attachment points slightly wider apart for stability.
- Add small felt pads behind the lower corners to prevent tipping.
The rope slips or loosens
- Use stronger knots (and test by gently tugging before hanging photos).
- If going functional, install a cleat or tie-off point so tension stays consistent.
Clips dent or mark photos
- Use sturdier cardstock backers behind photos.
- Switch to clips with smoother grips or add a thin paper buffer.
My wall anchor is spinning
- That usually means the hole is too big or the anchor type isn’t ideal for the load.
- Resize/replace with an appropriate anchor, or relocate to a stud for the cleanest solution.
Care and Photo Rotation Tips
Dust the pulley and board occasionally (especially if you used a textured rope that loves collecting lint like it’s a hobby).
When swapping photos, consider printing duplicates for this display so originals stay protected in albums.
If sunlight hits the display, rotate photos more often to reduce fading. Black-and-white prints can be especially forgiving for this kind of decor.
DIYer Experiences: What People Love (and What They’d Do Differently)
DIYers who try a hanging pulley photo display tend to agree on one thing immediately: the pulley is the “secret ingredient.”
Plenty of photo displays exist, but adding a pulley turns the project into a conversation piece. People walk into the room and do a double take
not because it’s loud or flashy, but because it looks like it has a purpose beyond decor. (Even when its only job is “hold adorable photos.”)
One common experience: the thrill of the thrift. Makers often start with a single interesting finda pulley, a salvaged bracket,
or an old piece of hardwareand then build the display around it. That approach makes the finished project feel collected rather than store-bought.
It’s also oddly motivating: when you’ve paid a few bucks for a pulley that looks like it once worked on a barn, you suddenly become
very committed to making something worthy of it.
Another lesson people share: rope choice changes the entire vibe. Sisal and jute create that rustic farmhouse look immediately,
but they can fray and shed fibers at first. Cotton rope looks cleaner and “newer,” and some DIYers prefer it for modern spaces. A few makers
even switch to darker cord for an industrial lookespecially when paired with black clips or darker-stained wood. The funny part is that the board
can stay exactly the same, yet the rope makes it read like a totally different project.
On the practical side, DIYers often say the biggest “wish I’d known” is mounting strategy. If the pulley is purely decorative
and the board is light, wall mounting can be straightforward. But once you make the display larger, add heavier backing, or go for functional
raise/lower movement, mounting becomes the star of the show. Many people end up happier when they take the time to find solid framing (or use the
right anchors), pre-drill clean holes, and test-hang the piece before loading it with photos. The display feels calmer, toono tiny wobble every time
you walk past it, like it’s nervous about being perceived.
People also love the photo-swapping ritual. Because the display is clip-based, it invites updates. Some DIYers turn it into a monthly tradition:
swap in seasonal photos, recent phone snapshots, or kids’ newest artwork. Others use it as a “mini gallery” for travel postcards and ticket stubs,
rotating items like a museum exhibit (but with more snack breaks and less security).
Finally, a lot of makers mention the unexpected bonus: this project scales beautifully. Once you’ve made one, you start seeing versions everywhere:
a smaller one for a bathroom with polaroids, a longer one for a hallway, a pair of matching displays flanking a window, or a functional pulley system
for lightweight decor swaps. It’s the kind of DIY that quietly turns into a “thing you do,” which is how most great home style happens anywayone small,
confident project at a time.
Conclusion
A hanging pulley photo display is the sweet spot between “practical photo holder” and “why does this look like it belongs in a magazine?”
It’s approachable, customizable, and it makes your memories feel curated instead of scattered across your camera roll like digital confetti.
Keep it simple if you want: a small board, two clips, one pulley, done. Or go full DIY maximalist: functional rope system, seasonal swaps,
custom stain, and a perfectly leveled hang that makes you feel like you should be paid for your craftsmanship. Either way, your wall just got a lot more interesting.


