
Table of Contents >> Show >> Hide
- What Are Deep-Set Eyes (and Why Makeup Behaves Differently)?
- The “Golden Rules” for Deep-Set Eye Makeup
- Tools & Products That Make This So Much Easier
- How to Apply Eye Makeup for Deep Set Eyes: 15 Steps
- Step 1: Start with skincare that won’t sabotage your makeup
- Step 2: Brighten the under-eye (strategically, not aggressively)
- Step 3: Prime the lidespecially where makeup disappears
- Step 4: Map your crease with eyes open (the most important trick)
- Step 5: Blend upward in a “lift,” not a “cave”
- Step 6: Keep the lid lighter to bring the eye forward
- Step 7: Build depth only on the outer corner (the “tiny triangle”)
- Step 8: Softly smoke the lower lash line (without dragging the eye down)
- Step 9: Highlight the inner cornerjust enough to “turn on the lights”
- Step 10: Tightline the upper waterline for invisible definition
- Step 11: Apply a thin lash-line liner (start mid-lid if needed)
- Step 12: Create a “visible wing” that doesn’t fold into the crease
- Step 13: Curl lashes like you mean it
- Step 14: Mascara placement matters (top-heavy for lift)
- Step 15: Final cleanup and setso it lasts past your first coffee
- Two Quick Looks Using the Same 15 Steps
- Common Mistakes (and the Fixes That Save Your Look)
- of Real-World Experience (a.k.a. The Stuff You Learn After Ruining a Few Wings)
- Conclusion
Deep-set eyes are gorgeous. They’re also the reason your eyeliner sometimes vanishes like it’s late for a meeting. If your crease seems to “eat” your shadow, your orbital bone casts a little built-in shadow, or your lashes keep smudging your lid by noon, welcomeyou’re in the right tutorial.
This guide breaks down eye makeup for deep set eyes into an easy, repeatable routine with 15 practical steps. We’ll cover eyeshadow placement, eyeliner that stays visible, and the small tweaks that make your eyes look brighter, more open, and still like you (just slightly more awake).
What Are Deep-Set Eyes (and Why Makeup Behaves Differently)?
Deep-set eyes sit farther back in the eye socket, which creates a natural shadow around the crease and under-brow area. That extra dimension is beautifullike built-in contourbut it also means:
- Your “real” crease may be harder to see (and easier to over-darken).
- Dark shades placed too high can make the eye look more recessed.
- Thick liner can visually shrink the lid space and disappear when your eyes are open.
- Under-eye shadows and darkness can look more pronounced without brightening.
Quick self-check
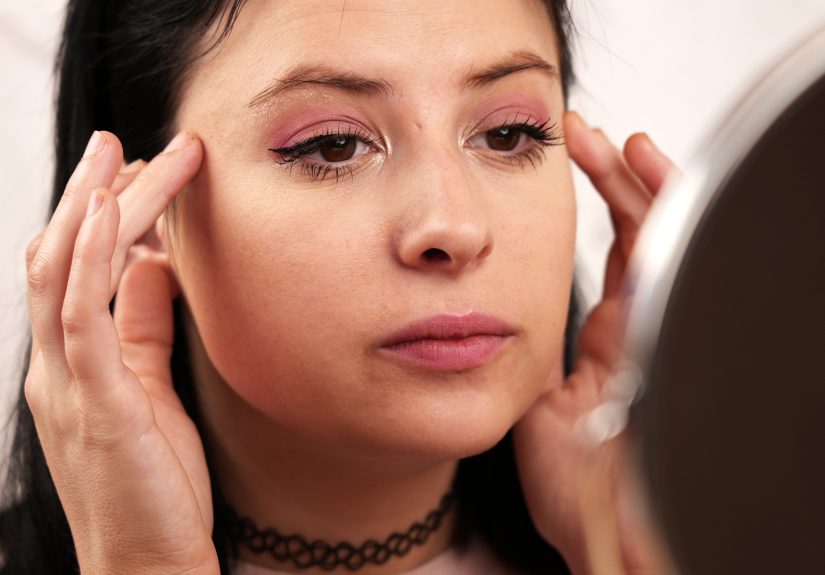
Look straight into a mirror in good lighting. If your brow bone feels prominent, your lid looks slightly tucked back, and the area above the crease naturally looks shaded even without makeup, you likely have deep-set eyes. You can also have deep-set + hooded lids (because eyes love being complicated).
The “Golden Rules” for Deep-Set Eye Makeup
- Brighten the lid, sculpt the socket. Light on the lid brings the eye forward; depth belongs in targeted areas.
- Place the crease with eyes open. Your best map is your face looking forward, not your eyelid looking down.
- Keep liner thin at the inner half. Start mid-lid when needed and build outward for lift.
- Choose textures strategically. Matte for shaping; shimmer for spotlighting (not for “making a brand-new crease”).
- Lift is your friend. Aim placement slightly up and out, not straight back into the socket.
Tools & Products That Make This So Much Easier
You don’t need a suitcase of products. You need the right basics:
- Eye primer (or a thin concealer set lightly): keeps shadow from migrating into the “eye socket HOA.”
- Matte transition shade (taupe, soft brown, or warm neutral): for a believable “crease.”
- Light lid shade (matte cream or soft champagne shimmer): to bring the lid forward.
- One deeper matte (espresso, plum-brown, charcoal-brown): for outer-corner structure.
- Thin liner option: felt-tip pen, gel pencil, or dark shadow used as liner.
- Lash curler + mascara: deep-set eyes often look instantly more open with a good curl.
- Small blending brush + pencil brush: precision is the secret sauce here.
How to Apply Eye Makeup for Deep Set Eyes: 15 Steps
-
Step 1: Start with skincare that won’t sabotage your makeup
Hydrate the under-eye with a lightweight eye cream or gel, then give it a minute. If your base is too slick, concealer will slide and crease. If it’s too dry, everything looks textured. The goal is “plump, not greasy.”
-
Step 2: Brighten the under-eye (strategically, not aggressively)
Deep-set eyes can look shadowed underneath. Use a corrector if you have blue/purple tones, then apply a brightening concealer mainly in the inner under-eye and the hollow area. Blend upward toward the outer corner for a subtle lifted effect. Avoid piling product right up against fine lines.
-
Step 3: Prime the lidespecially where makeup disappears
Apply a thin layer of primer from lash line to just above where you’ll place your “new crease.” Set lightly if your primer stays tacky. This step is the difference between “my eyeshadow looks great” and “my eyeshadow left the chat at lunchtime.”
-
Step 4: Map your crease with eyes open (the most important trick)
Look straight ahead, eyes relaxed. Using a matte transition shade, softly sweep color where you want the crease to readnot necessarily where your fold is. For many deep-set eyes, that’s slightly above the natural crease shadow but still below the brow bone.
-
Step 5: Blend upward in a “lift,” not a “cave”
Blend with a gentle upward-and-out motion toward the tail of the brow. Avoid blending straight inward or too high into the brow bone shadowotherwise you can accidentally deepen the socket and make the eye look more recessed.
-
Step 6: Keep the lid lighter to bring the eye forward
Apply a light shade on the mobile lid (the part that moves). Matte cream looks clean for daytime; a soft, satin shimmer looks bright and polished. If you love shimmer, keep it mainly on the lidnot up in the crease.
-
Step 7: Build depth only on the outer corner (the “tiny triangle”)
Using a deeper matte shade, place color on the outer third of the lid and slightly into the outer crease, creating a small lifted “V” or triangle. Start small. You can always add more; you cannot un-bake a smoky eye without consequences.
-
Step 8: Softly smoke the lower lash line (without dragging the eye down)
With a pencil brush, sweep a mid-tone (not your darkest shade) along the lower lash line, focusing more on the outer half. Keep it diffused. If your under-eye already looks shadowed, go lighter and shorter.
-
Step 9: Highlight the inner cornerjust enough to “turn on the lights”
Tap a bright inner-corner shade (champagne, pearl, or a pale pink) at the tear duct area. This counters the natural shadow that deep-set eyes can cast. Think “little spotlight,” not “disco ball.”
-
Step 10: Tightline the upper waterline for invisible definition
Tightlining (lining the upper waterline under the lashes) makes lashes look thicker without taking up lid space. Use a waterproof pencil if your eyes water easily. This trick is especially helpful when deep-set lids “eat” visible liner.
-
Step 11: Apply a thin lash-line liner (start mid-lid if needed)
For eyeliner for deep-set eyes, thinner is usually betterespecially on the inner half. Start around the middle of the upper lash line, then connect to the outer corner. This keeps the eye open and avoids crowding the inner eye.
-
Step 12: Create a “visible wing” that doesn’t fold into the crease
Look straight ahead and sketch the wing with your eyes open so you can see where it will actually show. Keep the wing angled slightly up toward the end of the brow. If your crease cuts into your wing, try a shorter “kitten wing” or a smudged shadow-wing instead of a thick graphic line.
-
Step 13: Curl lashes like you mean it
Deep-set eyes often look instantly more awake with curled lashes because the lash line can be visually “tucked.” Curl at the base, then (gently) pulse once halfway up for a natural curve. No need to clamp like you’re stapling homework.
-
Step 14: Mascara placement matters (top-heavy for lift)
Focus mascara on the upper lashes, especially the outer lashes, to lift and open the eye. If lower mascara tends to smudge on you, skip it or apply only to the outer third with a light hand. A clean lower lash line often looks bigger on deep-set eyes.
-
Step 15: Final cleanup and setso it lasts past your first coffee
Clean fallout with a small brush and a touch of concealer, then lightly set the under-eye with a finely milled powder. If your lids transfer, consider a long-wear shadow base or a setting spray misted over a sponge and pressed gently on top (avoid soaking).
Two Quick Looks Using the Same 15 Steps
Everyday “Bright & Defined”
- Transition: soft taupe
- Lid: matte cream or champagne satin
- Outer corner: neutral brown
- Liner: tightline + thin brown-black on outer half
- Lashes: curled + lengthening mascara
Evening “Soft Smoke (No Eye-Sinking)”
- Transition: warm medium brown
- Lid: soft bronze shimmer (kept on the lid)
- Outer corner: deep espresso matte
- Lower lash line: mid-tone brown smudged, concentrated outer half
- Liner: smudged shadow-liner + small lifted wing
Common Mistakes (and the Fixes That Save Your Look)
Mistake: Dark shadow all over the lid
Fix: Keep the lid lighter and place depth only where it lifts (outer corner + outer crease). If you want drama, build it outward, not upward.
Mistake: Shimmer placed as “crease contour”
Fix: Use matte shades for shaping. Save shimmer for the lid and inner corner where it reflects light beautifully.
Mistake: Thick liner from inner corner to outer corner
Fix: Start mid-lid, keep the inner line thin, and build thickness toward the outer corner. Your lid space will thank you.
Mistake: Under-eye makeup that looks heavy or creased
Fix: Use less concealer, blend outward for lift, and set with a tiny amount of powder. If needed, add color correction before concealer rather than adding more concealer.
of Real-World Experience (a.k.a. The Stuff You Learn After Ruining a Few Wings)
The first time I tried to follow a generic “cut crease tutorial,” I learned an important truth: deep-set eyes do not care about your plans. You can draw the most beautiful crease line on a closed eye, open your eyes, and suddenly it looks like you applied eyeshadow with a potato. The fix wasn’t “better eyeshadow.” It was better placement. The day everything clicked was the day I stopped doing my eye makeup with my eyes shut like I was meditating and started doing it with my eyes open like a functional adult.
Here’s what experience teaches you: deep-set eyes are basically natural stage lighting. If you put dark color in the wrong place, it doubles the shadow and your eyes look more recessed. If you put light in the right placelid, inner corner, and a gentle brightening under-eyeyour eyes look forward and awake, even if you slept like a raccoon. The biggest “aha” moment for most people is realizing the lid should be your bright canvas. The crease is the architecture. Architecture is matte. Canvas can be satin or shimmer. That simple texture rule saves you from accidentally creating a glittery cave.
Another thing you learn after a few smudgy days: lower mascara is optional, not a moral obligation. If it smears, skip it. Or apply it only to the outer third. A clean lower lash line can look bigger and fresher on deep-set eyes, especially if you already have natural under-eye shadow. When I want definition without the risk, I’ll smudge a soft brown shadow under the outer half of the lower lash line and call it a day. It reads polished, not heavy.
Eyeliner is its own emotional journey. The classic mistake is drawing a thick wing with your eyes closed, then opening your eyes and watching the wing fold into the crease like it’s trying to hide from responsibility. The solution is boringbut it works: map the wing with eyes open. Keep it short. Keep it lifted. If you want more drama, build the wing outward rather than thicker across the lid. Sometimes the best “wing” is a smudged shadow angled up, because it stays visible no matter what your lid does.
The last big lesson is that deep-set eye makeup is about illusion, not intensity. You can absolutely wear bold looks, but the boldness should come from contrast and shape, not from saturating everything with dark pigment. One bright lid shade + one well-placed matte crease + a clean, thin liner can look more elevated than a complicated palette situation that turns muddy by the time you get to your car. If your makeup ever feels like it’s “disappearing,” you’re not failing. Your eye shape is simply asking for a slightly different blueprintand once you learn it, your eyes become the main character every time.
Conclusion
The best makeup for deep-set eyes doesn’t fight your shapeit works with it. Brighten what you want to bring forward (lid and inner corner), sculpt with matte shades where you want definition (your customized crease and outer corner), and keep liner strategic so it stays visible. Once you nail placement with eyes open, everything else gets easierand your eyeliner stops ghosting you.


