
Table of Contents >> Show >> Hide
- What Makes Bathroom Floors So Hard to Clean?
- Supplies You’ll Actually Use (No “Cleaning Aisle Olympics” Required)
- The Weekly Clean: 20 Minutes, Start to Finish
- The Deep Clean: Grout Lines, Corners, and “Why Is This Sticky?”
- Disinfecting: When It’s Worth It (and How to Do It Safely)
- Floor-by-Floor Guide: Clean It Without Ruining It
- Targeted Fixes for Common Bathroom Floor Problems
- Maintenance Habits That Keep the Floor Cleaner Longer
- A Simple Bathroom Floor Cleaning Schedule
- Real-Life Bathroom Floor Cleaning Stories ( of Experience)
- Conclusion
Bathroom floors are where life’s little “oops” moments go to retire: toothpaste freckles, shower-spray mist, powdery makeup fallout, and that mysterious sticky spot you swear wasn’t there yesterday. The good news? You don’t need a hazmat suit (or a three-hour playlist) to get your floor genuinely clean. You just need the right order of operations, the right cleaner for your floor type, and one simple rule: don’t push dirty water around and call it “mopping.”
This guide breaks bathroom floor cleaning into a quick weekly routine and an occasional deep clean (especially for grout lines and corners). You’ll also get practical tips for tile, vinyl, natural stone, and moreplus how to disinfect safely when it actually matters.
What Makes Bathroom Floors So Hard to Clean?
Bathroom floors don’t just get “dirty”they get layered. Dust and hair combine with humidity, creating a clingy film. Soap and shampoo mist settle and dry into residue. Hard water can leave chalky mineral deposits. And grout (if you have tile) is porous, meaning grime can sink in instead of sitting politely on top.
The trick is to remove loose debris first, then wash away film, and only then target stains or disinfect. Skipping steps is how you end up scrubbing forever… while your mop water quietly turns into soup.
Supplies You’ll Actually Use (No “Cleaning Aisle Olympics” Required)
- Broom, dust mop, or vacuum (hard-floor mode)
- Microfiber flat mop (better than a sponge mop for grout and corners)
- Bucket (or a spray mop you can refill)
- Mild dish soap or a pH-neutral floor cleaner
- Soft nylon scrub brush or an old toothbrush for grout and edges
- Baking soda (for gentle scrubbing and deodorizing)
- 3% hydrogen peroxide (great for many tile/grout jobs; test first)
- Microfiber cloths for baseboards and edges
- Gloves and good ventilation for stronger products
Optional (but nice) upgrades
- Grout brush (stiffer bristles than a toothbrush)
- Steam cleaner (excellent for grout if your tile can handle it)
- Squeegee (for shower-adjacent water control)
The Weekly Clean: 20 Minutes, Start to Finish
If you do nothing else, do this once a week. It prevents the “how did it get this bad?” moment that turns a small chore into an emotional event.
Step 1: Clear the floor (quickly)
Pick up bath mats, trash cans, and anything living on the floor. Shake mats outside or toss them in the wash if they’re due. (Bathroom mats are basically dirt trampolines.)
Step 2: Dry-clean first (yes, it matters)
Sweep or vacuum to remove hair, dust, and grit. Hair + water = mop lasso. Grit + scrubbing = tiny sandpaper. Get it off the floor now so you don’t smear it everywhere later.
Step 3: Mop with the right mix
For most floors, mix warm water with a few drops of mild dish soap, or use a pH-neutral cleaner per label directions. The goal is to lift oily film without leaving residue.
- Work in sections (about 3×3 feet).
- Mop, then rinse your mop pad or swap to a clean one.
- Change the bucket water when it looks questionable. If it looks like iced coffee, it’s time.
Step 4: Rinse (when needed) and dry
If your cleaner is no-rinse, you can skip this. Otherwise, do a quick pass with clean water. Then dry the floor with a clean towel or microfiber clothespecially near the toilet and shower where puddles like to camp out.
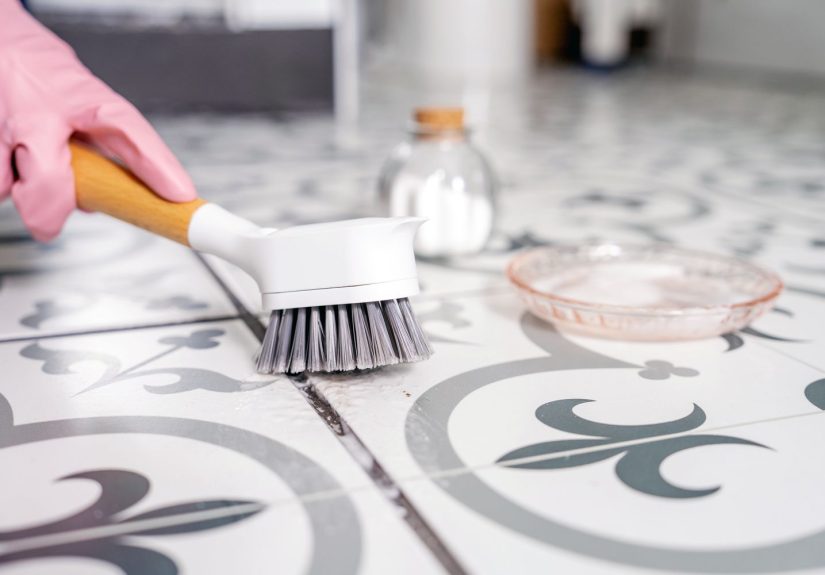
The Deep Clean: Grout Lines, Corners, and “Why Is This Sticky?”
Do a deep clean every month or two (or whenever your floor starts looking dull even after mopping). Focus on the trouble zones: around the toilet, along baseboards, and wherever water splashes and evaporates.
Step 1: Pre-treat problem areas
Before you mop, spot-treat the gross parts so your mop isn’t doing the emotional labor alone.
Grout and tile (ceramic/porcelain): baking soda + hydrogen peroxide paste
For many bathroom tile floors, a paste made from baking soda and 3% hydrogen peroxide can brighten grout and loosen grime. Spread it along grout lines, let it sit for 5–10 minutes, then scrub with a brush and rinse.
Tip: Use just enough paste to coat the groutnot the whole tile. You’re cleaning lines, not frosting a cake.
Soap scum film near showers: gentle degreasing
If the floor near your shower feels slick or looks hazy, you’re probably dealing with soap residue. Start with warm water and a small amount of dish soap. If needed, step up to a bathroom-safe cleaner designed for soap scum on nonporous surfaces. Rinse wellsoap scum’s best friend is leftover cleaner residue.
Hard-water deposits: don’t “acid-bomb” the wrong floor
Mineral buildup often looks chalky or dull. On ceramic/porcelain tile, some people use diluted acidic cleanersbut be careful: acids can weaken grout over time and can damage certain tile finishes.
On natural stone (marble, limestone, travertine), avoid vinegar, lemon juice, and harsh bathroom cleaners altogether. Use a stone-safe, pH-neutral cleaner instead (more on stone below).
Step 2: Mop again (yes, again) this time with purpose
After spot-treating and scrubbing, mop the whole floor with fresh solution to remove loosened grime. Follow with a rinse pass if your product requires it.
Step 3: Detail the edges
Spray a little cleaner onto a microfiber cloth and wipe baseboards, the floor edge behind the toilet, and the corners where dust bunnies go to start families.
Disinfecting: When It’s Worth It (and How to Do It Safely)
Most weeks, cleaning with soap and water is enough. Disinfecting is most useful after illness (stomach bugs, flu), if someone in the home is high-risk, or when there’s been… let’s call it “bathroom turbulence.”
Golden rule: clean first, disinfect second
Disinfectants work best on surfaces that aren’t coated in grime. So mop/clean first, then disinfect.
Option A: Use an EPA-registered disinfectant
Choose a product labeled for hard, nonporous surfaces, and follow the label instructionsespecially contact time (how long the surface should stay visibly wet).
Option B: Use a diluted bleach solution (carefully)
If you use bleach, follow the product label. A commonly cited household dilution is 5 tablespoons (1/3 cup) per gallon of room-temperature water or 4 teaspoons per quart. Use gloves, ventilate the room, and never mix bleach with ammonia, vinegar, or other cleaners.
Important: Bleach is not appropriate for every surface. Avoid it on many natural stones and on some finished or delicate floors. When in doubt, choose a surface-appropriate EPA-registered disinfectant instead.
Floor-by-Floor Guide: Clean It Without Ruining It
Ceramic or porcelain tile
- Weekly: warm water + a small amount of mild dish soap, applied with a microfiber mop.
- Deep clean: baking soda + hydrogen peroxide paste on grout; rinse thoroughly.
- Avoid: abrasive powders on glossy tile and anything that scratches.
Vinyl (sheet, tile, or luxury vinyl plank)
- Weekly: sweep/vacuum, then damp-mop with a neutral cleaner or a vinyl-safe product.
- Spot stains: use a soft cloth and the mildest option first. Test before using alcohol or stronger cleaners.
- Avoid: abrasive scrubbers and “mop-and-shine” coatings that can leave film or dull the finish.
- Moisture tip: don’t flood the flooruse a damp mop, not a swimming pool.
Natural stone (marble, travertine, limestone, slate)
- Use: a pH-neutral stone cleaner or mild dish soap in warm water.
- Rinse and dry: stone can streak if soap is left behind; drying helps prevent mineral spotting.
- Avoid: vinegar/citrus, harsh bathroom sprays, and abrasive cleaners (they can etch or scratch softer stone).
Laminate or engineered wood (in bathrooms)
- Use: a barely damp microfiber mop and a cleaner approved for your flooring.
- Dry fast: standing water is the enemy. If puddles happen, wipe them immediately.
- Avoid: steam mops and excess water unless the manufacturer explicitly allows them.
Targeted Fixes for Common Bathroom Floor Problems
1) Yellow or dark grout lines
Start with the baking soda + peroxide paste. If your grout is older and unsealed, stains may be permanent. In that case, grout colorant (also called grout renew) can refresh the look after cleaning.
2) A floor that feels sticky after mopping
That’s usually leftover product. Do a rinse mop with plain warm water, changing the water halfway through. Next time, use less soap. (More cleaner doesn’t mean more cleanit means more residue.)
3) Lingering odor
Wash bath mats weekly, clean around the toilet base, and make sure the floor dries fully. If your bathroom stays humid, run the exhaust fan during showers and for a bit after.
4) Water spots and mineral haze
Dry the floor after cleaning, especially near showers. If you have hard water, a quick towel-dry prevents the “free mineral art exhibit” from appearing again.
Maintenance Habits That Keep the Floor Cleaner Longer
- Shake and wash mats often. They trap grit that scratches floors and feeds grime.
- Ventilate: humidity encourages mildew and sticky film buildup.
- Spot-dry splash zones after showers30 seconds now saves 30 minutes later.
- Seal grout if you have cement-based grout and the manufacturer recommends it.
- Use the right mop: microfiber picks up more and pushes less dirty water into grout lines.
A Simple Bathroom Floor Cleaning Schedule
- Daily (1 minute): hang mats to dry, quick spot wipe for puddles.
- Weekly (15–20 minutes): sweep/vacuum + mop.
- Monthly (30–45 minutes): deep clean grout/edges + rinse + dry.
- Seasonally: check caulk lines, grout condition, and ventilation performance.
Real-Life Bathroom Floor Cleaning Stories ( of Experience)
The first apartment bathroom I ever had came with what I’ll politely call “vintage grout.” The tile was fine, but the grout lines looked like they’d been collecting secrets since the early 2000s. I did what many of us do when faced with grime: I panicked and bought three different cleaners, a new mop, and something labeled “maximum strength” in a font that screamed, “I dare you.”
Spoiler: maximum strength is greatif you also enjoy maximum regret. The floor ended up smelling like a chemistry lab, and the grout still looked tired. What finally worked wasn’t stronger products; it was a smarter process. I started dry: vacuumed up hair (so much hair), dust-mopped the corners, and pulled the bath mat back like I was revealing a crime scene. Then I did a simple warm-water-and-dish-soap mop, not to “finish the job,” but to remove the top layer of film that was blocking everything else. Only after the floor was actually clean did I tackle the grout with a baking soda and peroxide paste. Ten minutes later, the grout wasn’t magically brand-new, but it looked like it had slept for the first time in years.
Another bathroom taught me the “sticky floor” lesson. I was proud of myself for mopping twice in one weekuntil I walked in barefoot and my foot made a sound like peeling a Post-it note off a desk. Turns out I’d used too much cleaner, and the residue was basically acting like glue for new dirt. The fix was embarrassingly simple: a rinse mop with plain warm water, then a towel-dry. After that, I started treating soap like hot sauce: you can always add more, but you can’t un-add it once you’ve gone wild.
The biggest difference-maker, though, wasn’t any product. It was small habits. Hanging the bath mat to dry meant fewer musty smells and less trapped grit. Running the fan during showers cut down on that humid film that makes floors look dull. And once I got into the routine of a quick weekly clean, deep cleans stopped feeling like a weekend punishment. The floor stayed brighter, the grout stayed calmer, and the “mystery sticky spot” incidents dropped dramaticallywhich is a win for both cleanliness and sanity.
If you’re feeling overwhelmed, start with this: sweep, mop with a mild cleaner, and dry the splash zone. That’s the baseline. Once that’s easy, add grout work monthly. Your bathroom floor doesn’t need perfectionit needs consistency. (And maybe fewer dramatic shampoo explosions. But we can’t have everything.)
Conclusion
Cleaning a bathroom floor is mostly about doing the basics in the right order: remove debris, wash away film, treat grout and stains strategically, and disinfect only when it’s actually useful. Use a microfiber mop, keep your water clean, match products to your floor type, and dry trouble spots so grime doesn’t get a weekly invitation to move in. Do that, and your bathroom stops looking like a science experiment and starts looking like… well, a room you’d willingly walk into barefoot.


