
Table of Contents >> Show >> Hide
- Why Cleaning a Deep Freezer Matters (Besides Your Pride)
- Before You Start: Food Safety, Timing, and a Tiny Bit of Planning
- Supplies Checklist (No Fancy Stuff Required)
- Step-by-Step: Deep Freezer Cleaning That Actually Works
- Step 1: Empty it completely (yes, completely)
- Step 2: Prep for waterbecause melting ice is basically a spa day for puddles
- Step 3: Defrost the freezer (fast, safe, and not-chaotic)
- Step 4: Wash removable parts separately
- Step 5: Clean the interior with a gentle solution
- Step 6: Don’t ignore the gasket (the rubber seal that keeps cold air in)
- Step 7: Sanitize (optional, but smart after spills or funky odors)
- Step 8: Dry everything like it’s your new hobby
- Step 9: Clean the exterior (and the “forgotten zones”)
- Step 10: Restart, re-chill, then reload with a plan
- How to Remove Freezer Odor (Without Buying 12 Scented Gadgets)
- Prevent Frost Buildup and Mess: The Maintenance Habits That Matter
- Chest vs Upright Freezers: Same Goal, Slightly Different Vibes
- FAQ: Deep Freezer Cleaning Questions People Whisper in the Cleaning Aisle
- Conclusion: Clean Freezer, Clear Mind, Slightly More Space for Ice Cream
- From the Trenches: Real-Life Deep Freezer Cleaning Experience (500+ Words)
Let’s be honest: a deep freezer is basically your home’s cold-storage time machine. Somewhere under that glacier of frost
is a bag of peas from an era when you still believed you’d meal-prep every Sunday. The good news? Cleaning a deep freezer
isn’t hardit’s just a little wet, a little chilly, and mildly humbling.
In this guide, you’ll learn how to clean a deep freezer (chest or upright) safely and efficientlydefrosting without drama,
removing odors without chemical warfare, and restocking so you can actually find things later.
Why Cleaning a Deep Freezer Matters (Besides Your Pride)
A clean deep freezer does more than look nice. Built-up frost reduces usable space and can make the unit work harder.
Spills and old packaging can cause lingering odors, and crumbs can attract pestsespecially if the freezer lives in a garage
or basement. Regular deep freezer cleaning also helps you spot issues early: a struggling door gasket, blocked airflow, or a
“mystery puddle” situation before it becomes a whole lifestyle.
Before You Start: Food Safety, Timing, and a Tiny Bit of Planning
Pick your moment
Choose a time when your freezer is relatively low (or when you’re willing to play “Freezer Tetris” in another freezer).
If you have a manual-defrost unit or visible frost buildup, plan for a few hours. If your freezer is frost-free, the job is
usually quickermore wiping and organizing, less melting.
Keep food cold (and your conscience clear)
If you’re doing a full defrost, move frozen items into coolers with ice packs, insulated bags, or another freezer.
Keep the lid/door closed as much as possible. A full, closed freezer holds temperature better than a half-empty one, so
don’t leave food sitting out “just for a minute” while you rediscover five different kinds of frozen bread.
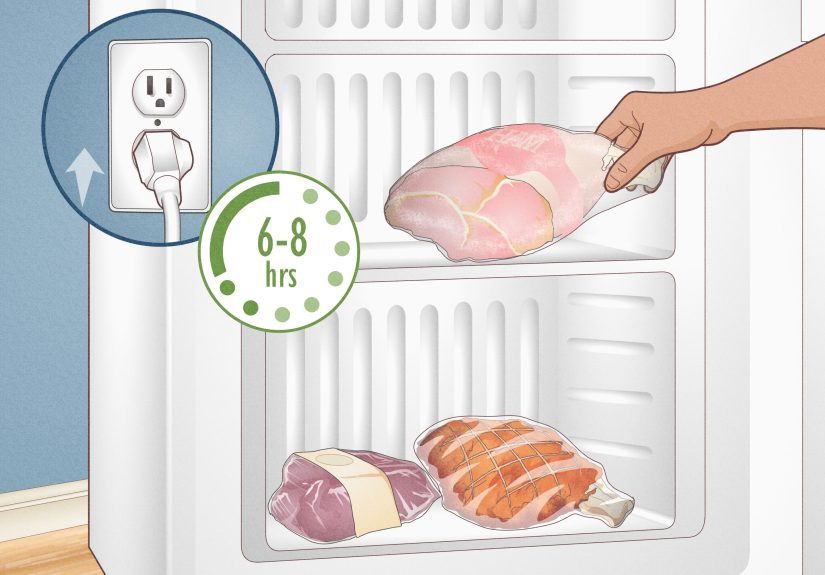
Unplug like you mean it
Always turn the freezer off and unplug it before deep cleaning. You’ll be using water, and electricity does not enjoy
surprise puddles. Also, unplugging prevents fans and compressors from running while the door is open.
Supplies Checklist (No Fancy Stuff Required)
- Towels (more than you think you need)
- Shallow pan or tray (especially helpful if your freezer has a drain)
- Bucket or large bowl
- Warm water
- Mild dish soap
- Baking soda (odor control + gentle cleaning)
- White vinegar (optional deodorizing wipe-down)
- Soft cloths/sponges (non-abrasive)
- Plastic scraper (never metalyour freezer’s liner will thank you)
- Old toothbrush (for gasket grooves and tight corners)
- Coolers/insulated bags for food
- Optional: small fan to move air in the room (not inside the freezer)
Skip abrasive powders, sharp tools, and anything that screams “industrial solvent.” If you choose to sanitize with a
disinfectant, use a food-safe option and rinse according to label directions.
Step-by-Step: Deep Freezer Cleaning That Actually Works
Step 1: Empty it completely (yes, completely)
Remove all food, baskets, dividers, and loose shelves. Use this moment to toss expired items, mystery blocks, and anything
you can’t identify without a carbon-dating kit. Put “keep” items into coolers or another freezer.
Step 2: Prep for waterbecause melting ice is basically a spa day for puddles
Lay towels around the base. If your chest freezer has a drain, open it and position a shallow pan or route water into a
bucket using the drain feature (check your owner’s manual for your exact setup).
Step 3: Defrost the freezer (fast, safe, and not-chaotic)
Leave the door or lid open and let the ice melt naturally. To speed things up, place a bowl/pan of hot water inside and
close the lid for short intervals to create steam that loosens ice. You can also aim a fan in the room toward the open
freezer to move warmer air across it.
As ice softens, use a plastic scraper to gently lift chunks. Avoid metal tools or aggressive chippingyou can puncture
the liner or damage internal components, and then your “cleaning day” becomes “appliance repair week.”
Step 4: Wash removable parts separately
Wash baskets and shelves in warm water with a few drops of mild dish soap. Rinse and let them dry completely.
Avoid very hot water on certain plastics if your manual warns against it. When in doubt, hand-wash gently.
Step 5: Clean the interior with a gentle solution
Once the ice is gone (or mostly gone), wipe the inside walls and floor. A classic, freezer-friendly cleaner is a baking soda
solution: mix baking soda with warm water (many appliance care guides suggest around 2 tablespoons per quart of warm water).
It cleans without harsh fumes and helps neutralize odors.
For greasy spots or sticky spills, use mild dish soap in warm water first, then wipe again with clean water to remove residue.
The goal is “clean,” not “perfumed.”
Step 6: Don’t ignore the gasket (the rubber seal that keeps cold air in)
Door seals collect crumbs, drips, and mystery lint. Wipe the gasket with warm water and mild detergent using a soft cloth.
Use a toothbrush for grooves. Then dry it well. If you see mold spots, clean carefully; if the gasket is torn, cracked, or
won’t seal, replacement may be worth it for efficiency and frost prevention.
Step 7: Sanitize (optional, but smart after spills or funky odors)
If you had raw meat leakage, lingering smells, or visible grime, sanitizing is a good idea. Use a food-safe disinfectant
according to label directions, or a carefully prepared diluted bleach solution on non-porous surfaces (then rinse thoroughly).
Don’t mix bleach with vinegar or other cleanersyour freezer doesn’t need chemical drama.
Step 8: Dry everything like it’s your new hobby
Moisture is frost’s best friend. Before restarting, wipe down the interior until it’s drywalls, corners, and especially the
bottom. Let the door stay open for 10–15 minutes to air out if you can.
Step 9: Clean the exterior (and the “forgotten zones”)
Wipe the handle, lid/door edges, and exterior with a damp cloth and mild soap. If your freezer has accessible condenser coils
(common on some models), gently vacuum dust with a brush attachment. Dusty coils can reduce efficiency, so this is one of those
boring steps that pays you back in performance.
Step 10: Restart, re-chill, then reload with a plan
Plug the freezer back in and set it to the correct temperature (for food safety, freezers are typically kept at 0°F or below).
Wait until it’s cold again before loading everything back. While you wait, label bags, group like items, and consider a simple
zone system so future-you doesn’t have to excavate dinner.
How to Remove Freezer Odor (Without Buying 12 Scented Gadgets)
If your freezer smells like “ancient onions” or “fish who regrets everything,” start with a deep clean and full dry-out.
Then try odor absorbers:
- Baking soda: Place an open box or bowl inside for 24–48 hours.
- Activated charcoal: A bowl of charcoal can absorb stubborn smells (great for “why is it still stinky?” moments).
- Coffee grounds: Helpful for mild odors if you don’t mind a faint coffee vibe.
Pro tip: odors often live in the gasket folds and tiny corners. If the smell remains, re-clean the seal area and ensure everything is fully dry.
Prevent Frost Buildup and Mess: The Maintenance Habits That Matter
1) Keep the seal clean and the door closing properly
Warm air sneaking in is a major frost-maker. Wipe the gasket regularly and make sure packages aren’t blocking the door.
Even small alignment issues can invite moisture.
2) Don’t overload or block airflow
Overpacking reduces circulation, leading to uneven freezing and frost issues. Leave a little breathing room, especially near vents.
3) Cool hot food before freezing
Putting warm items straight into the freezer adds moisture and makes the unit work harder. Let foods cool (safely) before freezing,
then package airtight to reduce freezer burn and odors.
4) Do quick wipe-ups
When a bag leaks or something spills, wipe it ASAP. A warm, damp cloth held on frozen-on mess for a minute helps loosen it
so you’re not chiseling marinara in six months.
5) Defrost when frost gets thick
If you have a manual-defrost deep freezer, don’t wait until it looks like a snow globe factory. Many experts recommend defrosting
when frost buildup is roughly ¼ inch thick. Less frost = more space and better efficiency.
Chest vs Upright Freezers: Same Goal, Slightly Different Vibes
Chest freezer cleaning tips
- Water management matters moreuse towels and take advantage of the drain if your model has one.
- Use baskets or bins after cleaning to prevent “bottom-of-the-chest freezer archaeology.”
Upright freezer cleaning tips
- Remove drawers and shelves to wash separately.
- Watch for frost around ventsblocked airflow can cause localized ice buildup.
FAQ: Deep Freezer Cleaning Questions People Whisper in the Cleaning Aisle
How often should I clean my deep freezer?
A thorough clean once or twice a year is a common recommendation, plus quick wipe-downs after spills.
If you have a manual-defrost model, you may need to defrost more often depending on frost buildup and how frequently you open it.
Can I use a hair dryer to defrost faster?
Some people do, but it’s risky (electricity + water + close quarters). Safer options are hot water pans for steam and room-air circulation.
If you use any electrical device, keep it outside the freezer and away from puddles, and follow your manufacturer’s safety guidance.
Is vinegar safe inside a freezer?
Diluted vinegar is commonly used for deodorizing and wiping surfaces. If you use it, wipe again with clean water and dry thoroughly.
Avoid mixing vinegar with bleach or other cleaners.
What’s the best temperature for a freezer?
For food safety, keep your freezer at 0°F (-18°C) or below. Use an appliance thermometer if your dial is vague or you suspect temperature swings.
Conclusion: Clean Freezer, Clear Mind, Slightly More Space for Ice Cream
Cleaning a deep freezer is one of those chores that feels intimidating until you do itand then you wonder why you waited so long.
Empty it, defrost safely, clean gently, dry thoroughly, and restock with a simple system. Your reward is more space, fewer odors,
less frost buildup, and the oddly satisfying feeling of being the kind of person who has their frozen peas under control.
From the Trenches: Real-Life Deep Freezer Cleaning Experience (500+ Words)
The first time I cleaned a deep freezer, I thought I’d be done in 30 minutes. That was adorable. I opened the lid and found
three distinct climate zones: “mild frost,” “ice age,” and “mysterious frozen soup container that predates streaming services.”
If you’ve never cleaned a deep freezer before, here are the real-world lessons that don’t show up on the back of the baking soda box.
Lesson one: towels are currency. You’ll think you have enough. You don’t. The meltwater finds its way under the freezer,
into that one floor crack you didn’t know existed, and somehow toward the direction of your socks. Now I lay down a “towel runway”
and keep a spare bucket nearby. If your freezer has a drain, life is easierjust remember to check the pan or bucket so it doesn’t overflow
and create a kitchen slip-and-slide.
Lesson two: defrosting is faster when you stop checking it every two minutes. There’s a special type of impatience that happens
when you’re waiting for ice to melt. You’ll want to poke it, chip at it, negotiate with it. The better move is to set up a bowl of hot water
for steam, close the lid for short bursts, and go do literally anything else for 10–15 minuteslabel bags, wash baskets, or finally admit that
you do not need five open bags of frozen blueberries.
Lesson three: the smell is usually hiding in the corners. I once cleaned every visible surface and still had a faint “something happened here”
odor. The culprit? A tiny drip that had seeped into the gasket fold and a crumb-filled seam near the bottom edge. A toothbrush, warm soapy water,
and a follow-up dry cloth fixed it. After that, a bowl of baking soda overnight took the freezer from “suspicious” to “neutral.”
Lesson four: organization is part of cleaning. If you just dump everything back in, you’ll be back here soon, emotionally and literally.
The best system I’ve seen is simple: group by category (meats, vegetables, prepared meals, desserts), keep a “use first” bin at the top, and label
everything with a date. For chest freezers, stackable bins are a sanity saver. For uprights, assign shelves like a tiny frozen grocery store.
Lesson five: the freezer teaches humility. No matter how disciplined you are, you will find at least one item you don’t remember buying.
Treat it like a helpful audit. Cleaning day becomes “food budget clarity day,” because you stop rebuying things you already haveburied under frozen
garlic bread and good intentions.
The biggest win? After a proper clean, the freezer runs better, smells fresher, and you gain space you didn’t know you had. It’s like decluttering,
but colderand you get to celebrate by actually finding the ice cream you were looking for in the first place.


