Table of Contents >> Show >> Hide
- Why Your Outside AC Unit Needs Regular Cleaning
- Safety First: Prep Before You Clean
- Step-by-Step: How to Clean an Outside AC Unit
- Step 1: Clear debris and give the unit some breathing room
- Step 2: Remove the top and access the interior
- Step 3: Dry clean first – vacuum and brush the fins
- Step 4: Apply coil cleaner
- Step 5: Rinse with gentle water pressure
- Step 6: Straighten bent fins (optional but helpful)
- Step 7: Reassemble and restart the system
- Bonus Maintenance Tips to Keep Your AC Happy
- When to Call a Professional Instead of DIY
- Real-World Experiences: What Homeowners Learn Cleaning Their Outside AC Unit
- Cool, Clean, and Under Control: Final Thoughts
When the weather turns sticky and your air conditioner sounds like it’s working overtime,
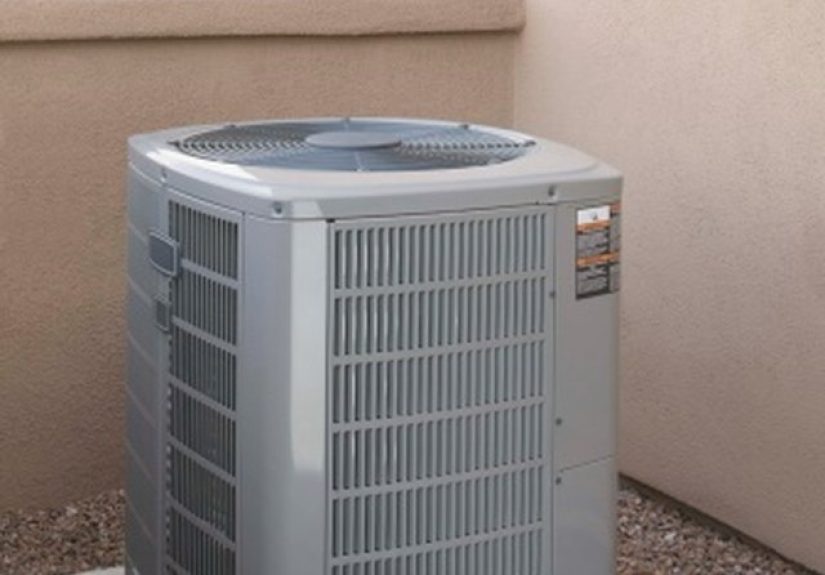
there’s a good chance your outdoor unit is begging for a bath. The outside AC unit (also
called the condenser) spends all year catching dust, leaves, cottonwood fluff, and whatever
else the wind throws at it. Learning how to clean an outside AC unit isn’t just a “nice to
do” project it can help your system cool better, run more efficiently, and last longer.
The good news? You don’t need to be a professional HVAC tech to give your outdoor unit a
safe, thorough cleaning. With basic tools, a garden hose, and a little patience, you can
clear away the grime that’s blocking airflow and stealing comfort (and money) from you
every summer.
Why Your Outside AC Unit Needs Regular Cleaning
Your central air conditioner works like a team: the indoor unit pulls heat from your home,
and the outside unit sends that heat into the great outdoors. The condenser coil and its
thin metal fins are the star players outside. When those fins clog with dirt, grass
clippings, and pollen, your system has to work harder to push heat out. That means:
- Higher energy bills for the same amount of cooling
- Longer run times and more wear on parts
- Less comfort on the hottest days
- Greater risk of breakdowns and costly repairs
Federal energy-efficiency programs recommend cleaning indoor and outdoor coils as part of
routine maintenance because dirty coils can significantly reduce cooling performance and
efficiency. Regular cleaning (and basic care like changing filters and keeping plants away
from the unit) helps the system breathe and keeps your home cooler with less effort.
Safety First: Prep Before You Clean
1. Turn off the power
Before you touch anything, shut the system down. This is not optional the outside unit
has high-voltage components inside.
- Set your thermostat to Off so the system doesn’t kick on while you’re working.
-
Find the outdoor disconnect box mounted near the unit. Open it and either pull out the
disconnect plug or flip the breaker to Off. -
If you can’t find the disconnect, turn off the appropriate breaker in your home’s main
electrical panel as well.
Once the power is off, give the fan blades a gentle tap with a stick or screwdriver handle.
They shouldn’t move on their own (a simple sanity check that nothing is running).
2. Gather your tools and supplies
You don’t need a full workshop to clean an outside AC unit. Most homeowners can get the
job done with:
- Flat-head screwdriver or nut driver (for panels and top cover)
- Shop vacuum with a soft brush attachment
- Soft-bristle brush or old toothbrush
- Fin comb (optional but nice if many fins are bent)
- Garden hose with a plain end (no pressure nozzle)
- Foaming coil cleaner rated for outdoor AC condensers
- Work gloves and safety glasses
One thing you absolutely don’t need: a pressure washer. High-pressure
spray can crush delicate fins, force water into electrical components, and create a very
expensive “oops.”
Step-by-Step: How to Clean an Outside AC Unit
Step 1: Clear debris and give the unit some breathing room
Start with the obvious clutter:
- Rake away leaves, mulch, and trash from around the base of the unit.
- Pull weeds and trim grass so nothing is touching the cabinet.
- Cut back shrubs, vines, or branches so there’s at least 2 feet of open space on all sides.
Think of this as creating a “no-hug zone” around your AC. Plants love to cuddle; your
condenser does not. Good airflow around the cabinet is just as important as clean coils.
Step 2: Remove the top and access the interior
Most outside AC units have a metal top grill that holds the fan. You’ll usually see screws
around the perimeter.
- Remove the screws and carefully lift the top straight up.
-
The fan is attached to wiring, so set the top aside gently without stretching or pinching
the wires. Sometimes you can lean the assembly against the house or support it on a small
stool. -
If side panels are removable on your specific model, unscrew and remove them to expose
the coil and fins more easily.
Avoid yanking or twisting anything connected to wiring. The goal is access, not a surprise
electrical repair project.
Step 3: Dry clean first – vacuum and brush the fins
Before bringing in water or cleaning chemicals, remove loose dirt and debris inside:
-
Use your shop vac (with a soft brush attachment) to gently clean the inside and outside
of the coil fins. Move the brush in line with the fins, not across them. -
Pick out leaves, twigs, and larger debris by hand. Don’t poke deep into the coils with
anything sharp. -
Gently brush stubborn dust with a soft-bristle brush, again following the direction of
the fins.
The fins bend easily that’s why the vacuum attachment and brush need to be soft. If you
accidentally push in a section, a fin comb can help straighten them later.
Step 4: Apply coil cleaner
Now it’s time to tackle the greasy, stuck-on grime that vacuuming can’t remove.
-
Shake your foaming coil cleaner as directed and spray it evenly over the exposed coil
fins from the outside. Many products are designed to cling and bubble dirt out of the
fins. -
If the manufacturer’s instructions say it’s safe, you can also spray from the inside of
the unit outward to push dirt toward the exterior. -
Let the cleaner sit for the recommended time (usually 5–10 minutes) so it can loosen
baked-on debris.
Always follow the label instructions. Some cleaners are “no-rinse” and rely on normal
condensation to wash residue away; others require rinsing with water. If you’re unsure,
choose a cleaner specifically marked for outdoor AC condensers and rinsing.
Step 5: Rinse with gentle water pressure
With the cleaner doing its job, it’s time for a rinse. This step is where many DIYers get
overexcited with a pressure nozzle resist the urge!
-
Use a garden hose with a plain end (no nozzle) or a very gentle spray setting. You want
a soft flow of water, not a cutting jet. -
Rinse the coils from the inside out when possible, pushing loosened dirt toward the
exterior of the unit, not deeper into the fins. - Work slowly around the unit until the water runs clear and foam is gone.
- Avoid soaking electrical components, control panels, and wiring as much as possible.
If you see areas that still look clogged, repeat the coil cleaner and rinsing once more.
When everything looks clean, let the unit drain and air-dry for a bit.
Step 6: Straighten bent fins (optional but helpful)
You’ll probably find a few bent fins along the way. While a couple won’t ruin performance,
large smashed areas can restrict airflow.
-
Use a fin comb sized to your coil’s fin spacing (your unit manual or product info may list
this). - Gently run the comb through bent sections to tease them back into alignment.
- Work slowly you’re aiming for “better,” not “perfect showroom coil.”
If a big section is crushed or you see signs of damage to refrigerant tubing, it’s time to
call a pro instead of forcing it.
Step 7: Reassemble and restart the system
- Set the fan assembly back on top of the unit carefully and reinstall all screws.
- Reattach any side panels you removed and tighten all fasteners.
- Restore power at the outdoor disconnect and main breaker panel.
- Switch your thermostat from Off to Cool and set a temperature below room temperature.
Let the system run for at least 10–15 minutes. The outside unit should sound smoother and
may cycle less often once airflow is restored. Indoors, you may notice more consistent
cooling after the first hour or so.
Bonus Maintenance Tips to Keep Your AC Happy
Change your air filter regularly
Cleaning the outside unit is only half the battle; a dirty indoor air filter can choke off
airflow just as badly. Many energy and HVAC experts recommend checking your filter every
month during cooling season and replacing it every 1–3 months, depending on dust, pets,
and allergies.
Trim plants and keep the area clear
Make it a habit to:
- Walk past the unit once a month and remove leaves and trash.
- Keep bushes and shrubs at least two feet away from all sides.
-
Avoid stacking anything (bikes, firewood, garden tools) against the cabinet. Your AC is
not a storage rack.
Don’t smother the unit in winter
Many homeowners are tempted to wrap their outside AC unit like a holiday present for the
winter. Full covers can trap moisture, encourage rust, and create cozy nesting spots for
mice and insects. A better approach:
- Use a breathable top cover or mesh if falling debris is an issue.
- Keep the sides open so air can move and moisture can escape.
- Clear snow, leaves, and branches off the unit after big storms.
If you have a heat pump (which runs year-round), never cover it unless your manufacturer
explicitly says otherwise.
Schedule professional maintenance
Your DIY cleaning goes a long way, but an annual tune-up by a licensed HVAC technician gives
your system a deeper health check. Pros can:
- Check refrigerant levels and look for leaks
- Test electrical components and capacitors
- Inspect the indoor coil, blower, and drain lines
- Spot issues before they turn into no-cool emergencies
When to Call a Professional Instead of DIY
Cleaning an outside AC unit is generally safe if you stick to gentle water pressure and
follow basic safety steps. But there are times when it’s smarter to stop and pick up the
phone:
- You see oil stains or suspect a refrigerant leak.
- The unit makes grinding, screeching, or buzzing noises.
- The circuit breaker trips repeatedly when the system tries to start.
- A large section of the coil fins is crushed or corroded.
- You’re not comfortable removing panels or working around wiring.
Refrigerant and high-voltage electrical components are not DIY territory. A licensed HVAC
technician has the tools and training to handle these safely and in line with environmental
regulations.
Real-World Experiences: What Homeowners Learn Cleaning Their Outside AC Unit
Guides and checklists are great, but nothing beats learning from real-world “I actually did
this” experiences. Here are a few common stories and lessons that tend to show up once
people roll up their sleeves and clean an outside AC unit for the first time.
The “Why Didn’t I Do This Sooner?” moment
Many homeowners go outside expecting the unit to look “a little dusty” and instead discover
a full-on leaf-and-lint fur coat wrapped around the fins. After a careful vacuum, coil
cleaner, and rinse, they often notice:
- Cooler air coming from vents
- Shorter run times before the thermostat hits its set point
- Fans and compressors that sound less strained
That’s a powerful reminder that even invisible dirt can seriously affect performance. Once
people see the before-and-after, they’re more likely to add outdoor cleaning to their
yearly spring checklist instead of waiting for the AC to struggle.
The pressure-washer regret
A very common “don’t be like me” story involves a pressure washer. It sounds efficient:
blast everything clean in seconds. In reality, high-pressure water can flatten fins, drive
debris deeper into the coil, and force water into electrical components.
Homeowners who learn the hard way usually end up with a system that cools worse than before
and may need professional repair. Their verdict after the bill arrives is almost always the
same: gentle garden-hose flow is enough, and patience is cheaper than replacing parts.
The allergy and air-quality surprise
Another group of homeowners start cleaning for comfort and discover air-quality benefits,
too. When they pair outdoor unit cleaning with:
- More frequent air filter changes
- Regular dusting and vacuuming indoors
- Occasional duct inspections by a pro
…they report fewer musty smells when the system kicks on and less dust buildup on surfaces.
It makes sense: a clean system moves air more effectively and is less likely to harbor
moisture and debris that can contribute to mold and odor problems.
The new homeowner “mystery” unit
New homeowners often inherit outside AC units that no one has touched in years. They’re
unsure how old the unit is or whether it’s been maintained at all. Starting with a basic
clean accomplishes two things:
-
It gives them a baseline for how the system performs when clean. If it still struggles,
they know it’s time to bring in a technician for deeper diagnostics. -
It lets them inspect the cabinet, fan blades, and coil surfaces up close. Rust, heavy
corrosion, and severely damaged fins can be signs that replacement should at least be on
the radar.
Even if the unit is older, a thorough cleaning can buy a couple more comfortable summers
while they plan for future upgrades.
The “once-a-year” chore that becomes routine
After one successful cleaning, most people realize the job isn’t nearly as intimidating as
it looks. They also realize next year will be easier if they don’t let debris pile up for
five seasons straight.
Over time, many homeowners build a simple rhythm:
- Quick visual check monthly during cooling season
- Leaf and debris clearing after big storms
- Full coil cleaning in early spring
- Filter checks every month or two
That small amount of consistent attention pays off in quieter operation, better comfort,
and lower risk of mid-summer breakdowns. It’s the HVAC equivalent of brushing and flossing
instead of waiting for a root canal.
Cool, Clean, and Under Control: Final Thoughts
Learning how to clean an outside AC unit is one of the most impactful home maintenance
projects you can tackle in an afternoon. By cutting the power, working gently around the
fins, using the right coil cleaner, and rinsing with low-pressure water, you can restore
airflow and help your system cool more efficiently.
Pair that yearly cleaning with regular filter changes, a clear area around the unit, and
occasional professional checkups, and your AC will reward you with better comfort, lower
bills, and fewer surprises on the hottest days of the year. Your future summer self not
to mention your energy budget will be very grateful.