
Table of Contents >> Show >> Hide
- Before You Cook: Frozen vs. Fresh (and the Sneaky “Wet” Scallop Problem)
- How to Thaw Frozen Scallops (Safely, Without Turning Them Into Water Balloons)
- The “Golden Crust” Prep Checklist (Do This Once, Win Forever)
- Way #1: Pan-Seared Scallops with Brown Butter Garlic-Lemon Sauce
- Way #2: Broiled Scallops with Parmesan-Herb Crunch
- Way #3: Air Fryer Scallops with Smoky Citrus Butter
- Common Scallop Mistakes (and How to Fix Them)
- Quick Menu Pairings (Because Scallops Like a Good Supporting Cast)
- Storing and Reheating Leftover Scallops
- Real-Life Cooking Experiences and Lessons (500-ish Words of Kitchen Real Talk)
Scallops are the seafood world’s overachievers: fancy enough for a “look at me, I’m thriving” dinner, fast enough for a Tuesday night, and dramatic enough to punish you for one mistake (too wet, too crowded, too chill). The good news: once you learn the two big ruleskeep them dry and cook them hot and quickyou can make restaurant-level scallops at home whether they came from a fish counter or your freezer’s mysterious “seafood drawer.”
This guide shows you how to cook frozen scallops (and fresh ones) in three tasty ways: pan-seared with a golden crust, broiled with a Parmesan-herb crunch, and air fryer scallops that come out tender with minimal drama. Along the way, you’ll learn what to buy, how to thaw frozen scallops safely, and how to avoid the classic “why are they leaking sadness into my pan?” moment.
Before You Cook: Frozen vs. Fresh (and the Sneaky “Wet” Scallop Problem)
Let’s clear up a misconception: “fresh” scallops at the store aren’t always fresher than frozen. In many places, frozen sea scallops are frozen quickly after harvest, which can lock in quality. The real difference-maker is usually this: dry-packed vs. wet-packed.
Dry-packed scallops (your best friend)
Dry-packed scallops haven’t been soaked in a preservative solution. That means less extra water, a cleaner flavor, andmost importantlybetter browning when you sear or broil. If you want that caramelized crust, dry-packed is the move.
Wet-packed scallops (the moisture gremlin)
Wet-packed scallops are treated/soaked, which can make them release more liquid in the pan. Translation: they’re more likely to steam instead of sear. Can you still cook them? Absolutely. Do you need to work harder to dry them? Also yes.
Sea scallops vs. bay scallops
Sea scallops are larger and ideal for searing, broiling, grilling, and air frying. Bay scallops are smaller and cook incredibly fastgreat for pasta, chowders, and quick sautés, but they’re easier to overcook and harder to get that picture-perfect crust.
How to Thaw Frozen Scallops (Safely, Without Turning Them Into Water Balloons)
If you’re cooking frozen scallops, thawing is the first “secret sauce.” Yes, you can cook them from frozen, but the extra moisture they release often blocks browning and can turn the texture soft. For the best sear and the best broil, thaw first.
Method 1: Overnight fridge thaw (best texture)
- Place the frozen scallops (preferably in a sealed container or bag) in the refrigerator.
- Let them thaw overnight (or several hours until pliable and no longer icy).
- Drain off any liquid before prepping.
Method 2: Quick cold-water thaw (best for “I forgot” nights)
- Keep scallops in a sealed bag (no direct water contactscallops will absorb water like a sponge).
- Submerge in a bowl of cold water.
- Change the water every 30 minutes until thawed.
- Cook immediately once thawed.
Method 3: Microwave defrost (only if cooking right away)
Use the defrost setting in short bursts and stop while the scallops are still a little icy in the center, then cook immediately. This method is a last resort because it can start cooking the edges unevenly.
Do not thaw scallops on the counter. Seafood shouldn’t hang out at room temperature long enough to start a podcast. Keep it cold, keep it safe.
The “Golden Crust” Prep Checklist (Do This Once, Win Forever)
Scallops are simple, but they’re picky about moisture and heat. Think of them like cats: they can be sweet, but only on their terms.
1) Don’t rinse unless you absolutely must
Most scallops are already cleaned. Rinsing adds surface water, which fights browning. If you see grit or shell fragments, do a quick rinse, then dry thoroughlyno soaking.
2) Pat them dry like you mean it
Use paper towels and press gently. For an even better crust, lay scallops on towels for 10–15 minutes, uncovered in the fridge. The goal is a dry surface so the heat can create browning instead of steam.
3) Remove the side muscle
That little rectangular flap on the side (sometimes called the abductor muscle) can be chewy. Peel it off with your fingers. Quick step, big texture upgrade.
4) Season simply (at first)
Salt and pepper go a long way. Save sugary glazes for latersugar can burn at high searing heat. You can add bold flavors in sauces and toppings where they won’t turn into burnt confetti.
5) Avoid overcrowding
If scallops are packed too close, they steam. Cook in batches if needed. Yes, it’s annoying. Yes, it’s worth it.
Way #1: Pan-Seared Scallops with Brown Butter Garlic-Lemon Sauce
This is the classic: crisp, golden edges and a tender center, finished with a sauce that tastes like you paid someone to do it for you. The technique is the headlineeverything else is supporting cast.
What you’ll need
- 1 to 1½ lb large sea scallops (thawed if frozen), side muscle removed
- Kosher salt and black pepper
- 1–2 tbsp neutral high-heat oil (avocado, canola, grapeseed)
- 2–3 tbsp unsalted butter
- 2–4 garlic cloves, thinly sliced or minced
- Lemon zest and/or lemon juice
- Optional: chopped parsley, chives, capers, or a splash of white wine
Step-by-step
- Dry and season. Pat scallops dry. Season with salt and pepper right before cooking.
- Heat the pan. Use stainless steel or cast iron. Heat over medium-high until very hot (a drop of water should sizzle and dance).
- Add oil. Swirl to coat lightly. You want shimmer, not a deep-fry situation.
- Sear, don’t shuffle. Add scallops in a single layer with space between. Sear undisturbed until deeply golden on the first side. If they stick, they’re not readygive them a few more seconds.
- Flip once. Turn each scallop and cook briefly on the second side until just opaque.
- Make the sauce. Reduce heat to medium. Add butter and garlic. Let the butter brown lightly and the garlic turn fragrant (not burnt). Add lemon juice and/or zest. Optional: a splash of white wine or a spoonful of capers for brightness.
- Finish. Spoon the sauce over the scallops for 10–20 seconds, then pull them off the heat.
Why it works (the quick science)
Browning is a moisture-and-heat negotiation. Dry surfaces + hot pan = caramelized crust. Wet surfaces + crowded pan = steamed scallops with the personality of a damp sock. Searing mostly on one side helps the crust develop before the scallop overcooks.
Easy serving ideas
- Over creamy polenta or grits with a squeeze of lemon
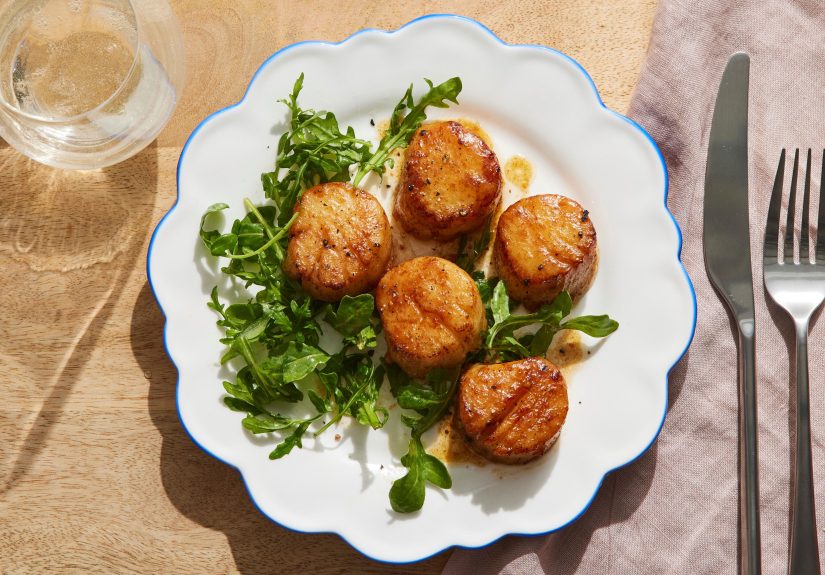
- With a simple arugula salad and toasted bread to mop up sauce
- On top of a corn puree or sautéed sweet corn for a summer vibe
Way #2: Broiled Scallops with Parmesan-Herb Crunch
Broiling is the “fast oven” method: high heat from above, quick cook time, and a crispy topping that screams “holiday appetizer,” even if you’re eating it in sweatpants.
What you’ll need
- 1 to 1½ lb large sea scallops (thawed if frozen), patted very dry
- 2 tbsp melted butter or olive oil
- ½ cup panko breadcrumbs (or fine fresh breadcrumbs)
- ⅓ cup finely grated Parmesan
- 1 small garlic clove, grated or minced
- 1–2 tbsp chopped parsley (or basil)
- Lemon zest, plus lemon wedges for serving
- Optional: pinch of paprika or red pepper flakes
Step-by-step
- Preheat the broiler. Position a rack so the scallops will be a few inches from the heat.
- Prep the pan. Lightly oil a sheet pan or use a small baking dish for a snugger fit.
- Dry and arrange. Pat scallops dry and place in a single layer.
- Mix topping. Combine breadcrumbs, Parmesan, garlic, herbs, lemon zest, and a little melted butter/oil until it looks like damp sand that you’d totally build a delicious sandcastle with.
- Top and broil. Spoon topping over scallops. Broil until the topping is golden and scallops are just opaque.
- Serve immediately. Finish with lemon juice. Try not to eat them straight from the pan like a kitchen goblin.
Flavor variations
- Italian-ish: Add chopped sun-dried tomatoes and a pinch of oregano.
- Spicy: Mix in cayenne or chili flakes and finish with lime.
- Bright: Swap parsley for basil and add extra lemon zest.
Way #3: Air Fryer Scallops with Smoky Citrus Butter
If you want tender scallops with less stovetop babysitting, the air fryer is basically a small convection oven that’s very serious about moving hot air around. The trick is the same as always: dry scallops, single layer, don’t crowd.
What you’ll need
- 1 lb sea scallops (thawed if frozen), patted dry
- 1 tbsp oil
- Salt and pepper
- Optional seasoning: paprika, Old Bay-style seasoning, garlic powder
- 1–2 tbsp butter (or olive oil) + lemon/orange juice for finishing
- Optional: chopped herbs
Step-by-step
- Preheat. Preheat the air fryer if your model benefits from it.
- Season. Toss scallops with a little oil, salt, pepper, and optional paprika/seasoning.
- Air fry in a single layer. Arrange scallops with space between. Cook until opaque and tender, flipping halfway through for even cooking. (Exact timing depends on scallop size and your air fryer.)
- Finish with butter + citrus. Toss hot scallops with a small knob of butter and a squeeze of lemon (or orange for a sweeter note). Add herbs if you want to be fancy on purpose.
When are scallops done?
Scallops are done when they turn opaque and feel springy, not rubbery. If you use a thermometer, follow standard seafood safety guidance (often cited as 145°F), but keep a close eyescallops can go from perfect to overcooked faster than you can say “just one more minute.”
Air fryer serving ideas
- Toss with pasta, olive oil, lemon, and arugula
- Serve over a rice bowl with avocado and a quick spicy mayo
- Pair with roasted vegetables and a simple yogurt-herb sauce
Common Scallop Mistakes (and How to Fix Them)
“My scallops won’t brown.”
- Cause: Too wet, pan not hot enough, or overcrowded.
- Fix: Dry longer, heat pan properly, cook in batches, and use a neutral oil first (butter later).
“They’re rubbery.”
- Cause: Overcooked or cooked too gently for too long.
- Fix: High heat, short cook time, and pull them as soon as they’re opaque and springy.
“They’re sticking to the pan.”
- Cause: Pan isn’t hot enough or you flipped too early.
- Fix: Let the crust form. Scallops release when they’re readylike a tiny seafood trust fall.
“They taste kind of… chemical.”
- Cause: Often happens with wet-packed scallops.
- Fix: Seek dry-packed scallops next time; dry them thoroughly before cooking.
Quick Menu Pairings (Because Scallops Like a Good Supporting Cast)
- Weeknight win: Air fryer scallops + rice + quick cucumber salad
- Date-night energy: Pan-seared scallops + lemony pasta + crisp salad
- Party appetizer: Broiled Parmesan scallops + lemon wedges + sparkling something
- Cozy mode: Seared scallops over creamy grits or polenta
Storing and Reheating Leftover Scallops
Scallops are best fresh, but leftovers can still be good if you avoid over-reheating. Store in an airtight container in the fridge and use soon. To reheat, warm gently in a skillet with a touch of butter or oiljust enough to take the chill off. Microwaving can make them tough, so go low and slow if you must.
Real-Life Cooking Experiences and Lessons (500-ish Words of Kitchen Real Talk)
Here’s what cooks often discover the first few times they attempt scallops at home: scallops are not “hard,” but they are honest. If your pan isn’t hot, they’ll tell on you by turning pale. If they’re wet, they’ll announce it by releasing liquid like they’re auditioning for a role as “Puddle #3.” And if you walk away “for just a second,” they’ll overcook with the speed of a viral meme.
One of the most common real-world scenarios goes like this: you buy frozen scallops, thaw them quickly, and think, “They look fine!” Then you toss them into a pan, and suddenly your skillet is full of cloudy water. That’s the moment you learn the scallop law of the universe: moisture is the enemy of browning. The fix is rarely exotic. It’s usually just patiencedrain, blot, and blot again. If you have time, letting scallops rest on paper towels (or uncovered in the fridge for a bit) feels almost too simple, but it changes everything. The next time you cook, the sound shifts from “sad simmer” to a confident sizzle, and that’s when you know you’re on the right track.
Another lesson people run into: “I flipped them a bunch because I was nervous.” Totally relatable. Scallops look delicate, so the instinct is to hover. But the best crust happens when you leave them alone long enough to do their thing. If you try to pry them up early, they cling to the pan. The calmer move is to wait and let the crust form. When they’re ready, they release more easily like they’re saying, “Okay, fine, you’ve earned this.”
Broiling brings its own real-life moment: the topping turns golden fast… and then it’s suddenly too golden. Broilers are intense and unpredictable (like that one friend who insists they “don’t do drama”). The practical trick is to have everything ready before the scallops go in: topping mixed, pan prepared, lemon cut, plates ready. Then you can watch the surface and pull at the right second, instead of scrambling while your breadcrumbs become charcoal.
And then there’s the air fryer experience: you cook one batch perfectly, and you feel unstoppable until you crowd the basket the next time because you’re hungry, and the scallops cook unevenly. Air fryers reward spacing. It’s annoying, but it’s also the whole point: hot air needs room to circulate. Once you accept “batch cooking” as part of the deal, air fryer scallops become one of the easiest ways to get a tender, weeknight-friendly seafood dinner with minimal cleanup.
The biggest takeaway cooks share after a few tries is simple: scallops are a short list food. Short cook time, short ingredient list, short path from “raw” to “ready.” When you focus on dryness, heat, and timing, you stop chasing perfection and start hitting it. And when you nail that first golden crust? Congratulationsyou have officially unlocked “restaurant confidence,” and your kitchen may now require applause.


