Table of Contents >> Show >> Hide
- What “Two Networks” Actually Means
- Pick Your “Two Networks” Method (Fast Decision Guide)
- Before You Start: A Quick Checklist
- How to Create Two Networks from One Connection in 11 Steps
- Step 1: Decide What You’re Separating (and Why)
- Step 2: Log In to Your Router and Locate Network Settings
- Step 3: Do the Boring Security Stuff First (It Pays Off)
- Step 4: Lock Down Wi-Fi Security (WPA3 if Possible)
- Step 5: Choose Names That Make Sense (and Don’t Cause Chaos)
- Step 6: Create Network #1 (Your Main / Trusted Network)
- Step 7: Create Network #2 (Guest / Work / IoT)
- Step 8: Turn On the “Keep Them Separated” Setting (Isolation Rules)
- Step 9: Set “Selective Sharing” (Only If You Need It)
- Step 10: Avoid the Classic Pitfalls (IP Conflicts and Double NAT)
- Step 11: Test Like You Don’t Trust Yourself (Because You’re Human)
- Example Setup: “Work Network” + “Home Network” (Simple, Realistic)
- Troubleshooting: Quick Fixes for Common Problems
- Security and Performance Tips That Are Worth the Effort
- Real-World Experiences and Lessons People Learn the Hard Way (Extra 500+ Words)
- Conclusion
You’ve got one internet connection, but two very different vibes in your house (or small office):
a “trusted” network for your work laptop and personal stuff, and a “not-trusted-but-still-loved” network
for guests, smart home gadgets, kids’ devices, or anything that has ever asked for access to your contacts
for absolutely no reason.
The good news: you don’t need two separate internet lines. With the right setup, one connection can feed
two separate networks that don’t get to mingle. Think of it like creating a “family dining room” and a
“party patio” from the same kitcheneveryone gets snacks, but not everyone gets to wander into the pantry.
What “Two Networks” Actually Means
When people say “two networks,” they usually mean two separate IP subnets (often backed by
VLANs) or a guest/secondary SSID that’s isolated from your main devices. Both approaches can:
- Share the same internet connection (one modem/ONT, one ISP plan)
- Use different Wi-Fi names (SSIDs), passwords, and rules
- Limit or block device-to-device access between groups
Pick Your “Two Networks” Method (Fast Decision Guide)
There are three common ways to split one connection into two networks. Choose based on how much control
you wantand how much you enjoy network settings menus.
Option A: Use Your Router’s Guest Network (Easiest)
Best for: visitors and basic device isolation. Many modern routers can broadcast a guest SSID that’s
separated from your main network.
Option B: Create Two Networks with VLANs (Most Control)
Best for: work-from-home setups, IoT isolation, homelabs, and anyone who wants “real boundaries” plus
custom firewall rules. This typically requires VLAN-capable gear (router/firewall + managed switch and/or
VLAN-aware access points).
Option C: Add a Second Router (Practical When Your Router Is Limited)
Best for: when your ISP router is basic or locked down. You can plug in a second router and run a separate
network behind it. This can introduce double NAT, which is often fine for browsing and streaming,
but can complicate gaming, VPNs, and port forwarding.
Before You Start: A Quick Checklist
- Admin access to your router (app or web dashboard)
- 5–10 minutes for setup, plus a little patience for password typos
-
If using VLANs: a VLAN-capable router/firewall and a managed switch (or a
VLAN-aware Wi-Fi system) - If using a second router: one extra router and one Ethernet cable
How to Create Two Networks from One Connection in 11 Steps
Step 1: Decide What You’re Separating (and Why)
Write down your goal in one sentence. Examples:
- “Guests get internet only.”
- “IoT devices can’t reach my laptop.”
- “Work devices are isolated from everything else.”
This matters because “two networks” can mean anything from a simple guest SSID to full VLAN segmentation
with firewall rules.
Step 2: Log In to Your Router and Locate Network Settings
Use your router’s app or web admin page. Look for menus like:
Guest Network, Wi-Fi, LAN, Network,
Advanced, or VLAN.
If you can’t find “Guest Network,” don’t panicsome routers hide it under “Wireless,” “Additional SSID,” or
“Visitor Network.”
Step 3: Do the Boring Security Stuff First (It Pays Off)
Update firmware if available, and change default admin credentials. This is unglamorous, but so is recovering
from a router compromise.
Step 4: Lock Down Wi-Fi Security (WPA3 if Possible)
Use WPA3-Personal if your router and devices support it, or WPA2-Personal if
not. Avoid outdated options that weaken security. Choose strong, unique passwords for both networks.
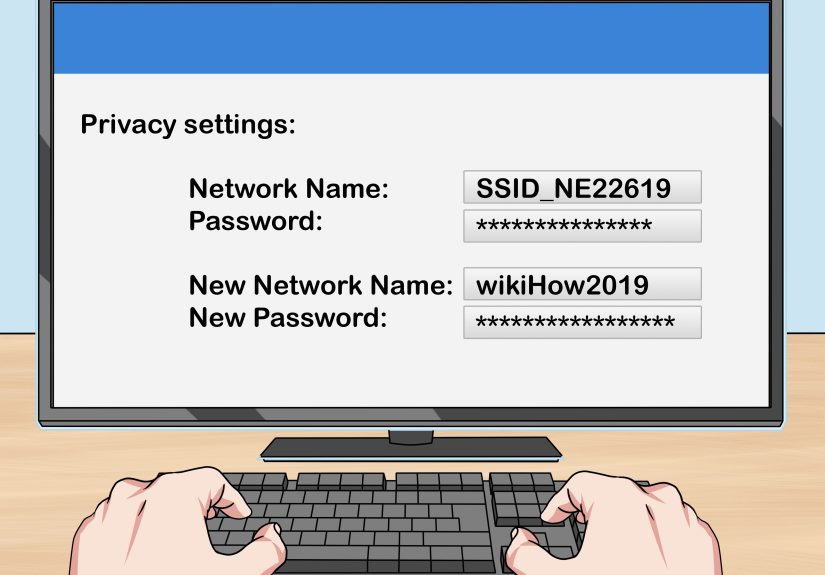
Step 5: Choose Names That Make Sense (and Don’t Cause Chaos)
Create two SSIDs you can recognize quickly, like:
- Henderson-Home (main network)
- Henderson-Guest or Henderson-IoT (secondary network)
Pro tip: naming your guest network “Definitely_Not_Spyware” is funny once, then confusing forever.
Step 6: Create Network #1 (Your Main / Trusted Network)
Your main network is the one that gets access to printers, NAS drives, smart home hubs, and your sanity.
Most home routers already have this set up.
If you’re building from scratch with VLANs, pick a subnet like 192.168.10.0/24 (gateway
192.168.10.1) and enable DHCP for that range.
Step 7: Create Network #2 (Guest / Work / IoT)
Now create the second network using one of these paths:
Path A: Guest Network (Fast Setup)
- Enable Guest Wi-Fi
- Set SSID and password
- Turn on network isolation (sometimes called “Access Intranet: Off”)
- If available, set a schedule (auto-disable overnight) and bandwidth limits
Path B: VLAN-Based Network (More Control)
- Create a second VLAN (example: VLAN 20)
- Assign it a different subnet (example: 192.168.20.0/24)
- Enable DHCP for VLAN 20
- Map a Wi-Fi SSID to VLAN 20 (or map switch ports to VLAN 20 for wired devices)
Path C: Second Router Network (When Your Router Won’t Cooperate)
- Connect the second router’s WAN port to your main router’s LAN port
- Set the second router to router mode (not access point mode)
- Make sure the second router uses a different subnet than the main router (example: main is 192.168.10.0/24, second is 192.168.20.0/24)
Step 8: Turn On the “Keep Them Separated” Setting (Isolation Rules)
This is the step people skipand then wonder why their guest’s laptop can see their printer, NAS, and possibly
their questionable folder naming decisions.
- Guest Network: enable “isolation” so guests can reach the internet but not your private LAN.
-
VLANs: create firewall rules that block traffic from VLAN 20 to VLAN 10 by default, while
allowing VLAN 20 to reach the internet (WAN). -
Second Router: by default, the second router’s devices can’t see upstream devices, but upstream
devices might see the second router unless you add rules. Most people want isolation both ways.
Step 9: Set “Selective Sharing” (Only If You Need It)
Sometimes you want separation except for one thinglike letting your phone on the main network print to
a printer on the secondary network, or letting a work laptop reach one internal service.
With VLANs, this is straightforward: add a firewall rule that allows only the needed traffic (for example,
allow printing protocols to a printer IP, block everything else). With guest networks, many routers don’t
support exceptionsguest often means “internet only,” period.
Step 10: Avoid the Classic Pitfalls (IP Conflicts and Double NAT)
Two big gotchas:
-
IP conflicts: Don’t use the same subnet on both networks. If both are 192.168.1.0/24,
devices get confused and your troubleshooting will become interpretive dance. -
Double NAT (second router setups): This happens when two routers both perform NAT. It often
works fine for everyday use, but can break inbound connections and some games. If you need to eliminate it,
consider putting the ISP gateway in bridge mode so only one router does NAT, or redesign with VLANs.
Step 11: Test Like You Don’t Trust Yourself (Because You’re Human)
Run a quick test plan:
- Connect a phone to Network #2 and confirm it has internet access
- Try to access a device on Network #1 (like a printer web page or file share) and confirm it fails
- Repeat in the opposite direction if you want isolation both ways
- Check speed on both networks
- Save a screenshot or note of your settings (future-you will be grateful)
Example Setup: “Work Network” + “Home Network” (Simple, Realistic)
Here’s a clean configuration that works well in many homes:
- Network #1 (Home/Trusted): 192.168.10.0/24, SSID “Henderson-Home”
- Network #2 (Work or IoT): 192.168.20.0/24, SSID “Henderson-Work”
- Rule: Block 192.168.20.0/24 → 192.168.10.0/24, allow 192.168.20.0/24 → internet
- Optional: Allow Work network to reach only one printer IP on Home network
If you’re using VLANs, you might pair those subnets with VLAN 10 and VLAN 20, then assign Wi-Fi SSIDs and switch
ports accordingly.
Troubleshooting: Quick Fixes for Common Problems
“My guest Wi-Fi works, but I can still see my home devices.”
Turn on isolation (or “block local network access”) for the guest SSID. Some routers default to
allowing local access unless you disable it.
“Nothing on my second network gets an IP address.”
Check DHCP settings for that network/VLAN, and confirm the SSID or switch port is actually assigned to the
secondary network. VLAN setups often fail because a port is set as “trunk/tagged” when it should be “access/untagged”
(or vice versa).
“Streaming works, but online gaming or remote access broke.”
If you used a second router, this is often double NAT. Consider bridge mode on the upstream gateway
(if available) or move to a VLAN-based design for cleaner routing and firewall control.
Security and Performance Tips That Are Worth the Effort
- Use strong Wi-Fi encryption and unique passwords for each SSID
- Rotate the guest password after parties, visitors, or “mystery devices”
- Limit guest bandwidth if your router supports it (so your video calls don’t turn into slideshow art)
- Keep firmware updatedespecially on older routers
- Prefer VLANs if you need precise control and exceptions
Real-World Experiences and Lessons People Learn the Hard Way (Extra 500+ Words)
When people set up two networks from one connection, the goal is usually simple“separate my stuff from their stuff.”
The reality is still simple, but the first attempt often includes at least one of these moments:
“Wait… why can my smart TV see my work laptop?”
The “Guest Network” That Wasn’t Actually Isolated
A common story: someone enables guest Wi-Fi, hands the password to visitors, and feels like a cybersecurity wizard.
Then they notice guests can cast to the living room TV or browse local devices. This usually happens because the router
has a guest SSID feature, but “local access” is still allowed until you enable isolation. The lesson: guest Wi-Fi is
only as “guest-y” as its isolation setting. If your router offers a toggle like “Allow guests to access local network,”
treat it like the “open trapdoor” button in a cartoon villain’s lair.
The Double NAT Surprise (AKA: “Why Did My Game Lobby Explode?”)
People love the second-router method because it’s tangible: plug it in, new Wi-Fi name appears, done. And for a lot of
households, it truly is “done.” Browsing? Fine. Streaming? Fine. Video calls? Fine.
Then someone tries to host a game server, use certain peer-to-peer voice features, access a home security system remotely,
or run a finicky corporate VPNand things get weird. That’s the double NAT effect: two layers of translation can complicate
inbound connections and certain network behaviors. The practical takeaway isn’t “never do it.” It’s: if you have gamers,
remote workers, or anyone who uses port forwarding, you should plan for either bridge mode upstream or a VLAN-based approach.
The “I Used the Same IP Range Twice” Facepalm
This one is incredibly human. Many routers default to 192.168.0.0/24 or 192.168.1.0/24. If you add a second router and it
uses the same range, you can end up with confusing routing and “it works… except when it doesn’t” behavior. The fix is easy:
choose different subnets (for example, 192.168.10.0/24 and 192.168.20.0/24). The lesson is even easier: networks need their
own “postal codes,” or the mail gets delivered to the wrong house.
The VLAN Upgrade That Felt Like OverkillUntil It Didn’t
Folks who move from a guest SSID to VLANs usually do it after they hit a wall: they want isolation and exceptions.
For example, they want IoT devices blocked from laptops, but they still want a phone to control a smart speaker, or they want
a work printer reachable from one subnet only. VLANs plus firewall rules handle that elegantly.
The first VLAN setup can feel like learning a new language: tagged ports, untagged ports, trunks, access ports, VLAN IDs, and
subnets. But once it’s working, it scales beautifully. Add a third network later (kids, lab, cameras)? You’re not rewiring the house.
You’re just adding a VLAN and rules. The takeaway: if your needs are growing, VLANs turn your network from “one big room” into
“rooms with doors,” and doors are underrated.
The “My Wi-Fi Is Fine, My Rules Are Not” Moment
Another common experience: the networks exist, the devices connect, internet worksyet the isolation doesn’t match expectations.
This is usually not a Wi-Fi problem; it’s a policy problem. For VLAN users, it can be a missing firewall rule. For guest networks,
it can be an isolation toggle left off. For second routers, it can be the upstream router still allowing access inward, or the
downstream router exposing admin pages too broadly. The lesson: after setup, do a deliberate test where you try to access something
you shouldn’t be able to access. Success looks like failure.
If you remember nothing else, remember this: creating two networks is easy. Creating two networks that behave exactly the way you
want is still easyonce you write down your goal, pick the right method, and actually test the boundaries.
Conclusion
Splitting one internet connection into two separate networks is one of the highest-impact upgrades you can make for privacy,
security, and sanity. If you want quick and simple, enable a guest network and turn on isolation. If you want fine-grained control,
VLANs are the long-term win. And if your existing router is limited, a second router can get you a separate network fastjust be aware
of double NAT and subnet planning.


