
Table of Contents >> Show >> Hide
- Why a Baby Sweater Is a Great Beginner Crochet Project
- Best Yarn for a Crochet Baby Sweater
- Tools and Supplies You Will Need
- Basic Crochet Stitches to Know
- Understanding Baby Sweater Sizing
- Do Not Skip the Gauge Swatch
- The Easiest Construction Methods for Beginners
- Step-by-Step: How to Crochet a Simple Baby Cardigan
- Common Beginner Mistakes and How to Fix Them
- Baby Sweater Safety Tips
- Beginner-Friendly Design Ideas
- Care Instructions for a Crochet Baby Sweater
- Conclusion
- Experience Notes: What Beginners Learn While Crocheting a Baby Sweater
Learning how to crochet a baby sweater for beginners sounds like a big, dramatic craft momentthe kind where you imagine yourself surrounded by yarn, sipping tea, and casually saying, “Oh this? I just made it.” The good news is that a baby sweater is far less scary than an adult sweater. It is smaller, faster, and much more forgiving. The baby will not leave a Yelp review if your first sleeve has a little “personality.”
A beginner crochet baby sweater is usually made with simple stitches, soft washable yarn, and a construction method that avoids complicated shaping. The easiest styles are cardigans, top-down raglan sweaters, and rectangle-panel sweaters. These designs teach you real garment-making skills without throwing you into the deep end with lace charts, math nightmares, or sleeves that look like confused tubes.
This guide walks you through the supplies, stitches, sizing, construction, finishing, and practical experience you need to make a sweet handmade baby sweater. Whether you are making a baby shower gift, a keepsake for your own little one, or a tiny cardigan because miniature clothing is legally adorable, this beginner-friendly tutorial will help you start with confidence.
Why a Baby Sweater Is a Great Beginner Crochet Project
A baby sweater is the perfect “first garment” because it is small enough to finish before your enthusiasm runs away to start a new hobby. Unlike blankets, which can feel endless, a baby cardigan gives you visible progress quickly. You learn useful techniques such as counting stitches, making increases, working sleeves, adding borders, and sewing on buttons or closures.
The best beginner crochet baby sweater patterns use basic stitches like chain, single crochet, half double crochet, double crochet, and slip stitch. If you can make a scarf, dishcloth, or small blanket, you already have many of the skills required. The main difference is that a sweater has a shape. That sounds fancy, but in beginner patterns, shaping often means placing two stitches into one stitch to make the fabric grow wider.
For first-timers, a cardigan is usually easier than a pullover because it opens in the front. That means you do not have to worry as much about getting the neckline over a baby’s head. Babies are cute, but they are not known for their patience during wardrobe experiments.
Best Yarn for a Crochet Baby Sweater
Choosing yarn is one of the most important steps. A baby sweater should be soft, washable, breathable, and gentle against sensitive skin. Look for yarn labeled baby yarn, soft acrylic, cotton blend, bamboo blend, or superwash wool. For everyday wear, machine-washable yarn is the hero. Parents are already dealing with milk, drool, applesauce, mystery stains, and tiny socks that disappear into another dimension. Hand-wash-only yarn may be beautiful, but it is not always practical.
Recommended Yarn Weight
For beginners, DK weight, light worsted weight, or worsted weight yarn is easiest to handle. Very thin yarn takes longer and makes stitches harder to see. Very bulky yarn can make a baby sweater stiff or too warm. A medium-weight yarn creates clear stitches and a cozy fabric without turning the baby into a soft little marshmallow.
Good Beginner Yarn Choices
Soft acrylic yarn is affordable, widely available, and easy to wash. Cotton blends are nice for warmer climates because they breathe well, though pure cotton can stretch. Superwash merino wool is warm and soft, but check the care instructions before choosing it for a busy household. Whatever yarn you choose, rub it gently against your neck or inner wrist. If it feels scratchy there, it will probably feel scratchy to a baby.
Tools and Supplies You Will Need
Before starting your crochet baby sweater, gather everything in one place. This prevents the classic crafter’s treasure hunt where the stitch marker is somehow in the kitchen and the yarn needle has joined witness protection.
- Soft baby-friendly yarn in DK, light worsted, or worsted weight
- Crochet hook recommended on the yarn label or pattern
- Stitch markers
- Measuring tape
- Yarn needle for weaving ends
- Small scissors
- Optional buttons, snaps, or ties
- A printed or saved pattern for easy reference
If you are using buttons, choose larger flat buttons and sew them on very securely. Avoid beads, loose decorations, long cords, or anything a baby could pull off and put in their mouth. For a newborn or very young baby, many makers prefer snaps, embroidered details, or no closures at all. Safety is more important than making the cardigan look like it belongs in a boutique window.
Basic Crochet Stitches to Know
You do not need to master every crochet stitch in existence. A beginner baby sweater can be made with just a handful of stitches. In U.S. crochet terms, the most common abbreviations are:
- ch: chain
- sc: single crochet
- hdc: half double crochet
- dc: double crochet
- sl st: slip stitch
- st: stitch
- inc: increase, usually making two stitches in one stitch
Half double crochet is especially good for baby sweaters. It works up faster than single crochet but creates a fabric that is not as holey as double crochet. Double crochet is also popular because it grows quickly and keeps the project light. If you are brand new, practice a small square before starting the sweater. Ten minutes of practice can save you from an evening of dramatic unraveling.
Understanding Baby Sweater Sizing
Baby sizing can be tricky because babies grow at the speed of gossip. A “3 to 6 months” size is only a guideline. Some babies are tiny dumplings; others are already auditioning for toddlerhood. If you are making the sweater for a specific baby, ask for chest measurement, arm length, and shoulder-to-hip length if possible.
As a general beginner rule, make the sweater slightly roomy but not oversized. A baby sweater should allow comfortable movement and layering over a onesie. However, it should not have long dangling parts, loose cords, or sleeves so oversized that the baby’s hands vanish forever.
Do Not Skip the Gauge Swatch
Gauge is the number of stitches and rows in a measured section, often four inches. Beginners love to skip gauge because it feels like homework. Unfortunately, gauge is the difference between “adorable baby cardigan” and “sweater for a decorative watermelon.”
Make a small swatch using your chosen yarn and hook. Wash and dry it the way the finished sweater will be cared for. Then measure your stitches. If you have too many stitches per inch, your work is too tight; use a larger hook. If you have too few stitches per inch, your work is too loose; use a smaller hook. This little step helps the sweater fit better and teaches you how your yarn behaves after washing.
The Easiest Construction Methods for Beginners
Top-Down Raglan Cardigan
A top-down raglan cardigan starts at the neckline and grows outward with increases at four points: two front sections, two sleeves, and the back. This method is popular because you can see the sweater take shape quickly, and there is often very little sewing. Once the yoke is wide enough, you separate the sleeves from the body and continue crocheting downward.
Rectangle-Panel Sweater
A rectangle-panel sweater is exactly what it sounds like. You crochet simple rectangles for the back, fronts, and sleeves, then seam them together. This is a great option if shaping makes you nervous. The tradeoff is that you will do more sewing at the end.
Hexagon Baby Cardigan
A hexagon cardigan is made from two crocheted hexagons that fold into sweater halves. It feels like crochet magic. This style can be beginner-friendly, especially if you enjoy granny clusters. Just remember that the final fit depends on yarn, hook size, and how large your hexagons become.
Step-by-Step: How to Crochet a Simple Baby Cardigan
The following overview explains how a beginner-friendly top-down baby cardigan usually comes together. Always follow your chosen pattern’s exact stitch counts, but use this as a roadmap so the instructions make sense.
Step 1: Make the Neckline Chain
Start with a foundation chain for the neckline. This chain should be loose enough to stretch comfortably. If your chain is tight, use a hook one size larger just for the foundation row. A tight neckline can make the cardigan hard to put on, and nobody wants a wrestling match with a baby over handmade fashion.
Step 2: Work the First Row
Work your first row of half double crochet or double crochet into the chain. Place stitch markers where the raglan increases will go. These markers are your tiny plastic bodyguards. They keep the sweater organized and prevent you from guessing where to increase.
Step 3: Increase for the Yoke
Continue crocheting rows back and forth, increasing at each raglan point. With every row, the yoke gets wider. Lay the piece flat occasionally. It should look like a growing curved rectangle with corners, not like a confused potato chip. Count your stitches every few rows so small mistakes do not become large, dramatic mistakes.
Step 4: Separate the Sleeves
Once the yoke is large enough, you will skip the sleeve stitches and join the front and back sections together under the arms. This creates armholes. It may feel strange the first time, but this is the moment when your project officially starts looking like a sweater. Celebrate responsibly, preferably with a snack.
Step 5: Crochet the Body
Work even rows down the body until the cardigan reaches the desired length. For a baby sweater, a slightly cropped length is often practical because it does not bunch up when the baby is sitting. Add a simple border or ribbed hem if you like. Front post and back post stitches can create a ribbed look, but plain single crochet edging is perfectly fine for beginners.
Step 6: Make the Sleeves
Join yarn at one armhole and crochet around or back and forth depending on your pattern. Sleeves can be worked in rounds to avoid seams or worked flat and sewn later. Count the stitches on each sleeve so they match. Babies are forgiving, but two wildly different sleeves will make the sweater look like it has a secret backstory.
Step 7: Add the Button Band or Border
Work single crochet evenly around the front opening and neckline. If adding buttons, create buttonholes on one side by chaining and skipping stitches. Keep closures simple. For newborn sizes, consider leaving the cardigan open or using secure snaps instead of small buttons.
Step 8: Weave Ends and Finish
Weave in every yarn tail securely with a yarn needle. Trim carefully, but do not cut too close. Check seams, buttons, and edges. Wash the finished sweater according to the yarn label, lay it flat if needed, and let it dry completely. The final wash relaxes the stitches and makes the sweater look polished.
Common Beginner Mistakes and How to Fix Them
Your Sweater Is Too Small
This usually means your tension is tighter than the pattern designer’s. Try a larger hook next time, or add a few extra rows to the yoke before separating sleeves. Always check gauge before beginning.
Your Edges Look Wobbly
Uneven edges often happen when turning chains are missed or extra stitches sneak into the row ends. Count stitches and use a marker in the first and last stitch of each row.
Your Sleeves Are Different Sizes
Count sleeve stitches before you start each sleeve, and write down the number of rows you complete. Do not trust memory. Crochet memory is unreliable, especially after coffee.
The Fabric Feels Stiff
Your hook may be too small, or the yarn may not be ideal for garments. Baby sweaters should have drape and softness. Try going up a hook size or choosing a lighter, softer yarn.
Baby Sweater Safety Tips
Handmade baby clothes should be cute, but they must also be safe. Avoid long drawstrings, cords around the neck, beads, pom-poms that can detach, and loose embellishments. If you use buttons, sew them on several times with strong thread or yarn and check them regularly. Avoid scratchy fibers, heavy seams, and rough labels.
A crochet baby sweater is best used as a daytime layering piece. Do not use thick sweaters, hooded garments, or loose handmade items as sleepwear unless they meet appropriate safety guidance for infant sleep clothing. When gifting the sweater, include a small care note and a reminder to inspect closures before use.
Beginner-Friendly Design Ideas
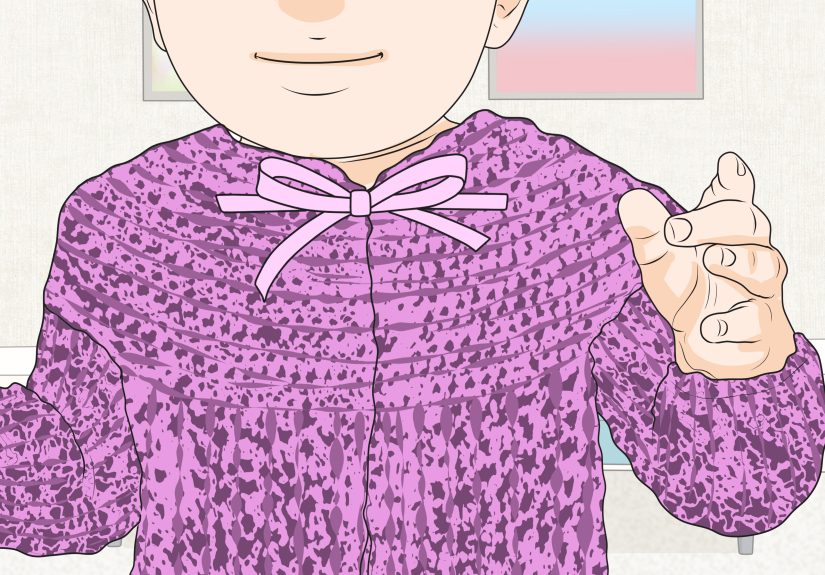
Once you understand the basic cardigan shape, you can personalize it without making the project too difficult. Try soft stripes, a contrasting border, wooden-look buttons, a simple textured stitch on the hem, or pastel color blocking. Neutral colors like cream, gray, sage, oatmeal, and soft blue are popular because they match many outfits. Bright colors are cheerful and hide stains better, which is a practical little blessing.
For a classic baby shower gift, pair the sweater with a matching hat or booties. Use the same yarn so the set looks coordinated. If you are short on time, make only the cardigan and wrap it with a handwritten care card. Handmade gifts do not need to be complicated to feel special.
Care Instructions for a Crochet Baby Sweater
Always follow the yarn label. If the yarn is machine washable, use a gentle cycle and mild detergent. Place the sweater in a mesh laundry bag to reduce stretching. Dry flat if the yarn label recommends it. Even machine-dryable yarn often looks better when dried flat because the sweater keeps its shape longer.
Tell the recipient not to hang the sweater while wet. Wet crochet fabric can stretch. Lay it flat on a towel, gently shape the sleeves and body, and let it dry naturally. This simple step keeps the sweater looking handmade in the charming way, not handmade in the “what happened here?” way.
Conclusion
Learning how to crochet a baby sweater for beginners is a satisfying step into garment-making. Start with soft washable yarn, choose a simple cardigan pattern, check your gauge, use stitch markers, and take your time with finishing. A tiny sweater teaches big skills: shaping, sizing, seaming, edging, and reading patterns with confidence.
Your first baby sweater may not be perfect, and that is completely normal. Handmade items are allowed to have character. What matters most is that the sweater is soft, safe, practical, and made with care. By the time you finish weaving in the final yarn tail, you will understand why crocheters keep making baby sweaters long after the baby shower season is over. They are quick, adorable, useful, and dangerously addictive.
Experience Notes: What Beginners Learn While Crocheting a Baby Sweater
The first real experience many beginners have with a crochet baby sweater is realizing that small does not always mean simplebut it does mean manageable. A baby cardigan has all the parts of a grown-up garment: neckline, yoke, sleeves, body, edging, and closures. The difference is that each section is small enough to practice without feeling trapped in yarn jail. You can make mistakes, pull back a few rows, and recover without losing an entire weekend.
One of the biggest lessons is that counting stitches matters more than natural talent. A beginner may think, “I’ll just eyeball it,” and that is exactly when the sweater begins drifting into abstract sculpture. Stitch markers are incredibly helpful. Place them at raglan corners, sleeve separations, row ends, and buttonhole positions. They make the project feel less mysterious and more like following a map.
Another common experience is learning how personal tension can be. Two crocheters can use the same yarn, same hook, and same pattern, yet produce different sizes. One person’s relaxed half double crochet is another person’s tightly armored stitch. That is why gauge is not a punishment; it is a preview. Making a swatch feels boring until it saves the sweater from becoming doll-sized.
Beginners also discover that yarn choice affects mood. A splitty yarn can make every stitch feel like a tiny argument. A soft, smooth, light-colored yarn makes learning easier because the stitches are visible and pleasant to touch. Dark navy may look elegant, but for a first sweater, it can hide stitches like a magician. Choose a color you can see clearly, especially if you crochet at night.
Finishing teaches patience. Many beginners rush through weaving ends, sewing buttons, or edging because they are excited to be done. But finishing is what makes the sweater look clean and gift-worthy. Even a very simple cardigan looks polished when the borders are even, the tails are hidden, and the sweater has been gently washed and shaped.
There is also an emotional side to crocheting baby clothes. A baby sweater feels personal. Every row is small, soft, and hopeful. If you are making it as a gift, you may imagine the baby wearing it in photos or being wrapped up for a chilly morning walk. That feeling can make the project more meaningful than a practice square or scarf.
The best advice from experience is to choose a pattern slightly below your ambition level. If you are a beginner, do not start with cables, lace sleeves, colorwork animals, and twelve decorative buttons. Start simple. Make a plain cardigan well. After that, add stripes, texture, pockets, or a matching hat. Confidence grows faster when your first project is finishable.
Finally, remember that every crocheter has a first sweater. Nobody begins with perfect seams and magazine-ready sleeves. The tiny uneven spots are proof that your hands learned something new. And when the sweater is finished, even if one sleeve is a row longer than the other, it will still carry the charm of being handmade. That is the real magic of crochet: yarn becomes fabric, fabric becomes clothing, and clothing becomes a memory.


