
Table of Contents >> Show >> Hide
- Why Pants Rip at the Crotch in the First Place
- What You Need Before You Start
- Step One: Figure Out Which Repair You Actually Need
- How to Fix a Crotch Tear by Hand
- How to Fix a Crotch Tear with a Sewing Machine
- A Temporary No-Sew Fix for Emergencies
- Visible Mending vs. Invisible Mending
- Common Mistakes That Make the Repair Fail
- When to Take It to a Tailor Instead
- How to Prevent Another Crotch Tear
- Real-Life Experiences with Fixing a Crotch Tear in Pants
- Final Thoughts
- SEO Tags
There are few wardrobe emergencies more humbling than hearing that sound when you squat, stretch, hop a fence, or simply exist too enthusiastically in a pair of pants. One second you are a confident, capable adult. The next, your pants have opened negotiations with the outside world. The good news? A crotch tear is one of the most common clothing repairs, and in many cases, it is absolutely fixable.
If you have ever stared at a rip between the legs of your jeans, work pants, chinos, or favorite old joggers and wondered whether to grab a needle or a trash bag, this guide will walk you through what to do. The trick is knowing what kind of crotch tear you have. Some tears are really just popped seams. Others happen because the fabric has worn thin from friction. Those are not the same problem, and they should not be repaired the same way.
In other words, this is not a “poke it twice and hope” situation. We are going to do this properly, with smart repair options, simple tools, and enough common sense to save your pants without making them look like they survived a bear encounter.
Why Pants Rip at the Crotch in the First Place
The crotch area of pants is a perfect storm of stress. It stretches when you sit, twists when you move, rubs when you walk, and absorbs wear every single time your thighs decide to say hello to each other. Over time, even well-made pants can start to fail there.
The two main causes
1. A split seam: The stitching has come undone, but the fabric itself is still mostly intact. This is the easiest fix.
2. Worn-through fabric: The material has thinned, frayed, or developed a hole from abrasion. This is more common in jeans and fitted pants, and it needs reinforcement, not just fresh stitches.
Stretch denim is especially tricky because the repair can stiffen the area if you overdo the stitching. Lightweight chinos and dress pants can also tear in the crotch because the weave gets stressed and thin long before the hole becomes obvious. So if you catch the wear early, you can often repair it before the full disaster scene arrives.
What You Need Before You Start
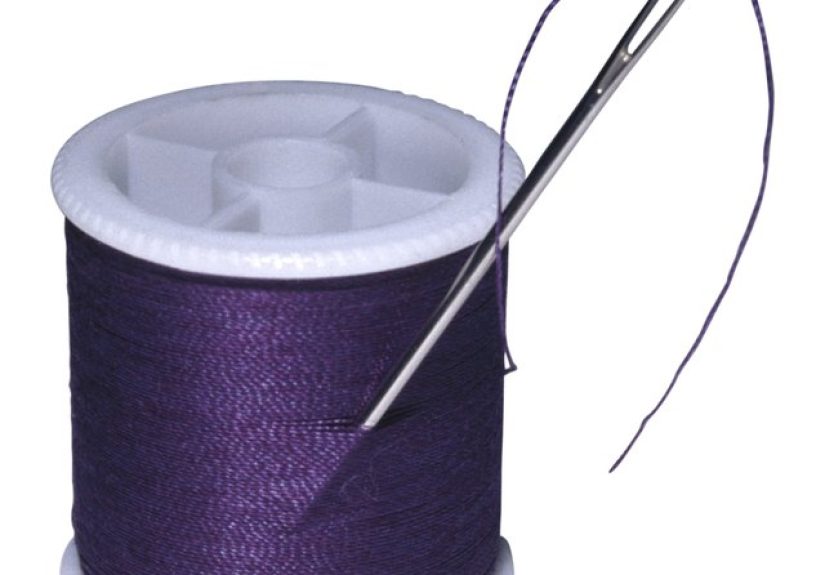
You do not need a Hollywood costume department to fix this. A basic setup will do:
- Sharp scissors or thread snips
- Hand-sewing needle
- Matching thread
- Pins or sewing clips
- Iron and ironing board
- Lightweight fusible interfacing or a thin patch fabric
- Optional: sewing machine, denim needle, darning foot, thimble, seam ripper
If you are repairing jeans or heavy cotton pants, use a stronger thread and the right machine needle if you sew by machine. If you are working with dress pants, use a lighter hand and a repair that keeps bulk to a minimum. Nobody wants an elegant pair of trousers with the structural personality of a camping tarp.
Step One: Figure Out Which Repair You Actually Need
If it is a seam split
Turn the pants inside out and inspect the damage. If the fabric edges are still clean and the tear follows the original stitching line, congratulations: you are likely dealing with a popped seam. That means you can usually resew it without adding a patch.
If it is a fabric blowout
If the area looks fuzzy, thin, shiny, frayed, or fully torn open, you need to reinforce it from behind. Sewing the edges together without support will only create a new hole right next to the old one. That repair tends to last about as long as a New Year’s resolution at a donut shop.
How to Fix a Crotch Tear by Hand
Hand sewing is slower than a machine, but it is precise, beginner-friendly, and excellent for seam splits or smaller tears.
Method 1: Repairing a split crotch seam
- Turn the pants inside out and trim any loose threads.
- Line up the original seam edges carefully.
- Pin the area so the fabric lies flat and the seam matches up naturally.
- Thread your needle with a manageable length of thread, not a giant spaghetti rope that will knot itself out of spite.
- Use a backstitch to resew the seam. This stitch is strong and ideal for stress points.
- Start about half an inch before the tear and end about half an inch after it.
- Knot securely, then press the seam lightly.
Backstitching is great here because it creates a sturdy line that behaves more like machine stitching than a simple running stitch. For a repair zone that gets tugged every time you sit down, stronger is better.
Method 2: Repairing a hole or worn-through fabric by hand
- Cut a patch from similar-weight fabric or use lightweight fusible interfacing.
- Make the patch larger than the damaged area so it covers not only the hole but also the surrounding thin fabric.
- Press the patch or interfacing to the inside of the pants if it is fusible.
- Using matching thread, stitch around the damaged zone and then sew back and forth across the hole with small, even stitches.
- Do not pull too tight. Tight stitching causes puckering and turns your pants into a geography lesson.
- For extra strength, add a second direction of stitches across the first, lightly weaving the damaged area back together.
This method works especially well for jeans, casual cotton pants, and any garment where function matters more than total invisibility. If you want the repair to disappear visually, keep the thread close to the fabric color and extend the stitching into the worn area instead of just circling the obvious hole.
How to Fix a Crotch Tear with a Sewing Machine
If the tear is in jeans or durable everyday pants, a sewing machine can give you a stronger and cleaner repair.
Best for: denim, work pants, chinos, and recurring inner-thigh wear
- Turn the pants inside out.
- Trim loose threads and press the area flat.
- Apply a piece of lightweight interfacing to the inside, extending beyond the weak area.
- If you are repairing denim, use a denim or jeans needle.
- Choose a thread color that blends with the fabric.
- Sew back and forth across the damaged area, gradually rebuilding the weakened section.
- Keep the stitching slightly beyond the hole to anchor into stronger fabric.
- Press again when finished to help the repair settle.
For machine darning, less is often more. Too much stitching can make stretch pants stiff and uncomfortable, especially in the crotch area, which is already not known for its patience. The goal is support, not armor plating.
What if the tear is close to a seam?
If the damage runs into the crotch seam, you may need a two-part repair: reinforce the thinned fabric first, then resew the seam. This gives the seam something solid to hold onto. If you skip the reinforcement, the new seam can simply tear through the weak fabric like a determined toddler through wrapping paper.
A Temporary No-Sew Fix for Emergencies
Need to survive the rest of the day before you can repair the pants properly? There are temporary fixes.
- Fusible mending tape
- Fusible web
- Fabric glue
- Adhesive patch products
These can hold a seam together for a short time, especially if the pants are clean and dry. But let’s be honest: these are emergency measures, not forever solutions. They are for “I have to get through this meeting” or “I am at a family barbecue and cannot explain this to Aunt Linda right now.” Do not rely on them as a washable long-term fix.
Visible Mending vs. Invisible Mending
You have two style choices when repairing a crotch tear:
Invisible mending
This uses matching thread, subtle stitching, and inside patches to make the repair hard to notice. It is the best choice for dressier pants, dark denim, uniforms, and people who do not want anyone admiring their mending craftsmanship in aisle seven.
Visible mending
This turns the repair into a feature. Think contrast thread, sashiko-style stitching, or clearly intentional patchwork. It works especially well on casual jeans, workwear, and clothes you want to keep in service without pretending they are brand new. Done well, visible mending says, “Yes, these pants have lived a life, and frankly they are more interesting now.”
Common Mistakes That Make the Repair Fail
- Sewing only the hole: Always include the weakened fabric around it.
- Using thread that is too weak: Thin, flimsy thread is not your friend here.
- Skipping the patch or interfacing: Especially on worn denim, this is asking for round two.
- Pulling stitches too tight: This causes puckering and strain.
- Ignoring fabric type: Stretch pants, wool trousers, and denim do not all behave the same way.
- Repairing when the garment is basically disintegrating: Sometimes the smartest move is a professional tailor or retirement.
When to Take It to a Tailor Instead
DIY is great, but there are times when a pro is the better call:
- The tear is very large
- The surrounding fabric is paper-thin
- The pants are lined or made from delicate fabric
- The crotch seam construction is complex
- You need the repair to look nearly invisible on expensive trousers
A tailor can sometimes replace part of the damaged section, add a gusset, or rebuild the seam more cleanly than most home sewers can. If the pants cost real money and fit beautifully, professional repair may be cheaper than replacing them.
How to Prevent Another Crotch Tear
Once you have fixed the problem, you probably do not want a sequel.
Smart prevention tips
- Wash denim less often and more gently
- Turn jeans inside out before washing
- Use cold water and air dry when possible
- Spot-clean minor stains between full washes
- Repair thinning fabric early, before it becomes a hole
- Rotate your pants instead of wearing the same pair every day
- Choose the right fit; pants that are too tight in the seat and thighs wear out faster
Prevention is not glamorous, but neither is ripping your pants while bending down to tie your shoe in public. A little maintenance beats a lot of embarrassment.
Real-Life Experiences with Fixing a Crotch Tear in Pants
The first time I repaired a crotch tear, I made the classic beginner mistake: I treated it like a normal rip. I matched the edges, stitched them together neatly, admired my own genius for about twelve minutes, and then the repair failed the next time the pants were worn. Why? Because the fabric around the tear was already tired. I had repaired the wound, but not the weakness.
That lesson changed everything. On the second attempt, I turned the jeans inside out, looked at the area under good light, and realized the damage extended far beyond the obvious hole. The fabric around the tear was thin, fuzzy, and soft in a suspicious way. That is when I finally understood why experienced menders keep saying to stitch beyond the hole. They are not being dramatic. They are saving you from doing the same job twice.
Another time, I repaired a pair of lightweight chinos that had split directly along the crotch seam. That job was much easier. The fabric itself was still fine, so I used a careful backstitch by hand and reinforced the beginning and end of the repair. It took maybe fifteen minutes, and the pants went back into rotation immediately. That experience taught me the most important truth in clothing repair: not every crotch tear is a five-alarm event. Some are just popped seams in need of a little respect.
I have also seen the opposite problem: people over-repairing stretch jeans until the crotch feels like cardboard. It is understandable. Once you go through the trouble of fixing something, you want it to survive forever. But too much dense stitching can make stretch fabric lose flexibility, which creates a new stress point nearby. Suddenly the jeans are technically repaired, yet somehow less wearable than before. Congratulations, you fixed the hole and invented a new form of discomfort.
The most satisfying repair I ever did involved visible mending on a battered old pair of weekend jeans. They had already reached the stage where no one expected elegance, so I gave up on invisibility and went for durability. I added a patch behind the inner thigh area and stitched over it with deliberate rows that looked handmade on purpose. The result was not showroom perfect, but it was strong, comfortable, and weirdly stylish. More importantly, it gave the jeans another year of life. That is when mending stops feeling like a chore and starts feeling like a small act of rebellion against waste.
Friends tend to fall into two camps when crotch tears happen. One group says, “These pants are dead to me.” The other says, “Can this be saved?” The honest answer is usually yes, at least for a while, if you catch the damage early and use the right method. I have seen inexpensive jeans become weekend workhorses again, office pants survive another season, and favorite broken-in pairs avoid the donation-bin death spiral because of twenty minutes with thread, a patch, and a little patience.
So no, fixing a crotch tear is not glamorous. It will not make your neighbors applaud. There are no trophies. But there is something deeply satisfying about taking a pair of pants that seemed finished and making them functional again. Also, it is nice to know that the next time you hear a suspicious rip, you will not panic. You will simply sigh, make coffee, and get the sewing kit. That is growth.
Final Thoughts
If your pants have a crotch tear, do not panic and do not toss them automatically. First, identify whether you are dealing with a split seam or worn-out fabric. Then choose the repair that matches the problem. A seam can be resewn. A hole needs reinforcement. A rushed fix may get you through the afternoon, but a proper repair can give your pants months or even years of extra life.
And really, that is the beauty of mending. It is practical, affordable, and a little satisfying in the way only useful skills can be. Plus, once you know how to fix a crotch tear in your pants, you will never again have to stare at a ripped pair and whisper, “Well, this is how it ends.”


