
Table of Contents >> Show >> Hide
- What Is Body Sugaring Paste?
- Before You Start: What You’ll Need
- How to Make Body Sugaring Paste: 10 Steps
- Step 1: Set Up Your Station
- Step 2: Add Ingredients to the Pot (No Heat Yet)
- Step 3: Start on Medium Heat and Dissolve the Sugar
- Step 4: Bring It to a Controlled Boil
- Step 5: Watch for Color and Temperature Cues
- Step 6: Do the Cold-Water Test (Even If You Have a Thermometer)
- Step 7: Remove from Heat at the Right Moment
- Step 8: Cool Safely, Then Pour into a Container
- Step 9: Let It Rest Until It’s Warm, Not Hot
- Step 10: Condition the Paste (Optional, but Helpful)
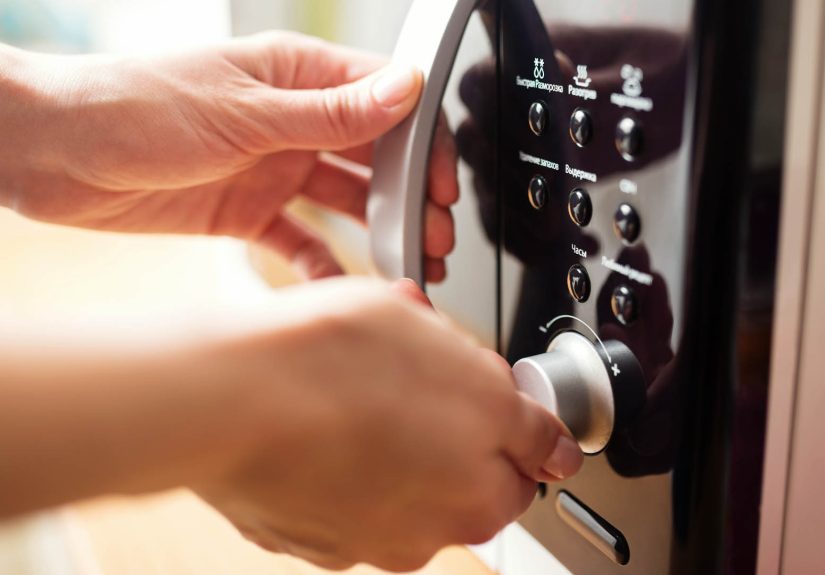
- How to Use Sugaring Paste (Quick, Beginner-Friendly Overview)
- Troubleshooting: When Your Paste Has “A Personality”
- Storage: How to Keep Sugaring Paste Usable
- Who Should Be Extra Careful (or Skip At-Home Sugaring)
- FAQs
- Conclusion
- Experiences People Commonly Have While Learning Sugaring (And What They Teach You)
Sugaring paste is the low-drama, high-reward cousin of traditional wax: it’s made from a short ingredient list (sugar + an acid like lemon + water),
it rinses away with water, andwhen used properlyit can feel gentler than hot wax because it tends to grab hair more than it grabs living skin.
It’s basically “candy science” with a beauty routine as the final exam.
In this guide, you’ll learn how to make body sugaring paste at home in 10 clear steps, plus how to tell if you’ve nailed the consistency,
what to do if your batch turns into a sugar rock, and how to store it so it doesn’t become a sticky science fair project in your cabinet.
What Is Body Sugaring Paste?
Sugaring is a hair removal method that uses a pliable sugar-based paste to pull hair from the root. The classic paste is cooked from
sugar, lemon juice, and water until it reaches a thick, caramel-like consistency. The paste is typically applied at or near body temperature,
and it can be molded and “flicked” off the skin in quick motions (or used with strips, depending on your preference and the paste consistency).
Why Lemon (or Another Mild Acid) Matters
Lemon juice isn’t just there to make your kitchen smell like a lemonade stand. The mild acid helps stabilize the syrup and can reduce the chances of
the sugar crystallizing into gritty, useless sadness. Translation: it helps your paste stay smooth and workable.
Before You Start: What You’ll Need
Ingredients
- 2 cups white granulated sugar
- 1/4 cup lemon juice (bottled is fine; fresh is fine too)
- 1/4 cup water
Tools
- Heavy-bottom saucepan (helps prevent scorching)
- Wooden spoon or heat-safe silicone spatula
- Candy thermometer (strongly recommended for consistency)
- Heat-safe glass jar or container with a lid (clean and dry)
- Bowl of cold water (for the cold-water test)
- Optional: pastry brush + a little water to wash sugar crystals from the sides of the pot
Safety Notes (Because Molten Sugar Is Not a Personality Trait)
- Hot sugar syrup can cause serious burns. Keep kids and pets out of the kitchen while you cook.
- Don’t taste-test the syrup while it’s hot. Your tongue deserves better.
- Use oven mitts and avoid splashingstir calmly, not like you’re trying to summon a caramel storm.
How to Make Body Sugaring Paste: 10 Steps
Step 1: Set Up Your Station
Place your saucepan on the stove, set out your thermometer, and have your jar ready. If you’re using a glass jar, make sure it’s heat-safe.
A quick trick: warm the jar with hot tap water, then dry it completelythis reduces the shock of pouring in warm paste.
Step 2: Add Ingredients to the Pot (No Heat Yet)
Add 2 cups sugar, 1/4 cup lemon juice, and 1/4 cup water to the saucepan.
Stir gently until the sugar looks evenly moistenedthink wet sand at the beach, not a soup.
Step 3: Start on Medium Heat and Dissolve the Sugar
Turn the heat to medium. Stir slowly until the sugar dissolves and you no longer see dry granules. This step helps you avoid scorching and reduces
crystallization later. Once it looks like a smooth syrup, stop stirring constantly (over-stirring can encourage crystals).
Step 4: Bring It to a Controlled Boil
When the syrup starts bubbling, reduce heat slightly to maintain a steady, controlled boil. If you have a candy thermometer, clip it to the pot
without letting it touch the bottom (that can give false readings).
Step 5: Watch for Color and Temperature Cues
Your goal is a deep golden/amber tonelike honey heading to caramel. Temperature-wise, you’re typically aiming for the
soft-ball to firm-ball range, depending on how soft or firm you want your paste:
- Soft-ball stage (about 235–240°F): softer paste, more likely to be sticky in warm rooms.
- Firm-ball range (about 245–250°F): firmer paste, often easier for beginners to handle.
If you live in a hot/humid climate, a slightly firmer batch can be easier to manage. If your home is cool and dry, you may prefer stopping a little earlier.
Step 6: Do the Cold-Water Test (Even If You Have a Thermometer)
Thermometers are great, but sugar is famous for being “technically correct” while still acting weird. To test, drop a small bit of syrup into a bowl of
cold water. Let it sit for a moment, then pinch it (carefully).
- If it forms a soft, pliable ball that flattens easily, you’re near soft-ball stage.
- If it forms a firmer ball that holds shape better, you’re closer to firm-ball.
For body sugaring paste you can mold and use, most people aim for a ball that’s pliable, not brittle. If it hardens like candy glass, it cooked too far.
Step 7: Remove from Heat at the Right Moment
Once you hit your target range (and the color looks right), remove the pot from heat. The syrup will keep cooking slightly from residual heat,
so don’t wait until it’s “perfect-perfect.” Pull it just before you think it’s donelike taking cookies out when they still look a little too soft.
Step 8: Cool Safely, Then Pour into a Container
Let the syrup cool in the pot for a few minutes until bubbling calms down. Then carefully pour into your heat-safe container.
Do not put a lid on while it’s still hottrapped steam can add moisture and mess with consistency.
Step 9: Let It Rest Until It’s Warm, Not Hot
Allow the paste to cool to a warm, workable temperature. It should be safe to touch and mold without burning you. A good rule:
if you wouldn’t put it on your wrist for 3 seconds, it’s not ready for your skin.
Step 10: Condition the Paste (Optional, but Helpful)
If you’re using a moldable “hand method,” scoop a small amount and knead it with clean, dry hands.
As it warms, it should become more pliable and less glossy. If it’s too stiff, you can warm the container briefly (short bursts in the microwave or
a warm water bath). If it’s too runny, your batch likely stopped too early and may need a re-cook.
How to Use Sugaring Paste (Quick, Beginner-Friendly Overview)
This article focuses on making the paste, but here’s a simple, practical way to use it so your first attempt doesn’t feel like you’re wrestling taffy.
Prep
- Clean and dry skin thoroughly.
- Lightly dust the area with a body powder (many people use cornstarch) so the paste grabs hair, not moisture.
- Hair length matters: too short won’t grip; too long can be more uncomfortable. Many at-home hair removal guides suggest roughly 1/4 inch of hair.
Apply + Remove
- Press paste onto skin against the direction of hair growth (this helps it wrap around the hair).
- Remove with a quick motion in the direction of hair growth (common sugaring technique).
- Work in small sections until you get the hang of it.
Aftercare
- Rinse residue with lukewarm water (no oil removers needed).
- For 24 hours, avoid heat-heavy stuff (hot baths, saunas), friction, and heavy fragrance products if you’re prone to irritation.
- Wear loose clothing over freshly sugared areas to reduce rubbing.
Troubleshooting: When Your Paste Has “A Personality”
Problem: It’s Too Hard (Like a Lollipop That Lifted Weights)
This usually means it cooked too long or too hot. Try gently warming the paste (very short microwave bursts or a warm water bath) and kneading a small
portion. If it’s still hard and brittle, you may need to remake the batch and stop earlier next time.
Problem: It’s Too Soft or Runny
You likely didn’t cook it long enough. You can pour it back into the pot and simmer a bit longer, then test again. This is where a thermometer and cold-water
test save you from repeating the same mistake in a loop.
Problem: It Turned Grainy or Crystallized
Crystals can happen when undissolved sugar clings to the pot sides or when the syrup is disturbed too much at the wrong time. Next batch:
dissolve thoroughly in Step 3, avoid aggressive stirring once boiling, and consider brushing down the sides with a wet pastry brush.
Problem: It’s Sticky on Skin
Sticky can be a recipe issue (too soft), a climate issue (warm, humid room), or a prep issue (skin wasn’t dry enough, or you skipped powder).
Try more powder, smaller sections, and a slightly firmer paste next time.
Storage: How to Keep Sugaring Paste Usable
- Store in a clean, airtight container to keep out moisture and contamination.
- Keep it in a cool, dry place (not next to the stove, and not in a steamy bathroom).
- If it firms up over time, warm it gently before use.
Who Should Be Extra Careful (or Skip At-Home Sugaring)
Sugaring is still hair removalyour skin can get irritated. Consider skipping at-home sugaring or talking to a dermatologist first if you:
- Use topical retinoids/retinol or strong exfoliants and have sensitive skin
- Have active rashes, sunburn, open cuts, or a skin infection
- Have a history of severe reactions to waxing/sugaring
If you’re doing facial hair removal, be especially cautious: certain skincare products can make skin more fragile. When in doubt, professional help is worth it.
FAQs
Can I make sugaring paste without a thermometer?
Yes, but expect more trial-and-error. Use the cold-water test and pay close attention to color changes. A thermometer just makes success repeatable,
which is handy if you’d like your paste to behave the same way next Tuesday.
Does it have to be lemon juice?
Lemon juice is common because it’s accessible and provides acidity, which helps the syrup behave. Some recipes use other acids, but lemon is the usual
starting point for DIYers.
Why does humidity seem to ruin everything?
Because sugar is hygroscopicit loves absorbing moisture from the air. In humid environments, a paste that felt perfect yesterday can feel softer today.
Storing it airtight helps, and cooking slightly firmer can make it easier to handle.
Conclusion
Making body sugaring paste is a mix of simple ingredients and surprisingly precise timing. If you remember just three things, let it be these:
use a thermometer (or cold-water test), respect the color change, and prioritize safety with hot sugar.
Once you land on the consistency that works for your home’s climate and your hair type, you’ll have a rinse-clean paste that can support a smooth-skin routine
without a cabinet full of mystery chemicals.
Experiences People Commonly Have While Learning Sugaring (And What They Teach You)
The first time you make sugaring paste, you’ll probably have a very specific thought: “Why is this acting like candy?” The second thought is usually:
“Oh… because it is candy.” That mental shifttreating sugaring paste like a candy-making projecttends to be the turning point for beginners.
People who approach it like “just boil sugar” often end up with one of two results: a syrup that never firms up, or a batch that could be used as a window decal.
A common early experience is what you might call the Color Panic. The mixture stays pale for a while, and you start questioning your life choices.
Then it suddenly deepens into gold faster than you expected. Many beginners learn (quickly) that once the color starts changing, your best move is to
stay nearby, lower the heat if needed, and stop thinking you can “just answer one text.” This is the part where a thermometer feels like a supportive friend:
it doesn’t judge you; it just tells the truth.
Another classic moment: the Cold-Water Test Surprise. People often expect the syrup to behave the same way in the water as it does in the pot.
But once that little drop hits cold water, it becomes a tiny preview of the paste’s future personality. Beginners report a weirdly satisfying “aha” moment
when they pinch the cooled drop and feel it form a soft ballor a firmer onebecause it’s the first time the process becomes predictable.
It’s also when you realize why “soft-ball stage” isn’t poetic language. It’s literal. Like, “I can roll this into a ball,” literal.
Once the paste cools, the next experience is often the Kneading Reality Check. People expect it to be instantly perfect, but it frequently needs
conditioningwarming slightly, kneading, and getting used to the texture. If it feels too stiff, beginners learn that gentle warmth changes everything.
If it feels too sticky, they learn the other half of the lesson: skin prep matters. Dry skin and a light dusting of powder can make the difference between
“this is manageable” and “why am I glued to myself?”
There’s also the Climate Plot Twist. In a cool, air-conditioned room, paste can feel firmer and easier to control.
In warm, humid conditions, the exact same batch can feel softer and stickier. Many people end up adjusting their cooking endpoint slightly
aiming a touch firmerso the paste behaves better in their environment. This becomes a personal “house recipe” situation, where you learn what works
in your kitchen, not just what worked in someone else’s video.
Finally, a lot of people describe the first successful use as oddly empoweringlike learning a life skill that’s half beauty routine, half chemistry trick.
The paste rinsing away with water is one of those small, satisfying details that surprises beginners (especially if they’ve dealt with traditional wax residue).
Over time, people often get quicker at reading the cues: the bubble size, the color shift, how the syrup drips from the spoon, and how the cooled test drop behaves.
The experience tends to move from “experiment” to “routine,” and that’s when sugaring starts to feel less like a project and more like a practical, repeatable option.


