Table of Contents >> Show >> Hide
- What You’ll Need for Simple Tie Dye
- Step-by-Step: How to Make Simple Tie Dye (15 Steps)
- Step 1: Choose the Right Fabric
- Step 2: Prewash Your Item
- Step 3: Protect Your Workspace
- Step 4: Put on Gloves and Old Clothes
- Step 5: Mix Your Dyes
- Step 6: Decide on a Simple Pattern
- Step 7: Fold and Tie Your Fabric
- Step 8: Place Your Project on a Protected Surface
- Step 9: Apply the Dye
- Step 10: Massage the Dye in (Gently)
- Step 11: Wrap and Let the Dye Set
- Step 12: Rinse Out the Extra Dye
- Step 13: Wash Separately
- Step 14: Dry Completely
- Step 15: Wear and Enjoy Your Creation
- Simple Pattern Ideas for Beginners
- Safety Tips and Common Mistakes
- Care Tips to Keep Your Tie Dye Bright
- Extra : Real-Life Tie-Dye Experiences and Pro Tips
Tie dye is one of those crafts that looks wildly impressive but is secretly pretty simple. With a few bottles of dye, some rubber bands, and an old T-shirt, you can turn “laundry day” into “art day” in about an afternoon. This guide walks you through a beginner-friendly, 15-step process inspired by classic wikiHow how-tos, plus expert tips from dye brands and crafting pros. You’ll learn exactly how to prep, fold, dye, and wash your project so your design looks bright and lasts more than one trip through the washer.
What You’ll Need for Simple Tie Dye
Before you start squirting color like a mad scientist, gather your materials so you don’t have to go hunting for a rubber band with blue dye dripping off your elbow.
Basic Supplies
- 100% cotton or natural-fiber item (T-shirt, tote bag, pillowcase, etc.)
- Fiber-reactive tie-dye kit or bottled fabric dye (one-step kits are easiest for beginners)
- Plastic squeeze bottles (usually included in kits)
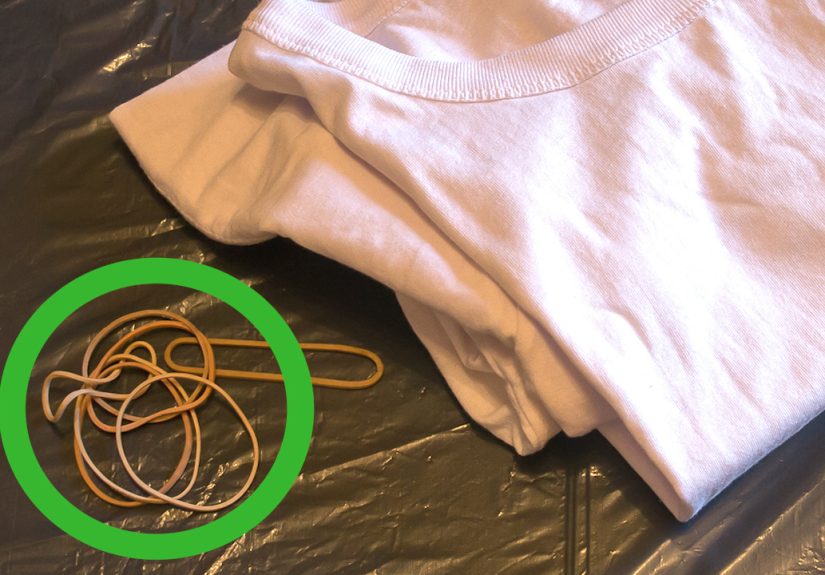
- Rubber bands or string
- Plastic tablecloth, trash bags, or baking trays to protect your surface
- Plastic bags or plastic wrap for setting the dye
- Disposable gloves
- Apron or old clothes you don’t mind decorating… permanently
Optional but Helpful
- Soda ash solution if your kit recommends pre-soaking for brighter color
- Measuring cups and a funnel for mixing powdered dyes
- Squirt bottles of plain water for diluting color or blending edges
- Paper towels or old rags for quick clean-ups
Step-by-Step: How to Make Simple Tie Dye (15 Steps)
These 15 steps walk you from “plain white shirt” to “I made this!” For a mental picture, imagine a step-by-step photo series showing your shirt change from flat white to a colorful swirl.
Step 1: Choose the Right Fabric
For the brightest results, choose items made from 100% cotton or other natural fibers like rayon, linen, or hemp. Synthetic fabrics like polyester don’t hold regular tie-dye well, and blends will usually look more muted. Check the tag before you start so you’re not disappointed later.
Step 2: Prewash Your Item
Give your shirt or fabric a quick wash without fabric softener. This removes any factory finishes or oils that can repel dye. You don’t need to fully dry itslightly damp fabric actually absorbs dye better, which is why many professional instructions suggest dyeing on damp fabric.
Step 3: Protect Your Workspace
Cover your table with a plastic tablecloth, trash bags, or a large baking tray. Tie dye can and will stain almost anything porous. If you’re working indoors, line the floor under your table just in case your artistic enthusiasm overflows.
Step 4: Put on Gloves and Old Clothes
This is the moment to admit that you are not stronger than the dye. Put on plastic or latex gloves and an apron or old T-shirt. Dye on skin will fade in a few days, but dye on your favorite jeans will not be so shy.
Step 5: Mix Your Dyes
If you’re using a one-step kit, you’ll usually add warm water directly to the bottles, then shake until the powder fully dissolves. With powdered dyes, follow the package instructions for the right water-to-dye ratio. Shake well so there are no clumps; undissolved powder can leave speckles or uneven spots on your design.
Step 6: Decide on a Simple Pattern
For a beginner-friendly project, start with one of these classic tie-dye patterns:
- Spiral: Pinch the center of the shirt and twist until it forms a flat disk, then secure with rubber bands into wedges.
- Crumple (scrunch): Crumple the fabric into a loose mound and bind it randomly with bands to create a marbled, galaxy-style pattern.
- Bullseye: Pinch where you want the center, pull the fabric up like a cone, and place rubber bands every few inches.
- Stripes: Accordion-fold the shirt in narrow pleats, then band across it every few inches.
Spirals and crumples are usually the easiest and most forgiving for first-timers.
Step 7: Fold and Tie Your Fabric
Once you’ve picked your pattern, fold and tie the shirt accordingly. Pull your rubber bands snugly, but not so tight that they cut into the fabric. The more folds and pleats you create, the more interesting your pattern will be. Those tight, compressed areas will resist the dye and become the white or lighter bits in your design.
Step 8: Place Your Project on a Protected Surface
Set your tied shirt on a wire rack over a tray, inside a shallow bin, or on top of a plastic-covered table. Elevating it slightly lets extra dye drip away instead of pooling underneath, which can muddy your colors.
Step 9: Apply the Dye
Now for the fun part. Using your squeeze bottles, apply dye to each section of the shirt. A few tips:
- Start with lighter colors (like yellow) and move to darker ones (like navy or black) so you don’t accidentally contaminate your bottles.
- Leave a bit of space between very dark and very light colors to avoid brown “mystery” zones.
- Flip the shirt and add dye to the back so the color soaks through the layers.
For a simple rainbow spiral, color each wedge a different shade and repeat the sequence on the back.
Step 10: Massage the Dye in (Gently)
Wearing your gloves, lightly squeeze and press the fabric to help the dye penetrate the folds. Don’t overwork it, or you’ll blend everything into one color. Think “gentle pat” rather than “full-body massage.”
Step 11: Wrap and Let the Dye Set
Place your dyed project in a plastic bag or wrap it in plastic wrap to keep it damp. Most fiber-reactive dyes need at least 6–8 hours to bond with the fabric, and 12–24 hours is even better for bold, saturated color. Leave it somewhere at room temperature and away from curious pets.
Step 12: Rinse Out the Extra Dye
When your patience (or the recommended time) runs out, it’s rinse time. Still wearing gloves, remove the bands and rinse the fabric under cold running water. Start with the tied sections intact if you want even less color bleed, then gradually untie and keep rinsing until the water runs mostly clear.
Step 13: Wash Separately
Wash your tie-dyed item by itself in the washing machine using cold water and a small amount of detergent. This removes any excess dye that didn’t bond with the fibers. Don’t toss it in with your regular clothes yet unless you’re hoping to surprise-dye your entire wardrobe.
Step 14: Dry Completely
Dry your item according to the fabric instructionsusually on a low to medium dryer setting or on a clothesline. Heat helps set the color, but avoid super-high temperatures that might shrink your shirt into toddler size.
Step 15: Wear and Enjoy Your Creation
That’s it! You’ve just made your own custom tie-dyed piece. Expect a little extra dye to wash out in the next one or two washes, so keep it separate or with similarly colored items. After that, your shirt should be as wearable and washable as anything else in your closetjust way more fun.
Simple Pattern Ideas for Beginners
Once you’ve mastered one basic project, you’ll probably start eyeing everything in your house like, “Can I tie dye that?” Here are a few easy pattern ideas, inspired by popular tie-dye tutorials and guides.
1. Classic Rainbow Spiral
This is the iconic festival T-shirt. Pinch the front center of your shirt, twist into a flat disk, then add rubber bands to divide it into 6 or 8 wedges. Apply a different color to each wedge, flipping to catch the back. The result is a vibrant swirl that radiates from the middle.
2. Monochrome Crumple
Perfect if you prefer something subtle. Crumple the shirt into a loose ball and bind it with rubber bands in several places. Use one color or a couple of shades in the same family (like navy and sky blue). You’ll get a marbled, cloudy pattern that’s great for hoodies, joggers, and loungewear.
3. Bullseye Target
Pinch where you want the bullseye to startcentered on the front, off to the side, or over the heart. Pull the fabric into a cone shape and wrap bands every 2–3 inches. Apply different colors to each banded section for rings of color that radiate outward.
4. Simple Stripes
Lay your shirt flat and fold it in an accordion from one side to the other, like a paper fan. Add rubber bands every few inches along the length. Apply dye between the bands, alternating colors for bolder stripes. This works especially well on long-sleeve shirts and pillowcases.
Safety Tips and Common Mistakes
Safety First
- Always wear gloves when working with dye, especially powdered dyes, and avoid breathing in the powder.
- Protect surfaces and keep dye away from food prep areas.
- Work in a well-ventilated space, particularly if you use soda ash or other additives.
Common Tie-Dye Mistakes (and How to Fix Them)
- Muddy or brownish colors: Too many colors touching or over-blending. Stick to 2–3 colors at first and leave small gaps between contrasting shades.
- Pale, washed-out results: Fabric might be synthetic, dye may be old, or set time too short. Use fresh dye, natural fibers, and allow a full 8–24 hours for setting.
- Big white “blank” areas: That can be a cool look, but if you don’t want that, apply more dye and gently work it into the folds. Also make sure the shirt starts slightly damp.
Care Tips to Keep Your Tie Dye Bright
After all that effort, you want your colors to stay happy, not sad and faded. Here’s how to keep your design looking fresh:
- For the first few washes, launder your tie-dyed items separately in cold water.
- Turn garments inside out before washing to reduce friction on the outer surface.
- Use a gentle detergent and avoid bleach or strong stain removers on the dyed areas.
- Line dry when possible, or tumble dry on low heat to preserve vibrancy.
Extra : Real-Life Tie-Dye Experiences and Pro Tips
The basic steps are simple, but a lot of tie-dye wisdom comes from real-life, slightly messy experience. Here are some practical lessons and examples that can help you skip a few beginner mistakes.
Start Small Before You Go Big
If this is your first time, resist the urge to start with your favorite expensive hoodie. Begin with something low-pressure like a plain cotton T-shirt, a bandana, or even old cotton napkins. Many experienced crafters recommend keeping a small pile of test fabric nearbythink scrap pieces of cotton or old undershirtsso you can experiment with color combos before committing to your main project.
For example, try a mini spiral on a small square of fabric. Test how that bright pink interacts with your turquoise. Do they blend into a nice purple, or do they fight and turn murky? Once you’ve seen the result on a test piece, you can apply the same colors with confidence to your shirt.
Think in Color Families
A simple trick to get consistently pretty tie dye is to stick with colors that play nicely together. Warm colors (reds, oranges, yellows) blend well with each other, as do cool colors (blues, greens, purples). When you mix across those familieslike red and greenyou risk creating brown where they meet. That can be intentional, but it’s rarely what beginners were hoping for.
Try this: choose three colors in the same family and arrange them in a rainbow order. For a cool spiral, go with turquoise, royal blue, and purple. For a warm, sunset design, pick yellow, orange, and fuchsia. You can always add more complexity once you’re comfortable predicting how colors will blend.
Photograph Each Stage Like Your Own “Picture Guide”
Since the classic wikiHow style includes lots of step-by-step photos, borrow that idea for your own projects. Take quick pictures with your phone at each stage: the plain shirt, the fold, the tied bundle, the dye applied, and the final reveal. Not only is this satisfying (who doesn’t love a before-and-after?), but it’s incredibly helpful for learning.
Later, when you’re admiring a favorite shirt, you can look back and see exactly how you folded and colored it. That makes it much easier to recreate the same patternor tweak it slightly to improve it next time. If you tie dye with friends or kids, these photos also make great memories and easy social media posts.
Turn Mistakes into “Design Choices”
One of the best things about tie dye is that it’s forgiving. Did your colors bleed more than you wanted? Congratulations, you’ve invented a dreamy watercolor effect. Did one corner stay almost completely white? Call it a negative-space design and lean into it.
If something really doesn’t turn out how you planned, you can often layer on another technique. A too-subtle pattern can be brightened with a second round of dye in a darker color. A shirt that feels too busy can be overdyed with a single shade to unify everything. Some people even reverse tie dye by using bleach on dark shirts to remove color and then re-dye over the lighter areas for a moody, galaxy vibe.
Make It a Group Activity
Tie dye is almost suspiciously perfect for parties, youth groups, camps, and family days. Set up a covered “dye station” outside with multiple colors, a stack of shirts, and plenty of gloves. Give everyone a quick demo of 2–3 basic folds, then let them experiment.
To keep things organized, write each person’s initials on the tag of their shirt with a permanent marker before they start dyeing. That way, when you have a mountain of rainbow bundles setting in plastic bags, you can still tell whose masterpiece is whose. Group projects are also a great way to see many different combinations of folds and colors in one session, which quickly expands your sense of what’s possible.
Customize Beyond T-Shirts
Once you’re comfortable, you can branch out to socks, tote bags, pillowcases, bandanas, and even cotton dresses or skirts. Smaller items are especially fun because they use less dye and set more quickly. Tie-dyed socks and bandanas make great gifts, and you can coordinate them with a shirt for a full matching set.
Remember the basics still apply: check the fiber content (natural fibers win), wash items before dyeing, and don’t overload with too many colors at once. When in doubt, lean on the same simple foldsspiral, crumple, bullseye, stripesand just apply them to new shapes and sizes.
Embrace the Surprise
Finally, the real magic of tie dye is the moment you cut off the rubber bands and unfold your fabric. Even the most experienced dyers can’t predict every single swirl and streak. That surprise is part of the charm. If you approach each project with curiosity instead of perfectionism, you’ll enjoy the process way more.
So lay out your supplies, twist up that shirt, and get ready for your own 15-step tie-dye adventure. Whether your final design looks like a sunset, a galaxy, or a happy accident, you’ll have created something one-of-a-kindand you’ll know exactly how to do it again.


