
Table of Contents >> Show >> Hide
- Before You Paint Anything, Figure Out What You’re Actually Looking At
- Can You Really Paint the Inside of a Freezer?
- When Painting Makes Senseand When It Doesn’t
- What You’ll Need
- How to Paint the Inside of a Freezer, Step by Step
- Step 1: Empty the freezer and unplug it
- Step 2: Clean the interior thoroughly
- Step 3: Inspect the damage like a detective, not a gambler
- Step 4: Wipe away dust and mask the surrounding area
- Step 5: Prime bare metal if necessary
- Step 6: Apply the paint in thin coats
- Step 7: Let it dry and cure fully
- Step 8: Restart the freezer and monitor the repair
- The Biggest Mistakes to Avoid
- Paint, Patch, or Replace? Here’s the Smart Rule
- Final Thoughts
- Real-Life Experience: What I Learned From Dealing With a Beat-Up Freezer Interior
If your freezer interior is chipped, rusty, stained, or just looks like it survived a tiny kitchen apocalypse, you may be tempted to grab the nearest can of paint and go wild. Fair enough. A battered freezer is not exactly giving “clean and organized home” energy. But painting the inside of a freezer is one of those projects where confidence alone is not a strategy.
The good news? In some situations, you can improve the inside of a freezer. The bad news? Not every freezer interior should be painted, and not every paint that claims to “refresh appliances” belongs anywhere near the food-storage zone. So before you channel your inner home-improvement hero, let’s talk about when painting makes sense, when it absolutely does not, and how to do it the smart way.
Before You Paint Anything, Figure Out What You’re Actually Looking At
This is the step most people skip, and it is also the step that separates a tidy repair from a regrettable weekend project.
Most freezer interiors are made from one of two materials: painted metal or molded plastic liner. If your interior is painted metal and the damage is mostly cosmeticthink small rust spots, chips, scuffs, or worn coating on a chest freezer floor or along a metal edgeyou may be able to repair it. If the inside is molded plastic, though, paint is usually the wrong fix.
That is because plastic liners behave differently from painted metal. They flex. They expand and contract. They also do not always hold paint well, especially in a cold, high-moisture environment. If your freezer has cracks in the liner, peeling layers, or exposed insulation, you are often better off using a liner repair kit, replacing a part, or leaving a cosmetic crack alone if the manufacturer says it does not affect performance.
In other words: if the inside of your freezer is plastic, step away from the paintbrush like it just insulted your family. If it is painted metal, keep reading.
Can You Really Paint the Inside of a Freezer?
Here is the honest answer: sometimes, but only in a limited, careful way.
Most mainstream appliance epoxy products are marketed for metal appliance surfaces and touch-ups, but many brands position them for the exterior of appliances, not the inside cavity. That means painting the entire inside of a freezer is not usually the best default recommendation. What does make sense is a smaller, targeted repair on painted metal where rust or chips are spreading and you want to stop the damage from getting worse.
So if you came here imagining a dramatic full interior color makeoversay, matte sage green freezer chicthis is the universe gently suggesting a different hobby. But if your goal is to clean up a rusting or chipped metal area so the freezer looks better and lasts longer, you are in business.
When Painting Makes Senseand When It Doesn’t
Painting makes sense if:
- The damaged area is painted metal, not plastic.
- The problem is cosmetic wear, rust spots, chips, or scuffs.
- You can fully defrost, dry, ventilate, and leave the freezer off long enough for proper curing.
- You are using a manufacturer-approved touch-up paint or a suitable appliance repair coating for small areas.
Painting does not make sense if:
- The interior is a plastic liner.
- The liner is cracked, split, bowed, or exposing insulation.
- You are trying to cover odor problems, mold damage, or structural issues with paint.
- You cannot leave the unit off long enough for the coating to dry and cure properly.
- You are planning to use regular wall paint, craft paint, or “whatever was in the garage.” That path leads only to sadness.
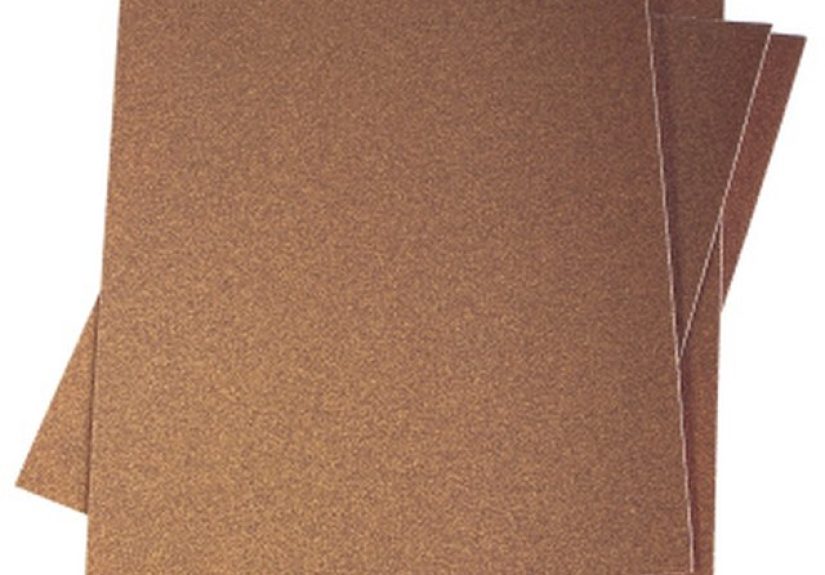
What You’ll Need
- Coolers or insulated bags for frozen food
- Towels and a shallow pan for defrost water
- Mild detergent or a baking soda cleaning solution
- Soft cloths or microfiber cloths
- Plastic scraper
- Fine- to medium-grit sandpaper
- Painter’s tape
- Rust-inhibiting primer, if bare metal or rust is exposed
- Appliance touch-up paint or appliance epoxy appropriate for the repair
- Disposable gloves
- Respirator or mask appropriate for paint fumes, if the product label requires it
One important note: for tiny chips and scratches, a bottle of appliance touch-up paint is usually a smarter choice than coating a big area. It is easier to control, dries faster, and is far less likely to turn your freezer interior into an accidental abstract art exhibit.
How to Paint the Inside of a Freezer, Step by Step
Step 1: Empty the freezer and unplug it
Start by removing all food and storing it in coolers. Then unplug the freezer or disconnect the power. Leave the door or lid open and let all frost melt naturally. Put towels around the base and use a pan or drain if your model has one.
Do not attack ice with a knife, screwdriver, or any tool that looks like it belongs in a medieval film. A plastic scraper is fine. Sharp tools can gouge the surface and make your repair job worse.
Step 2: Clean the interior thoroughly
Once the ice is gone, clean the interior with a mild detergent solution or a baking soda-and-warm-water mix. Wipe everything down, including shelves, walls, corners, and the gasket area. Then rinse if needed and dry it completely.
This step matters more than people think. Paint hates grease, grime, loose dust, and mystery residue from a bag of frozen berries that exploded in 2024. If the surface is not clean, the paint will not bond well, and all your effort will peel off later like a bad sunburn.
Step 3: Inspect the damage like a detective, not a gambler
Now that the interior is clean and dry, inspect the damaged spots. Are you looking at chipped paint on metal? Surface rust? A crack in plastic? If it is plastic liner damage, stop here and switch to a repair kit or manufacturer guidance. If it is painted metal, continue.
If there is rust, remove all loose rust and flaking paint first. Use medium-grit sandpaper to knock back the damaged area, then switch to finer grit to smooth the edges. The goal is not to grind the freezer into submission. You just want a sound, lightly scuffed surface that gives the coating something to grab.
Step 4: Wipe away dust and mask the surrounding area
After sanding, wipe the area with a clean, dry cloth until all dust is gone. Mask nearby surfaces if needed, especially if you are repairing a larger patch. This keeps the repair neat and prevents you from repainting places that were innocent.
Step 5: Prime bare metal if necessary
If sanding exposed bare metal or active rust, apply a rust-inhibiting metal primer if the paint system you chose calls for one. Follow the label exactly. Some appliance touch-up products are designed for direct application to small defects, while larger damaged metal areas may benefit from primer first.
Let the primer dry fully. Do not rush this part. Paint projects fail in two classic ways: bad prep and impatience. Most DIY disasters are basically those two problems wearing different outfits.
Step 6: Apply the paint in thin coats
For small chips, use appliance touch-up paint. For larger metal wear areas, use a suitable appliance epoxy coating only if the product instructions and surface type make sense for your repair. Apply thin, even coats rather than one thick blob that will sag, wrinkle, or stay tacky forever.
If you are brushing, feather the edges so the patch blends with the original finish. If you are coating a removable metal shelf or bin, it is usually easier and safer to paint that piece outside the freezer in a well-ventilated area. For an attached interior metal spot, work carefully and keep the coating localized.
Step 7: Let it dry and cure fully
This is the point where many people get impatient, plug the freezer back in too early, and then wonder why the finish looks rough, smells strange, or fails. Don’t do that.
Let the final coat dry and cure according to the product label. Dry-to-touch and fully cured are not the same thing. If the product says 24 hours, give it at least that long. If conditions are cool or humid, give it more time. Air out the freezer well before turning it back on and putting food back inside.
Step 8: Restart the freezer and monitor the repair
Once the coating is fully dry and any odor has dissipated, plug the freezer back in. Allow it to return to proper freezing temperature before reloading food. Over the next few days, keep an eye on the repair. If the spot bubbles, peels, or feels soft, the surface prep, product choice, or cure time was off.
The Biggest Mistakes to Avoid
Using the wrong paint: Standard household paint is not built for this job. It will not hold up well on appliance metal in a cold, moisture-prone environment.
Painting plastic liner walls: If the surface is liner plastic, paint is usually a shortcut that creates a bigger mess later.
Skipping the sanding: Glossy, damaged, or rusty metal needs to be scuffed so the new coating can bond.
Painting over rust: If rust is loose or active, it keeps working underneath the finish. Remove it first.
Turning the freezer back on too soon: Paint that has not fully cured and a freezer full of subzero air are not best friends.
Ignoring the gasket and door seal: If frost keeps coming back, the real issue may be the seal, not the paint. A beautiful repair on a badly sealing freezer is like putting lipstick on a snowstorm.
Paint, Patch, or Replace? Here’s the Smart Rule
If the damage is minor and on painted metal, paint or touch-up can be a reasonable fix. If the damage is a crack in a liner, use a liner repair approach instead of paint. If the interior is deteriorating badly, rust has spread widely, insulation is exposed, or the freezer is old enough to remember flip phones, replacement may be the better investment.
The smartest DIYers are not the ones who paint everything. They are the ones who know what not to paint.
Final Thoughts
Painting the inside of a freezer is not impossible, but it is definitely not a “grab a random brush and trust your instincts” project. The best results come from treating it as a repair, not a makeover. Confirm that the damaged area is painted metal. Defrost and clean thoroughly. Remove rust. Use the right appliance repair product. Apply thin coats. Let it cure completely. And if your freezer interior is plastic, cracked, or shedding pieces like a stressed-out croissant, skip the paint and look into a liner repair or replacement instead.
Done correctly, a small repair can make your freezer look cleaner, stop rust from spreading, and buy you more years before you need a replacement. Done carelessly, it can create peeling paint, lingering odor, and a truly annoying conversation with yourself three days later. Choose the first option.
Real-Life Experience: What I Learned From Dealing With a Beat-Up Freezer Interior
The first time I considered painting the inside of a freezer, I was feeling wildly optimistic. The freezer was old, the bottom panel looked rough, and there were a few rusty chips that made the whole thing look like it had been rescued from a suspicious garage sale. I told myself this would be easy. Clean it, paint it, done. A classic case of a person confusing confidence with expertise.
What I learned almost immediately is that freezer repairs are less about painting and more about patience. The longest part of the whole process was not the sanding or the touch-upit was emptying the freezer, keeping the food cold, waiting for the frost to melt, cleaning every surface, and then waiting even longer for everything to dry properly. I realized that most of the “hard” part is not technical. It is resisting the urge to rush.
I also learned that small repairs look better than dramatic ones. At first, I thought I should coat a huge section so everything would match perfectly. That was not the move. Once I cleaned the freezer thoroughly, I could see the actual problem areas much more clearly. Only a few spots truly needed attention. A targeted repair looked neater, took less product, and gave me a better chance of getting a smooth finish instead of a thick, obvious patch.
Another lesson: sanding matters more than you think, but over-sanding is a trap. The first few passes made the area look worse before it looked better, which is emotionally rude but technically normal. Once the loose paint and rust were gone, the surface finally felt stable. That was the turning point. Before that, any paint I applied would have just been decorating a problem instead of solving it.
The biggest surprise was how much cure time matters in a cold-appliance project. Paint that seems dry is not always ready for business. If I had plugged the freezer back in too early, I am pretty sure I would have locked in the smell and compromised the finish. Giving the repair extra time felt inconvenient in the moment, but it was absolutely worth it.
And maybe the most useful lesson of all: sometimes the best repair is deciding not to paint. On another older appliance, I found what looked like paint failure, but it turned out to be a liner issue instead. That changed the whole plan. Now I always start by asking a basic question: is this painted metal, or is this a liner problem pretending to be a paint problem? That one question saves time, money, and a remarkable amount of DIY heartbreak.
So yes, I came out of the experience with a better-looking freezer. But I also came out with a healthy respect for boring prep work, product labels, and the fact that home projects are often won in the quiet, unglamorous stages. Not on the final coat. Not in the dramatic before-and-after photo. In the cleaning, the drying, the sanding, and the decision to slow down enough to do the job right.


