
Table of Contents >> Show >> Hide
- Why Pruning Azaleas Is Different From Pruning Other Shrubs
- Quick Answer: When and How to Prune an Azalea
- Azalea Pruning Rules You Should Follow
- Best Tools for Pruning Azaleas
- Step-by-Step: How to Prune an Azalea Properly
- Step 1: Wait Until Blooming Ends
- Step 2: Inspect the Shrub Before Cutting
- Step 3: Remove Dead, Damaged, and Diseased Wood First
- Step 4: Remove Crossing and Inward-Growing Branches
- Step 5: Thin to Shape the Plant Naturally
- Step 6: (Optional) Light Deadheading for Appearance
- Step 7: Stand Back and Stop
- Step 8: Water and Mulch if Needed
- How to Rejuvenate an Overgrown Azalea
- Common Azalea Pruning Mistakes to Avoid
- Azalea Pruning by Type: Evergreen vs. Deciduous
- Quick FAQ
- Conclusion
- Experience-Based Tips: What Gardeners Commonly Learn the Hard Way (and Then Never Forget)
- SEO Tags
Azaleas are generous plants. Give them the right spot, decent soil, and a little respect with the pruners, and they will absolutely show off every spring. Give them a random haircut with hedge trimmers in late fall? Well… they will also remember that. Possibly forever. (Or at least until next bloom season.)
If you are wondering how to prune an azalea without ruining next year’s flowers, this guide walks you through the real rules, the right tools, and the step-by-step process gardeners actually use. You will also learn when not to prune, how to fix an overgrown shrub, and how to make your cuts look natural instead of “green meatball in formal mourning.”
Why Pruning Azaleas Is Different From Pruning Other Shrubs
Azaleas are not like fast-growing hedge shrubs that love constant clipping. Most azaleas bloom on flower buds that form months before the next spring bloom. That means timing matters a lot. Prune too late, and you remove the buds before they ever open.
Azaleas also look best when they keep their natural shape. In other words: selective cuts usually beat flat-top shearing. The goal is a healthy, airy, flower-filled shrub that still looks like an azalea, not a cube with trust issues.
Quick Answer: When and How to Prune an Azalea
Prune azaleas right after they finish blooming in spring. Use selective thinning cuts to remove dead, damaged, crossing, or overly long branches, and cut back to a side branch, crotch, or healthy bud. Avoid pruning in late summer or fall because azaleas are already setting flower buds for next year.
Azalea Pruning Rules You Should Follow
Rule 1: Prune Right After Bloom
This is the big one. For most spring-blooming azaleas, the best pruning window is immediately after flowering. Think of it as a short “cleanup and shaping” window. Many experts recommend finishing within a few weeks after bloom, and several extension guides warn against waiting into mid-summer because the plant begins setting buds for next year.
Practical rule: If the flowers are gone and fresh growth is starting, you are in the right zone. If summer is rolling along and you are hearing cicadas sing, you may be late.
Rule 2: Do Not Prune in Late Summer or Fall
Late-season pruning encourages tender new growth that may not harden off before cold weather. It also removes flower buds that are already forming. That is how people end up saying, “My azalea is healthy but didn’t bloom.” The shrub is innocent. The calendar is the culprit.
Rule 3: Prune With a Purpose
Do not prune just because you own pruners. Good reasons include:
- Removing dead, damaged, or diseased wood
- Improving airflow in a dense shrub
- Reducing size after it outgrows its space
- Restoring an old, leggy azalea
- Lightly shaping after bloom
If the plant is healthy, fits the space, and blooms well, it may need very little pruning.
Rule 4: Thin First, Shear Last (Usually Never)
Selective thinning is the preferred method for azaleas. That means removing individual branches back into the plant instead of clipping all branch tips at the same outer height. Thinning preserves the plant’s natural shape, brings light into the center, and helps keep flowers from being limited to the outer shell.
Hedge shearing can make the plant look neat for five minutes, but it often creates a dense outer crust of growth and a bare interior. Translation: fewer blooms inside, weaker airflow, and a shape that looks suspiciously like landscaping by chainsaw.
Rule 5: Make Hidden Cuts
When shaping azaleas, reach into the shrub and cut back to a branch junction or bud rather than chopping everything from the outside. Hidden cuts keep the plant looking natural and avoid that blunt, “buzzed” look.
Rule 6: Do Not Remove Too Much at Once
For routine pruning, go easy. A common gardener-friendly limit is to avoid removing more than about one-third of the shrub in one season unless you are doing a true rejuvenation pruning. Heavy cuts can stress the plant and reduce flowering the following year.
Rule 7: Sanitize Tools When Disease Is Involved
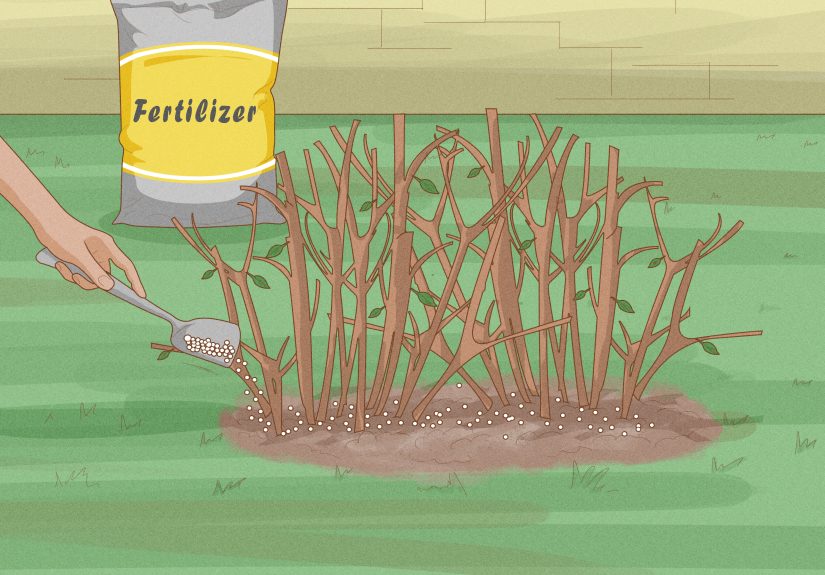
If you are removing diseased branches, clean your tools between cuts or at least between plants. Extension guidance commonly recommends disinfecting with rubbing alcohol (such as 70% isopropyl alcohol) or a properly mixed bleach solution. Also remove and trash diseased plant material instead of composting it.
Best Tools for Pruning Azaleas
You do not need a giant tool collection. You need the right tools, sharp blades, and about 20% self-control.
1) Bypass Hand Pruners
This is your main azalea tool. Bypass pruners make cleaner cuts than anvil-style pruners and are ideal for small stems and tip pruning. Clean cuts heal better and reduce tissue damage.
2) Loppers
Loppers give you leverage for thicker branches and deeper cuts inside mature shrubs. They are especially useful when an azalea has outgrown its spot and needs selective height reduction.
3) Pruning Saw
For old, woody stems, a small pruning saw is often better (and safer) than forcing loppers through a branch that is too thick.
4) Gloves
Azalea branches can be springy, scratchy, and weirdly committed to poking your knuckles. Gloves are worth it.
5) Disinfectant and Rag
Keep alcohol wipes, a spray bottle of rubbing alcohol, or another suitable disinfectant nearby if you are removing diseased wood. Wipe tools clean of sap and debris before disinfecting for best results.
6) Optional: Tarp or Garden Bag
Azalea pruning creates lots of twiggy trimmings. A tarp makes cleanup fast, and your future self will be thrilled.
Step-by-Step: How to Prune an Azalea Properly
Step 1: Wait Until Blooming Ends
Let the flowers finish their show. Once blooms fade, start pruning soon after. This timing protects next year’s buds and gives new growth time to mature.
Step 2: Inspect the Shrub Before Cutting
Walk around the plant and look at it from all sides. Ask:
- Is it too tall, too wide, or just a little messy?
- Are there dead, broken, or rubbing branches?
- Is the center dense and shaded?
- Are there one or two branches sticking out way beyond the rest?
This 30-second inspection prevents random cuts and gives you a better pruning plan.
Step 3: Remove Dead, Damaged, and Diseased Wood First
Start with the obvious cleanup. Cut dead or damaged branches back to healthy wood or to a branch junction. If a branch is diseased, cut back into healthy tissue and disinfect your tools as you go. Bag and discard diseased debris.
Step 4: Remove Crossing and Inward-Growing Branches
Crossing branches rub and create wounds. Inward-growing branches crowd the center and reduce airflow. Remove the weaker or poorly positioned branch, cutting it back to its point of origin. This improves structure and helps reduce that dense outer shell problem.
Step 5: Thin to Shape the Plant Naturally
Now shape the shrub by removing selected long shoots back inside the canopy. Make cuts at different heights so the plant keeps a soft, mounded form. This technique is better than clipping all tips to the same line.
Example: If one branch is reaching over a walkway, do not trim the whole shrub to match it. Follow that branch into the plant and cut it back where it joins a lower side branch. The walkway is clear, and the shrub still looks natural.
Step 6: (Optional) Light Deadheading for Appearance
Deadheading spent azalea blooms is optional. It can make the plant look tidier, but it is not required for plant survival. If you do it, pinch or clip the spent flower truss without damaging the new growth just below it.
Step 7: Stand Back and Stop
This is the step everyone forgets. Prune a little, then step back. Look from a distance. If the shape is balanced and open, stop. Azaleas rarely benefit from “just a few more cuts” when those cuts are made because you still have pruning energy left.
Step 8: Water and Mulch if Needed
After pruning, especially heavier pruning, keep the soil evenly moist (not soggy). Maintain a mulch layer to help moderate soil moisture and temperature, but keep mulch pulled slightly away from the main stem to prevent rot.
How to Rejuvenate an Overgrown Azalea
If your azalea is huge, bare underneath, or swallowing a window, you have two good options.
Option A: Gradual Rejuvenation (Safer and Prettier)
Over about three years, remove a portion of the oldest stems each year. This keeps some flowers every season while slowly rebuilding the shrub. It is slower, but it is the easiest approach for most home gardens and it looks less dramatic.
Option B: Hard Rejuvenation (Fast, Bold, Effective)
In late winter to very early spring, severely cut the plant back (some extension and gardening sources describe cutting to roughly 6 to 12 inches above the ground for true renewal). This can work well on azaleas, but you will likely sacrifice blooms that season. New shoots typically emerge strongly, and follow-up tip pruning later helps create branching and fullness.
Important: Hard pruning is a real technique, not a punishment. Use it when the shrub is truly overgrown, unhealthy-looking, or in the wrong place.
Common Azalea Pruning Mistakes to Avoid
- Pruning too late: You remove next year’s flower buds.
- Using hedge shears on everything: You get outer shell growth and fewer interior blooms.
- Cutting every stem to the same height: The shrub looks stiff and unnatural.
- Skipping cleanup cuts: Dead or diseased wood stays in the plant and may spread problems.
- Using dull tools: Ragged cuts heal slowly and damage tissue.
- Over-pruning a healthy shrub: Sometimes the best pruning is minimal pruning.
Azalea Pruning by Type: Evergreen vs. Deciduous
Many evergreen azaleas benefit from occasional shaping and maintenance pruning, especially in foundation plantings where size control matters. Deciduous azaleas, on the other hand, often need less pruning and are usually best left with a looser, natural form unless there is damage or crowding.
If you are not sure which type you have, just follow the universal rules: prune after bloom, thin instead of shear, and make cuts back to a branch or bud.
Quick FAQ
Can I prune azaleas in winter?
Routine pruning is usually a bad idea in winter because you may remove flower buds. Severe rejuvenation pruning is the main exception and is often done in late winter or very early spring before growth starts.
Can I prune azaleas in summer?
Only early summer, and preferably right after bloom. The later you wait, the more likely you are cutting off future flowers.
Do azaleas need pruning every year?
No. Many azaleas need only occasional cleanup and light shaping. If the plant fits the space and looks good, leave it mostly alone.
Should I use electric hedge trimmers?
Not for normal azalea shaping. They are great for formal hedges, but azaleas usually respond better to selective hand pruning with bypass pruners and loppers.
Conclusion
Learning how to prune an azalea is really about learning restraint and timing. Prune too hard, too late, or too evenly, and the plant looks awkward and blooms less. Prune right after flowering, make selective thinning cuts, and use the proper tools, and your azalea will keep its natural shape and reward you with a much better flower show.
The short version: prune with purpose, cut back to real branch points, avoid the late-season haircut, and let the shrub look like itself. Azaleas are already dramatic enough in bloom. They do not need a barbershop phase.
Experience-Based Tips: What Gardeners Commonly Learn the Hard Way (and Then Never Forget)
One of the most common experiences gardeners share with azaleas is this: the plant blooms beautifully for years, then suddenly it feels “too big,” and the first response is to trim everything evenly from the outside. The result often looks tidy for a week, but by the next season the shrub has a dense outer layer and a bare interior. Flowers shift to the surface, and the plant loses that soft, natural shape. The lesson? Azaleas usually respond better to thoughtful, inside-the-plant cuts than to topiary-style shearing.
Another frequent experience happens with timing. Many people wait until midsummer because life gets busy, then do a major pruning session when they finally have a free weekend. The shrub survives, but the following spring bloom is disappointing. That is often the moment the “prune right after flowering” rule becomes unforgettable. Once gardeners connect the timing to flower-bud formation, azalea care gets much easier. A simple reminder on the calendar right after bloom can save a lot of regret.
Gardeners who inherit older landscapes also run into a classic azalea problem: giant shrubs with healthy tops and a tangle of woody, leafless branches underneath. At first, the plant can look beyond help. But in many cases, selective thinning or staged rejuvenation works surprisingly well. People are often shocked by how much better the shrub looks after removing a few old canes and opening the center to light. It does not require perfection; it just requires a plan and a willingness to cut a few big branches instead of hundreds of tiny tips.
There is also the tool lesson. A lot of pruning frustration comes from using the wrong tool for the branch size. Dull hand pruners crush stems, oversized loppers are awkward in tight spaces, and hedge trimmers create fast but sloppy results. Gardeners who switch to a sharp pair of bypass pruners for detail work and loppers for the thicker stems usually notice an immediate difference: cleaner cuts, less hand strain, and a shrub that looks naturally shaped instead of abruptly “cut back.”
Finally, experienced gardeners often mention that azaleas reward patience. A pruning session can make the plant look a little sparse for a few weeks, especially if you did a meaningful thinning. But as new growth fills in, the structure looks better, airflow improves, and the bloom display is often stronger and more evenly distributed. In other words, azalea pruning is one of those jobs where the best results do not always appear the same day. The payoff shows up next season, when the shrub flowers well and still fits the space without looking forced.
If you are new to pruning azaleas, start small. Remove dead wood, take out a few crossing branches, shorten one or two strays, and stop. You can always prune a bit more later, but you cannot tape branches back on. Most gardeners who become “good at azaleas” did not get there by cutting boldly the first time; they got there by pruning carefully, watching the plant respond, and improving each season.


