
Table of Contents >> Show >> Hide
- Can Your Shoes Actually Be Resoled?
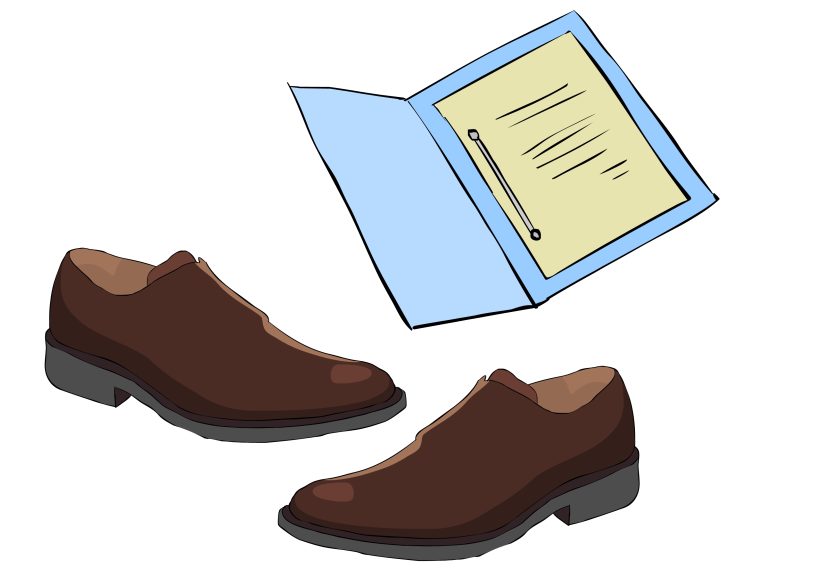
- Tools and Materials You’ll Need
- How to Resole Your Footwear in 11 Steps (with “Mental Pictures”)
- Step 1: Inspect the Shoes and Decide if They’re Worth Resoling
- Step 2: Remove the Old Soles
- Step 3: Clean and Roughen the Bottom of the Shoe
- Step 4: Prepare the New Soles
- Step 5: Roughen the New Soles
- Step 6: Apply Contact Cement to Both Surfaces
- Step 7: Align and Attach the New Soles
- Step 8: Clamp and Let the Glue Cure
- Step 9: Trim Excess Sole and Shape the Edges
- Step 10: Add Traction (Optional)
- Step 11: Break In and Maintain Your “New” Shoes
- How Often Can You Resole a Good Pair of Shoes?
- DIY vs. Professional Resoling: When to Call the Cobbler
- Frequently Asked Questions About Resoling Footwear
- Real-Life Resoling Experiences and Lessons Learned
- Conclusion: Save Your Soles, Save Your Shoes
If your favorite boots or sneakers are falling apart at the soles, don’t panic and don’t rush to throw them out just yet. Learning how to resole your footwear is like unlocking a “new game plus” mode for your shoes: you keep the comfy, broken-in uppers and simply give them a brand-new base. With a little patience, the right glue, and a steady hand, you can safely resole many types of shoes at homeand know when it’s smarter to call in a professional cobbler.
In this guide, we’ll walk through 11 clear steps (with suggestions for pictures you can create) to resole your shoes, plus practical tips on which shoes can be saved, how often they can be resoled, and what real-life DIYers wish they’d known before they started. By the end, you’ll be able to look at a worn sole and think, “Challenge accepted,” instead of “Guess I need to buy new shoes.”
Can Your Shoes Actually Be Resoled?
Before you whip out the glue, you need to know if your footwear is a good candidate for resoling. Not all shoes are built the same. Higher-quality shoes with stitched or welted construction are usually designed to be resoled multiple times, while cheap, fully glued “fast-fashion” styles might not be worth the effort or cost.
Best candidates for resoling
- Goodyear-welted dress shoes and boots – The soles are stitched to a welt, which makes them relatively easy for cobblers to remove and replace.
- Stitch-down boots – Common in work boots and heritage styles; the upper is flared and stitched directly to the midsole.
- Leather-soled shoes with a separate heel – Heels and soles can often be swapped out several times.
- Climbing shoes and approach shoes – These usually have thin rubber soles that many specialized shops or experienced DIYers can replace.
- Quality work boots – Brands that advertise rebuild or resole services are almost always resole-friendly.
Shoes that are hard or impossible to resole
- Cheap sneakers with fully molded soles – When the upper and sole are essentially fused into one piece of plastic or foam, there’s nothing to separate.
- Very thin, fully glued fashion shoes – Even if you manage to glue on a new layer, it may not bond well or flex correctly.
- Uppers that are cracked, torn, or warped – If the leather or fabric is destroyed, a new sole won’t magically fix the shoe.
As a rule of thumb, if you paid more for the shoes and they use stitched or welted construction, resoling makes more economic and environmental sense than replacing them.
Tools and Materials You’ll Need
You don’t need a full cobbler’s workshop to resole your shoes at home, but you do need a few key tools and supplies. Many DIY resolers use a setup similar to what professional guides recommend.
- Replacement soles or rubber sheets – Pre-cut soles or Vibram-style sheets you can trim to shape.
- Contact cement or shoe adhesive – Such as Barge cement or a high-strength shoe glue formulated for rubber and leather.
- Utility knife or cobbler’s knife – For carefully cutting away old soles and trimming new ones.
- Sandpaper or a sanding block – 60–120 grit for roughing surfaces and cleaning off old adhesive.
- Clamps or heavy weights – To hold the shoe and sole together while the adhesive cures.
- Marker or pen – For tracing the outline of your shoes onto the new sole material.
- Rags and solvent (like acetone) – For cleaning off old glue and oilsuse with good ventilation.
- Safety gear – Gloves, eye protection, and ideally a respirator mask if you’re using strong contact cement.
How to Resole Your Footwear in 11 Steps (with “Mental Pictures”)
Step 1: Inspect the Shoes and Decide if They’re Worth Resoling
Put your shoes on a flat surface and look at them from all angles. Are the uppers in good condition? Any deep cracks, separated seams, or serious water damage? If the leather or fabric is falling apart, you’re better off replacing the shoes or taking them to a professional for a full rebuild rather than just a resole.
Step 2: Remove the Old Soles
Use your utility or cobbler’s knife to carefully separate the old sole from the midsole or upper. Start at the heel or toe and gently pry, cutting through any remaining glue as you go. Work slowlythis is not the time to test your speed-running skills. You want to save as much of the midsole and welt as possible.
For stitched shoes, you may need to cut or remove the old stitching. If the stitches are visible around the edge, snip them carefully and pull out the threads as you peel away the sole.
Step 3: Clean and Roughen the Bottom of the Shoe
Once the old soles are removed, scrape off any remaining glue. Use sandpaper to roughen the surface evenly. The goal is a clean, slightly textured base so your new adhesive has something to grip. Wipe the area with a rag lightly dampened with acetone or another appropriate solvent to remove dust and oils, then let it dry completely.
Step 4: Prepare the New Soles
Place each shoe on the new sole material and trace around it with a marker. Cut just outside the lineit’s better to have a little extra rubber you can sand down later than to cut the sole too small. Try fitting the rough-cut sole against the shoe and trim in small increments until it matches the outline closely.
Step 5: Roughen the New Soles
Just like the bottom of the shoe, the underside of your new soles needs some texture. Lightly sand the contact surface of each sole. If the rubber is glossy, keep sanding until it looks a bit dull. This helps the contact cement form a stronger bond.
Step 6: Apply Contact Cement to Both Surfaces
Following the directions on your adhesive, apply a thin, even coat of contact cement to the bottom of the shoe and the undersides of the new soles. Avoid puddles or dripsmore glue does not equal more strength. Most shoe glues need to sit for several minutes until the surfaces are tacky, not wet.
Work in a well-ventilated area and wear a mask if recommended; these adhesives can be potent, and there’s no hero badge for inhaling fumes.
Step 7: Align and Attach the New Soles
When the glue is tacky, carefully line up the sole starting at the toe. Once contact cement touches, it grabs quickly, so you want your first contact point to be accurate. Press from toe to heel, smoothing out any air pockets as you go. Then firmly press the sole into place all around the edges.
If you misalign slightly, don’t panicbut do correct it immediately if you can. For bigger mistakes, you may need to gently pry the sole up and reapply glue, which is why slow, deliberate alignment is your friend.
Step 8: Clamp and Let the Glue Cure
Use clamps, straps, or heavy weights (like stacks of books) to press the soles and shoes together while the glue cures. Make sure pressure is applied evenly from heel to toe. Leave the shoes alone for the full curing time recommended on the adhesiveoften 12–24 hours. This is the hardest step for impatient people, but it’s crucial for long-lasting results.
Step 9: Trim Excess Sole and Shape the Edges
After the glue has fully cured, use your knife to trim away any rubber that sticks out beyond the upper. Keep your cuts smooth and controlled. Then switch to sandpaper or a file to round and blend the edges so the sole looks like it was always part of the shoe.
If you want a more professional finish, you can bevel the edges slightly and polish them with finer sandpaper.
Step 10: Add Traction (Optional)
Some replacement soles come with aggressive tread patterns already molded in. If yours are flat, you can lightly roughen them with coarse sandpaper or use a file to create small grooves for extra grip. Don’t overdo itjust enough texture to reduce slipping on smooth surfaces.
Step 11: Break In and Maintain Your “New” Shoes
Slip your shoes on and take them for a short test walk on a clean, dry surface. New soles may feel a bit stiff for the first day or two. After that, treat your freshly resoled shoes like the long-term investment they are: keep them clean, condition leather uppers, use shoe trees for dress shoes, and avoid letting the soles wear down so far that holes appear before the next resole.
How Often Can You Resole a Good Pair of Shoes?
There’s no universal number, but high-quality welted shoes and boots can often be resoled multiple timessometimes three, four, or even more, depending on how well the uppers are maintained and how aggressive the wear is. Some boot brands report that customers resole popular models three to five times over many years.
Key factors that affect how many resoles you’ll get include:
- Construction quality – Strong welts, quality midsole materials, and robust stitching last longer.
- How you use them – Daily city walking is one thing; concrete job sites, motorbike shifting, or mountain trails are another.
- Maintenance habits – Cleaning, conditioning, and drying shoes properly after they get wet all extend their life.
DIY vs. Professional Resoling: When to Call the Cobbler
DIY resoling is absolutely doable for patient beginners, especially on inexpensive boots you’re willing to experiment on. But there are times when paying a professional is the smart move:
- High-end dress shoes or heritage boots – If you’ve invested several hundred dollars, a professional resole helps preserve the value and aesthetics.
- Complex constructions – Certain welted or layered soles, stacked leather heels, or specialty midsoles are trickier to rebuild at home.
- Severely damaged shoes – If the welt or midsole is rotted, cracked, or deformed, you may need a full rebuild, not just a new outsole.
- Zero-margin footwear – If you absolutely can’t risk ruining the pair (they’re sentimental or hard to replace), let an expert handle it.
Many cobblers also offer mail-in resoling services, so even if there’s no local shop that pops up on Google Maps, there may still be a small business ready to rescue your soles from afar.
Frequently Asked Questions About Resoling Footwear
Can I resole sneakers?
Sometimes, but it’s trickier. Traditional leather dress shoes and boots are designed with resoling in mind; most running shoes and lightweight sneakers are not. That said, some people successfully glue new rubber patches or skateboard-style soles onto canvas or vulcanized sneakers as a repair or customization project. Just keep expectations realisticperformance won’t be identical to a factory sole.
Is resoling worth it financially?
For well-made shoes, yes. The cost of a professional resole is often far less than replacing them with a shoe of similar quality, and DIY resoling can be even cheaper once you have the basic tools. For very inexpensive or poorly constructed shoes, though, it might not make sense to invest in new soles.
Can I resole climbing shoes myself?
You can, but it’s more advanced. Climbing shoes use thin, sticky rubber, and the shape of the toe and rand is critical for performance. Many climbers prefer to send shoes to a specialist resoler who works specifically with climbing footwear. If you do try DIY, practice on older pairs first and follow detailed guides geared toward climbing shoes.
How do I know it’s time to resole?
Look for excessive thinning, visible midsole or cork, deep heel wear, or smooth, slippery tread. For work boots, it’s important not to let soles get so worn that they become unsafelosing traction on ladders or wet floors is not the kind of adventure you want.
Real-Life Resoling Experiences and Lessons Learned
Articles and guides are great, but nothing beats real-world stories to highlight what works (and what definitely does not) when resoling your footwear.
First up: the “thrift-store hero” scenario. Imagine you find a pair of high-quality leather boots at a secondhand shop. The uppers look amazingno cracks, stitching is tight, leather is still supplebut the soles are destroyed. This is a textbook case where resoling is almost always worth it. For the price of a modest resole job at a cobbler or a weekend DIY project, you end up with boots that might have cost several hundred dollars when new. Many frugal fashion and sustainability enthusiasts rely on this approach to build entire wardrobes of long-lasting shoes.
Then there’s the “I waited too long” story. A lot of people don’t think about resoling until their shoes are literally falling apart. By that point, you might see holes all the way through the outsole and into the midsole or even the insole layer. When that happens, the repair becomes more expensive and complicated because the cobbler may need to rebuild not just the outsole, but the structural layers inside the shoe as well. DIYing that level of repair is possible but far more advanced. The lesson: once you notice serious thinning or uneven wear, schedule that resole sooner rather than later.
Another common experience comes from people with physically demanding jobsconstruction workers, hospitality staff, retail employeeswho are on their feet for eight to twelve hours a day. Instead of buying cheap work boots every year, many switch to higher-quality, resole-able boots. Over several years, they might resole the same pair multiple times, ultimately spending less money and enjoying better comfort and support. They often report less foot fatigue and fewer aches simply because the uppers mold perfectly to their feet over time, while the soles get refreshed whenever needed.
Hobbyists and DIY tinkerers also share a lot of trial-and-error stories. Some brag about their first successful resole, complete with slightly crooked edges and a proud “I did this myself!” feeling. Others admit that their first attempt was messy: too much glue, poorly aligned soles, or surfaces not sanded enough, leading to early separation. What separates the success stories from the frustrating ones is usually patiencewaiting for glue to become properly tacky, clamping long enough, and not rushing the sanding and shaping steps.
There are also cautionary tales about using the wrong adhesive. Multipurpose household glues that aren’t designed for flexible materials often crack or peel after a few walks. Shoe-specific adhesives and contact cements remain more elastic and hold up better to the bending and twisting that soles endure. People who switch to the right glue frequently report dramatically longer-lasting repairs.
Finally, a lot of resoling veterans talk about the emotional side of the process. Shoes that carried someone through big life eventsfirst jobs, important trips, everyday routinescan feel almost like old friends. Resoling them is more than a practical repair; it’s a way to extend the story. Instead of throwing beloved footwear into a landfill, you get to keep walking in them, mile after mile, with a sense of satisfaction every time you look down and see those refreshed soles.
If you’re on the fence about trying your first resole, start with a low-risk pairthrifted boots or older shoes that you like but wouldn’t be devastated to mess up. Follow the 11 steps carefully, be generous with your prep time, and don’t rush the curing stage. After you’ve successfully brought one pair back to life, you’ll never look at worn soles the same way again. You’ll see potential instead of problemsand that’s a pretty empowering shift for both your feet and your wallet.
Conclusion: Save Your Soles, Save Your Shoes
Resoling your footwear is a practical skill with big payoffs: you spend less money over time, send fewer shoes to the landfill, and keep your favorite pairs in rotation for years instead of months. By learning which shoes can be resoled, using the right tools and adhesives, and following a clear 11-step process, you can confidently tackle many repairs at homeand know when it’s wiser to hand them over to a pro.
The next time you notice worn tread or thinning heels, don’t assume your shoes are done for. With a bit of care and patience, resoling lets you keep walking in comfort, style, and maybe even a little smug satisfaction that you’ve outsmarted fast fashion and treated your footwear like the long-term investment it was meant to be.


