
Table of Contents >> Show >> Hide
- Before You Start: A 5-Minute Checklist That Saves Hours
- Method 1: Quick Start (Wireless iPhone-to-iPhone Transfer)
- Method 2: Wired iPhone-to-iPhone Transfer (Quick Start, but Faster)
- Method 3: Computer Backup & Restore (Finder / Apple Devices App / iTunes)
- Which Method Should You Choose?
- Bonus: Only Need a Few Things? Use AirDrop (Selective Transfers)
- Troubleshooting: Fix the Stuff That Makes People Yell at Phones
- Conclusion: You Can Absolutely Upgrade Without iCloud
- Experience Section: What It’s Actually Like ( of Real-World Transfer Wisdom)
iCloud is greatuntil it politely informs you that your entire digital life is larger than 5GB.
If you’re upgrading iPhones and don’t want to use iCloud (or you’re on slow internet, or you simply enjoy
living off the cloud-grid like a techy mountain hermit), you still have solid options.
Below are three reliable ways to transfer data between iPhones without iCloudincluding the fastest “plug in and go”
method, plus the classic computer backup approach that feels like 2012 (but works like a charm).
I’ll also sprinkle in practical tips, common failure points, and a few “learn from my mistakes” moments so you don’t have to.
Before You Start: A 5-Minute Checklist That Saves Hours
Any data transfer is basically a tiny road trip. If you don’t pack snacks, you will suffer. Do this first:
- Charge both iPhones to at least 50% (or keep them plugged in the whole time).
- Update iOS on the old iPhone if you can. Transfers are smoother when devices speak the same “iOS dialect.”
- Use stable Wi-Fi (even if you’re not using iCloud). Many steps still need the internet for activation and app downloads.
- Have your Apple Account password ready. Your new iPhone will ask eventuallyusually when your hands are wet or you’re late.
- Free up space on the new iPhone if it’s not brand new. Transfers can’t squeeze a 200GB life into a 128GB phone.
Quick reality check: What “without iCloud” really means
You can transfer without iCloud storagebut you’ll still use your Apple Account to sign in, activate the device,
and re-download apps from the App Store. Your data moves directly phone-to-phone or via a computer, not via iCloud backups.
Method 1: Quick Start (Wireless iPhone-to-iPhone Transfer)
This is the easiest method for most people. Apple basically turns your old iPhone into a “setup wizard sidekick”
that walks your new iPhone through the whole moveapps, settings, photos, messages, and morewithout iCloud backup storage.
Best for
- Brand-new iPhone setup (you’re on the “Hello” screen)
- People who want the most “it just works” experience
- Anyone who doesn’t want to touch a computer with a 10-foot Lightning cable
Step-by-step: Wireless Quick Start transfer
-
Turn on the new iPhone and place it near your old iPhone (within a few inches).
Keep Bluetooth on. - When your old iPhone shows the Quick Start prompt, tap Continue.
- Use the old iPhone’s camera to scan the swirling setup animation on the new iPhone (it’s like a QR code’s artsy cousin).
- Enter your old iPhone passcode on the new iPhone when asked, then follow the prompts (Face ID/Touch ID, Apple Account sign-in, etc.).
- On the Apps & Data step, choose Transfer from iPhone.
- Wait. Keep both phones close together and plugged in. Don’t wander off like you’re microwaving popcorn.
Pro tips to avoid a slow or failed transfer
- Keep them plugged inbattery saver modes and low power can throttle the transfer.
- Don’t use either phone during transfer. Yes, even “just one quick TikTok.”
- If the prompt disappears, restart both devices and try again.
-
If your old phone is packed with photos and videos, expect time.
(Your new iPhone might finish “setup” first and then keep downloading apps/content in the background.)
What might not transfer perfectly?
Most people get a near clone of their old iPhone, but a few things commonly require re-checking:
- Apple Pay cards often need to be re-added for security reasons.
- Some apps may require you to log in again (especially banking and authenticator apps).
- eSIM / carrier activation may prompt steps depending on your carrier.
Method 2: Wired iPhone-to-iPhone Transfer (Quick Start, but Faster)
Think of this as Method 1 with a caffeine boost. It’s still Quick Start, still iPhone-to-iPhone,
but using a cable connection to speed things up and reduce wireless weirdness.
If you have a ton of dataor Wi-Fi that behaves like it’s hauntedthis is your move.
Best for
- Large transfers (hundreds of GB)
- Unreliable Wi-Fi environments (dorms, offices, “someone is always resetting the router” households)
- Anyone who prefers “plugged in” reliability
What cable do you need?
It depends on your iPhone generation:
- iPhone 15 or later → iPhone 15 or later: USB-C to USB-C cable.
- iPhone 14 or earlier → iPhone 15 or later: USB-C to Lightning cable.
- iPhone 14 or earlier → iPhone 14 or earlier: Lightning-to-USB 3 Camera Adapter + Lightning cable (and external power for the adapter).
Step-by-step: Wired transfer
- Connect the two iPhones using the correct cable/adapter setup.
- Turn on the new iPhone and place it near the old one (yes, still do thisQuick Start needs proximity).
- Follow the same Quick Start prompts and choose Transfer from iPhone when asked.
- Let it finish before using either iPhone. Wired can be faster, but it still needs time.
Why wired is sometimes dramatically better
Wireless transfers can slow down due to interference (neighbors, smart TVs, microwavesyes, microwaves),
while a cable connection stays consistent. If you’re moving a huge photo library or lots of app data,
wired transfer can feel like switching from a bicycle to a train.
Method 3: Computer Backup & Restore (Finder / Apple Devices App / iTunes)
This is the “no-nonsense” method: you back up your old iPhone to a computer, then restore that backup to the new iPhone.
It’s especially useful if your iPhones aren’t cooperating with Quick Start, or if you want a local backup you control.
Best for
- People who want a local backup they can keep (and even archive)
- Situations where Quick Start fails repeatedly
- Anyone who wants the most complete transfer possible (especially with an encrypted backup)
Important: Use an encrypted backup if you want the “most complete” restore
An encrypted computer backup can include sensitive items that a non-encrypted backup may not,
like saved passwords, Wi-Fi settings, website history, Health data, and call history.
Translation: if you want your new iPhone to feel like your old one instantly, encryption is your friend.
(Write down the password. Seriously. Tattoo it on your soul.)
How to back up your old iPhone to a computer
- Connect the old iPhone to your computer using USB.
-
Open:
- Finder (macOS Catalina / 10.15 or later)
- Apple Devices app (Windows, on supported setups)
- iTunes (older Windows setups or older macOS)
- Select your iPhone in the sidebar/device list.
-
Choose Back up to this computer.
Turn on Encrypt local backup if available, then set a password you won’t forget. - Click Back Up Now and wait for completion.
How to restore that backup to your new iPhone
- Turn on the new iPhone and go through setup until you reach Apps & Data.
- Choose Restore from Mac or PC.
- Connect the new iPhone to the same computer you used for the backup.
- In Finder / Apple Devices / iTunes, select Restore Backup and pick the most recent backup.
- If the backup was encrypted, enter the password. Then let it complete.
Common gotchas (and how to dodge them)
-
“My new iPhone is already set up.”
Restores generally require the new iPhone to be in a fresh setup state. If you’ve already set it up,
you may need to erase it and start again. -
“I forgot the encrypted backup password.”
There’s no magic back door. You may need to create a new encrypted backup and restore from that instead. -
“My backup is huge and my laptop is tiny.”
Make sure your computer has enough free storage. Backups are not known for being minimalist.
Which Method Should You Choose?
| Method | Speed | Best Use Case | What You’ll Love |
|---|---|---|---|
| Quick Start (Wireless) | Fast (depends on Wi-Fi/data size) | Most upgrades with a new iPhone | Super simple, no computer |
| Quick Start (Wired) | Often fastest | Big transfers / unreliable Wi-Fi | Stable, fewer dropouts |
| Computer Backup & Restore | Moderate | Quick Start issues / want a local archive | Great control; encrypted backup can be very complete |
Bonus: Only Need a Few Things? Use AirDrop (Selective Transfers)
If you’re not trying to clone your whole phonemaybe you just want photos, a couple of documents, or a video
AirDrop is the fastest “grab-and-go” option. It’s not a full migration method, but it’s a lifesaver for
selective transfers.
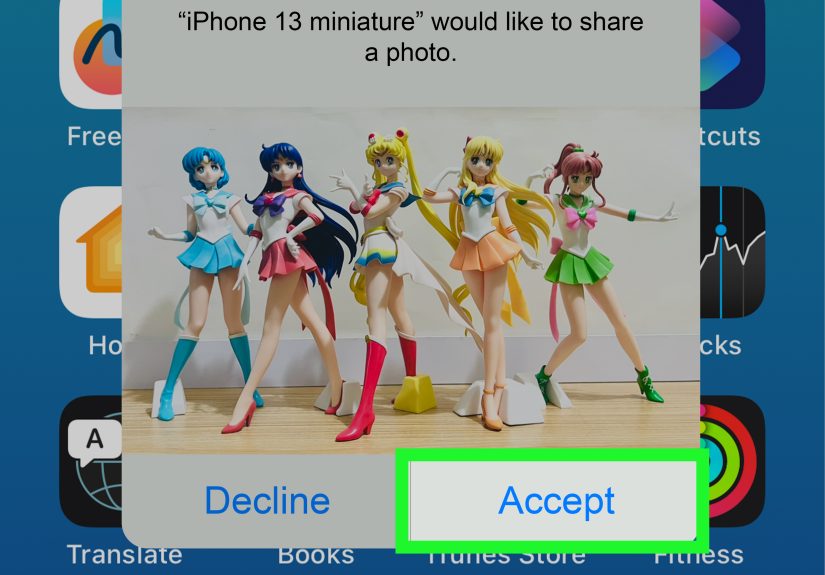
- Open the file/photo, tap Share, then tap AirDrop.
- Select the other iPhone when it appears.
- Accept the transfer on the receiving iPhone.
Privacy tip: set AirDrop to receive from Contacts Only (or use the temporary “Everyone for a limited time” setting if available),
then turn it back off when you’re done. AirDrop is amazing, but “Random Stranger’s iPhone” should not be in your sharing circle.
Troubleshooting: Fix the Stuff That Makes People Yell at Phones
Quick Start won’t show up
- Turn on Bluetooth and Wi-Fi on the old iPhone.
- Restart both iPhones and try again.
- Make sure the new iPhone is at the “Hello”/setup screen and close to the old iPhone.
Transfer is taking forever
- Plug both iPhones into power.
- Switch to the wired transfer method if you can.
- Avoid heavy Wi-Fi usage nearby (big downloads, streaming, online gaming, summoning storms).
Not enough space on the new iPhone
- Delete large items you don’t need on the old iPhone before transferring.
- Consider moving huge videos/photos to a computer first, then re-import what you actually want.
- Be honest with yourself about how many “duplicate screenshots of directions to a restaurant that closed in 2021” you need.
Conclusion: You Can Absolutely Upgrade Without iCloud
If iCloud storage is not part of your plan (or budget), you’re not stuck. For most people, Quick Start is the easiest win.
If you have a lot of data or flaky Wi-Fi, go wired. And if you want maximum controlor you like having a local safety net
do a computer backup and restore, ideally encrypted.
Pick the method that matches your reality: your cables, your Wi-Fi, your patience level, and the size of your photo library.
Your new iPhone should feel like homenot like a vacant apartment with one lonely app icon.
Experience Section: What It’s Actually Like ( of Real-World Transfer Wisdom)
Let’s talk about the part guides don’t always capture: the emotional journey of transferring iPhone data.
On paper, it’s “tap a button and wait.” In real life, it’s more like hosting two tiny robots that demand snacks (power)
and panic if you walk away for 30 seconds.
The first time I did a wireless Quick Start transfer, I treated it like making toast. I started it, wandered off,
and came back expecting “ding!” Instead, both phones looked offended. One was dimmed, the other was asking for my Apple Account password,
and the transfer estimate had transformed from “12 minutes” into the vague existential concept of “Time.”
Lesson one: park both phones on chargers and babysit the first few minutes.
Once the transfer is truly underway, you can relaxbut early on, it asks questions like a toddler at bedtime.
Then there was the “I have amazing Wi-Fi” eraalso known as “I have Wi-Fi that collapses when someone opens the fridge.”
Wireless transfers can be fast, but if you live in a crowded apartment building where every router is named “FBI_SURVEILLANCE_VAN,”
interference is real. That’s when the wired transfer method became my hero. The vibe is instantly calmer: fewer pauses, fewer hiccups,
fewer dramatic progress bar mood swings. If you’re transferring a big photo library, wired feels like cheating.
It’s not always glamorous (you may need adapters that look like they were designed by a committee of octopuses),
but once it’s connected, it’s steady.
The computer backup method is the one I use when I want a safety net. It’s also the method that teaches respect for passwords.
An encrypted backup is incredible because it can bring over the “deep stuff” like saved passwords and Health data
which makes the new iPhone feel immediately familiar. But if you forget that encryption password, you’ll discover a harsh truth:
your backup is now basically a locked treasure chest at the bottom of the ocean. No hacks. No secret questions.
Just you, your regret, and the realization that “Password123” would have been easier to remember (but please don’t).
The practical move: write the password down somewhere secure, or use a reputable password manager.
Finally, there’s AirDropthe method that makes you feel like a tech wizard when you only need a few things.
I’ve used it to move a handful of photos, a PDF, and a video without committing to a full migration.
The trick is to keep AirDrop discoverability tightbecause the only thing worse than losing a file
is accidentally offering it to a stranger’s iPhone in the coffee shop like you’re handing out party favors.
Use it, love it, and then turn it back down to “Contacts Only” when you’re done.
Bottom line: transferring iPhone data without iCloud is totally doableand once you’ve done it once,
you’ll wonder why it ever felt intimidating. Keep devices powered, pick the method that matches your environment,
and don’t underestimate the power of a cable when Wi-Fi decides to cosplay as a potato.


