
Table of Contents >> Show >> Hide
- What “Whitewashing Brick” Really Means
- Before You Start: The Brick Reality Check
- Tools and Materials Checklist
- How to Whitewash Interior Brick
- How to Whitewash Exterior Brick
- Step 1: Choose the right weather window
- Step 2: Clean like you mean it
- Step 3: Address efflorescence and salt deposits
- Step 4: Fix what water will exploit
- Step 5: Pick a breathable approach
- Step 6: Test a small area first
- Step 7: Apply from top to bottom, keep a wet edge
- Step 8: Cure, then baby it a little
- Best Whitewash Mix Ratios (So You Don’t Play “Paint Soup” All Day)
- Common Whitewashing Mistakes (and How to Avoid Them)
- Maintenance: Keeping Whitewashed Brick Looking Good
- FAQ
- Conclusion
- Real-World Experience: of “I Learned This So You Don’t Have To”
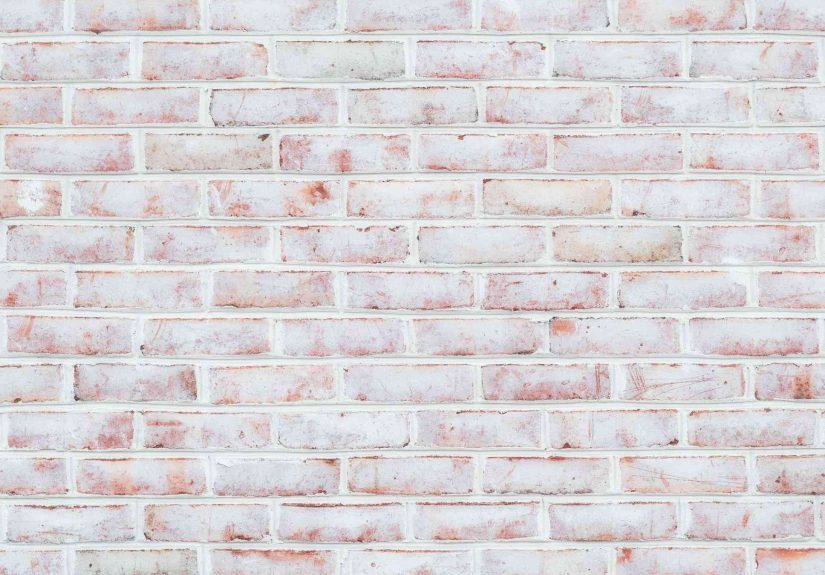
Brick has personality. Sometimes it’s charming and vintage. Sometimes it’s giving “pizza parlor in 1994.”
Whitewashing is the sweet spot between embracing brick and burying it under a thick coat of paint.
Done right, you keep the texture, soften the color, and make the whole space feel brighterwithout turning your wall into a flat, featureless rectangle.
This guide walks you through how to whitewash brick indoors and outdoors, including the best mix ratios,
prep steps that actually matter, product choices (paint wash vs. limewash), and the mistakes that cause peeling, blotchiness,
or that “why is it chalky everywhere I touch?” surprise.
What “Whitewashing Brick” Really Means
Whitewashing brick is a technique where you apply a thin, semi-transparent coating so the brick’s color and
texture still show throughjust calmer, lighter, and more “architectural magazine” than “basement rec room.”
Whitewash vs. Limewash vs. Painting Brick
-
Paint-based whitewash: Usually white latex paint diluted with water. You brush it on and often wipe or dab
to control coverage. Great for interiors and smaller projects. -
Limewash: A mineral-based finish that bonds differently than paint and is often chosen for a breathable,
old-world lookespecially outdoors on porous masonry. -
Solid paint: Fully opaque. Looks crisp, but it’s more permanent and can create moisture issues on exterior brick
if the wall can’t “breathe.”
If you’re whitewashing an interior brick fireplace or accent wall, a diluted paint wash is common and forgiving.
For exterior brick, the conversation shifts to durability, breathability, and moisture managementbecause Mother Nature
does not care about your Pinterest board.
Before You Start: The Brick Reality Check
1) Inspect for damage and moisture (especially outdoors)
Whitewash won’t fix failing brick. If you see spalling (flaking faces), crumbling mortar, persistent damp areas, or heavy
efflorescence (white salt deposits), handle that first. Moisture trapped behind coatings is a top reason masonry finishes fail.
For exterior brick, solve water entry issues (gutters, grading, flashing problems) before you coat anything.
2) Do the simple absorption test
Sprinkle or mist water on the brick. If it darkens and absorbs, you’re working with porous brick (good).
If it beads up, the surface may be sealed, previously treated, or less porousmeaning adhesion and absorption
could be a struggle. You can still finish it, but your prep and product choice become more important.
3) Decide your “look” first
Whitewashing isn’t one look; it’s a dial:
sheer (barely there), classic (softened red and mortar), or almost painted (bright and modern).
Your mix ratio and wipe-back technique control that dial.
Tools and Materials Checklist
- Drop cloths, painter’s tape, plastic sheeting
- Stiff nylon brush (or a wire brush for stubborn debrisuse gently)
- Shop vac or vacuum with brush attachment
- Mild detergent + water (and optional degreaser/TSP substitute for interiors)
- Bucket, measuring cup, stir stick
- White latex paint (matte/eggshell is common for wash looks)
- Large masonry brush (or a 4″–6″ block brush), plus a smaller brush for mortar joints
- Rags or sponges (for wiping/dabbing and controlling coverage)
- Spray bottle or pump sprayer (to dampen brick)
- Safety gear: gloves, eye protection, mask (especially when brushing old masonry dust)
How to Whitewash Interior Brick
Interior brick is the best place to learn whitewashing because you’re not racing rain, sun, or freeze-thaw cycles.
The goal: a finish that looks intentionally “washed,” not accidentally “we ran out of paint halfway through.”
Step 1: Protect everything you like
Brick is textured, and textured surfaces are basically drip magnets. Cover floors, tape trim, mask nearby walls,
and remove mantel décor. If you’re whitewashing a fireplace surround, protect the firebox opening and any metalwork.
Step 2: Clean the brick thoroughly
Dust, soot, and oils block adhesion. Start by vacuuming. Then scrub with mild soapy water and a stiff brush.
For greasy kitchen brick or smoky fireplaces, you may need a stronger cleaner (follow label directions) and extra rinsing.
Let the brick dry fully.
Step 3: Repair small flaws
Knock off loose mortar crumbs and patch holes with appropriate masonry filler (or address mortar issues properly if needed).
You don’t need perfectionwhitewash is wonderfully forgivingbut you do want a stable surface.
Step 4: Dampen the brick (yes, really)
Lightly mist the brick so it’s damp, not dripping. Damping helps you spread the wash more evenly and gives you
more working time before it dries. Think “dewy morning,” not “just survived a water balloon fight.”
Step 5: Mix your whitewash
Start with a simple baseline: 1:1 paint to water. Want more transparency? Add more water.
Want more coverage? Add more paint. Mix thoroughly and keep stirring as you work.
Step 6: Apply in small sections
Brush the wash onto a manageable area (like 6–10 square feet), working it into the mortar joints.
Then immediately control the look:
- Wipe-back with a rag for a softer, more natural wash.
- Dab with a sponge for a mottled, aged effect.
- Leave it for a brighter, more uniform finish.
Step 7: Step back and “season to taste”
Whitewash dries lighter. Let it dry, then decide if you want a second pass.
A second coat can be applied selectivelyon darker bricks or areas that need more liftso the finish doesn’t look too uniform.
Step 8: Let it cure and clean up
Avoid scrubbing for a bit while the finish cures. Reinstall décor once you’re confident it’s dry to the touch and stable.
For fireplaces, avoid coating the inside of the firebox unless you’re using products rated for high heat in that specific area.
How to Whitewash Exterior Brick
Exterior brick projects are where planning pays off. The biggest difference: you’re balancing looks with performance.
Brick is porous and manages moisture; coatings can change that behaviorso product choice and prep matter a lot.
Step 1: Choose the right weather window
Work during a stretch of mild, dry weather. Avoid scorching sun, freezing temps, and rainy days.
If the wall is baking hot, the wash can dry too fast and go streaky.
Step 2: Clean like you mean it
Remove dirt, mildew, and chalky residue. A garden hose, scrub brush, and masonry-safe cleaner are often enough.
Pressure washing can work, but keep pressure moderate and avoid blasting mortar joints like you’re power-washing a crime scene.
Rinse thoroughly and let the wall dry completely.
Step 3: Address efflorescence and salt deposits
Efflorescence (that white powdery stuff) is a sign moisture has moved through the wall and left salts behind.
Remove it properly (often starting with dry brushing and progressing to appropriate cleaning methods).
If you coat over active efflorescence or moisture issues, you’re basically sealing in a future mess.
Step 4: Fix what water will exploit
Repair failing mortar, cracks, and gapsespecially around windows/doors. Check gutters and downspouts.
A great-looking finish won’t stay great if the wall keeps getting soaked from above.
Step 5: Pick a breathable approach
For exterior brick, many pros prefer masonry systems designed to be durable and manage vapor transmission.
If you’re set on a whitewashed look outdoors, consider:
limewash on porous brick for a traditional, mineral finish, or
a masonry-appropriate coating system if the wall needs a more protective approach.
When in doubtespecially on older homestalk to a local masonry professional.
Step 6: Test a small area first
Choose a less visible spot and do a full mini-process: clean, dry, dampen, apply, and let it cure.
Check for adhesion, color, and whether it chalks off more than you’d like.
Exterior projects are not the place for “we’ll see what happens.”
Step 7: Apply from top to bottom, keep a wet edge
Work in sections and blend edges before they dry. Back-brush to push the wash into texture.
Use the same wipe-back or dab technique as interior work if you want a softer, varied finish.
Step 8: Cure, then baby it a little
Avoid heavy rinsing or harsh cleaning right away. Give the finish time to set up.
After it cures, maintenance usually looks like gentle washingnot aggressive scrubbing.
Best Whitewash Mix Ratios (So You Don’t Play “Paint Soup” All Day)
These are starting points. Your brick’s porosity and your desired look will change the recipe.
Always test first.
- Classic whitewash: 1:1 white latex paint + water
- Sheer wash: 1 part paint + 2 parts water
- More coverage: 2 parts paint + 1 part water
- Warm white look: Add a small amount of beige/greige tint (tinybrick shows everything)
Common Whitewashing Mistakes (and How to Avoid Them)
Skipping cleaning
Dust and soot = poor adhesion and blotchy absorption. If the brick looks clean but feels gritty, it’s not clean.
Working too large
Big sections dry unevenly, especially in sun or low humidity. Smaller sections = more control and fewer lap marks.
Not damping the brick
Dry brick can “drink” your wash instantly, leaving harsh brush lines. Damp brick buys you time and smoother blending.
Trying to make every brick identical
The charm of whitewashed brick is variation. If you want perfect uniformity, you’re describing paint.
Let the wall look like a wall, not a spreadsheet.
Exterior: coating a wall with unresolved moisture problems
If water is getting into the wall, finishes can peel, blister, or accelerate damage.
Fix the source first, then finish the surface.
Maintenance: Keeping Whitewashed Brick Looking Good
- Interior: Dust with a soft brush attachment; spot-clean gently with mild soap.
- Exterior: Rinse with low pressure; use masonry-safe cleaners for mildew; avoid harsh acids unless you know exactly what you’re doing.
- Touch-ups: Keep a labeled jar of your wash ratio for quick blending later.
FAQ
Can I whitewash painted brick?
You can, but it behaves less like a “wash” and more like a decorative coating on top of paint.
Clean and scuff-sand if needed, then test adhesion.
Will whitewashing ruin my brick?
Interior whitewashing is generally low-risk if the brick is sound and clean.
Exterior finishes require more caution because moisture movement matterschoose breathable systems and solve water issues first.
Is limewash better than paint-based whitewash?
“Better” depends on the goal. Limewash is often chosen for a breathable, mineral look on porous masonry.
Paint-based wash is easy and popular indoors for controlled decorative results.
Can I spray whitewash?
You can, but you’ll usually still want to back-brush or wipe to push the wash into the texture and avoid a flat, sprayed-on look.
Spraying also increases masking time (and the odds you’ll find paint mist in places you didn’t know existed).
Conclusion
Whitewashing brick is one of the rare DIY projects that can look both intentional and effortlessif you handle the prep,
test your mix, and work in small sections. Indoors, it’s a flexible way to modernize a fireplace or brick wall without erasing
the texture that makes brick worth having. Outdoors, the same “washed” vibe can look stunning, but it demands extra respect:
brick manages moisture, and your finish must play nicely with that reality.
Real-World Experience: of “I Learned This So You Don’t Have To”
The first time I whitewashed a brick fireplace, I was confident in the way only a person with a fresh paintbrush and zero humility can be.
I mixed my paint and water, took one dramatic step back to admire my “vision,” and then immediately painted a section the size of a garage door.
Two minutes later, the top half was drying, the bottom half was dripping, and I was inventing new expressions of surprise.
Lesson one: brick is thirsty and unpredictable. Some bricks absorb fast, some repel, and mortar joints have their own agenda.
Damping the surface felt like an unnecessary extra step until I tried it. Once the brick was lightly misted, the wash stayed workable longer.
My brush strokes softened, my wipe-back looked intentional, and I stopped chasing weird streaks like I was playing whack-a-mole.
Lesson two: your “perfect ratio” doesn’t exist until you test it. I started at 1:1, loved it on one brick, hated it on another.
The fix was embarrassingly simple: I kept two small containersone slightly thinner (more water) and one slightly thicker (more paint).
Darker bricks got the thicker mix. Bricks that were already light got the thinner mix. Suddenly the wall looked naturally varied instead of
“painted, then regretted.”
Lesson three: wiping is an art form and a cardio program. Rags matter. Cheap paper towels disintegrate in textured brick,
leaving fuzz behind like a sad little confetti party. Old cotton rags and a sponge were the MVPs. I’d brush on the wash, then dab and wipe
selectivelyespecially along edges where drips like to form. If you’re aiming for that soft, European-cottage vibe, wiping is where it happens.
Lesson four: exterior brick is not just “interior brick but outside”. I helped a friend test a whitewashed look on an exterior wall.
In the shade, it was dreamy. In direct sun, it dried too quickly and looked patchy until we adjusted our approach: smaller sections, earlier in the day,
and a consistent dampening step. Also: we spent more time inspecting gutters and splashback areas than painting. Not because we’re boringbut because
moisture will ruin a finish faster than a toddler with grape juice.
Finally, the biggest surprise: whitewashed brick photographs beautifully, but the real win is how it changes a room’s mood.
It bounces light, softens harsh reds and oranges, and makes décor choices easier. And if you mess up a section?
You usually don’t have to start overyou just adjust the next pass. Whitewashing is forgiving like that. Unlike your group chat, which will definitely
ask why you’re “painting rocks.”


