
Table of Contents >> Show >> Hide
- Valance Basics: What You’re Making (and Why It Works)
- Measure Once, Cry Never: Valance Sizing That Looks “Right”
- Choose Your Build: Sewn or No-Sew
- Method A: Sew a Simple Rod-Pocket Valance (Beginner-Friendly)
- Method B: Make a Board-Mounted Easy Valance (Fast, Crisp, and Very “Custom”)
- Method C: The Lightweight (Often Renter-Friendly) Foam-Board Valance
- Fabric, Pattern, and Color: What Looks Good in Real Rooms
- Installation Tips That Prevent Wobble, Sag, and Regret
- Troubleshooting: Fix the Common “First Valance” Problems
- Style Ideas: Make Your Easy Valance Look Intentional
- Conclusion: Your Window Just Got a Promotion
- Real-World Valance Lessons ( of “What It’s Actually Like”)
If your window looks a little… naked (no judgment), a valance is the fastest way to dress it up without committing to full-on drapes.
It’s the “hat” of window treatments: small, stylish, and surprisingly powerful. Even better? You can make an easy DIY valance in an
afternoon with beginner-level sewingor no sewing at all. Yes, this is your permission slip to use a staple gun like a crafting
superhero.
In this guide, you’ll learn how to pick the right valance style, measure like a pro (so it doesn’t end up looking like a fabric mustache),
and build either a quick sewn rod-pocket valance or a super-simple board-mounted valance that hides hardware and instantly upgrades the room.
We’ll also cover renter-friendly options, fabric choices, lining, and the tiny “details” that make your DIY look store-bought.
Valance Basics: What You’re Making (and Why It Works)
A valance is a fabric top treatment that runs across the upper part of a window. It can:
- Hide curtain rods, blinds, and the less-glamorous parts of hardware
- Add color, pattern, and softness without blocking much light
- Make windows look taller when hung higher
- Help a room feel more finished (like adding earrings to an outfit)
Three “easy” valance styles that look great
- Rod-pocket valance (sewn): A soft fabric valance that slides onto a curtain rod. Beginner-friendly and flexible.
-
Board-mounted valance (no-sew or minimal-sew): Fabric wrapped around a wood board (often a 1×4 or 2×4) and mounted with brackets.
Crisp, tailored, and fantastic at hiding blinds. -
Lightweight cornice/foam-board valance (renter-friendly): A lighter version of the board-mounted look using foam insulation or foam core.
Easy to lift, easy to swap fabric, and easy to pretend you’re a DIY wizard.
Measure Once, Cry Never: Valance Sizing That Looks “Right”
Most valance frustration comes from guessing. Let’s not guess. You’ll decide two things:
width (how far it spans) and drop (how tall it hangs).
1) Width: go wider than the glass
A common approach is to extend your valance beyond the window casing so it frames the window and lets in maximum light.
For many windows, adding 2–5 inches on each side looks balanced, depending on wall space and style.
2) Drop (height): keep it proportional
Valances are usually in the neighborhood of 10–18 inches tall, but scale matters. A helpful guideline is to keep
the valance around 15–20% of the full treatment height (or roughly 1/5 to 1/6 of the drapery length
if you’re pairing it with curtains). If the valance is too deep, it can start to feel heavy and block lightlike the window is wearing a low baseball cap.
3) Depth (for board-mounted styles): match your hardware
If you’re covering blinds or a chunky curtain rod, measure how far the hardware sticks out from the wall.
That’s your “return” depth. Most board-mounted valances are built with a front piece and two side returns so they look finished from an angle.
Choose Your Build: Sewn or No-Sew
Pick the method that matches your time, tools, and tolerance for thread-related drama.
Both end with a polished, easy valancejust different routes to the same “wow.”
Method A: Sew a Simple Rod-Pocket Valance (Beginner-Friendly)
This is the classic “I own a sewing machine (or a determined attitude)” approach. You’ll make a rectangular valance with a rod pocket and a small header
above the rod for a soft ruffle.
Materials
- Decor fabric (cotton, linen blend, or light upholstery fabric)
- Optional lining fabric (recommended for a fuller, more polished drape)
- Thread
- Iron + ironing board (non-negotiable for pro results)
- Measuring tape, pins or clips, scissors/rotary cutter
- Curtain rod (or tension rod for renter-friendly installs)
Step 1: Decide finished size
Example window: 36″ wide casing-to-casing. You want it to extend 3″ past the casing on each side.
Finished valance width = 36 + 3 + 3 = 42 inches.
Step 2: Add fullness (the “pretty gathers” factor)
For a rod-pocket valance, a good fullness range is 1.5x to 2x the finished width.
More fullness = more gathers. Less fullness = cleaner, flatter look.
Using 1.75x fullness: Cut width (before hems) ≈ 42 × 1.75 = 73.5 inches.
Round up to 74″. If your fabric isn’t wide enough, you can seam panels together (and pretend it was intentional design engineering).
Step 3: Calculate cut length (this is where people get “mystery short”)
Decide your finished dropsay 14 inches. Now add allowances:
- Bottom hem: 3–4 inches total (a deeper hem helps it hang nicely)
- Top hem + rod pocket: depends on rod diameter, plus a little ease
- Header above rod: 1–2 inches (optional but pretty)
A simple, flexible top plan:
Top fold total = header (1.5″) + pocket (2.5–3.5″) + seam/turn allowance (0.5″).
If you’re unsure, measure around the thickest part of the rod and build the pocket slightly larger so it slides easily.
Example cut length:
14″ finished drop + 4″ bottom hem + 5″ top folds = 23 inches cut length.
(If using lining, cut lining slightly shorter at the bottom so it won’t peek out.)
Step 4: Sew the sides
- Hem or turn the side edges (a double-turn hem looks clean).
- Press your hems with an iron before sewing. Pressing is the difference between “handmade” and “homemade.”
Step 5: Create the bottom hem
- Press up the hem allowance (for example, 2″ then 2″ again for a 4″ double hem).
- Sew close to the folded edge.
Step 6: Make the rod pocket and header
- Press the top edge under about 1/2″ to hide the raw edge.
- Fold down the top to create your header + pocket depth.
-
Stitch two horizontal seams: one near the bottom of the fold (creates the pocket),
and one above it (creates the header space). - Slide onto the rod, fluff gathers, and admire your new window “hat.”
Optional upgrade: Add lining for structure
Lining improves drape, helps fabric last longer, and can add privacy or light control when paired with other treatments.
If your decor fabric is thin, lining also keeps sunlight from turning your bold print into a “vintage faded memory” too soon.
Method B: Make a Board-Mounted Easy Valance (Fast, Crisp, and Very “Custom”)
If you want a tailored look that hides blinds or makes a room look professionally finished, this is the method.
It’s also the one where people say, “Wait… you made that?” and you casually say, “Oh this? Just a little project.”
Materials
- Wood board (commonly 1×4 or 2×4 depending on depth needed)
- 2 side return pieces (same depth as the board’s projection from the wall)
- Sandpaper (quick smoothing saves snags later)
- Fabric (enough to wrap the front and returns with extra)
- Staple gun + staples
- L-brackets or corner braces + screws
- Optional: batting for a softer upholstered look
- Optional: hook-and-loop tape if you want removable fabric
Step 1: Cut and prep the board
- Cut the board to your desired width (often window width plus side extensions).
- Cut two return pieces for the sides (depth based on your hardware projection).
- Sand edges lightly. You’re not making a canoejust removing splinters.
Step 2: Assemble the box shape
- Attach the side returns to the front board using screws (pre-drilling helps prevent splitting).
- If you want extra rigidity, add a top strip (like a shallow lid). This is more “cornice” territory but still easy.
Step 3: Wrap with fabric
- Optional: staple batting to the front and sides for a padded look.
- Iron fabric first. Wrinkles don’t disappear just because you believe in them.
- Center the fabric pattern on the front.
- Wrap fabric around the board and staple on the inside/back where staples won’t show.
- Fold corners neatly like wrapping a presentonly your “gift” is better-looking windows.
Step 4: Mount it safely
- Hold the valance in position and mark bracket locations.
- Use anchors if you’re not hitting studs, and make sure hardware is rated for the weight.
- Screw L-brackets into the wall, then attach the valance to the brackets.
- Step back and check level. If it’s crooked, your window will look like it’s smirking.
Method C: The Lightweight (Often Renter-Friendly) Foam-Board Valance
Want the clean lines of a cornice without the weight of wood? Foam insulation board or sturdy foam core can give you that boxed look
with less cutting and easier lifting. It’s especially handy if you like swapping fabric seasonally.
Quick build overview
- Cut a long front panel and two side return panels.
- Tape or glue panels into a U-shape.
- Wrap fabric around the foam and secure on the inside with fabric tape, hot glue, or staples (depending on foam type).
- Mount using appropriate removable solutions rated for weight, or use small brackets if drilling is allowed.
Tip: If your fabric is removable (hook-and-loop or Velcro-style tape), you can make multiple covers and treat your valance like a wardrobe.
Your window gets outfit changes. Your window is now more fashionable than most people.
Fabric, Pattern, and Color: What Looks Good in Real Rooms
Best beginner fabrics
- Cotton and cotton blends: easy to press, easy to sew, easy to love
- Linen blends: airy and modern, but wrinkles like it’s a hobby
- Light upholstery fabric: great structure for tailored valances
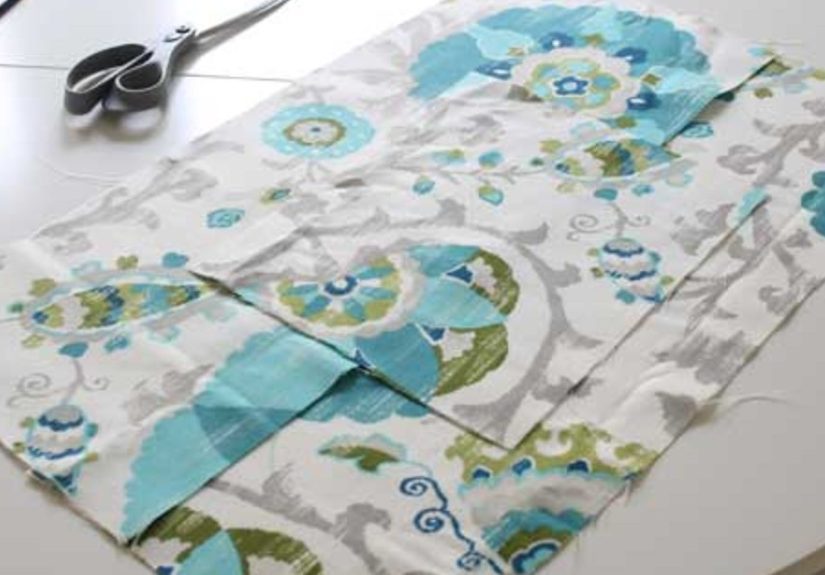
Print placement (aka “Why does the flower look decapitated?”)
If you’re using a large-scale print, center a key motif on the front of a board-mounted valance or across the middle of a rod-pocket valance.
For stripes, measure carefully and keep stripes levelcrooked stripes are basically a neon sign that says “DIY occurred here.”
Lining: when it’s worth it
Lining can help with structure, longevity, and light controlespecially if you’re layering over blinds or pairing with curtains.
If your room gets intense sun, lined treatments can help protect the face fabric and can also support better temperature comfort.
Installation Tips That Prevent Wobble, Sag, and Regret
- Use a level: your eyes lie, but a level is brutally honest.
- Anchor smart: if brackets aren’t in studs, use appropriate anchors rated for the load.
- Add a center support: wider spans often need a middle bracket to prevent sag.
- Hang high when possible: it can visually elongate windows and make ceilings feel taller.
Troubleshooting: Fix the Common “First Valance” Problems
Problem: It looks skimpy and flat
Increase fullness (aim closer to 2x width), add lining, or consider a board-mounted style for a crisp silhouette.
Problem: It’s too long and blocks light
Shorten the drop, raise the rod, or switch to a shallower valance height.
Sometimes the best fix is simply moving it up a few inches so the window can breathe.
Problem: Crooked hems and puckers
Press before sewing, sew slowly, and keep seam allowances consistent. If fabric shifts, use more pins or clips and don’t be afraid to rip a seam.
Seam rippers are just tiny, humble time machines.
Problem: Board-mounted corners look bulky
Trim excess fabric at corners, fold like a crisp gift wrap, and staple in layers. Batting helps, but too much makes corners lumpy.
Aim for “upholstered” not “stuffed burrito.”
Style Ideas: Make Your Easy Valance Look Intentional
- Kitchen: cheerful prints, gingham, stripes, or a simple neutral linen blend
- Bathroom: moisture-aware fabrics and easy-to-remove options for washing
- Bedroom: layered treatments (shade + valance) for softness and better light control
- Living room: tailored board-mounted valance for a clean, architectural finish
Conclusion: Your Window Just Got a Promotion
An easy DIY valance is the rare home project that’s quick, practical, and surprisingly high-impact. Whether you sew a rod-pocket valance
for soft gathers or build a board-mounted valance for a crisp custom look, you’re upgrading your space without upgrading your stress levels.
Measure carefully, press everything (seriously), and choose the method that matches your tools and vibe. Then enjoy the moment when someone
asks where you bought itand you get to say, “Oh, I made it.”
Real-World Valance Lessons ( of “What It’s Actually Like”)
The first time you make a valance, the biggest surprise is how quickly “simple rectangle” becomes “tiny math project.” You start confident:
“It’s just fabric at the top of a window!” Ten minutes later you’re holding a tape measure, squinting, and asking the wall, “Are you sure
that’s 36 inches?” (The wall is never sure. The wall is emotionally unavailable.)
One of the most common first-time experiences is discovering that windows are not always symmetrical. Trim can be a hair off. Walls can be a
touch uneven. Hardware can sit slightly higher on one side. This is why a level feels like an annoying extra step right up until it saves you.
When you finally hang the valance and it’s straight, you’ll get a very specific kind of satisfactionlike hitting “send” on an email you rewrote
eight times and it finally sounds smart.
Fabric has opinions, too. Some cottons behave nicely and press like a dream. Other fabrics crease if you look at them wrong. Linen blends can be
gorgeous and relaxed, but they may wrinkle while you’re still congratulating yourself for ironing them. If you do a board-mounted valance, you’ll
learn that pattern centering is the secret sauce. The fabric can be expensive, the staples can be perfect, and yet if the big flower lands half on
the front and half on the side return, your eye will go straight to it every single time. The fix? Dry-fit the fabric before stapling and step back
to check placement. It feels slow, but it’s faster than pulling 37 staples while muttering.
If you sew a rod-pocket valance, you’ll probably have a “pocket panic” moment: “What if the rod doesn’t fit?” This is normal. Measure the rod, add
a little ease, and remember that a slightly roomy pocket slides better than a tight pocket that fights you like a stubborn jar lid. You may also
notice that wider hems actually help the valance hang better. It’s one of those quietly professional details that doesn’t look exciting on paper but
looks amazing on the window.
With no-sew or board-mounted methods, the experience is different: it feels almost suspiciously quick. You wrap fabric, staple, mount, and suddenly
your window looks custom. The “aha” moment comes when you realize the valance isn’t just decorationit’s a visual frame. It pulls colors from the room,
hides the utilitarian stuff, and makes the whole wall feel designed. And once you’ve made one, you start seeing windows everywhere thinking,
“You know what you need? A valance.” That’s how it begins. Today it’s a kitchen window. Tomorrow you’re considering a seasonal valance rotation and
referring to your staple gun as “my assistant.”


