Table of Contents >> Show >> Hide
- What Mask Shards Do in Hollow Knight
- The Easiest Route to Your First Extra Mask
- Every Mask Shard Location, Explained the Easy Way
- Best Order to Collect Mask Shards Without Losing Your Mind
- Tips That Make Mask Shard Hunting Easier
- Common Mistakes Players Make With Mask Shards
- Final Thoughts
- Bonus Experience: What Mask Shard Hunting Actually Feels Like in a Real Playthrough
Note: Source links were intentionally omitted for clean web publishing.
If Hollow Knight has ever made you whisper “I was doing so well” right before a random flying pest bonks your last hit point into the void, welcome. You are among friends. One of the best ways to make Hallownest feel less like a bug-themed stress interview is to collect Mask Shards. These little upgrades increase your health, give you more room for mistakes, and make scary boss rooms feel slightly less like unpaid overtime.
The good news is that Mask Shards are not just late-game trophies for maniacs who enjoy suffering. Several can be picked up fairly early if you know where to look, and the rest become much easier when you collect them in a smart order instead of wandering around the kingdom like a confused beetle with a nail. This guide breaks down what Mask Shards do, the easiest route for getting them, every location in the game, and a bunch of practical tips to help you collect them without turning your controller into modern art.
What Mask Shards Do in Hollow Knight
Mask Shards are permanent health upgrades. Every time you collect four Mask Shards, they combine into one full new mask on your health bar. That means more survivability in boss fights, more breathing room during platforming, and fewer dramatic death scenes caused by spikes, bees, or your own optimism.
The Knight starts with five masks, and there are sixteen Mask Shards total in the game. That adds up to four extra full masks if you collect them all. In plain English: yes, these are absolutely worth chasing down.
They are also one of the most satisfying upgrades in the game because they reward several different play styles. Some are bought with Geo. Some come from exploration. Some come from rescuing NPCs. Others are rewards for harder optional challenges. In true Hollow Knight fashion, the game basically says, “Sure, you can have more health. Now go earn it, tiny warrior.”
The Easiest Route to Your First Extra Mask
If your goal is to get stronger quickly instead of collecting all sixteen in one heroic marathon, this is the easiest practical route.
1. Save Sly as early as possible
Sly is one of your best early-game friends, assuming you define “friend” as “small merchant who sees your suffering and responds with price tags.” After you find him in the Forgotten Crossroads and he returns to Dirtmouth, he sells Mask Shards in his shop.
The first two are easy pickups if you have the Geo: 150 Geo for the first shard and 500 Geo for the second. The third and fourth shards from Sly cost 800 and 1,500 Geo, and those require the Shopkeeper’s Key from Crystal Peak. So yes, Sly starts reasonable and then immediately remembers capitalism exists.
2. Get the Mantis Claw, then circle back
Once you have the Mantis Claw, several “not yet” locations suddenly become “actually, yes.” This is the moment when Mask Shard hunting becomes much more efficient. With the wall-jump ability, you can grab the shard in the Forgotten Crossroads south of False Knight, the shard near the east side of Queen’s Station, and you can also take on Brooding Mawlek if you feel spicy.
3. Rescue Bretta and check Dirtmouth again
Bretta’s house in Dirtmouth contains another Mask Shard, but only after you rescue her from the Fungal Wastes. This is one of those classic Hollow Knight rewards where helping a sad NPC also helps your own health bar. Everybody wins, except the bugs trying to kill you later.
4. Pick up Grubfather’s reward naturally
You only need five rescued Grubs for one Mask Shard reward from Grubfather. That is very doable without going full completionist mode. If you keep an eye out for Grub jars while exploring early areas, this reward often arrives earlier than people expect.
If you follow that route, you can build your first extra mask without needing late-game movement, dream grinding, or flower-delivery nerves. That is the sweet spot for most players.
Every Mask Shard Location, Explained the Easy Way
Below is the full list of all sixteen Mask Shards, grouped by how practical they are during a normal playthrough.
Early and Easy Mask Shards
| Location | What You Need | Why It’s Easy |
|---|---|---|
| Sly in Dirtmouth, first shard | Find Sly | Simple purchase for 150 Geo |
| Sly in Dirtmouth, second shard | Find Sly | Another simple purchase for 500 Geo |
| Grubfather reward | Rescue 5 Grubs | Happens naturally if you explore |
| Bretta’s house in Dirtmouth | Rescue Bretta | Safe, easy pickup once Bretta returns |
These are your low-stress shards. If you are trying to get stronger without doing anything too ridiculous, start here. The only real cost is Geo, mild exploration, and the emotional effort of listening to Grubfather make weird happy noises.
Mid-Game Mask Shards That Are Very Worth It
| Location | Requirement | Tip |
|---|---|---|
| Forgotten Crossroads, south of False Knight | Mantis Claw | Grab this soon after getting wall-jump |
| Queen’s Station, east side | Mantis Claw | Quick detour and very manageable |
| Brooding Mawlek reward | Mantis Claw recommended | Optional boss, but great payout |
| Stone Sanctuary in Greenpath | Lumafly Lantern recommended | Dark area, easier if you bring light |
| Royal Waterways, northwest section | Access to Waterways | Exploration-based, no huge gimmick |
This is the section where the game starts rewarding players who revisit older zones with new abilities. If Hollow Knight had a slogan for upgrades, it would probably be, “Congratulations, your map is now twice as rude and three times more useful.”
The Brooding Mawlek shard is especially interesting. Technically, it is available earlier than some players expect, but it does not feel “easy” until you are comfortable with the fight. If you are struggling, leave it and come back. Pride is not a healing item.
Late-Game or More Annoying Mask Shards
| Location | Requirement | Why It’s Later |
|---|---|---|
| Sly in Dirtmouth, third shard | Shopkeeper’s Key | Costs 800 Geo and unlocks after Crystal Peak progress |
| Sly in Dirtmouth, fourth shard | Shopkeeper’s Key | Costs 1,500 Geo and is the priciest shop shard |
| Deepnest near the Fungal Core entrance | Monarch Wings | Mobility requirement plus Deepnest being, well, Deepnest |
| Enraged Guardian reward | Monarch Wings | Boss reward in Crystal Peak |
| The Hive behind a breakable wall | Bait a Hive Guardian | Classic “let the angry bee help you” moment |
| Seer reward | 1,500 Essence | Takes Dream Nail progress |
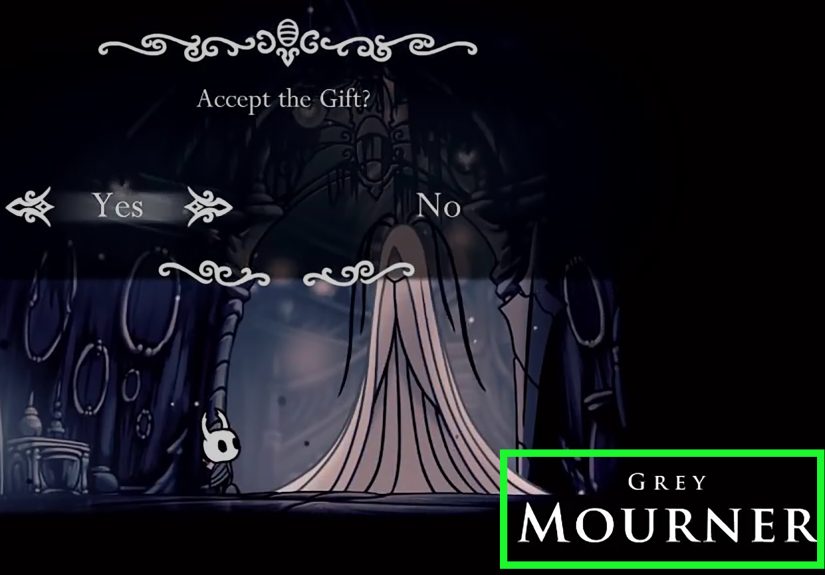
| Grey Mourner reward | Complete the Delicate Flower quest | One hit can ruin your day |
These are the shards that separate “I want a little more health” from “I will sweep every corner of Hallownest and bully destiny itself.” They are all worth collecting, but they are not the ones you rush first if your goal is easy upgrades.
Best Order to Collect Mask Shards Without Losing Your Mind
If you want the smoothest route, use this order:
- Save Sly and buy shard one.
- Buy shard two when Geo allows.
- Rescue a few Grubs and collect the Grubfather reward.
- Get Mantis Claw.
- Grab the Crossroads shard south of False Knight.
- Grab the Queen’s Station shard.
- Rescue Bretta and collect the Dirtmouth shard.
- Fight Brooding Mawlek when you feel ready.
- Pick up Stone Sanctuary and Royal Waterways shards as your route opens up.
- Return to Sly after obtaining the Shopkeeper’s Key.
- Leave Deepnest, Enraged Guardian, The Hive, Seer, and Grey Mourner for later cleanup.
This order works because it stacks upgrades around movement progression instead of brute force. In a Metroidvania, that is usually the right answer. The map is basically one giant locked toolbox, and every new ability is another key.
Tips That Make Mask Shard Hunting Easier
Use Gathering Swarm if you hate losing Geo
Since several shards are bought from Sly, Geo matters. Gathering Swarm is a very handy charm for picking up dropped Geo automatically, especially in annoying terrain. It will not make you rich overnight, but it does reduce the amount of money you accidentally leave behind because you jumped into spikes like a brave fool.
Open Jiji’s cave if corpse runs annoy you
Confessor Jiji can summon your Shade in exchange for a Rancid Egg. Her cave east of Dirtmouth requires a Simple Key. This does not directly unlock Mask Shards, but it makes shard hunting safer if you are carrying a lot of Geo and hate trekking back through danger just because one enemy got lucky.
Do not force the Delicate Flower quest early
Yes, it rewards a Mask Shard. No, that does not mean you should attempt it the second you hear about it. The flower breaks if you take damage, and even riding the Stagways will destroy it. Save this one for later, when your route knowledge is better and your blood pressure is not trying to leave your body.
Dream Nail side content is secretly health content
The Seer’s Mask Shard reward arrives at 1,500 Essence, which means dream warriors, whispering roots, and dream boss cleanup all contribute to your health total. If you were planning to ignore dream content, consider this your polite nudge from the universe.
Come back later is a valid strategy
Hollow Knight loves to make you notice something before you can actually get it. That is not the game mocking you. Well, not always. It is also teaching you to revisit the map after major upgrades. If a shard feels miserable now, tag it mentally and return later. There is no medal for collecting it in the most inconvenient way possible.
Common Mistakes Players Make With Mask Shards
- Ignoring Sly for too long: his early shards are among the easiest health boosts in the game.
- Skipping Grubs: the first Grubfather reward arrives quickly and pays off well.
- Tackling Brooding Mawlek too early: available does not always mean enjoyable.
- Forgetting to revisit Dirtmouth: Bretta’s house and Sly’s stock both matter.
- Doing the Delicate Flower quest while emotionally unstable: this is not a clinical diagnosis, just practical advice.
Final Thoughts
If you want to find Mask Shards easily in Hollow Knight, the trick is not raw skill. It is smart route planning. Focus on Sly, Grubs, Bretta, and the first Mantis Claw-accessible shards before worrying about late-game challenges. That gives you more health early, which makes everything else easier, which then helps you collect the harder shards later. It is a beautiful cycle. A brutal, bug-filled, occasionally humiliating cycle, but still beautiful.
Mask Shards are one of the clearest examples of how Hollow Knight rewards curiosity. Explore thoroughly, revisit old zones after new movement upgrades, and do not be afraid to leave one tough shard for later. Hallownest is hard enough already. Your job is to survive it with style, one little shard at a time.
Bonus Experience: What Mask Shard Hunting Actually Feels Like in a Real Playthrough
There is a very specific emotional arc that comes with hunting Mask Shards in Hollow Knight, and it starts with overconfidence. At first, most players think, “I just need a little more health and then I’ll be fine.” That sounds reasonable. It sounds mature. It sounds like a player who has things under control. Five minutes later, that same player is hanging from a wall in Greenpath, one hit from disaster, wondering why a dark cave full of creeping noises seemed like a good idea. That is the true Mask Shard experience.
The funny part is that collecting these upgrades changes how the whole game feels, not just your health bar. One extra mask does not seem huge on paper, but in a real fight it is the difference between recovering and panicking. It is the difference between “I can learn this boss” and “well, I guess I live here now.” When you finally complete a set of four shards and watch that new mask appear, it feels less like a stat increase and more like the game quietly admitting, “Fine. You’ve suffered enough. Here’s a little dignity.”
Some shard hunts are genuinely satisfying because they reward exploration. You spot a suspicious corner, test a pathway, and suddenly find exactly what you were hoping for. That kind of discovery is part of what makes Hollow Knight so good. The world feels hand-built for curious players. You are not just following checklist items. You are slowly learning how Hallownest thinks. The map starts as chaos, then turns into memory, and eventually becomes instinct.
Other shard hunts are memorable because they are a little ridiculous. The Hive shard, for example, has the kind of solution that only makes sense in this game: let a giant angry bee help you by smashing something you need smashed. That is the sort of moment where Hollow Knight stops being a simple action platformer and becomes a full-time job in reading environmental nonsense. You either laugh or you cry. Usually both.
Then there is the Delicate Flower quest, which deserves its own support group. Nothing in the phrase “flower delivery” sounds stressful until Hollow Knight gets involved. Suddenly the mission feels like escorting a soap bubble through a war zone while every enemy in the kingdom has signed a personal petition against your happiness. Finishing it is incredibly rewarding, but the experience itself is the gaming equivalent of carrying a full cup of coffee across an ice rink.
What really stands out, though, is how Mask Shards reward different personalities. Careful explorers get paid. Completionists get paid. Strong fighters get paid. Players who circle back after learning the map get paid. Even the stubborn gremlins who refuse to leave a room until they understand every ledge eventually get paid. It is one of the smartest upgrade systems in the game because it supports so many ways to play without ever feeling random.
By the end of a full playthrough, Mask Shards also become tiny landmarks in your memory. You remember the one that felt generous, the one that felt sneaky, the one that felt rude, and the one that nearly sent you into a spiritual crisis. You remember how weak the early game felt and how much safer the late game became once you invested in health. And if you are like most players, you also remember at least one moment where that final extra mask saved you from making a noise so embarrassing the neighbors would have filed a report.
That is why Mask Shards matter so much. They are not just collectibles. They are confidence upgrades. They turn “maybe I can do this” into “okay, one more try.” In a game as challenging as Hollow Knight, that kind of mental shift is priceless.