
Table of Contents >> Show >> Hide
- Why a Mason Jar Planter Works (and Why It Sometimes Doesn’t)
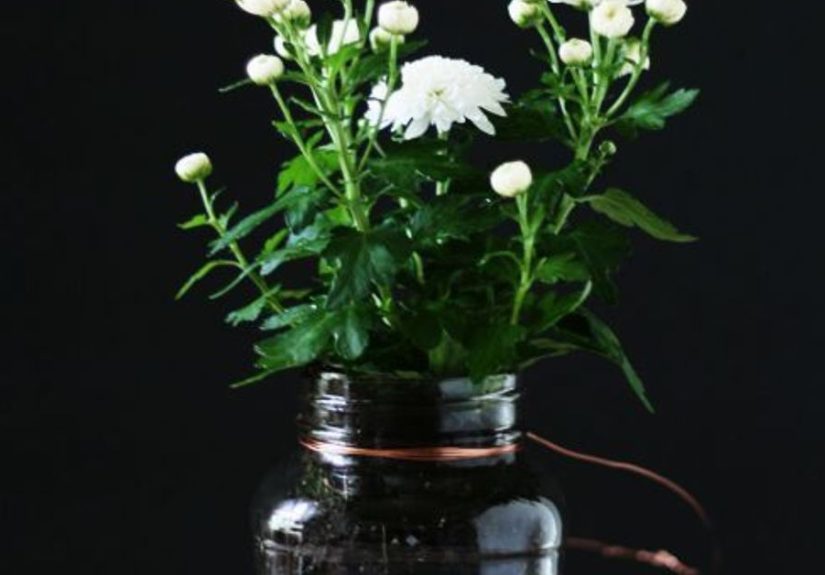
- Pick Your Mason Jar Planter Style
- Best Plants for a Mason Jar Planter
- Step-by-Step: Build a Mason Jar Planter (Choose Your Path)
- How to Drill a Hole in a Mason Jar (Without Turning It into Confetti)
- Watering & Care: The “Don’t Make It Weird” Rules
- Troubleshooting Common Mason Jar Planter Problems
- Design Ideas That Make a Mason Jar Planter Look Intentional
- Experiences with Mason Jar Planters (The Real-Life Stuff People Learn the Hard Way)
- Conclusion
A mason jar planter is the DIY equivalent of showing up to brunch in sneakers that look like loafers: practical,
stylish, and slightly smug about it. You get a cute, clear container; a tiny pocket of green life; and the
satisfying feeling that you “upcycled,” even if you also bought a 12-pack of jars on purpose.
But here’s the truth: mason jars are not born as plant pots. They’re born to hold salsa, overnight oats,
and the occasional emotional-support iced coffee. So if you want your plants to thrive (and not slowly
dissolve into a swampy science experiment), you need the right setup.
Why a Mason Jar Planter Works (and Why It Sometimes Doesn’t)
Mason jars make great mini planters because they’re inexpensive, widely available, and the glass lets you
see what’s happening insideroots, moisture, and whether you’re accidentally running a mosquito spa.
They also fit perfectly on windowsills, desks, and small patios where traditional pots feel too bulky.
The catch is drainage. Most mason jars don’t have holes, which means excess water can’t escape.
That’s the fastest route to root rot, fungus gnats, and the unmistakable smell of “I tried.”
The solution isn’t “throw rocks in the bottom and hope for the best.” The solution is choosing one of the
mason jar planter styles beloweach designed to handle water in a way plants can survive.
Pick Your Mason Jar Planter Style
There isn’t one “right” way to build a mason jar planter. There are four good waysplus one bad way
(the bad way is “random soil + random plant + random watering schedule = chaos”).
Choose the style that matches your tools, your plant, and your tolerance for maintenance.
1) The “Real Planter” Method: Drill a Drainage Hole (Best Overall)
If you want the highest success rate, this is it. A drilled mason jar functions like a standard pot:
water goes in, excess water drains out, roots breathe, and everybody stays friends.
This method is great for herbs, small flowering annuals, and many houseplants that hate wet feet.
- Best for: herbs, pothos, spider plant pups, small leafy houseplants, many succulents
- Not ideal for: anyone who doesn’t want to drill glass (fair), very large plants
- Maintenance: similar to a normal pot
2) The No-Drill “Pot-in-a-Jar” Method (Fast, Safe, Still Cute)
This is the cheat code for mason jar planters: keep your plant in a small nursery pot (with drainage holes)
and use the mason jar as a decorative cachepot. You get the look of a jar planter without trapping water
at the bottom forever.
Here’s how it works: you plant (or keep) your plant in a plastic nursery pot that fits inside the jar.
When you water, you lift the pot out, let it drain completely, then set it back into the jar.
It’s simple, it’s effective, and it’s the least likely to end in a “Why is it mush?” moment.
- Best for: beginners, offices, gifts, plants that need reliable drainage
- Bonus: you can swap plants seasonally without redoing the whole jar
3) The Self-Watering Wick Method (Great for Herbs and “Thirsty” Plants)
A self-watering mason jar planter uses a water reservoir in the jar and a wick (cord) that pulls water
upward into the soil. It’s like your plant has a tiny strawexcept not gross.
This setup can be especially helpful if you travel, forget to water, or want steadier moisture.
The key is plant choice. Many herbs love consistent moisture, but succulents and cacti usually don’t.
If your plant prefers to dry out between waterings, a wick system can keep it too wet.
- Best for: basil (in a roomy insert), mint (also in an insert), leafy houseplants
- Not ideal for: succulents/cacti, plants that need “dry-down” cycles
- Pro tip: use a wick material that won’t rot quickly (some people use synthetic cord)
4) The Terrarium-Style Jar Garden (A Mini Ecosystem, Not a Standard Pot)
Terrariums are a different category: you’re building a small, controlled environment.
Many terrariums use a drainage layer (like gravel) plus charcoal and soil, and you water lightly.
Closed terrariums can recycle moisture through condensation; open terrariums breathe more and are less prone
to mold.
This method shines with humidity-loving plants like fittonia (nerve plant), small ferns, and moss.
It’s not ideal for most herbs (they want airflow) and it’s usually a bad match for succulents in a closed jar
(too humid).
Best Plants for a Mason Jar Planter
The “best plant” depends on your jar method. A mason jar planter is small by design, so pick plants that
tolerate tight root space or can live happily as cuttings, starters, or mini varieties.
Top picks for sunny windowsills
- Chives: compact, forgiving, doesn’t demand a giant root zone
- Thyme: slow-growing and happy in smaller containers
- Oregano: sturdy, but still appreciates drainage
- Parsley: works well if you give it consistent moisture and enough light
Top picks for indoors (bright light to medium light)
- Pothos cuttings: perfect for water propagation in a jar
- Spider plant babies: easy starters in a small pot-in-a-jar setup
- Fittonia (nerve plant): excellent for terrariums
- Small ferns: better for terrarium-style jars than standard potting setups
Succulents in mason jars: possible, but picky
Succulents can look amazing in glass, but they need two things: excellent drainage and careful watering.
If you want a succulent mason jar planter, choose the drilled-hole method or the pot-in-a-jar method.
Avoid a closed terrarium unless you enjoy watching succulents slowly regret their life choices.
Step-by-Step: Build a Mason Jar Planter (Choose Your Path)
Option A: Drilled-Drainage Mason Jar Planter (Most Reliable)
- Choose the right jar: wide-mouth jars are easier to plant and maintain.
- Add drainage hardware: after drilling (see drilling guide below), place a small mesh screen inside over the hole to keep soil in.
- Use a well-draining mix: potting mix for herbs/houseplants; cactus/succulent mix for succulents.
- Plant thoughtfully: keep the crown of the plant above soil level and press soil gently to remove air pockets.
- Water once, then pause: water until it drains, then wait until the top inch of soil dries (or more, depending on the plant).
- Add a saucer: set the jar on a small dish to protect surfaces.
Option B: Pot-in-a-Jar (No Drill, Low Stress)
- Find the insert pot: a nursery pot that slips into the jar with a little breathing room.
- Plant in the insert: use the same soil you’d use in a normal pot.
- Optional spacer: if the pot sits too low, use a small upside-down plastic lid or a few flat stones to lift it (don’t pack the bottom with random gravel).
- Water outside the jar: lift the insert pot out, water at the sink, let it drain fully, then place it back.
- Empty standing water: if water collects in the jar, dump it. Your plant is not a fan of foot baths.
Option C: Self-Watering Wick Mason Jar Planter (Herb-Friendly)
- Build a plant insert: use a small perforated cup, net pot, or container that fits into the jar opening.
- Add the wick: thread cord through the insert so one end sits in the soil and the other hangs into the water reservoir.
- Fill with soil: a light, airy potting mix works best. Keep wick contact with soil consistent.
- Add water to the jar: fill the reservoir so the wick end is submerged but the soil isn’t flooded.
- Plant and monitor: in week one, check moisture daily to learn how fast your plant drinks.
Option D: Mason Jar Terrarium (A Tiny Indoor World)
- Start clean: wash and dry the jar to reduce mold risk.
- Add a drainage layer: coarse gravel or small stones (this is a terrarium buffer layer, not “instant drainage”).
- Add charcoal: a thin layer helps keep things fresher and can reduce odors.
- Add soil: use sterile potting mix; avoid mixes loaded with slow-release fertilizer in tight terrarium spaces.
- Plant small: choose slow growers; don’t cram plants against the glass.
- Water lightly: think “mist,” not “monsoon.”
- Control condensation: if the jar fogs up constantly, open it briefly to let moisture escape.
How to Drill a Hole in a Mason Jar (Without Turning It into Confetti)
Drilling glass is a “slow and steady wins the plant pot” situation. The big rules are:
use the right bit, keep the glass cool with water, and don’t apply brute force like you’re trying to open
a pickle jar that insulted your family.
What you’ll need
- Diamond-tipped drill bit or diamond hole saw (size depends on desired drainage hole)
- Painter’s tape
- Spray bottle or a way to keep water flowing over the drilling spot
- Safety glasses and work gloves
- Towel or rubber mat (to stabilize the jar)
- Fine sandpaper or a diamond hand file (to smooth edges)
Drilling steps
- Stabilize the jar: set it on a folded towel or rubber mat so it doesn’t slide.
- Tape the spot: place painter’s tape where you’ll drill to help prevent slipping.
- Go low and slow: use low speed. High speed creates heat and stress.
- Use water constantly: keep the area wet to cool the glass and reduce cracking risk.
- Light pressure only: let the bit do the work.
- Ease up near breakthrough: reduce pressure as you get close to the end to avoid chipping.
- Smooth the edges: gently sand or file the hole to remove sharpness.
Watering & Care: The “Don’t Make It Weird” Rules
Rule 1: Treat the jar like a small container (because it is)
Small containers dry out faster and can get waterlogged faster. That sounds unfair, and it is.
Check moisture with your finger or a wooden skewer. If it comes out damp with soil clinging to it, wait.
Rule 2: Bright light is your best friend
Most herbs and many houseplants need strong light near a window. Rotate your mason jar planter every few days
so plants don’t lean dramatically like they’re posing for an album cover.
Rule 3: Never let water sit in the bottom (unless it’s a reservoir system)
In a standard jar planter without a designed reservoir, standing water is trouble. Dump it.
If you’re doing a wick system, keep the water level where it supports wicking without saturating soil.
Troubleshooting Common Mason Jar Planter Problems
“My jar is green.” (Algae)
Clear glass + light + moisture = algae. It’s not the end of the world, but it’s a sign you can water less,
improve airflow, or wrap the jar with paper, paint, or a sleeve to block light from the wet soil zone.
“It smells… earthy in a bad way.”
Sour odors usually mean the soil is staying too wet. Switch to the pot-in-a-jar method, drill drainage,
or repot using a lighter mix. For terrariums, reduce watering and vent briefly if condensation is heavy.
“Tiny flies are living their best lives.” (Fungus gnats)
Fungus gnats love damp soil. Let the surface dry more between waterings, remove dead leaves,
and consider a thin layer of sand or fine gravel on top of the soil (top layer, not bottom layer).
“My herb looks sad.”
Herbs often struggle in tiny containers because they grow fast and want more root space.
If basil is droopy, it may need more light, more room, or a more consistent watering rhythm.
Don’t be afraid to “graduate” a plant to a larger pot and reuse your jar for cuttings.
Design Ideas That Make a Mason Jar Planter Look Intentional
- Kitchen herb lineup: label jars with chalk paint labels or a simple tag tied with twine.
- Hanging mason jar planter: try a macramé holder for a floating window garden vibe.
- Wall-mounted jar garden: mount jars to a board with metal clamps for a vertical display.
- Centerpiece jars: use low-profile jars with greenery as a table runner accent.
- Seasonal swaps: spring bulbs (short-term), summer herbs, fall mini mums (briefly), winter evergreen cuttings.
Experiences with Mason Jar Planters (The Real-Life Stuff People Learn the Hard Way)
The first experience most people have with a mason jar planter is pure optimism. You plant a cute herb,
set it on the windowsill, and imagine yourself casually snipping fresh thyme like a main character in a
cozy cooking show. Then real life shows up: the jar fogs, the soil stays wet, and suddenly you’re
Googling “why does my basil hate me” at 11:47 p.m.
One common “aha” moment is realizing that clear glass is basically a backstage pass to what’s happening
below the surface. In a traditional pot, you can pretend everything is fine. In a mason jar, you can see
moisture clinging to the sides, you can spot algae early, and you can catch overwatering before the plant
turns into compost with leaves. That visibility helps you get better fastespecially if you start using a
skewer or your finger to test soil before watering. Many beginners water on a schedule; jar planters teach
you to water based on reality, which is rude but effective.
Another common experience is learning which plants actually like the “small container life.” Chives tend to
stay pretty content, thyme is slow-growing and chill, and pothos cuttings will happily root in water like
it’s their job (because it is). Basil, on the other hand, often behaves like it needs its own apartment.
Basil grows quickly, drinks a lot, and can outgrow a jar faster than you can say “caprese.” If you want
basil in a mason jar planter, using a wick setup or a pot-in-a-jar method (so you can size up later) usually
makes the experience smoother.
People also discover that “rocks in the bottom” isn’t the magical fix it’s often advertised to be. Sure,
a gravel layer can make a jar look Pinterest-perfect, but if the system doesn’t actually drain, water can
still pool and the soil above can stay too wet. What tends to work better in day-to-day life is either
drilling a drainage hole or using an insert pot so you can water properly and dump excess water. That’s
the difference between a jar that looks cute for a week and a jar that stays healthy for months.
Terrarium-style jars create a different kind of learning curve. Many people’s first terrarium experience is
overwateringbecause we’re used to watering plants like we’re putting out a tiny fire. In a terrarium,
“just a little” water goes a long way. The practical experience is watching condensation build up and
realizing you can vent the jar briefly to rebalance moisture. It’s oddly satisfying when the system finds
equilibrium: less watering, slow growth, and a tiny green world that mostly minds its own business.
Finally, there’s the design experiencebecause mason jar planters aren’t just about plant care; they’re
décor. People often start with one jar and end up creating a whole lineup: matching herbs for the kitchen,
a hanging jar by the window, and a jar of cuttings on a desk that makes Zoom calls look more “intentional.”
The best part is that jar planters are easy to refresh. When a plant outgrows the jar, you don’t have to
feel like you failed. You just repurpose: move the plant to a bigger pot, clean the jar, and start again
with cuttings, seedlings, or a seasonal mini arrangement. That cycleplant, learn, upgrade, reuseis
basically the mason jar planter lifestyle in a nutshell.
Conclusion
A mason jar planter can be charming, practical, and surprisingly successfulif you match the setup to the
plant. If you want the simplest path to healthy roots, drill a drainage hole or use the pot-in-a-jar method.
If you want lower-maintenance watering for moisture-loving plants, try a wick system. And if you’re in the
mood to build a tiny indoor ecosystem, go full terrarium.
The big win is that mason jar planters invite experimentation without a huge budget or a huge space.
Start small, pay attention to moisture, and don’t be afraid to change the method if the plant looks unhappy.
Plants aren’t judging you. (If they were, succulents would have a podcast.)


