
Table of Contents >> Show >> Hide
- Why This Style Is Still So Popular
- Before the Makeover: Decide What the Dresser Needs
- How to Give a Mid Century Modern Dresser a Makeover
- Color Ideas That Work for Mid Century Modern Style
- Common Mistakes That Can Ruin the Look
- How to Style the Finished Dresser
- The Real Value of a Dresser Makeover
- Experience: What It Feels Like When a Mid Century Modern Dresser Gets a Makeover
- Conclusion
section, with publish-ready English content and the SEO JSON block at the end. The article’s practical guidance is based on current U.S. home-improvement and design coverage, including advice on cleaning, sanding, dust removal, priming, thin coats, finish testing, and classic miArchitectural Digest+5Bob Vila+5This Old House+5Minwax+10Better Homes & Gardens+10The Spruce+10
A mid century modern dresser makeover is one of the most satisfying home projects you can tackle without demolishing a wall, upsetting your neighbors, or developing a new and dramatic relationship with drywall dust. A good dresser already has the bones: clean lines, practical storage, and that low-slung, unfussy charm that makes mid-century design feel timeless instead of trendy. The trick is giving it new life without sanding away the personality that made you stop and say, “Yep, that’s the one.”
Whether your dresser came from a thrift store, a grandparent’s guest room, or the curbside “free if you can carry it” section of the universe, a thoughtful makeover can turn it into a statement piece. The best results happen when you balance preservation with polish. In other words, you want it to look refreshed, not like it lost a bet with a gallon of paint.
Why This Style Is Still So Popular
Mid-century modern furniture has staying power because it is practical, streamlined, and easy to update. Dressers in this style often feature tapered legs, minimal ornamentation, simple hardware, warm wood tones, and a low profile that keeps a room feeling open. Even when the finish is worn, the silhouette usually still works beautifully in modern homes.
That is exactly why a mid century modern dresser makeover makes sense. You are not trying to force a dated piece into a new identity. You are helping a well-designed piece return to form. Sometimes that means restoring the wood. Sometimes it means painting the frame and keeping the drawer fronts natural. Sometimes it means swapping clunky hardware for slim brass pulls and suddenly acting like you are the design lead on a boutique hotel renovation.
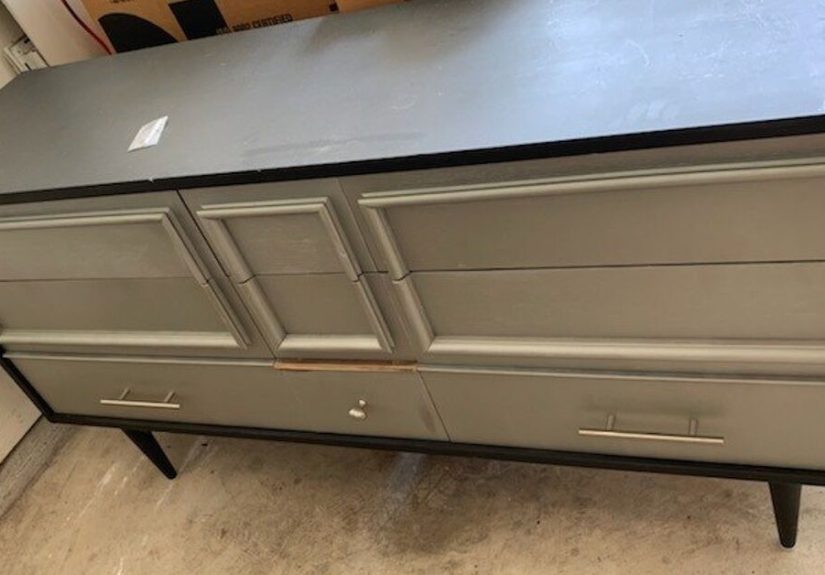
Before the Makeover: Decide What the Dresser Needs
Not every dresser deserves the same treatment. Before you grab sandpaper and go full DIY hero, take a close look at the piece.
Check the structure first
Open every drawer. See whether they stick, sag, scrape, or wobble. Look for loose joints, cracked corners, chipped veneer, water rings, and bubbling finish. A dresser can survive ugly paint, dated knobs, and an unfortunate 1990s sheen. It cannot survive a drawer box that sounds like it is filing a complaint every time you open it.
If the dresser is solid wood or has attractive veneer in good condition, a refinishing route may make more sense than full paint. If the surface is heavily stained, patched, mismatched, or too damaged to save attractively, paint becomes the stylish rescue plan.
Choose between paint, stain, or a mixed finish
One of the smartest approaches for a wood dresser makeover is to let the shape guide the finish. If the piece has gorgeous drawer fronts or a beautiful grain pattern, consider staining or clear-coating those areas while painting the frame. This mixed-finish look feels custom and keeps the mid-century vibe intact.
Paint works well when you want a crisp, modern update. Stain works well when you want warmth, depth, and a more original look. A combination of both often delivers the best of both worlds: character plus freshness.
How to Give a Mid Century Modern Dresser a Makeover
1. Remove hardware, drawers, and old distractions
Start by removing the knobs or pulls, taking out the drawers, and labeling anything you might want to reuse. This step sounds basic because it is basic, but it also separates calm DIYers from the people later muttering, “Where did this screw come from?” into a coffee cup full of mystery parts.
Getting the dresser into pieces makes cleaning easier and gives you better access to edges, sides, and drawer fronts. It also helps you decide whether the hardware is salvageable or whether it belongs in a drawer labeled “Lessons Were Learned.”
2. Clean like you mean it
Years of dust, furniture polish, body oil, and household grime can interfere with primer, paint, or stain. Wipe the piece down thoroughly with an appropriate cleaner and let it dry completely. Skipping this step is the furniture makeover version of putting mascara on before washing your face.
Pay extra attention to drawer fronts, side panels, and around handles, where residue tends to build up. A surface that looks clean can still be surprisingly greasy. Your finish will absolutely notice.
3. Sand strategically, not aggressively
Sanding matters because it improves adhesion and smooths out surface imperfections. But this is where people get a little too enthusiastic and accidentally remove what made the dresser special in the first place. If you are working with veneer, be especially gentle. The goal is to scuff and smooth, not excavate.
For painted makeovers, a light to medium sanding is usually enough to dull the existing finish and help primer grip. For staining, you may need more extensive prep if the existing topcoat is thick or blotchy. Always sand in a way that respects the grain and shape of the piece.
4. Make repairs before the pretty part
Fill gouges, dents, and hardware holes if you are changing pull placement. Tighten loose legs. Reglue anything that wiggles with more confidence than it should. If drawers stick, wax or adjust the runners after the finish work is complete. This is not the glamorous stage, but it is the difference between “beautiful makeover” and “lovely from across the room.”
If you are painting a light color over a dark or stained surface, use a quality primer so tannins and old finish do not come back to haunt you. If you are using chalk-style or mineral paint, follow the product’s system for the best result. And yes, test your finish schedule on a hidden area first. Future you will be grateful.
5. Apply paint or stain with patience
Thin, even coats usually beat thick coats every time. Thick paint loves to drip, pool, and leave brush marks like little souvenirs from your impatience. Use a brush, roller, or sprayer depending on the surface and the look you want. Smooth broad panels often benefit from a roller or sprayer, while edges and detail areas may need a brush.
If you are staining, work methodically and wipe back excess to keep the tone even. If you are painting, let each coat dry fully before the next one. Rushing this part can turn a sleek dresser makeover into a fingerprint museum.
6. Protect the finish
A dresser is a high-touch piece of furniture. Drawers open and close. Jewelry gets dropped. Water glasses appear where they should not. That means protection matters. Depending on the finish you chose, this could mean a clear topcoat, wax, or a self-sealing paint system.
For a modern painted dresser, a durable protective finish can make the surface easier to clean and more resistant to everyday wear. For a waxed finish, buffing brings out a soft sheen that feels especially right on vintage-inspired furniture. The best choice depends on the paint type, desired sheen, and how the dresser will be used.
7. Upgrade the hardware without losing the style
Hardware is small, but it changes everything. The wrong pull can make a beautiful mid-century dresser look confused. The right one makes it look intentional, elevated, and just expensive enough to annoy people who paid full retail for theirs.
For a mid-century modern dresser, look for slim bar pulls, understated round knobs, wood knobs, or warm metallic finishes like brass. Black can work too, especially if the dresser has a rich walnut tone or a moody painted finish. Keep the hardware simple and proportionate to the drawer fronts.
Color Ideas That Work for Mid Century Modern Style
If you want your dresser painting ideas to stay faithful to mid-century character, think in terms of warmth, contrast, and restraint. This style is not afraid of color, but it usually uses it with purpose.
Warm neutrals
Greige, camel, mushroom, clay, and creamy off-white can modernize a dresser while still letting the silhouette do the talking. These shades work especially well in bedrooms where you want the piece to feel calm and collected.
Earthy color hits
Olive, rust, deep green, navy, and muted ochre can look fantastic on a vintage dresser. These tones nod to retro palettes without turning the room into a themed diner.
Classic wood tones
Walnut-inspired and teak-inspired finishes are natural companions for mid-century modern design. If the grain is attractive, a refreshed stain plus new hardware may be all your dresser needs.
Common Mistakes That Can Ruin the Look
The first mistake is overdoing the makeover. Mid-century furniture tends to shine when the lines stay clean and the finish feels intentional. Heavy distressing, ornate stencils, or fussy embellishments can fight the original design. Unless your dresser specifically wants to cosplay as a French farmhouse piece, let it be what it is.
The second mistake is ignoring scale. Oversized pulls can swallow a clean drawer front. Extra-thick paint can soften edges that are supposed to look crisp. Bulky legs or decorative appliques can make a low-profile dresser feel visually heavy.
The third mistake is treating prep like a suggestion. A beautiful color cannot save poor adhesion, trapped dust, or a tacky topcoat. When people say a dresser makeover failed, the culprit is often not the paint. It is the skipped prep hiding in the background like a villain in a cozy mystery.
How to Style the Finished Dresser
Once your dresser is done, styling matters. A well-made dresser makeover deserves more than random receipts, five tangled chargers, and a candle you have never actually lit.
Try a round mirror above the dresser for contrast against the straight lines. Add a ceramic lamp, a framed print, or a sculptural vase. If the dresser has a strong wood tone, balance it with soft textiles nearby. If it is painted, repeat that tone somewhere else in the room so it feels integrated rather than accidental.
Mid-century style thrives on contrast: warm wood against crisp walls, streamlined forms beside organic textures, function paired with quiet beauty. Your dresser can anchor that balance in a bedroom, hallway, office, or entryway.
The Real Value of a Dresser Makeover
A mid century modern dresser makeover is not just about looks. It is also about keeping a well-built piece in use. Many older dressers were made with materials, proportions, and craftsmanship that feel harder to find in mass-produced furniture. Updating one can be more affordable than replacing it, and often more rewarding too.
There is also something deeply satisfying about creating a piece that fits your home instead of settling for one that merely exists in it. You choose the tone, the sheen, the hardware, and the mood. The dresser stops being old furniture and starts becoming your furniture.
Experience: What It Feels Like When a Mid Century Modern Dresser Gets a Makeover
The experience of giving a mid century modern dresser a makeover is part design project, part patience test, and part unexpected emotional journey. At the beginning, the piece usually looks more tired than charming. The finish is dull, the drawers smell faintly like history, and the hardware has all the glamour of a forgotten office supply. But the minute you start removing the drawers and wiping away the grime, something shifts. You begin to notice the shape. The taper of the legs looks more intentional. The proportions feel balanced. Under the wear, the dresser starts to show you why it survived this long.
Then comes the prep stage, where confidence and humility become roommates. Sanding teaches patience fast. You cannot rush it, and you definitely cannot fake it. Every pass over the surface feels like a negotiation between preserving character and removing damage. When the dust settles, literally, the piece begins to look strangely elegant even before the new finish goes on. It is in that in-between stage that you realize most furniture makeovers are really about seeing potential clearly enough to keep going.
Painting or staining is the turning point. The first coat always looks slightly alarming, which is one of the universal truths of DIY. You wonder whether you have made a huge mistake. The color seems wrong. The sheen looks uneven. You briefly consider apologizing to the dresser. But then the second coat goes on, the finish levels out, and suddenly the piece starts making sense. The hardware you picked out no longer seems overly ambitious. The vision clicks. It begins to look like something that belongs in a room with good lighting, a stack of art books, and a plant that somehow never dies.
One of the best parts of the experience is how the dresser changes the room after it is finished. Even if you only updated one piece, the entire space can feel more intentional. A bedroom looks calmer. A hallway looks designed instead of merely occupied. The dresser becomes proof that thoughtful changes beat expensive ones. Guests may assume you bought it from a vintage boutique with dramatic pricing and selective opening hours. You are under no obligation to correct them.
There is also a personal satisfaction that is hard to overstate. A makeover like this gives you a tangible result for your effort. You can open the drawers, run a hand across the smooth top, and say, “I did that,” which is a rare and pleasant feeling in a world where so much work happens invisibly behind screens. The dresser becomes more than storage. It becomes evidence of taste, effort, and a willingness to rescue something worth keeping.
And that may be the most rewarding part of all. A mid century modern dresser getting a makeover is not just a furniture project. It is a reminder that good design ages well, that quality deserves a second chance, and that a little elbow grease can turn a forgotten piece into the one everyone notices first.
Conclusion
A successful mid century modern dresser makeover respects the original silhouette while improving the finish, function, and personality of the piece. Start with the bones, choose a finish that suits the wood and style, prep carefully, and keep the details simple. Whether you paint it, stain it, or combine both, the goal is the same: make the dresser feel fresh without erasing what made it special.
When done well, a dresser makeover does more than refresh old furniture. It adds warmth, character, and intention to your space. And unlike many home upgrades, this one lets you stand back at the end of the day and admire something both useful and beautiful. That is a pretty good return on a weekend project.


