
Table of Contents >> Show >> Hide
- Why the Worx Maker X Works So Well for This Project
- Choose the Right Board First, or Everything Gets Harder
- What You Need for the Project
- Step-by-Step: How to Make a Wood Burned Charcuterie Board
- Design Ideas That Actually Look Good on a Charcuterie Board
- Common Mistakes to Avoid
- How to Use and Care for the Finished Board
- The Real Experience of Making One
- Final Thoughts
Some DIY projects are practical. Some are pretty. And some, like a wood burned charcuterie board made with the Worx Maker X, are the overachievers of the craft world. This one holds cheese, looks custom, sparks conversation, and quietly tells your guests, “Yes, I do have excellent taste. Thanks for noticing.”
If you want a project that feels personal without requiring a full-on furniture shop and a beard full of sawdust, this is a smart place to start. A wood burned charcuterie board gives you the warmth of handmade woodwork and the charm of pyrography without the commitment of building a dining table in your garage. Add the slim, pen-like control of the Worx Maker X, and suddenly detailed borders, monograms, botanical sketches, and playful phrases do not feel so intimidating.
The trick is not just burning a pretty design into a board. The trick is making one that still functions well, still feels good in the hand, and still belongs anywhere near brie, grapes, and a dramatic little pile of prosciutto. That means choosing the right hardwood, planning your design carefully, working with the right heat, and finishing the board in a way that is safe for serving food.
So let’s walk through how to make a wood burned charcuterie board with the Worx Maker X the right way, with fewer mistakes, better results, and no weird mystery finish that turns your snack board into a science experiment.
Why the Worx Maker X Works So Well for This Project
The Worx Maker X Wood & Metal Crafter is a great fit for a decorative charcuterie board because it behaves more like a precision pen than a bulky old-school burner. That matters. When you are outlining a monogram, tracing a leafy border, or trying to avoid turning a simple line into what looks like a tiny burnt potato, control is everything.
One of the biggest advantages is temperature flexibility. The tool is designed to work from 400 to 900 degrees Fahrenheit, which gives you room to adjust for different woods, different tips, and different effects. Lighter lines, darker shading, crisp outlines, and bolder marks all benefit from being able to change heat rather than just crossing your fingers and hoping for the best.
It also heats quickly, which is a blessing for impatient makers and anyone who has ever stared at a cold tool and wondered if this was how their crafting villain origin story began. The Maker X reaches target heat in about 30 seconds, has digital temperature control, and comes with multiple wood-burning tips. If you buy the tool-only version, remember that the Maker X Hub is required for operation, so do not plan your whole Saturday project around a box that still needs one more box.
Another nice touch is the built-in sleep behavior. If the tool sits still for a while, it drops temperature and eventually shuts down. That does not replace good habits, but it does add a little peace of mind when you get distracted by a text, a snack, or the sudden realization that you spelled “gather” as “gatheer” in your outline.
Choose the Right Board First, or Everything Gets Harder
A great wood burned charcuterie board starts with good wood. Not bargain-bin mystery lumber. Not pallet scraps. Not treated wood. Not something that smells like it once lived a very complicated life in a garden center.
For a serving board, hardwoods are the safest and smartest bet. Hard maple is especially popular because it has a fine grain, good hardness, and excellent finishing quality. Walnut is another strong choice if you want richer color and a more dramatic, upscale look. Cherry is beautiful too, especially if you like warm tones and a smoother, slightly softer visual style.
Maple tends to give you clean contrast for burning because its lighter surface makes dark lines pop. Walnut is moodier and more luxurious, but the darker tone means subtle burns may not stand out as strongly. Cherry lands nicely in the middle, offering warmth, smooth texture, and a classy finish that ages beautifully over time.
If you are buying a ready-made blank instead of gluing up your own board, look for an untreated hardwood board with a flat surface and a shape that suits your design. A paddle-style board with a handle works especially well because you can burn the art on the handle, around the edges, or on one serving face without crowding the whole board.
If you are making your own glued board, use an adhesive intended for that kind of kitchen project. Titebond III is a common choice because it is waterproof and approved for indirect food contact, which is exactly the kind of sentence you want associated with your future cheese board.
What You Need for the Project
You do not need a massive workshop to make this. You need a good plan, a steady setup, and enough patience to test your tool before you touch the actual board.
Basic materials
Start with a hardwood charcuterie board or board blank, your Worx Maker X with the correct Hub, a wood-burning tip suited for line work, medium and fine sandpaper, a pencil, tracing paper or graphite paper if you want to transfer a design, a soft cloth, and a food-safe finish such as mineral oil or a mineral-oil-and-beeswax conditioner.
Optional but helpful extras
A ruler, stencil set, masking tape, a small eraser, and scrap wood for practice will all make the process smoother. Practice wood is not glamorous, but it saves lives. Or at least saves boards.
Step-by-Step: How to Make a Wood Burned Charcuterie Board
1. Prep the wood surface
Before you burn anything, sand the board until the surface feels smooth and even. A rough surface will fight your tip, wobble your lines, and make you feel like the wood personally resents you. Start with a medium grit if needed, then move to a finer grit for a cleaner finish.
Wipe away every bit of dust before you begin. Fine dust can muddy your design and make it harder to see your layout lines clearly.
2. Decide where the design should go
This part matters more than people think. A charcuterie board is still a serving piece, so your artwork should support the board, not sabotage it. The smartest locations are the handle, the outer border, one corner, or a decorative band along the perimeter.
If you expect people to slice food directly on the board, avoid putting heavy pyrography in the main cutting zone. Knife marks will chew through the art over time. Decorative wood burning belongs where it can be admired, not where it will get attacked by a serrated baguette knife.
3. Sketch or transfer your design
Simple designs usually look best. Think olive branches, vines, initials, family names, cheese-themed phrases, geometric borders, mountain scenes, or a minimal holiday motif. If freehand drawing is not your thing, trace a printed design using graphite paper. That is not cheating. That is called enjoying your life.
Keep your pencil lines light. You want enough to guide the burner, not enough to create a ghost image under the finished design.
4. Test the Maker X on scrap wood first
This is the step people skip right before they regret everything. Test the same wood species on scrap if you can. Different woods react differently, and even a perfect temperature on maple might look too aggressive on cherry.
Try a few temperatures and strokes. Practice slow pulls for dark lines, quicker passes for lighter marks, and small circles or repeated passes for shading. You are not just testing the tool. You are learning the pace. Good wood burning is less about brute force and more about rhythm.
5. Burn the main outlines first
Once you feel comfortable, start with the cleanest outlines in your design. Hold the Maker X like a pen and let the heated tip move at a steady pace. Do not press hard. Pyrography rewards control, not wrestling. If you force the tip, the lines can blob, snag, or darken unevenly.
Work in small sections and rotate the board as needed. Turning the board is usually easier than contorting your wrist into a shape your chiropractor would later discuss in a case study.
6. Add shading and detail
After the main lines are in place, go back and build texture. Shading adds depth and makes even a simple design feel more custom. You can darken leaves, add dimension to lettering, or create a soft burned edge around a border for a more finished look.
The key word is build. Go gradually. It is much easier to darken a line than to reverse one that now looks like it survived a tiny campfire.
7. Clean up gently
When the board has cooled completely, erase any remaining visible pencil marks. If needed, do a very light final sanding around untouched areas, but be careful not to soften the burned details you just created. This is a finesse moment, not a sanding marathon.
8. Apply a food-safe finish
For a serving board, keep the finish simple and safe. Food-grade mineral oil is the classic choice, and many board makers follow it with a beeswax-based conditioner for extra moisture resistance. Avoid cooking oils that can go rancid, and avoid film-forming finishes that are not intended for kitchen use.
Apply the oil generously with a soft cloth, let it soak in, and wipe away the excess. Some makers like to let the first coat sit overnight. If the board still looks thirsty, add another coat. Wood is honest that way. When it is dry, it looks dry.
Design Ideas That Actually Look Good on a Charcuterie Board
The best wood burned charcuterie board designs do not try to cram an entire art school portfolio onto one serving surface. Keep it intentional.
Monogram on the handle
A single initial or small family monogram on the handle looks custom, elegant, and gift-worthy without competing with the food.
Botanical border
Olive branches, eucalyptus stems, vines, herbs, or wildflowers around the edge create a warm handmade look that works year-round.
Short phrase
Something like “Gather,” “Snack Time,” “Stay Awhile,” or “Slice, Sip, Repeat” adds personality. Just keep the lettering neat and the message short. A charcuterie board is charming, but it does not need a TED Talk.
State outline or place theme
A home state outline, a mountain silhouette, or a lake-house motif makes the board feel personal without being fussy.
Common Mistakes to Avoid
The first mistake is choosing the wrong wood. Soft construction lumber is not ideal for a kitchen board, and treated wood should never be used where food touches the surface.
The second is skipping the test burn. Temperature control is wonderful, but only if you actually use it. Jumping straight onto the final board is how clean lettering turns into a burnt ransom note.
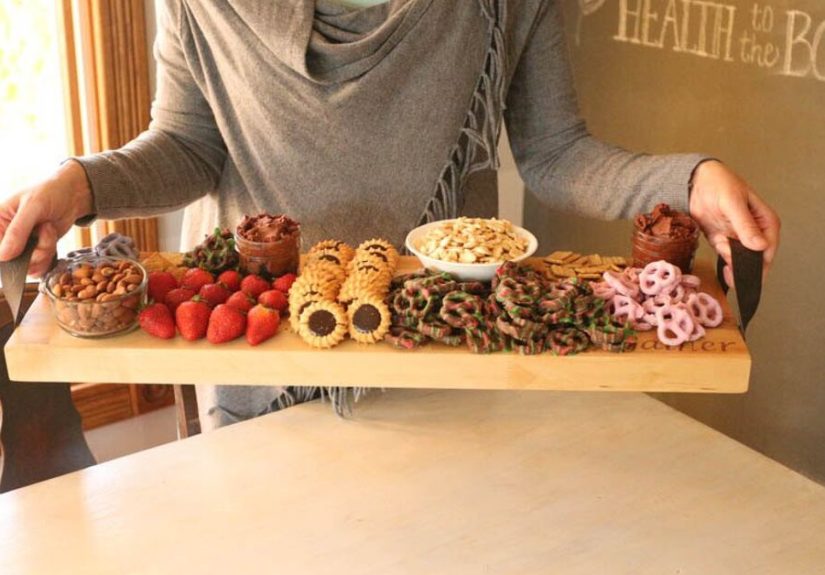
The third is over-decorating the working surface. Remember that this is a serving board. Leave room for cheese, crackers, fruit, little jars of mustard, and all the tasty chaos that comes with a proper spread.
The fourth is using the wrong finish. A beautiful design can be ruined by a finish that feels sticky, smells off, or is not suitable for food-contact surfaces.
How to Use and Care for the Finished Board
Once your board is finished, treat it like the useful showpiece it is. Wash it by hand with hot, soapy water after use. Do not soak it. Do not send it through the dishwasher unless you are interested in a dramatic before-and-after story for all the wrong reasons.
If the board is used with raw meat or other risky foods, clean and sanitize it properly. In general, it is smartest to keep a decorative charcuterie board for serving ready-to-eat items rather than raw prep. Save the raw chicken duties for a different board. Your handcrafted pyrography project deserves a calmer career path.
Re-oil the board whenever it looks dry. Many wood board care guides suggest oiling about once a month, depending on use and household conditions. A little regular care keeps the wood from drying out, helps the grain look rich, and keeps your board looking like a gift-shop hero instead of a neglected camp prop.
The Real Experience of Making One
Making a wood burned charcuterie board with the Worx Maker X is one of those projects that feels simple on paper and surprisingly satisfying in real life. The first few minutes are usually a mix of excitement and low-level panic. You have the smooth hardwood in front of you, the design traced out, the tool heating up, and that tiny voice in your head saying, “Please don’t ruin the nice board. Please don’t ruin the nice board.” That voice is not helpful, but it is very committed.
Then the tip touches the wood, and everything changes. You hear that soft hiss, see the line appear, and suddenly the project stops feeling theoretical. It becomes physical, slow, and weirdly calming. The smell of warm wood drifts up. The line darkens a little more than expected. You adjust your speed. You breathe. By the third or fourth stroke, you start to understand that pyrography is really about patience. The tool is hot, yes, but the process itself is not frantic. It is measured. It rewards staying relaxed.
One of the most memorable parts is how much the board’s personality changes with each small detail. A blank piece of maple can look clean but ordinary. Add a border of leaves around the edge and a monogram on the handle, and suddenly it looks like something from a boutique kitchen shop where everything costs just enough to make you squint. That transformation is satisfying in a very specific way because it comes from your hand, not from slapping on some factory-made decal.
The Worx Maker X makes that experience more enjoyable because it feels less like using a clunky hot tool and more like drawing with a powered pen. That pencil-style grip matters. It lets you settle into the work. You can rotate the board, follow the curve of a letter, and add shading without feeling like you are fighting the tool the whole time. The learning curve is still real, but it feels manageable. You are learning finesse, not brute survival.
There is also a funny little emotional arc that comes with the project. At first, you obsess over every wobble. Midway through, you stop trying to make it machine-perfect and start making it beautiful. By the end, the tiny imperfections actually help. They are part of what makes the board feel handmade instead of mass-produced. It has character. It has warmth. It has what people politely call “artisan charm” and what your best friend will call “proof you made this yourself.”
And then comes the best part: using it. The first time you pile on crackers, grapes, cheddar, salami, and a tiny bowl of olives, the board finally clicks into its full purpose. It is not just a craft project anymore. It is part of the gathering. People touch it, ask where you got it, and look mildly impressed when you say you made it. That moment is hard to beat. It is useful, personal, decorative, and just flashy enough to earn compliments without screaming for attention. In other words, it is exactly what a handmade kitchen piece should be.
Final Thoughts
A wood burned charcuterie board with the Worx Maker X hits a sweet spot that many DIY projects miss. It is creative without being chaotic, practical without being boring, and detailed without demanding professional-level woodworking skills. With the right hardwood, a thoughtful layout, controlled burning, and a food-safe finish, you can make a board that looks polished, feels personal, and actually earns its place in your kitchen.
Whether you keep the design minimal or go full custom gift-mode, the best result comes from respecting both sides of the project: the art and the function. Make it beautiful, yes. But also make it usable. Because a board that looks gorgeous and serves cheese like a champion is the kind of multitasker we should all aspire to be.


