
Table of Contents >> Show >> Hide
- Before You Start: What Makes a Good Outdoor Ring Setup?
- Method 1: Hang Gymnastic Rings from a Strong Tree Branch
- Method 2: Hang Rings from an Outdoor Pull-Up Bar or Freestanding Rig
- Method 3: Install Rings on a Permanent Outdoor Beam or Ring Hanger
- Outdoor Ring Safety Checklist
- How High Should Outdoor Gymnastic Rings Be?
- Common Mistakes to Avoid
- of Real-World Experience: What Outdoor Ring Training Actually Feels Like
- Conclusion
Gymnastic rings are the Swiss Army knife of bodyweight training. Hang them properly outside, and suddenly your backyard, driveway, garage overhang, or local park becomes a full upper-body gym. Hang them badly, however, and your “quick workout” can turn into a dramatic reenactment of gravity winning an argument. The good news is that learning how to hang gymnastic rings outside is simple when you understand three things: the anchor must be strong, the straps must sit correctly, and your training space must give you enough room to move without bonking into a fence, grill, or suspiciously judgmental garden gnome.
This guide explains three practical outdoor ring setups: hanging rings from a sturdy tree branch, using an outdoor pull-up bar or freestanding rig, and installing a permanent beam or ring hanger. Each method can work beautifully, but each has its own personality. Trees are flexible and budget-friendly. Pull-up bars are fast and adjustable. Permanent mounts are clean, dependable, and excellent for people who want their workout station ready before their coffee is finished.
Before choosing a method, remember that gymnastic rings are not just decorations with deltoid dreams. They create dynamic force. Even basic ring rows, push-ups, dips, and support holds can shift your body weight in different directions. That means the anchor point should be stronger than “probably fine,” the straps should be inspected often, and beginners should start close to the ground before attempting anything advanced. Safety is not the boring part of ring training; safety is what lets you keep training next week.
Before You Start: What Makes a Good Outdoor Ring Setup?
A reliable outdoor gymnastic rings setup starts with a strong overhead anchor. The best anchor is one that does not bend, shake, splinter, twist, slide, or make spooky creaking noises when you load it. Whether you use a tree branch, pull-up bar, pergola beam, or mounted ring hanger, the support should be capable of holding your body weight plus the extra force created by movement. If you plan to do dynamic exercises like muscle-ups or kipping movements, you need an even more robust structure and a higher level of skill.
Clearance matters, too. For most outdoor ring workouts, you want enough height to adjust the straps for rows, push-ups, dips, pull-ups, and hangs. A higher anchor gives you more flexibility, but you do not need a competition gymnastics facility in your backyard. Many home users do well with an anchor roughly 9 to 12 feet high, depending on the exercises they plan to perform. For width, leave enough room around your body so your shoulders, elbows, and feet can move naturally. Shoulder-width ring spacing, or slightly wider, is usually comfortable for basic strength training.
Also check the ground. Grass, rubber tiles, mulch, or another forgiving surface is much better than concrete. Rings are challenging because they move; your landing area should not be a hard punishment zone. Remove rocks, tools, toys, hoses, buckets, and anything else that could trip you. Outdoor training already has enough variables. You do not need a surprise rake cameo.
Method 1: Hang Gymnastic Rings from a Strong Tree Branch
The classic outdoor method is also the most charming: find a big tree, loop the straps over a branch, adjust the rings, and train in the shade like a woodland athlete. A tree setup is affordable, portable, and perfect for parks or backyards. It is especially good for ring rows, push-ups, assisted dips, support holds, pull-ups, and controlled core work.
Choose the Right Tree Branch
Do not use a random branch just because it is conveniently overhead. The branch should be thick, alive, healthy, and attached to a strong trunk. Avoid dead branches, cracked limbs, branches with fungus, hollow spots, or sections that flex heavily under load. A good tree branch should feel solid when you test it gradually. If it creaks, bends dramatically, or drops bark like it is filing a complaint, pick another anchor.
The branch should also be mostly horizontal. If the branch slopes too much, the straps may slide toward the trunk or outward while you train. That can make the rings uneven and annoying, like trying to do pull-ups on a boat that has personal issues. If you must use a slightly angled branch, position the straps so they cannot migrate and test carefully with your feet on the ground first.
Set Up the Straps Correctly
Throw or place each strap over the branch so the webbing lies flat. Avoid twists, knots, and sharp contact points. The strap should rest evenly on the branch, not on the buckle or carabiner. Metal hardware rubbing against bark, edges, or the ring itself can damage equipment and create unstable loading. Once the straps are over the branch, thread them through the buckles according to the manufacturer’s instructions and pull them snug.
Set both rings at the same height. An easy trick is to count the visible strap markings or hold the rings together and compare them before you start. Uneven rings can make rows and dips feel lopsided, and not in a fun “functional fitness” way. For beginner rows, set the rings around waist to chest height. For pull-ups or hanging work, raise them so your feet can clear the ground while still letting you dismount safely.
Best Exercises for a Tree Setup
A tree branch setup is excellent for controlled, beginner-friendly ring training. Start with ring rows, ring push-ups, incline ring planks, dead hangs, scapular pulls, and assisted support holds. These movements teach you how the rings move and how your shoulders respond. Save high-skill or dynamic movements for a purpose-built rig or a professional gym unless you are experienced and your anchor is unquestionably solid.
The main advantage of a tree setup is convenience. The main drawback is inconsistency. Branches vary in height, diameter, texture, and strength. Weather also matters. Wet straps can slip, bark can become slick, and storms can weaken branches. Inspect your tree and straps every time. Trees are wonderful, but they do not come with product manuals.
Method 2: Hang Rings from an Outdoor Pull-Up Bar or Freestanding Rig
An outdoor pull-up bar is one of the easiest and cleanest ways to hang gymnastic rings outside. If the bar is properly installed and rated for bodyweight training, the setup can take less than a minute. Loop the straps over the bar, adjust the length, check that the buckles are secure, and start training. This method is great for patios, garage gyms, backyard calisthenics areas, and outdoor fitness stations.
Why a Pull-Up Bar Works So Well
A straight bar gives the straps a smooth, predictable surface. Unlike a tree branch, the bar usually has a consistent diameter and does not change shape. That makes ring height easier to adjust and keeps the straps from wandering. A wall-mounted, ceiling-mounted, rack-mounted, or freestanding outdoor pull-up bar can all work as long as the structure is stable and rated for the type of training you plan to do.
For basic ring rows and push-ups, the load is moderate because your feet stay on the ground. For pull-ups, dips, L-sits, and muscle-up progressions, the bar and its mounting hardware must be much stronger. Always check the manufacturer’s weight rating. If the bar wobbles when you hang from it, it is not ready for aggressive ring work. Your workout should build confidence, not suspense.
How to Attach the Rings to a Pull-Up Bar
Stand under the bar and toss one strap over the top. Feed the strap through the buckle as directed by the ring manufacturer. Repeat with the second strap, then slide both straps until they are shoulder-width apart or slightly wider. Make sure the buckles hang at a similar height and face the same direction. Pull down firmly on each ring before putting your full weight into the setup.
When using a freestanding rig, check the base. Some lightweight towers can tip or shift during dynamic movement. If the rig has anchor points, use them according to the manufacturer’s instructions. If it is designed only for strict pull-ups, do not assume it can handle swinging ring skills. Rings can create forward, backward, and side-to-side force that a simple pull-up bar may not be built to manage.
Best Exercises for a Pull-Up Bar Setup
This setup is ideal for a wide range of exercises: ring rows, ring push-ups, dips, pull-ups, chin-ups, knee raises, L-sit progressions, assisted muscle-up drills, and controlled support holds. Because height adjustment is easy, you can move quickly between pulling, pushing, and core exercises. For example, you can do ring rows with the rings low, then raise them for pull-ups, then lower them again for push-ups. It is like having a portable gym that does not ask for a monthly membership or play terrible lobby music.
The pull-up bar method is often the best choice for beginners who want repeatable training. You can mark strap settings for different exercises, keep your equipment in one place, and build a consistent routine. The limitation is space. If the bar is close to a wall, fence, or ceiling, some movements may feel cramped. Leave room in front, behind, and beside you.
Method 3: Install Rings on a Permanent Outdoor Beam or Ring Hanger
If you want the most polished outdoor setup, install a permanent anchor. This can be a heavy-duty ring hanger mounted to a structural beam, a properly built backyard frame, a pergola beam that is actually structural, or a dedicated outdoor gym station. This method takes more planning, but it gives you a dependable place to train whenever you want.
When a Permanent Mount Makes Sense
A permanent setup is best if you train often, own your home, or want a clean backyard gym. It is also useful if you do not have a suitable tree or pull-up bar. A properly installed beam or ring hanger can provide consistent height, spacing, and stability. That consistency is valuable because ring training rewards precision. When your setup is the same every time, it is easier to track progress and improve technique.
However, permanent does not automatically mean safe. The anchor must be mounted into a structure that can handle the load. Decorative beams, thin pergola slats, old porch trim, and mystery lumber should not be trusted just because they look sturdy from far away. If you are unsure whether a beam is structural, ask a qualified builder, contractor, or engineer. This is not the time to “eyeball it” with the confidence of a reality-show home renovator.
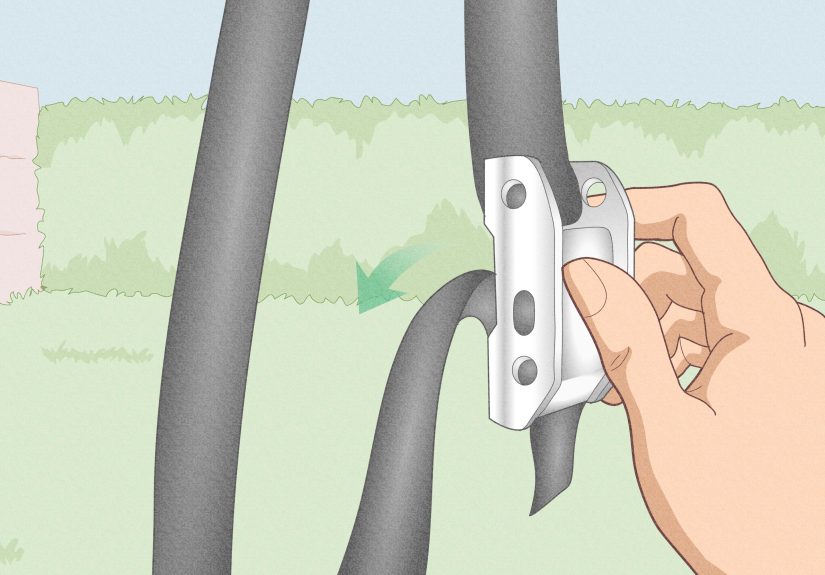
Hardware and Installation Basics
Use hardware designed for bodyweight suspension training. Ring hangers, eye bolts, lag screws, and mounting plates should be rated for the expected load and installed according to the manufacturer’s instructions. Outdoor hardware should resist rust and weather damage. Stainless steel or properly coated hardware is usually better for exposed areas than cheap indoor hardware.
Spacing is important. Mount points should be about shoulder-width apart for most users, commonly around 20 to 24 inches. If the anchors are too narrow, exercises may feel pinched. If they are too wide, dips and support holds can strain the shoulders. The exact spacing depends on your body size and training style, but shoulder width is a sensible starting point.
After installation, test gradually. First pull down on the rings with your feet on the ground. Then load more body weight slowly. Listen for creaking, watch for shifting hardware, and inspect the mounting surface. Do not jump straight into dips or muscle-ups. The first test should be boring. Boring is good. Boring means nothing snapped.
Best Exercises for a Permanent Setup
A permanent outdoor ring station is excellent for structured strength training. You can practice ring rows, push-ups, dips, pull-ups, skin-the-cat progressions, tuck holds, body saws, archer rows, and controlled transitions. More advanced users may use it for muscle-up progressions or longer skill sessions, provided the anchor is built for that level of force and the athlete has appropriate experience.
The downside is that permanent mounts are not portable. You also need to protect the rings and straps from weather. Wooden rings feel fantastic in the hands, but they do not love rain. Nylon straps can degrade over time with sun, moisture, and abrasion. When you finish training, take the rings down or store them under cover. Your future self will appreciate not grabbing mildew-flavored equipment.
Outdoor Ring Safety Checklist
Before every workout, inspect the straps, buckles, stitching, rings, and anchor point. Look for fraying, cuts, discoloration, cracking, rust, sharp edges, loose bolts, and anything that has changed since your last session. If a strap looks worn, replace it. If hardware looks loose, stop using it until it is fixed. Gymnastic ring straps are wear items, not family heirlooms.
Check the surface under the rings. A forgiving surface reduces risk if you slip or step down awkwardly. Avoid setting up over concrete, asphalt, rocks, or uneven ground. Keep the area clear of furniture, pets, children, and random objects. Rings move, legs swing, and elbows travel. Give yourself space.
Start with low-risk exercises. Beginners should master ring rows, incline push-ups, dead hangs, and basic support positions before moving to dips or pull-ups. Ring dips are much harder than bar dips because the rings want to drift apart. That instability is the magic of ring training, but it is also why your ego should wait politely outside the workout area.
How High Should Outdoor Gymnastic Rings Be?
The right ring height depends on the exercise. For rows, set the rings around waist to chest level. The lower the rings and the more horizontal your body, the harder the row becomes. For push-ups, set the rings a few inches above the ground at first, then lower them as you gain control. For dips and support holds, set them around lower-chest height so you can jump or step into position without a wild struggle.
For pull-ups and hanging core work, set the rings high enough that your feet clear the ground when your arms are extended. If your anchor is not high enough, bend your knees. If your anchor is extremely high, make sure you can reach the rings safely without climbing on unstable objects. A step stool on uneven grass is not a training accessory; it is a blooper reel waiting to happen.
Common Mistakes to Avoid
Using Weak or Decorative Anchors
Not every overhead object is a ring anchor. Decorative beams, thin branches, porch trim, swing sets made for small children, and lightweight patio covers may not be suitable. When in doubt, do not hang from it.
Letting Straps Rub Against Sharp Edges
Sharp metal, rough concrete, splintered wood, or abrasive bark can damage straps. If the strap fibers are being scraped every rep, the setup is not safe. Use a smoother anchor or protective padding when appropriate.
Skipping the Test Load
Always test the rings before training. Pull down, lean back, and gradually add weight. This takes seconds and can prevent a bad surprise.
Trying Advanced Skills Too Soon
Muscle-ups, levers, swings, and inversions require strength, mobility, and technique. Build the basics first. Outdoor rings are not impressed by bravery; they reward control.
of Real-World Experience: What Outdoor Ring Training Actually Feels Like
The first thing most people notice when they hang gymnastic rings outside is that the setup feels more alive than indoor equipment. A bar is fixed. A machine is guided. Rings, on the other hand, politely ask every stabilizer muscle in your upper body to report for duty. Even a simple ring row can feel different outdoors because the ground may be slightly uneven, the straps may sway in a breeze, and your body has to organize itself without the neat borders of a gym.
In a backyard tree setup, the experience can be surprisingly enjoyable. Training under shade feels cooler, calmer, and less boxed in. Morning sessions are especially good because the straps are not hot from the sun and the ground is usually dry. The biggest lesson from tree setups is to be picky. One branch may look perfect but sit too high for easy adjustment. Another may be strong but angled enough that the straps slide. Once you find the right branch, mark your preferred strap length with a small piece of tape or remember the buckle position. That little habit saves time every workout.
Outdoor pull-up bar setups feel more athletic and efficient. If you already have a backyard bar, rings turn it into a full training station. One practical approach is to organize workouts by strap height. Start high with pull-ups or hangs, lower the rings for rows, then lower them again for push-ups or fallouts. This prevents constant fiddling. The less time you spend adjusting straps, the more likely you are to finish the workout instead of wandering off to “check something” and accidentally becoming one with the couch.
Permanent mounts feel the most professional, but they teach another lesson: weather matters. Leaving rings outside all week can shorten their life. Wooden rings may absorb moisture, straps can fade in harsh sun, and metal hardware can rust if it is not outdoor-rated. A simple storage habit solves most of this. Unclip the rings after use, keep them in a dry bin, and inspect the mount before each session. It is not fancy, but it works.
Another real-world tip is to begin every outdoor workout with a basic support check. Hold the rings with straight arms, keep your shoulders active, and let your feet lightly touch the ground. If the rings feel uneven, slippery, or unstable, fix the setup before moving on. Do not negotiate with equipment. Equipment does not care about your schedule.
Finally, outdoor ring training is best when you keep it simple. A strong session might include ring rows, ring push-ups, assisted dips, knee raises, and a few controlled hangs. That is enough to challenge the back, chest, shoulders, arms, grip, and core. You do not need circus skills to get results. You need consistency, good anchors, careful setup, and the humility to respect two wooden circles dangling from straps. They look simple. They are not.
Conclusion
There are three reliable ways to hang gymnastic rings outside: use a healthy tree branch, loop the straps over a sturdy outdoor pull-up bar or rig, or install a permanent beam or ring hanger. The best choice depends on your space, budget, training goals, and comfort with installation. A tree is quick and natural. A pull-up bar is convenient and repeatable. A permanent mount is durable and polished when installed correctly.
No matter which method you choose, the rules stay the same: inspect everything, use a strong anchor, avoid sharp edges, leave enough clearance, train over a safer surface, and start with controlled movements. Gymnastic rings can build serious strength with very little equipment, but they demand respect. Set them up well, and your outdoor space can become a simple, powerful training zone. Set them up carelessly, and gravity will offer feedback with zero customer service skills.


