
Table of Contents >> Show >> Hide
- Essential Supplies for DIY Flower Hair Clips
- Safety and Quality Tips Before You Begin
- Way 1: Make a Silk Flower Hair Clip
- Way 2: Make a Felt Flower Hair Clip
- Way 3: Make a Fabric Flower Hair Clip
- Way 4: Make a Paper or Crepe Paper Flower Hair Clip
- How to Choose the Right Clip for Your Hair Type
- How to Make Your Flower Hair Clip Look Professional
- Common Mistakes to Avoid
- Creative Variations to Try
- Personal Experience: What I Learned Making Flower Hair Clips
- Conclusion
Flower hair clips are tiny mood boosters with a job: they hold your hair back while making you look as if you casually wandered through a garden and left with excellent accessories. The best part? You do not need a professional craft room, a sewing degree, or a fairy godmother with a glue gun. With a few affordable supplies, you can make a handmade flower hair clip that looks sweet, stylish, and completely personal.
This guide covers four practical ways to make a flower hair clip: using silk flowers, felt, fabric, and paper or crepe paper. Each method has its own personality. Silk flowers are fast and dramatic. Felt flowers are soft, beginner-friendly, and great for kids’ accessories. Fabric flowers look polished and boutique-worthy. Paper flowers are lightweight, artistic, and perfect for parties, photoshoots, or special occasions.
Before you start, choose your clip base. Alligator clips are excellent for most hair types because they grip well and are easy to cover with ribbon. Snap clips are great for children or fine hair. Barrettes work beautifully for larger flowers. Bobby pins are best for small, delicate blooms. Once you match the flower style to the clip, the rest is basically crafting with confidenceand maybe a little glue on your fingers. It happens to the best of us.
Essential Supplies for DIY Flower Hair Clips
You do not need every item on this list for every method, but keeping a small craft kit nearby makes the process smoother. Think of it as your “tiny flower factory” starter pack.
- Alligator clips, snap clips, barrettes, or bobby pins
- Silk flowers, felt sheets, cotton fabric, satin, ribbon, cardstock, or crepe paper
- Hot glue gun and glue sticks, or strong fabric/craft glue
- Needle and thread for fabric flowers
- Small felt circles for backing
- Scissors or fabric scissors
- Buttons, beads, rhinestones, pearls, or brads for flower centers
- Ribbon to line clips
- Pencil, marker, or petal template
Safety and Quality Tips Before You Begin
If you are using a hot glue gun, work on a protected surface and keep the nozzle away from fingers, hair, fabric scraps, and anything that should not become permanently attached to your craft table. For children, use tacky glue, fabric glue, or low-temperature glue with adult supervision. Also check that beads and small decorations are firmly attached, especially if the clip is for a young child.
For a professional finish, cover the back of each flower with a felt circle. This hides glue, thread, and flower stems while giving the clip a stronger surface to hold onto. If the hair clip feels slippery, wrap the top of the clip with grosgrain ribbon before gluing the flower on. It adds grip and makes the finished accessory look boutique-style instead of “I made this five minutes before leaving the house,” even if you absolutely did.
Way 1: Make a Silk Flower Hair Clip
A silk flower hair clip is the fastest method and one of the most eye-catching. It is perfect for summer outfits, beach photos, flower girl accessories, birthday parties, dance costumes, and last-minute gifts. Since craft stores sell silk blooms in endless colors and sizes, you can go tiny and elegant or full tropical vacation mode.
What You Need
- One silk flower
- Alligator clip or barrette
- Hot glue gun or strong craft glue
- Felt circle
- Button, bead, rhinestone, or decorative brad
- Ribbon, optional
Steps
- Pull the silk flower off its plastic stem. Most artificial flowers pop off easily.
- Remove the plastic center and backing if they make the flower too bulky.
- Keep the petal layers in order so you can rebuild the bloom neatly.
- Stack the petals again, rotating each layer slightly so the flower looks full.
- Add a button, bead, rhinestone, or brad to the center.
- Glue a felt circle to the back of the flower to create a clean base.
- Line the clip with ribbon if desired, then glue the flower onto the clip.
- Let it dry completely before wearing.
Best Uses
Silk flower clips are ideal when you want a bold accessory with very little effort. A large peony or dahlia looks beautiful on a barrette for a side-swept hairstyle. Smaller silk daisies work well on snap clips for everyday wear. For weddings or bridal showers, choose ivory, blush, champagne, or dusty rose flowers and add pearl centers for a softer look.
Way 2: Make a Felt Flower Hair Clip
Felt is one of the most forgiving materials for DIY flower hair clips. It does not fray, it comes in gorgeous colors, and it holds shape well. If fabric sometimes makes you nervous because it slips around like it has somewhere better to be, felt is your friend.
What You Need
- Felt sheets in two or three colors
- Scissors
- Petal template or freehand petal shape
- Hot glue or felt glue
- Alligator clip, snap clip, or barrette
- Small felt circle for backing
- Optional: embroidery thread, beads, or buttons
Steps
- Draw a simple petal shape on paper and cut it out as a template.
- Trace 8 to 12 petals onto felt and cut them out.
- Cut a small strip of felt, about half an inch wide and four inches long, for the center.
- Roll the strip tightly and glue the end to create a flower center.
- Glue petals around the rolled center, overlapping them slightly.
- Add a second layer of petals behind the first for a fuller bloom.
- Cut two green felt leaves and glue them behind the flower.
- Attach the flower to a felt backing circle.
- Glue the backing to the hair clip and let it dry.
Design Ideas
For a daisy, use white petals and a yellow center. For a rose, cut a spiral from a felt circle and roll it from the outside inward. For cherry blossoms, use pale pink petals with tiny cuts at the tips. For a modern look, try muted colors like terracotta, sage, cream, and mustard. Felt flower barrettes also make lovely handmade gifts because they are soft, lightweight, and easy to customize.
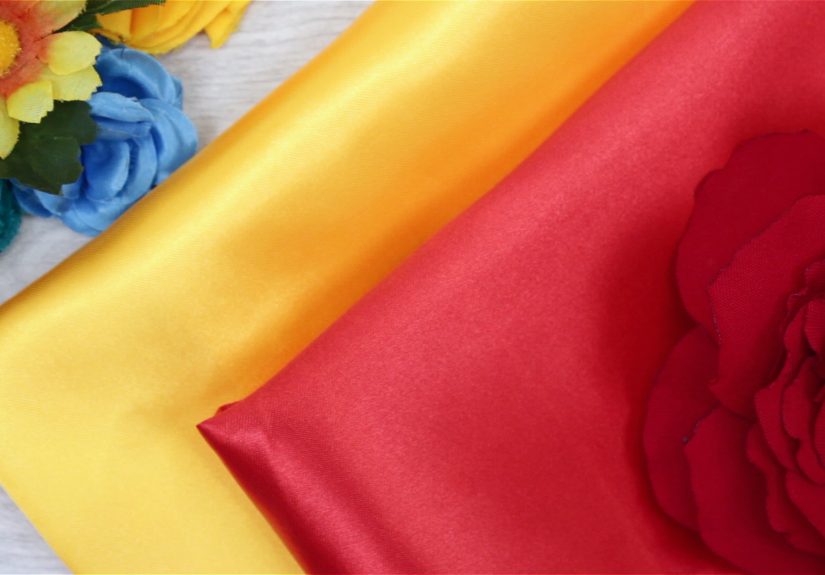
Way 3: Make a Fabric Flower Hair Clip
Fabric flower clips look elegant and can be made from scrap fabric, old shirts, leftover quilting cotton, satin, organza, or lace. This is a great project if you have fabric scraps too pretty to throw away but too small to become anything sensible. Finally, those little pieces get their big moment.
What You Need
- Cotton fabric, satin, chiffon, or organza
- Needle and thread
- Scissors
- Round template, such as a cup or jar lid
- Button, bead, or pearl
- Felt backing circle
- Hair clip base
- Hot glue or fabric glue
Steps for a Folded Circle Fabric Flower
- Trace and cut six to nine fabric circles. Larger circles create a fuller flower.
- Fold one circle in half, then fold it in half again to make a petal wedge.
- Stitch through the pointed end to hold the fold.
- Repeat with the remaining circles, stitching each petal to the same thread.
- Pull the thread gently so the petals gather into a flower shape.
- Knot the thread securely.
- Sew or glue a button, bead, or pearl into the center.
- Glue the flower to a felt backing circle.
- Attach the backing to your clip.
Steps for a Rolled Fabric Rosette
- Cut a long strip of fabric, about 1.5 to 2 inches wide.
- Fold the strip lengthwise for a softer edge.
- Start rolling one end tightly to form the center bud.
- Twist and wrap the fabric around the center, adding small dots of glue as you go.
- Keep the bottom flat so it sits neatly on the clip.
- When the flower is the size you want, glue the end underneath.
- Add a felt backing and attach it to the clip.
Best Fabric Choices
Cotton creates a casual, cheerful flower that works well for everyday clips. Satin gives a dressier shine, while chiffon and organza create soft, airy petals. Lace adds vintage charm. If you want a flower with slightly curled edges, synthetic fabrics like polyester satin can be carefully heat-sealed by an adult, but this should be done with extreme caution and good ventilation. For most crafters, stitching or gluing is safer and simpler.
Way 4: Make a Paper or Crepe Paper Flower Hair Clip
Paper flower hair clips are beautiful for parties, costumes, photos, school events, and creative gift toppers. They are lightweight and affordable, and crepe paper can mimic real petals surprisingly well. The only catch is that paper does not love rain, sweat, or being crushed in the bottom of a backpack. Treat it gently and it will reward you with drama.
What You Need
- Crepe paper, cardstock, or scrapbook paper
- Scissors
- Craft glue
- Floral wire, optional
- Small felt circle
- Alligator clip, barrette, or hair comb
- Bead, paper fringe, or button for the center
Steps
- Cut petal shapes from crepe paper or cardstock. Make some petals slightly larger than others.
- Gently stretch the center of each crepe paper petal to create a curved shape.
- Cut a small strip of paper fringe or use a bead for the flower center.
- Glue the smallest petals around the center first.
- Add larger petals behind them, overlapping as you go.
- Cut green paper leaves and glue them behind the flower.
- Attach the flower to a felt circle for support.
- Glue the felt circle to a clip or comb.
- Let the flower dry fully before styling.
When to Choose Paper Flowers
Paper flowers are best for decorative moments rather than heavy everyday wear. They are wonderful for party favors, handmade Valentine’s Day accessories, tea parties, spring photos, craft fairs, and costume pieces. For a more durable clip, use crepe paper over cardstock petals because it bends more naturally and feels less stiff. If you want extra strength, make the backing from felt instead of paper.
How to Choose the Right Clip for Your Hair Type
The prettiest flower still needs a good foundation. For thick hair, use a strong alligator clip or barrette. For fine hair, choose a snap clip with a lightweight flower, or line the clip with ribbon to improve grip. For curly hair, avoid clips with rough glue edges that can snag. For updos, bobby pins with small flowers are easier to place in groups. For children, keep the flower lightweight and secure every decoration firmly.
How to Make Your Flower Hair Clip Look Professional
Small finishing details make a big difference. Trim loose threads. Hide glue strings. Cover every messy back with felt. Place the flower slightly off-center on the clip if you want a natural look. Add leaves behind the flower to make it feel more realistic. Use odd numbers when grouping small flowers, such as three mini blossoms on one barrette. Odd numbers usually look more organic, while even numbers can look a little too “lined up for school picture day.”
Color also matters. For everyday wear, try neutrals, soft pinks, ivory, navy, burgundy, or earthy tones. For children’s clips, bright colors and glitter centers are always popular. For weddings, match the clip to the dress, bouquet, or theme. For craft fairs or handmade shops, create collections by season: pastel spring daisies, tropical summer hibiscus clips, autumn felt roses, and winter white satin flowers.
Common Mistakes to Avoid
Using Too Much Glue
More glue does not always mean stronger. Too much glue can leak through fabric, create hard lumps, or make the flower look bulky. Use small dots and press firmly.
Skipping the Backing
A felt backing circle gives the flower structure and helps it attach securely to the clip. Without it, the flower may wobble or peel off.
Choosing a Flower That Is Too Heavy
Large blooms look gorgeous, but they can slide out of fine hair. Match the flower size to the clip strength and hair type.
Not Letting Glue Dry
Give the clip enough time to cure before wearing it. Testing it too soon can shift the flower or weaken the bond.
Creative Variations to Try
Once you master the basic flower hair clip, you can customize it in dozens of ways. Add tiny pearls for a bridal look, rhinestones for sparkle, embroidery for texture, or layered leaves for realism. Make matching clips for bridesmaids, birthday party guests, dance teams, or school spirit days. You can also attach flowers to headbands, hair combs, brooch pins, gift wrap, tote bags, or shoes. One handmade flower can live many lives. Very efficient for something with petals.
Personal Experience: What I Learned Making Flower Hair Clips
The first thing you learn when making flower hair clips is that the flower always looks slightly strange before it looks beautiful. Halfway through the process, you may stare at a pile of petals and wonder whether you are crafting or cleaning up after a very dramatic garden squirrel. Keep going. Once the center is added and the petals are fluffed, the whole piece suddenly makes sense.
Silk flowers are the easiest place to start. They give quick results, which is helpful if you are new to DIY hair accessories. I have found that removing the bulky plastic pieces from the back makes the flower sit much flatter on the clip. If you leave too much plastic attached, the flower can tilt forward like it is trying to escape. A felt backing solves this problem and makes the clip more comfortable.
Felt flowers are the most relaxing to make. Cutting petals can feel slow at first, but felt is wonderfully cooperative. It does not fray, it does not slide away, and it forgives imperfect shapes. In fact, slightly uneven petals often make the flower look more natural. My favorite felt trick is mixing two shades of the same color. For example, pale pink petals with a deeper rose center create more depth than one flat color.
Fabric flowers take a little more patience, but they look the most polished. The folded circle method is especially satisfying because flat circles turn into a full flower with just a few stitches. Lightweight cotton is easiest for beginners. Satin looks elegant, but it can slip while sewing, so use clips or pins to hold pieces in place. A pearl or covered button in the center instantly makes a fabric flower look gift-worthy.
Paper flowers are the most artistic option. Crepe paper petals can be stretched, curled, and layered in ways that feel almost sculptural. However, paper clips need gentle handling. I would not wear one to a windy beach picnic unless I wanted to donate it to nature. For indoor events, photos, parties, and decorative hairstyles, they are stunning. They also cost very little, so you can make several without worrying about wasting expensive supplies.
One practical lesson is to test the clip before calling the project finished. Open and close it several times. Gently tug the flower. Place it in the hair and check whether it slides. If it feels unstable, add more felt, use a stronger clip, or reduce the flower size. The goal is beauty plus function. A flower clip that falls out every seven minutes is not an accessory; it is a tiny floral prank.
Another helpful habit is making clips in batches. Cut several felt circles, line several clips with ribbon, and prepare centers ahead of time. Then you can assemble multiple flowers quickly. This is especially useful for party favors, craft fairs, or matching accessories for a group. Batch crafting also helps colors and sizes stay consistent.
Finally, handmade flower hair clips are more than cute accessories. They are small, personal projects that let you use color, texture, and imagination without needing expensive tools. They make thoughtful gifts because each one can match someone’s favorite color, outfit, season, or personality. Whether you choose silk, felt, fabric, or paper, the best flower hair clip is the one that makes you smile when you put it on.
Conclusion
Learning how to make a flower hair clip is simple, creative, and surprisingly addictive. Start with a silk flower clip if you want instant results. Try felt if you love soft, colorful crafts. Use fabric for a boutique-style accessory, or experiment with paper flowers when you want something artistic and lightweight. With the right clip base, a neat backing, and a few thoughtful details, you can turn basic craft supplies into a beautiful handmade hair accessory.
The real charm of DIY flower hair clips is that no two have to be alike. You can make one for a wedding, one for a child’s birthday, one for everyday outfits, and one just because your Monday needs petals. That is the joy of handmade accessories: they are practical, pretty, and full of personality.


