
Table of Contents >> Show >> Hide
- Before You Start: What Makes a Sew-In Work Well?
- 1. The Traditional Full Sew-In
- 2. The Partial Sew-In
- 3. The Closure or Frontal Sew-In
- 4. The Braidless or Beaded-Row Sew-In
- Common Mistakes That Can Ruin a Sew-In
- How to Care for a Sew-In Without Losing Your Mind
- Real-Life Experiences: What People Learn After Wearing Sew-Ins
- Final Thoughts
If you have ever looked in the mirror and thought, “My hair is cute, but it could use a little more drama,” sew-in hair extensions may be your answer. They add length, fullness, color dimension, and styling flexibility without asking your natural hair to do all the heavy lifting by itself. A good sew-in can look polished, glamorous, and surprisingly natural. A bad one can feel like your scalp is being punished for having dreams.
That is why technique matters. Not every sew-in is built the same, and not every method fits every hair type, lifestyle, or styling goal. Some methods keep all of your hair tucked away. Some leave a little natural hair out for blending. Some are built on braids, while others are sewn onto beaded rows for a flatter finish. The trick is knowing what each method does well, where it can go wrong, and how to keep your natural hair happy underneath it all.
In this guide, we break down four practical ways to sew in hair extensions, from classic installs to newer braidless options. You will also learn how to choose the right method, avoid common mistakes, and take care of both the extensions and your own hair. Because gorgeous hair is great, but gorgeous hair with a calm scalp is even better.
Before You Start: What Makes a Sew-In Work Well?
Before talking about the four methods, it helps to understand the basics. A sew-in usually involves attaching wefted extension hair to a foundation created from your natural hair. In traditional methods, that foundation is made with cornrows. In newer methods, it may be built with beads or a mix of beads and stitching. The final look depends on a few big factors: how well the hair is prepped, how balanced the tension is, how closely the extension texture matches your own, and whether the install suits your daily routine.
Healthy prep is not optional. Clean, detangled, conditioned hair gives you a better base and a more comfortable install. Extension hair matters too. Human hair generally gives the most natural movement and styling flexibility, while better-quality Remy hair tends to tangle less because the cuticles stay aligned. That does not mean you need the most expensive bundle on earth, but bargain-bin mystery hair can turn “soft glam” into “what is this bird nest doing on my shoulder?” very quickly.
You also need a reality check about tension. A sew-in should feel secure, not painful. If your scalp throbs, your edges look stressed, or you leave the appointment feeling like you cannot blink without hearing your braids, that install is too tight. Protective styling is supposed to protect. It is not supposed to feel like a medieval loyalty test.
1. The Traditional Full Sew-In
What it is
The traditional full sew-in is the classic method many people picture first. Your natural hair is braided into a cornrow base, often in a beehive or straight-back pattern, and the extension wefts are sewn directly onto those braids. With a full sew-in, most or all of your natural hair is tucked away, which makes this one of the most protective options when done correctly.
Why people love it
This method is excellent for adding major length, major volume, and a polished finish. Because your own hair is hidden, you do not have to style a leave-out every morning or flat-iron one section into submission. It is also a solid choice for people who want a break from constant heat styling, brushing, or daily manipulation.
Best for
A traditional full sew-in works well for people who want a long-wear style, fuller coverage, and low day-to-day styling demands. It is especially useful if your goal is protection first and switching up your look second.
Watch-outs
The biggest downside is access. Since your hair is fully braided underneath, you need to be more intentional about scalp care, cleansing, and drying. If the braids are too tight or the hair added is too heavy, you can also create unnecessary tension at the scalp and hairline. That is where many sew-ins stop being glamorous and start becoming a bad decision with shine spray.
2. The Partial Sew-In
What it is
A partial sew-in combines extensions with your natural hair. Usually, part of your head is braided and covered with sewn-in wefts, while another section of your own hair is left out to blend over the top. That leave-out can be around the part, the crown, or another strategic section depending on the style.
Why people love it
This method often looks incredibly natural because your real hair helps camouflage the extensions. If your texture matches the added hair well, the final result can be seamless. A partial sew-in also tends to feel lighter and less bulky than a full install, which some people prefer for everyday wear.
Best for
Choose a partial sew-in if you want added fullness or length but still want your style to move and part like your own hair. It is also a nice option if you like soft, believable blending and do not need full coverage.
Watch-outs
The leave-out needs care. If you are constantly flat-ironing, curling, or manipulating that section to match the extensions, the “natural” look can come at a cost. Humidity can also expose the difference between your natural texture and the extension texture if the match is not good. In other words, a partial sew-in can be gorgeous, but it will reveal every lazy decision you made in the consultation chair.
3. The Closure or Frontal Sew-In
What it is
A closure or frontal sew-in gives you coverage at the top and front without relying on your natural hair for blending. A closure is a smaller lace piece that typically covers a set parting area. A frontal is larger, usually ear to ear, and allows more flexibility for styling and part changes. Both are paired with sewn-in wefts behind them.
Why people love it
This method gives a polished finish without requiring leave-out, which can be a huge win if you want to reduce heat styling. A closure sew-in is a great choice if you like a stable, neat part and want a lower-maintenance top section. A frontal sew-in offers more versatility, including middle parts, side parts, and certain pulled-back styles.
Best for
A closure is great for people who want a refined look with less daily fuss. A frontal is better for people who want more styling freedom and a more customizable hairline effect.
Watch-outs
More flexibility usually means more maintenance. Lace has to be placed well, cared for gently, and styled thoughtfully. Poor installation can make the hairline look obvious, while overhandling can shorten the lifespan of the lace. Also, a frontal is not a magical excuse to ignore tension. If the foundation underneath is tight or the front is not installed properly, the style can still stress your scalp and edges.
This is one method where working with an experienced stylist really matters. A beautiful closure or frontal sew-in should look effortless. Getting there, however, is usually not effortless at all. It is architecture. Tiny, glamorous architecture.
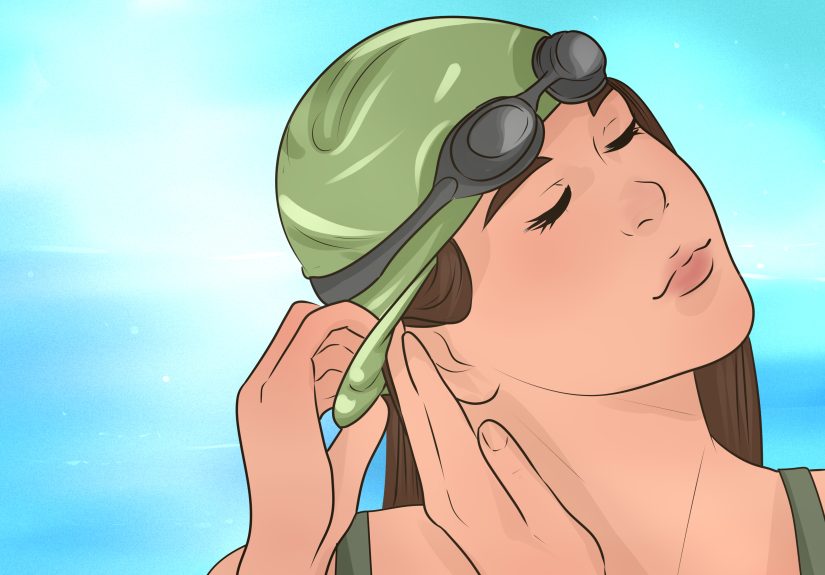
4. The Braidless or Beaded-Row Sew-In
What it is
The braidless sew-in, sometimes called a beaded-row sew-in, replaces the cornrow foundation with rows anchored by beads. Wefts are then sewn onto those rows. Depending on the system and stylist, the row can be customized for density, head shape, and desired fullness.
Why people love it
This method often lies flatter than a traditional braided install, which many people find more comfortable and easier to wear. It can also give better access to the scalp and feel less bulky overall. For clients who dislike the raised look of classic braids under extensions, this option can feel like a modern upgrade.
Best for
A braidless sew-in is often a smart choice for people who want natural-looking movement, a flatter installation, and a custom fit. It can be especially appealing when volume and blend are priorities over full protective coverage.
Watch-outs
Braidless does not mean tension-free by default. Beads that are installed poorly, placed too close to the scalp, or used on hair that cannot support the weight can cause discomfort and stress. This method also requires careful customization. Hair density, scalp sensitivity, and the amount of extension hair used all matter. Think of it like tailoring: when it is done well, it looks expensive and easy. When it is done badly, you spend weeks wondering why your head feels personally offended.
Common Mistakes That Can Ruin a Sew-In
Picking the wrong method for your lifestyle. If you work out often, wash frequently, wear ponytails regularly, or hate spending time styling, that should influence the install you choose. The prettiest option on social media is not always the smartest option for real life.
Using hair that does not match your texture or goal. Bone-straight bundles plus highly textured leave-out can become a daily battle. Likewise, overly dense extension hair can overwhelm finer natural hair and create a bulky, unnatural result.
Ignoring scalp hygiene. Extensions do not cancel scalp care. Build-up, itching, and trapped moisture can make an install uncomfortable and unhealthy. Clean foundations last better and feel better.
Overloading with oils and products. More product does not always equal more moisture. Sometimes it just equals buildup, limp hair, and a sew-in that smells like a beauty supply aisle had a disagreement with your pillowcase.
Leaving it in too long. Sew-ins are not permanent roommates. At some point, your natural hair growth, scalp needs, and extension wear will require maintenance, removal, or a break. Trying to stretch an install far beyond its good behavior window rarely ends well.
How to Care for a Sew-In Without Losing Your Mind
Good aftercare is what separates “this style still looks amazing” from “I need a hat and a prayer.” Start with gentle cleansing. Focus on the scalp, not just the visible hair. An applicator or nozzle bottle can help you direct shampoo where it needs to go. Condition with care, rinse thoroughly, and make sure the foundation underneath gets clean.
Drying matters more than people realize. Extensions may look dry on the outside while moisture lingers at the base, especially in braided installs. Trapped dampness can lead to odor, irritation, or a very cranky scalp. Use a microfiber towel to remove excess water, then let the hair dry completely with air-drying or careful blow-drying as needed.
Brushing should be gentle and methodical. Start lower, work upward, and support the base so you are not yanking on the attachment points. Sleep with the hair wrapped, braided loosely, or secured in a low-manipulation style. And go easy on heat. If you are constantly trying to force the extensions and your leave-out to behave like identical twins when they are clearly distant cousins, you will shorten the lifespan of both.
Most importantly, pay attention to warning signs. Pain, bumps, hairline thinning, excessive shedding, scalp tenderness, and persistent itching are not “just part of the process.” They are signs that the install, the maintenance, or both need attention.
Real-Life Experiences: What People Learn After Wearing Sew-Ins
One of the most common experiences people report with sew-ins is that the first few days tell you almost everything. If the install feels balanced, secure, and comfortable, life is good. If it feels tight, itchy, or oddly heavy from day one, that feeling usually does not magically become charming later. It becomes a countdown to takedown.
Many first-timers also underestimate how much texture matching matters. On appointment day, salon styling can make almost any install look flawless. Then the real world shows up with humidity, workouts, rain, sleep, and the human tendency to get lazy by Wednesday. People quickly learn that the most successful sew-ins are not always the most dramatic ones. They are the ones that still look believable after a long week and one slightly chaotic morning.
Another common lesson is that scalp care is not glamorous, but it is the reason the style stays wearable. Clients often focus on the visible part of the extensions and forget what is happening underneath. Then the itching starts. Then the product buildup starts. Then comes the sudden realization that a cute install can still feel miserable if your scalp is not clean and calm. The people who have the best long-term experiences usually build a simple routine early: cleanse the scalp carefully, dry thoroughly, keep products light, and stop treating discomfort like a personality trait.
People also learn that “protective” is not automatic. A sew-in can absolutely help reduce daily manipulation, but only if the foundation is healthy and the install is appropriate for the person wearing it. For someone with fragile edges, a too-tight braided base can create more problems than it solves. For someone who wants to wear their hair up often, the wrong closure or row placement can become frustrating fast. That is why experienced wearers start asking better questions before the install: How much leave-out will I need? How often will I need heat? Will I be able to access my scalp? Can my hair actually support this much added density?
There is also the emotional side of sew-ins, which people do not talk about enough. A really good sew-in can make someone feel polished, confident, and far less annoyed by their reflection before coffee. It can simplify styling, boost fullness, and create a whole new silhouette. But a bad one can do the opposite. It can make you feel self-conscious, overly aware of your scalp, and weirdly resentful of your own pillow. That contrast is why so many experienced extension wearers become picky in the best possible way. They stop chasing trends and start chasing methods that actually fit their hair, their budget, and their routine.
Over time, people also get better at spotting the small signs that a method is right for them. Some realize they prefer a traditional full sew-in because they want their natural hair completely tucked away. Others discover that a partial sew-in looks amazing for exactly three days before their leave-out starts acting like it has independent political opinions. Some fall in love with closures because they cut down on daily styling, while others become loyal to braidless installs because they like a flatter result and easier access to the scalp.
The biggest takeaway is simple: there is no universal best sew-in. There is only the best sew-in for your hair, your habits, and your tolerance for maintenance. The more honest you are about those three things, the better your experience will be.
Final Thoughts
The best way to sew in hair extensions depends on what you want the style to do for you. If you want maximum protection, a traditional full sew-in may be your winner. If you want the most natural blending, a partial sew-in can shine. If you want a polished top without leave-out, closures and frontals offer a sleek solution. And if you want a flatter, more customized feel, a braidless or beaded-row sew-in may be the smarter choice.
Whichever route you choose, the real goal is not just pretty hair. It is pretty hair that respects your scalp, your edges, your texture, and your actual life. Because the ideal sew-in should turn heads for the right reasons, not because you are tilting yours at a strange angle trying to escape the tension.


