
Table of Contents >> Show >> Hide
- Why a $5 DIY Window Valance Is a Game-Changer
- Planning Your $5 DIY Window Valance
- Supplies You Need (and How to Keep It Under $5)
- Step-by-Step: How to Make a $5 DIY Window Valance
- Design Ideas Inspired by Hometalk & Other DIYers
- Common Mistakes to Avoid
- Care, Cleaning, and When to Swap It Out
- My $5 DIY Window Valance Experiences & Extra Tips
- Final Thoughts
If your windows are sitting there naked and awkward, like they just showed up to a Zoom call in pajama pants, it’s time to give them a little outfit on a serious budget. A $5 DIY window valance is one of the easiest ways to add color, pattern, and polish to a room without spending more than the cost of a fancy latte.
DIY decorators all over the web love valances because they use minimal materials, can be no-sew, and often come together in under an hour. Many popular tutorials use foam board, scraps of fabric, and basic hardware to get a high-end look for a tiny price. With a few smart tricks (and maybe a raid of your linen closet), you can absolutely create your own Hometalk-worthy window valance for around five dollars.
Why a $5 DIY Window Valance Is a Game-Changer
Think of a valance as eyeliner for your window not strictly necessary, but once you see it, you can’t unsee the glow-up. A simple box or soft valance can:
- Hide less-than-cute blinds or tension rods
- Make your windows look taller and wider
- Add color and pattern without committing to full-length drapes
- Offer a renter-friendly way to decorate without major hardware
DIY bloggers who specialize in budget window treatments often highlight valances because they’re so material-efficient: a narrow strip of fabric, a lightweight base (like foam board or insulation), and a couple of dollars’ worth of mounting supplies can completely change the vibe of a room. Instead of spending $30–$60 per window on store-bought valances, you can dress multiple windows for the price of one cheap store option.
Planning Your $5 DIY Window Valance
Step 1: Measure Your Window (The Not-Boring-But-Necessary Part)
Grab a tape measure and note three key measurements:
- Width: Measure from outer edge to outer edge of the window trim. Add 2–4 inches on each side if you want the valance to visually widen the window.
- Height: Standard valances are usually 10–16 inches tall. For small windows or low ceilings, stay closer to 10–12 inches to keep things proportional.
- Mounting height: Decide how far above the window trim the valance will sit. Mounting 3–6 inches above the trim can make the ceiling look higher.
Write these measurements down this is your roadmap for cutting foam board or wood and for sizing your fabric.
Step 2: Choose Your Valance Style
There are dozens of valance styles, but a $5 Hometalk-style project usually leans toward simple, no-fuss designs that use inexpensive materials:
- Box valance / cornice: A straight, tailored look using foam board or lightweight wood wrapped in fabric.
- Soft gathered valance: Fabric draped over a basic rod, casually tucked and pinned into a gentle swag.
- Faux Roman valance: A flat fabric panel with a few pinned or clipped “folds” to mimic a Roman shade.
For a true $5 project, the foam-board box valance or simple draped valance wins almost every time. They’re fast, forgiving, and don’t require sewing skills.
Supplies You Need (and How to Keep It Under $5)
You don’t need a workshop or a craft store haul. To stay around $5, think “dollar store meets thrift store meets linen closet.” Here’s a sample supply list and how you can save:
- Base: 1–2 sheets of foam board from a dollar store or discount retailer (often $1–$1.50 each).
- Fabric: A remnant, old curtain panel, tablecloth, or even a cute shower curtain. If you buy a remnant, you can often get enough fabric for $2–$3.
- Padding (optional): Thin batting, an old flannel sheet, or a cut-up pillow cover to soften edges.
- Adhesive: Hot glue sticks or strong craft glue you already own; you may also use painter’s tape or duct tape on the back where no one sees it.
- Mounting: Existing tension rod, Command hooks with a slim wood strip, or a couple of small nails if you’re allowed to make holes.
If you already have fabric, tape, or glue at home, the only thing you might need to purchase is foam board making that “$5 DIY window valance” title very realistic.
Step-by-Step: How to Make a $5 DIY Window Valance
Step 1: Cut Your Base
Using your measurements, mark the width and height of your valance on the foam board. Cut with a sharp craft knife or utility knife along a straightedge. If you want the valance sides to return back toward the wall, cut two smaller side pieces (typically 3–5 inches deep) to attach at right angles to the front piece.
Dry-fit the pieces above your window to be sure the width and height feel right before moving on.
Step 2: Add Optional Padding
This step gives your valance that cushy, designer look. Lay your batting or scrap fabric on a flat surface, place the foam board face-down on top, and trim the padding so it overhangs by about 1–2 inches on all sides. Wrap the padding around the edges and secure on the back with tape or glue. It does not have to be pretty on the backside no one will see it.
Step 3: Wrap with Fabric
Now for the fun part: the pretty layer.
- Iron your fabric so it’s wrinkle-free.
- Lay it face-down, then place the padded foam board on top.
- Cut the fabric so it overlaps the board by 2–3 inches on all sides.
- Start on one long side: pull the fabric snug (but not warped) and glue or tape it to the back.
- Move to the opposite side, pulling gently to keep things smooth, and secure.
- Fold the corners like you’re wrapping a gift, then secure the short sides on the back.
If you’re using side returns, attach them to the front piece with heavy tape or glue along the inside seams, then wrap the fabric around as one continuous piece, securing on the backside as you go.
Step 4: Mount the Valance
There are a few inexpensive, renter-friendly ways to hang your handmade valance:
- On a tension rod: Create a “sleeve” by leaving extra fabric at the top and sliding the tension rod behind the valance, or simply rest the foam valance on top of existing curtain brackets.
- On Command hooks: Attach two hooks above your window and rest a lightweight wood strip or dowel across them, then glue or tape the back of the foam valance to the strip.
- On small L-brackets: If you’re allowed to drill small holes, L-brackets offer a sturdy and still cheap mounting solution.
Once the valance is in place, step back, adjust any uneven fabric folds, and bask in the glow of your nearly free “custom” window treatment.
Design Ideas Inspired by Hometalk & Other DIYers
DIY communities and home decor bloggers are constantly reinventing the window valance. For your $5 version, you can borrow ideas from popular techniques and tweak them to fit your budget:
- Wallpaper-wrapped valance: Instead of fabric, use leftover peel-and-stick wallpaper for a modern, graphic look.
- Soft gauzy valance: Trim affordable gauze or mesh curtains into a narrow strip and drape them casually over a rod for a light, airy feel.
- Faux Roman shade: Fold and clip a fabric panel so it looks like a Roman shade that’s always “pulled up,” but it’s actually just a stationary valance.
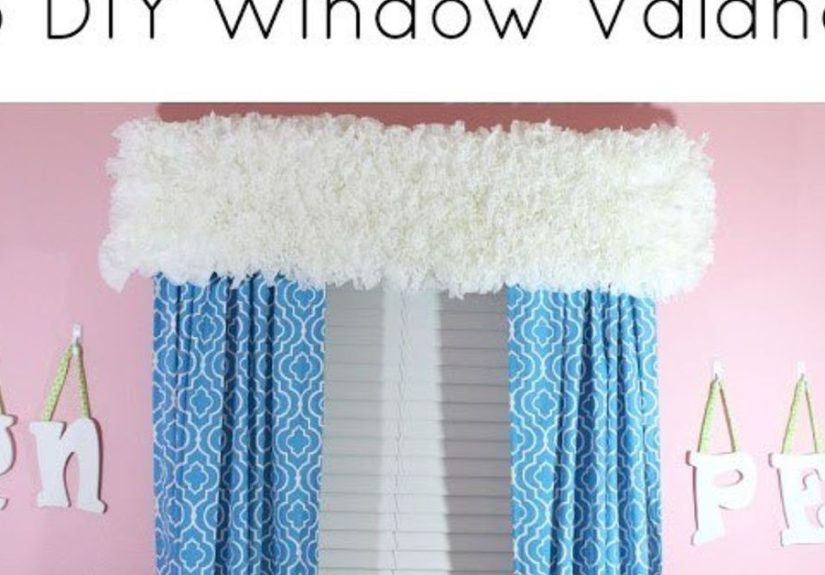
- Bold pattern box valance: Use a big-scale floral or geometric print to create a focal point over a neutral window.
- Rustic farmhouse valance: Wrap the foam board with linen or drop cloth and add a simple trim like jute rope or nailhead tacks.
The key is to use what you have: one leftover yard of fabric, a scrap of wallpaper, or a thrifted tablecloth can easily become a stylish valance.
Common Mistakes to Avoid
Even simple DIYs have a few traps. Here’s how to dodge the most common ones:
- Cutting too short: A valance that barely covers the top of the window can look skimpy. Err on the side of slightly longer, then trim if needed.
- Mounting too low: Hanging the valance right on top of the trim can visually shrink the window. Raising it a few inches instantly feels more “custom.”
- Overly busy patterns in tiny rooms: If the room is small, a medium-scale pattern or solid color often looks more polished than a very busy print.
- Using heavy materials: Thick plywood or heavy boards can be overkill and more expensive. Foam board, insulation, or lightweight wood scraps are cheaper and easier to hang.
Remember: your goal is “high impact, low cost,” not “fight with a board in the hallway for 45 minutes.” Keep it light and simple.
Care, Cleaning, and When to Swap It Out
Because your $5 DIY window valance is mostly fabric and foam, care is easy:
- Dust it periodically with a microfiber cloth or vacuum brush attachment.
- Spot-clean stains with a damp cloth and mild detergent, testing first in an inconspicuous area.
- If you used a removable cover (fabric wrapped but not glued too aggressively), you can occasionally re-wrap the valance with new fabric when you’re ready for a refresh.
One of the best perks of this type of project is that you don’t feel guilty changing it. If you’re tired of the pattern in six months, you can swap the fabric and still stay within a tiny budget.
My $5 DIY Window Valance Experiences & Extra Tips
Here’s where the real-life part kicks in. Once you start making budget window valances, you quickly realize they’re a little addictive. The first one is usually a “test subject” the window where you don’t mind experimenting. For many people, that’s a laundry room, kitchen sink window, or a guest bedroom that doesn’t see much traffic.
On that first try, you learn a lot about scale. Many DIYers discover their valance looks too short or too skinny the moment they step back. I’ve seen countless people go back and add 2–3 inches of height after the fact, and the difference is huge. A taller valance that sits higher on the wall instantly feels more custom and more intentional, even if it’s still made from a dollar-store foam board and a leftover tablecloth.
Another big lesson: fabric choice is everything. The same basic foam structure can look wildly different depending on whether you choose a casual cotton print, a linen-look solid, or a dramatic, dark floral. Lightweight cotton is very forgiving and easy to wrap; thicker upholstery fabric can look stunning but may be harder to fold neatly around corners. If you’re nervous, start with something soft, thin, and easy to handle. Once you’re comfortable with the process, upgrade to bolder fabrics.
Budget-wise, the trick that consistently keeps costs near $5 is using what you already own. Old curtains, a duvet cover that’s seen better days, or even a patterned shower curtain can become multiple valances. One large patterned curtain panel can dress two or three windows when cut strategically. That means your actual out-of-pocket cost might be just the foam board and a handful of glue sticks.
Mounting is where you balance “renter-friendly” with “sturdy.” In spaces where you can’t drill, tension rods and Command hooks are your best friends. A slim tension rod tucked just behind the top edge of the valance can hold a surprising amount of weight if your base is light. In homes where a couple of small holes are acceptable, tiny L-brackets or angle braces make the whole setup feel solid without adding more than a couple of dollars to the project. It’s reassuring to know that when a door slams or someone opens a window, your valance isn’t going to leap off the wall in protest.
One fun experience many people share is how much a cheap DIY valance changes the “mood” of the room. A plain kitchen suddenly feels finished; a basic apartment bedroom gains a focal point above the bed’s headboard wall; even a home office feels a little less like a cubicle and a little more like a designed space. Guests often assume the valance is custom-ordered, especially when you coordinate it with throw pillows or a runner on a nearby piece of furniture.
The best part? Because your investment is so low, you can treat your windows like a style playground. Try a bright, bold pattern for spring and summer, then switch to a cozy plaid or subtle neutral for fall and winter. You might even keep an extra fabric-wrapped valance in a closet and swap them out seasonally the way you rotate throw blankets or wreaths. The foam base can be reused over and over you’re mostly just changing the “clothes” your window wears.
After you’ve built a few, the process becomes second nature. Measuring and cutting takes minutes, wrapping the fabric feels like wrapping a gift, and mounting becomes a quick weekend chore. That’s when you know you’ve unlocked a powerful budget-decor tool: with just a few dollars, a bit of creativity, and a spare hour, you can give any room an instant lift. A $5 DIY window valance may be small in size, but the design confidence you gain from making it yourself is huge.
Final Thoughts
A $5 DIY window valance is proof that stylish home decor doesn’t have to come with a painful price tag. By combining inexpensive materials with smart measuring, simple construction, and a little creativity, you can create a polished, Hometalk-inspired look that makes your windows and your whole room feel intentional and inviting.
Whether you’re decorating your first apartment, refreshing a tired room, or just looking for a quick weekend project, this tiny strip of fabric and foam can deliver a surprisingly big design payoff.


