
Table of Contents >> Show >> Hide
- What a Nintendo Account Actually Does
- Before You Start: A Quick Setup Checklist
- How to Create a Nintendo Account
- Understanding Family Groups Before You Link
- How to Link a Nintendo Account to a Nintendo Switch
- What Happens Right After You Link the Account
- Common Problems People Run Into
- Best Practices After Setup
- Real-World Experiences: What This Process Feels Like in Practice
- Final Thoughts
- SEO Tags
If you just unboxed a Nintendo Switch and you’re staring at it like it’s a tiny spaceship with Joy-Cons, welcome. One of the first smart things to do is create a Nintendo Account and link it to your Switch. Without that account, your console is still fun, but it’s basically wearing sneakers without laces. You can play local games, sure, but features like the Nintendo eShop, friend functions, downloadable content, and many online features become a lot easier or only possible once your account is connected.
The good news is that the setup is not hard. The mildly annoying news is that Nintendo has a few account-related rules that can surprise people, especially first-time users, parents setting up a family console, or anyone who made an account in the wrong region at 1:00 a.m. with a cup of coffee and too much confidence. This guide walks through everything in plain English: how to create a Nintendo Account, how to link it to a Nintendo Switch, what happens after linking, what mistakes to avoid, and what the whole process feels like in real life.
What a Nintendo Account Actually Does
A Nintendo Account is your key to the online side of the Switch ecosystem. It connects your identity to services such as the Nintendo eShop, online play features, My Nintendo rewards, friend-related functions, and account-based settings. In normal human terms, it is the thing that makes your Switch feel like your Switch instead of just a very pretty game machine sitting on the couch.
Once your Nintendo Account is linked to a user on your Nintendo Switch, you can typically do the following:
- Access the Nintendo eShop
- Use online game features
- Download DLC and updates tied to your account
- Exchange friend codes and manage friends more easily
- Use account-connected services and rewards
- Manage certain parental-control features through Nintendo’s tools
If you have multiple people using one console, that does not mean everyone should pile into one single user profile like it’s a clown car. The Switch supports multiple users, and each player should ideally have a separate user profile. That keeps save data, settings, and account activity cleaner and less chaotic.
Before You Start: A Quick Setup Checklist
Before you make your Nintendo Account or link anything, make sure you have a few basics ready:
- A stable internet connection
- A smartphone, tablet, or computer
- An email address for a standard account
- Your correct date of birth
- The right user profile selected on the Nintendo Switch
That last one matters more than people think. Nintendo treats user profiles seriously. If you link the wrong Nintendo Account to the wrong user profile, it is not the kind of mistake you fix with one cheerful tap and a shrug. So before linking, double-check the user icon, nickname, and profile that will be attached to that account.
How to Create a Nintendo Account
Create the account on a phone or computer
To create a Nintendo Account, go to accounts.nintendo.com. Choose the option to create a new account, then enter your date of birth and continue through the registration steps. You’ll be asked for standard information such as your email address, password, display details, and region settings.
Take your time with the country or region selection. This is not a random dropdown you click just to get to the fun part. Your Nintendo eShop region follows your Nintendo Account region, and region mismatches can cause confusion later if you expect one store but get another. If you ever change the region later, any leftover eShop balance may need to be used before the change can go through. In other words, choose carefully now and save your future self from dramatic sighing later.
When creating your password, use something strong. “mario123” may feel emotionally correct, but it is not security. After the account is created, it is wise to turn on 2-step verification from your account’s sign-in and security settings. That adds an extra layer of protection and is one of those responsible adult moves that feels boring until the day it saves you.
What if the account is for a child?
If the date of birth indicates that the user is a child, Nintendo routes the process through a parent or guardian. A child account is created through the parent’s general Nintendo Account and becomes part of that parent’s Family Group. Child accounts can have special restrictions, and they do not work exactly like standard adult accounts.
That setup is actually helpful for families. It allows parents to organize accounts, use family-oriented features, and manage access more safely. It is much better than pretending a seven-year-old totally needs an unrestricted account and a credit card connection. That road ends in mystery purchases and very fast lessons in digital responsibility.
Understanding Family Groups Before You Link
Nintendo’s Family Group system is useful if more than one person in your household uses Nintendo services. A Family Group can include up to eight accounts, including child accounts. This matters if you plan to manage children’s accounts, share certain membership benefits, or keep a family setup clean instead of building a spaghetti bowl of disconnected profiles.
Parents should know two things. First, a child account is tied into the parent or guardian structure from the beginning. Second, funds and points are not automatically merged into one big happy wallet just because accounts are in the same family setup. Each account still has its own boundaries, which is probably for the best.
How to Link a Nintendo Account to a Nintendo Switch
Option 1: Link during initial console setup
If your Switch is brand new, the system may prompt you to sign in or link a Nintendo Account during the early setup flow. This is the smoothest option because everything is fresh, your user profile is new, and nobody has yet created a mysterious second user named “asdf” just to skip ahead.
If you already have a Nintendo Account, sign in when prompted. If you do not, the console can point you toward the account-creation process and a QR-based shortcut that sends you to the Nintendo Account website on your smart device. After you finish creating the account online, return to the console and sign in.
Option 2: Link after the Switch is already set up
If your Switch is already running and you skipped the account part earlier, no problem. You can still link the account later.
- From the HOME Menu, open System Settings.
- Scroll down to Users.
- Select the user profile you want to connect.
- Choose Sign in to a Nintendo Account or Link Nintendo Account.
- Sign in with your existing Nintendo Account, or follow the prompts to create one online first.
- Confirm the link.
Depending on the menu version and how your Switch was set up, you may also see account-linking paths from the user profile area. The names can vary slightly, but the goal is the same: connect that specific local user profile to your Nintendo Account.
Important: once a Nintendo Account is linked to a user profile, Nintendo does not treat it like a casual sticker you can peel off and reapply somewhere else. Link carefully. Make sure the account belongs to the right person and the right user profile before you hit the final confirmation.
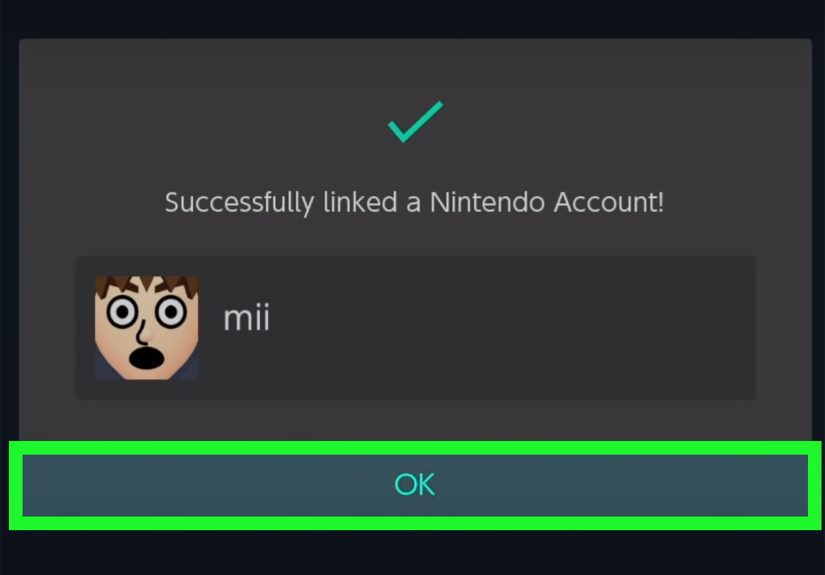
What Happens Right After You Link the Account
Once linking is complete, your Switch becomes much more useful. You can open the Nintendo eShop under that user, use account-based online functions, and connect more smoothly with friends and digital purchases. If you are setting up multiple players on one console, each person can have a separate user with their own linked Nintendo Account.
This is also when the Switch starts to feel less like shared furniture and more like a personalized gaming hub. Your nickname, icon, preferences, save data, and access begin to line up properly. It is surprisingly satisfying, like alphabetizing a bookshelf but with more mushrooms.
Common Problems People Run Into
1. “Why can’t I create the account directly on the Switch?”
Because Nintendo generally wants account creation done through the Nintendo Account website on a phone, tablet, or computer. The console helps you get there, but the account itself is created online. If you expected the entire process to happen right on the system, you are not confused; you are just experiencing Nintendo being Nintendo.
2. “I linked the wrong account to the wrong user.”
This is one of the biggest setup mistakes. The best prevention is to pause for ten extra seconds before linking. Check the nickname, avatar, and email. If a family is sharing one console, label local user profiles clearly from the start instead of leaving generic names that make every account look like it belongs to a witness-protection program.
3. “My eShop region looks wrong.”
Your Nintendo eShop region follows your Nintendo Account region. If you selected the wrong country when making the account, the eShop may not match what you expected. Fixing it later is possible in some cases, but it can create headaches if you still have unused balance. This is why the region field should never be treated like a multiple-choice question you can guess your way through.
4. “My child can’t finish the setup alone.”
That is normal. Child accounts are handled through a parent or guardian account and Family Group tools. Parents need to complete the setup path and manage the related permissions. If a child gets blocked during registration, it usually means Nintendo is following age-based and consent-related rules, not randomly trying to ruin game night.
5. “Do I need Nintendo Switch Online too?”
A Nintendo Account and a Nintendo Switch Online membership are not the same thing. You need the Nintendo Account first. For many online multiplayer features, a Nintendo Switch Online membership is sold separately. Think of the account as the front door key and the membership as the ticket for certain rides inside the park.
Best Practices After Setup
Turn on 2-step verification
After creating the account, go to the sign-in and security settings on the Nintendo Account website and enable 2-step verification. It adds a security step when signing in and helps protect your purchases, profile, and account access. This is especially smart if you plan to buy digital games or save payment info.
Create separate users for separate players
If siblings, roommates, or partners all use the same Switch, give each person their own local user profile. That protects save files and makes account linking much less messy. One profile per person is boring advice, but it prevents enormous amounts of digital drama.
Keep family accounts organized early
If you are managing a family console, create the adult account first, then set up child accounts properly under the Family Group structure. Doing it the clean way from the beginning beats trying to untangle a rushed setup later when everyone just wants to play Mario Kart.
Update the console before deeper setup
If your Switch has been sitting in a box for a while, run the latest system update before troubleshooting account issues. Some menu behavior, prompts, and online functions work better when the system software is current. It is not glamorous, but software updates are basically vegetables for electronics.
Real-World Experiences: What This Process Feels Like in Practice
In real life, creating a Nintendo Account and linking it to a Nintendo Switch usually takes less time than people fear, but a little more patience than they expect. The actual account creation is simple. The part that slows people down is not the technology. It is the human stuff: choosing the right profile, remembering old passwords, deciding whose email should be used, or realizing that the Switch is a family device and not a one-person kingdom.
A lot of first-time users start with one thought: “I just want to play.” That is fair. But five minutes later, they discover the Switch is gently nudging them toward online setup, region settings, user profiles, and account linking. It can feel slightly annoying in the moment, yet it makes sense later. Once everything is connected properly, downloading games, finding friends, and managing purchases becomes much smoother.
Parents often have the most interesting setup experience. On paper, the process sounds easy: make an account, make a child account, link the console, done. In reality, there is usually at least one pause where a parent says, “Wait, whose email did we use?” followed by a child saying, “Can I just click this?” followed by a firm adult response that definitely means no. The good news is that Nintendo’s family structure is actually useful once it is in place. It helps separate kids’ access from adult settings and prevents a lot of accidental chaos.
Single users usually have the smoothest ride. If you are the only person using the Switch, the main trick is simply making sure you create the account with the right region and link it to the right user profile the first time. After that, the setup feels clean and satisfying. The eShop opens properly, your user looks official, and the whole console feels like it finally knows who you are.
People upgrading from older Nintendo systems sometimes bring extra confusion with them. They may remember terms like Nintendo Network ID and wonder whether that is still the same thing. For most modern Switch use, the important piece is the Nintendo Account. Once that clicks, the rest of the process becomes much easier to understand. Nintendo’s naming history can feel like it was designed during a caffeine shortage, but the current setup is far more straightforward than it used to be.
The most common emotional arc is this: mild confusion, quick setup, one preventable mistake, then relief. By the end, most users realize the process is not difficult; it just rewards careful reading. If you slow down, choose the correct user, use the right region, and finish the account online before linking, the whole thing works well. And once it is done, you rarely have to think about it again. Which is perfect, because your real job is not account management. Your real job is deciding what to play first and pretending that choice is not going to take another 40 minutes.
Final Thoughts
Creating a Nintendo Account and linking it to a Nintendo Switch is one of those tasks that sounds more technical than it really is. The key is understanding the order: create the account on Nintendo’s website, choose the correct region and user information, then link it to the right local user profile on the console. Once that is done, your Switch opens up in all the right ways, from eShop access to friend features to smoother online use.
If you are setting up a family console, be extra careful with child accounts and Family Groups. If you are setting up a personal console, focus on choosing the correct profile and turning on 2-step verification. Either way, do it once, do it carefully, and future-you gets to enjoy the fun part without revisiting account drama later.


