Table of Contents >> Show >> Hide
- What Makes a Witch Hat Look “Wicked” (Not Wobbly)
- Choose Your Build Style
- Materials List
- Measurements That Actually Matter
- Option A Tutorial: Make a Stiff, Wicked Witch Hat (Felt + Structure)
- Option B Tutorial: No-Sew Poster Board Witch Hat (Fast + Surprisingly Good)
- Option C Tutorial: Mini Witch Hat Headband (The “I’m Here to Slay” Version)
- Troubleshooting: Fix the “Why Is My Hat Doing That?” Moments
- Safety + Sanity Notes (Because the Only Burns We Want Are Witchy One-Liners)
- Quick Styling Ideas for a Full Wicked Witch Costume
- Real-World Witch Hat Experiences (a.k.a. Lessons From the Craft Table)
- Conclusion
A wicked witch hat is basically a tiny piece of architecture you wear on your head. It’s tall. It’s dramatic.
It has opinions. And unlike most costume-store hats, a DIY witch hat can actually fit, stay put, and
look like you didn’t grab it off a dusty rack five minutes before the party.
This tutorial gives you three build optionsfrom “I can sew” to “I own a glue gun and I’m not afraid to use it.”
You’ll get a sturdy brim that won’t flop like a sad pancake, a crown that keeps its pointy attitude, and
simple upgrades (bands, buckles, lace, “I live in a haunted library” texture) that make it feel custom.
What Makes a Witch Hat Look “Wicked” (Not Wobbly)
Before we start cutting anything that can’t be un-cut, here’s the secret sauce behind a great Halloween witch hat:
- Structure: A stiff brim and a supported crown keep the silhouette crisp in photos.
- Proportions: The hat should be slightly oversized (dramatic), but not so big it becomes a wind sail.
- Intentional “imperfection”: A slight bend, a twist, or a tilt reads wicked and vintagelike you’ve hexed the lighting in the room.
- Comfort: A soft inner band or headband insert prevents forehead regret.
Choose Your Build Style
Pick the method that matches your patience level and your tool situation. (No judgment. Witches are busy.)
Option A: The Classic Felt Hat (Stiff, Photogenic, Wearable)
Best for: Adults or kids who want a real hat that holds shape and can survive a full night of candy negotiating.
This is the “main tutorial” below.
Option B: No-Sew Cardstock / Poster Board Hat (Fast + Budget-Friendly)
Best for: Classroom parties, last-minute costumes, or anyone who thinks sewing is a medieval punishment.
Option C: Mini Hat Fascinator / Headband (Cute, Lightweight, Won’t Mess Up Your Hair)
Best for: People who want “witch energy” without committing to a full head-tower.
Materials List
For Option A (Classic Felt Hat)
- Felt: 1/2–2/3 yard of stiff felt (premium craft felt works; wool-blend felt is even better)
- Ultra-firm interfacing (sew-in recommended) or heavy stabilizer for the brim and crown
- Thread (black or matching)
- Sewing machine (or hand-sewing needle + determination)
- Scissors or rotary cutter
- Measuring tape + chalk/marker
- Iron (pressing makes the hat look “made,” not “made-ish”)
- Optional comfort: 1″ grosgrain ribbon for an inner band OR a simple black headband insert
- Optional shaping: Floral wire, millinery wire, or craft wire for the brim edge
- Optional décor: Ribbon, lace, faux buckle, tulle, feathers, silk flowers, tiny plastic spider with big dreams
For Option B (No-Sew Cardboard / Poster Board)
- Poster board or thin cardboard (cereal box + shipping box combo works)
- Hot glue gun (or strong craft glue)
- Black paint or black fabric to wrap
- String, elastic, or combs/clips to keep it on
For Option C (Mini Hat Headband)
- Felt (or craft foam) + tiny piece of stiff interfacing
- Headband
- Hot glue
- Décor goodies (this is where you go feralin a charming way)
Measurements That Actually Matter
You can eyeball a witch hat… but your head will remember. Measure once, cackle forever.
- Head circumference: Wrap measuring tape around where the hat will sit (usually slightly above eyebrows).
- Hat opening: Add about 1/2″–1″ of ease so it sits comfortably and doesn’t squeeze your soul out.
- Brim width: 3″–4″ for kids, 4″–6″+ for adults (wider brims look more “wicked,” but are more wind-aware).
- Crown height: 12″–16″ for adult drama; 8″–12″ for kids or “I still want to walk through doorways.”
Option A Tutorial: Make a Stiff, Wicked Witch Hat (Felt + Structure)
This method creates a classic Halloween witch hat with a supported brim and a crown that stands tall. The build is
basically: cone (crown) + donut (brim) + structure + comfort + flair.
Step 1: Draft a Simple Pattern (Crown + Brim)
You’ll need two main pieces:
- Crown: A tall cone section (a curved triangle when laid flat).
- Brim: A donut shape (big circle with a head-sized circle cut out of the center).
Easy crown draft: Decide your crown height (H). For an adult, try H = 14″. Your crown base
circumference should match your head opening (plus ease). If your head circumference is 23″, aim for about 24″.
Draw a cone template by sketching a tall curved triangle whose bottom edge length equals that circumference.
(If you’ve ever made a paper cone, you already understand the vibe.)
Easy brim draft: Draw a large circle for the outer brim edge. Then draw a smaller circle in the
center for the head opening. Cut out the center and you’ve got the donut.
Pro tip: If you want the hat to look extra “wicked,” make the brim slightly asymmetrical or give the crown
a subtle lean. It reads intentionallike you’re mid-spell, not mid-mistake.
Step 2: Cut Fabric and Structure Pieces
Cut:
- 1 crown piece in felt
- 2 brim pieces in felt (top and bottom layers)
- Matching interfacing/stabilizer pieces for the brim (and optionally the crown)
Why two brim layers? Sandwiching structure inside the brim gives you a clean finish and a brim
that holds shape instead of drooping like it’s emotionally exhausted.
Step 3: Sew the Crown (Cone)
- Fold the crown piece right sides together (if your felt has a “right” side).
- Sew the long edge to form a cone. Use a medium stitch length (around 3.0 mm) for stability.
- Turn right side out.
- Press the seam gently with an iron (use a pressing cloth if needed).
Wicked upgrade: Before you fully press, pinch a slight twist into the crown seam or bend the tip forward.
A perfectly straight cone can look costume-store; a slightly crooked crown looks like you have a backstory.
Step 4: Build the Brim Sandwich
- Stack brim felt (bottom), interfacing, brim felt (top).
- If your interfacing is sew-in, keep it inside the sandwich. If it’s fusible, fuse carefully to avoid warping.
- Sew around the outer brim edge and the inner opening edge (leave a small gap if you need to turn/adjust).
- Trim bulk, clip curves, and press flat.
Optional wire edge: If you want a brim you can shape (curl, wave, dramatic swoop), sew wire along
the outer brim edge inside the sandwich. It’s the difference between “nice hat” and “I definitely own a cauldron.”
Step 5: Attach Crown to Brim (Two Reliable Ways)
Pick one:
Method 1: Tabs (Great for Felt)
- Cut small vertical slits around the bottom edge of the crown to form tabs (like sun rays).
- Insert the crown through the brim’s center opening.
- Fold tabs outward flat against the underside of the brim.
- Stitch or glue the tabs securely under the brim.
Method 2: Seam Join (Cleaner Look)
- Pin the brim opening to the crown base edge, right sides together.
- Sew around the opening carefully, easing as you go.
- Press and topstitch for strength.
Fit tip: If the opening is slightly loose, that’s okayyou can tighten it with an inner band. If it’s too
tight, you’ll feel it instantly (and the hat will “rise” off your head like it’s trying to escape).
Step 6: Add Comfort + Stay-Put Power
The best witch hats don’t slide off when you laugh, dance, or sprint after someone who “just has one more spooky story.”
- Inner ribbon band: Sew or glue grosgrain ribbon around the inside opening. It feels nicer on the forehead and slightly tightens fit.
- Headband insert: Stitch a simple black headband inside the hat so the hat grips your head without squeezing.
- Elastic strap (kids): A thin elastic under the chin keeps it on during peak sugar momentum.
- Bobby pin loops: Add two tiny ribbon loops inside so you can pin the hat to your hair.
Step 7: Make It Wicked (Styling + Texture)
Now the fun part: turning “hat” into “icon.” Try one theme or mix them like you’re building a potion.
Classic Wicked Witch
- Wide satin ribbon band
- Matte black buckle
- Slightly bent tip and a subtle brim curl
Victorian Spellbook Witch
- Black lace overlay or tulle around the crown
- Antique-looking brooch pinned on the band
- Dusty charcoal “aging” (light dry-brushing with fabric paint)
Forest Witch (Cute But Could Hex You)
- Twine wrap + faux greenery + tiny mushrooms (craft store kind, unless you’re really committed)
- Muted velvet ribbon
- Warm brown or deep olive accents
Modern Minimal Witch
- Sharp, clean brim and straight crown
- One bold band detail (metallic ribbon or geometric buckle)
- Zero glitter. (Glitter is forever. Choose wisely.)
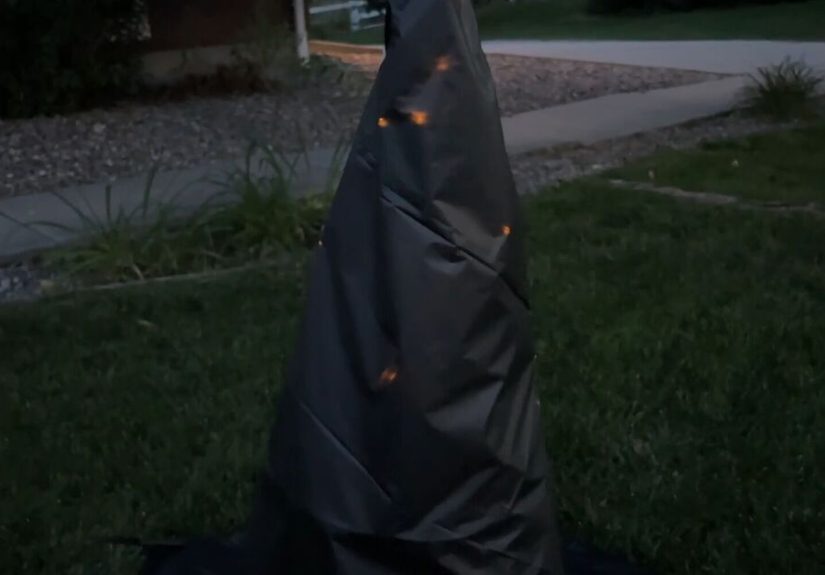
Option B Tutorial: No-Sew Poster Board Witch Hat (Fast + Surprisingly Good)
If you need a Halloween witch hat today, this method is your broomstick.
Step 1: Make the Cone
- Roll poster board into a cone shape that fits your head opening.
- Glue or tape the seam.
- Trim the bottom edge so it sits flat.
Step 2: Make the Brim
- Trace a large circle (use a big bowl, pizza pan, or your best “close enough” circle energy).
- Mark a smaller center circle for the head opening.
- Cut out the donut shape.
Step 3: Join Cone + Brim
- Cut tabs around the bottom of the cone.
- Insert cone through brim opening and fold tabs flat under the brim.
- Glue thoroughly. Let it cool before you declare victory.
Step 4: Wrap or Paint
Paint it black (quick) or wrap it in black fabric (nicer). If wrapping, glue fabric smoothly and trim excess.
Step 5: Keep It On
- Glue in a headband
- Add elastic
- Attach hair clips
Option C Tutorial: Mini Witch Hat Headband (The “I’m Here to Slay” Version)
Mini hats are lightweight, comfy, and perfect for offices, schools, and anyone who doesn’t want hat hair.
- Cut a small cone from felt or foam and glue the seam.
- Cut a small brim circle (think teacup saucer size) and cut a center hole.
- Use tabs or glue to attach cone to brim.
- Glue the hat to a headband at a jaunty angle (jaunty = wicked-cute).
- Decorate: tiny veil, little bow, mini spider, feather, or a dramatic ribbon tail.
Troubleshooting: Fix the “Why Is My Hat Doing That?” Moments
My brim is floppy
- Add heavier interfacing (ultra-firm sew-in is a game changer).
- Stitch a wire around the brim edge for shape control.
- Make the brim slightly smaller or reduce brim width for less leverage.
My crown collapses or wrinkles
- Add a layer of interfacing to the crown.
- Press seams and shape with steam (carefully).
- Use premium felt; thin felt tends to buckle under its own ambition.
The hat won’t stay on my head
- Add an inner ribbon band to snug the opening.
- Sew in a headband insert.
- Add bobby-pin loops inside and pin to hair.
My hat looks “too new”
Wicked witches rarely look factory-fresh. Try light dry-brushing with gray fabric paint, add a crease, tilt the crown,
or wrap the band in slightly wrinkled ribbon for a vintage vibe.
Safety + Sanity Notes (Because the Only Burns We Want Are Witchy One-Liners)
- Hot glue is lava. Treat it like lava.
- If kids are crafting, pre-cut pieces and supervise glue/irons.
- Wire ends should be tucked and taped so they don’t poke.
- Test any paint on scrap fabric first to avoid surprise shininess.
Quick Styling Ideas for a Full Wicked Witch Costume
Your DIY witch hat is the headline. Now give it a supporting cast:
- All-black base outfit + textured layers (lace, velvet, tulle) for depth
- Statement collar (stiff felt or lace) for “high witch council” energy
- Boots and a broom (optional, but emotionally important)
- Makeup: smoky eyes, sharp liner, or green-tinted highlight if you’re going full classic
Real-World Witch Hat Experiences (a.k.a. Lessons From the Craft Table)
The first time I made a witch hat, I learned a powerful truth: a hat is not just a hatit’s a personality test.
The calm people measure and press seams. The chaotic people “freehand a cone” and then wonder why it looks like
a traffic cone that joined a coven. I was… somewhere in the middle, powered by caffeine and spooky confidence.
The biggest game-changer was realizing that pressing is basically witchcraft for fabric. I used to treat the iron
like an optional side quest. Then I pressed the crown seam and suddenly the hat looked like something from a movie
instead of something from a haunted thrift store bin labeled “misc.” If you’re making the felt version, press early
and press often. It’s the difference between “DIY” and “did you buy that?”
Another memorable moment: the Great Brim Flop of 2022. I tried to use thin felt because it was what I had on hand.
The crown stood tall, proud, and pointy… while the brim drooped like it had heard some deeply disappointing gossip.
I ended up stitching a wire around the edge, and the brim snapped back into shape with the confidence of someone who
just remembered they’re the main character. Since then, I always tell people: if your brim needs support, it’s not
being “difficult.” It’s just asking for a skeletoninterfacing or wire.
The funniest hat experience was a group craft night where everyone made a “wicked witch hat” with their own theme.
One friend made a sleek, minimalist hat with a sharp brim and a single silver bucklevery modern witch CEO.
Another went full forest witch and glued on moss, faux mushrooms, twine, and leaves. It looked incredible… and also
weighed enough to be considered light cardio. My hat landed in the “Victorian spellbook” category with lace and a
brooch, plus a slightly bent tip that made it look like it had opinions about the moon.
The best part of DIY hats is how wearable they can be when you add comfort details. A simple ribbon band inside
stopped mine from scratching my forehead, and two tiny bobby-pin loops kept it from sliding when I laughed (which
is often, because Halloween parties are basically social chaos with snacks). If you’re making a hat for kids, the
elastic strap trick is pure peace-of-mind: they can run, dance, and do the sugar tornado without losing the hat.
Finally, here’s the most important lesson: don’t aim for perfect. A witch hat with a slight tilt, a bend, or a
textured band looks more believablelike it has a past. If your cone seam isn’t mathematically flawless, congratulations:
your hat looks like it was made by a witch, not a factory. Add a band, press it, shape it, and let the “imperfections”
become your hat’s story. That’s not a crafting mistake. That’s lore.
Conclusion
A wicked witch hat is one of the most rewarding Halloween DIY projects because it delivers maximum drama for a pretty
reasonable amount of effort. Whether you sew a stiff felt masterpiece, whip up a no-sew version in an hour, or go mini
with a headband fascinator, the key is structure, comfort, and a little intentional attitude. Make it fit, make it
hold shape, and then make it yoursbecause the best witch hat is the one that looks like it chose you.