
Table of Contents >> Show >> Hide
- What Shiplap Is (and What People Call Shiplap)
- Pick the Look First (Because Your Wall Will Not “Figure It Out Later”)
- Tools and Materials Checklist
- Prep Work That Makes Shiplap Look “Custom” Instead of “Weekend Panic”
- Step-by-Step: How to Install Horizontal Shiplap
- Step 1: Establish a perfectly level starting line
- Step 2: Install the first board (slowlythis is the foundation)
- Step 3: Stagger end joints (because “brick pattern” is easier on the eyes)
- Step 4: Use spacers if your style needs a reveal
- Step 5: Keep boards tight, flat, and aligned
- Step 6: Cut around outlets and obstacles
- Step 7: Finish the top row cleanly
- Vertical Shiplap, Ceilings, and When You Need Furring Strips
- Finishing: The Difference Between “New Build” and “DIY, But Make It Cute”
- Common Mistakes (So You Don’t Invent New Words)
- Maintenance Tips
- Real-World Experiences and Lessons People Learn While Installing Shiplap (About )
- Conclusion
Shiplap is basically the interior design equivalent of a good haircut: it makes a room look put-together
even when the rest of your life is held together by coffee and optimism. The good news? Installing shiplap
is very DIY-friendly if you plan well, start straight, and accept one universal truth:
your first board is the boss. Get it right and the whole wall behaves. Get it wrong and you’ll
spend the afternoon “making artistic choices” to hide the problem.
This guide walks you through choosing materials, prepping your wall, installing boards horizontally (most common),
handling tricky spots like outlets, and finishing for a clean, durable lookwithout turning your wall into a
“rustic nail-hole constellation.”
What Shiplap Is (and What People Call Shiplap)
Traditional shiplap boards have a rabbet (a notch) cut along the long edges so boards overlap and sit flatter
on the wall. That overlap creates a tidy reveal line and helps boards align. These days, “shiplap” can mean a few things:
- True shiplap boards: overlapped rabbets along the edges.
- Nickel gap: boards with a consistent, squared-off gap (often around 1/8″) for a crisp shadow line.
- Shiplap-style panels: large sheets (often 4×8) with grooves that mimic planks.
- Peel-and-stick planks/panels: fast and tidy, best for low-wear areas or rentals.
The installation basics are similarflat wall, straight layout, consistent fasteningbut your material choice affects
cutting, spacing, moisture resistance, and finishing.
Pick the Look First (Because Your Wall Will Not “Figure It Out Later”)
Horizontal vs. vertical
- Horizontal shiplap feels classic and can make a room look wider.
- Vertical shiplap can make ceilings feel taller and looks more modern/coastal.
Flush seams vs. a visible gap
Some products are designed to install tight for a subtle eased edge, while others look best with a deliberate gap.
If you want a consistent reveal, you’ll use spacers while installing. If you want a seamless “one plane” look,
you’ll aim for snug joints and rely on caulk/filler and paint for a clean finish.
Material choices that matter
- Solid wood (pine, poplar, etc.): beautiful, durable, but expands/contracts with humidity.
- MDF shiplap: smooth and stable indoors, but not a fan of repeated moisture exposure.
- Plywood shiplap panels: fast coverage, fewer seams to align, great for accent walls.
- PVC/composite: handy in damp areas, but follow manufacturer guidance for fastening and finishing.
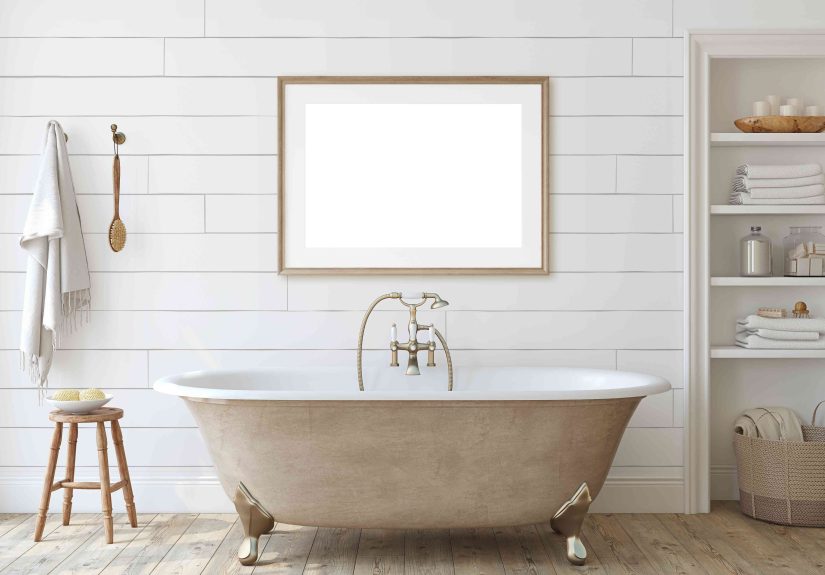
If you’re installing in a bathroom or laundry area, you can absolutely use shiplapbut choose the right product and finish,
keep water from sitting on ledges, and seal/paint properly.
Tools and Materials Checklist
Tools
- Stud finder
- 4′ level (or a laser level if you like life on “easy mode”)
- Tape measure, pencil, chalk line
- Miter saw or circular saw (plus a straightedge guide)
- Jigsaw or oscillating multi-tool (for outlet cutouts)
- Nail gun (finish/trim nailer) or hammer + nail set
- Caulk gun
- Putty knife
- Sanding block or random orbit sander
Materials
- Shiplap boards or shiplap-style panels (buy ~10% extra for waste)
- Construction adhesive (optional but helpful for flatness and squeak prevention)
- Finish/trim nails (common: 15- or 16-gauge trim nails for boards; follow your product instructions)
- Spacers (1/8″ tile spacers, nails, nickels, or a dedicated spacer toolyour call)
- Wood filler/spackle for nail holes
- Paintable caulk for edges/corners (and anywhere dust might move in and never leave)
- Primer and paint (or touch-up paint if you’re using prefinished boards)
- Trim boards (optional) for framing the wall
Prep Work That Makes Shiplap Look “Custom” Instead of “Weekend Panic”
1) Acclimate the boards
Wood moves. It’s not being dramatic; it’s responding to humidity. Let boards acclimate in the room where they’ll be installed.
Many manufacturers recommend roughly 36–72 hours depending on the product and conditions.
Stack boards flat with spacers so air can circulate.
2) Clear the wall and plan the edges
- Remove outlet covers, switch plates, wall hooks, and anything else that will block boards.
- Decide whether trim (baseboard/casing) stays or gets removed and reinstalled.
- If you’re framing the shiplap area with trim, decide whether it goes on before or after.
3) Find and mark studs
Shiplap needs solid fastening. Use a stud finder and mark stud locations from top to bottom. Studs are commonly spaced
about 16 inches on center in many homes, but don’t assumeverify. Marking studs now makes installation
faster and helps you nail consistently.
4) Paint the wall behind (optional, but smart)
If your shiplap will have any visible gaps (like nickel gap), painting the wall behind it prevents “mystery wall color”
from peeking through later. Even if you’re going tight, a quick coat behind the install can help hide tiny seasonal shifts.
5) Map your layout (the “math” part that saves your sanity)
Measure wall height and do a quick layout calculation:
- How many full boards fit?
- What width will the last board be?
- Do you want the top and bottom cuts to look balanced (a common pro move)?
If your last board would end up as a sad little sliver, adjust the starting point so the top and bottom boards look intentional.
Step-by-Step: How to Install Horizontal Shiplap
Step 1: Establish a perfectly level starting line
Most horizontal installs start at the bottom and work up. Use a level or laser to draw a straight reference line.
Floors are often not level, so don’t “follow the floor” unless you enjoy staring at a crooked shadow line forever.
Step 2: Install the first board (slowlythis is the foundation)
- Position the first board along your reference line.
- If your wall bows, use shims behind the board at studs to keep the face flat.
- Apply construction adhesive in a bead pattern if your product allows it (especially helpful over drywall).
- Nail into each stud using your chosen nail type (many interior shiplap installs use trim/finish nails).
If your shiplap has an overlapping profile, keep the overlap oriented correctly for your product. For many shiplap systems,
you’ll work upward with the overlap pointing downward and avoid nailing through overlapping areas.
Step 3: Stagger end joints (because “brick pattern” is easier on the eyes)
For a natural look and stronger layout, stagger seams so joints don’t stack in a single vertical line.
A simple approach:
- Row 1: Full-length board
- Row 2: Start with a half board (or a different offset)
- Row 3: Back to full-length (or another offset)
Pro tip: avoid repeating the same offset every other row on a large wall. Small variation looks more “custom built.”
Step 4: Use spacers if your style needs a reveal
If you want a consistent gap (often around 1/8″), insert spacers between boards as you go.
Common spacer stand-ins include tile spacers, the width of certain nails, or even coinsjust be consistent.
Step 5: Keep boards tight, flat, and aligned
- Check level every few rows (walls can drift).
- Press boards snugly into the previous row’s profile.
- For stubborn boards, use a scrap block and gently tap into place to avoid denting the face.
Step 6: Cut around outlets and obstacles
Outlets are where DIY confidence goes to be “humbled,” but it’s manageable with careful measuring:
- Turn off power at the breaker before working around electrical boxes.
- Measure from a known board edge to the box edges (left/right/top/bottom).
- Transfer those measurements to your shiplap board.
- Cut the opening with a jigsaw or oscillating tool.
If your shiplap thickness pushes outlets back too far, you may need a box extender so the device sits flush with the finished surface.
This is a common, normal stepnot a personal failure.
Step 7: Finish the top row cleanly
You may need to rip the last board lengthwise to fit. Measure the remaining space in several spots (walls can vary),
then cut accordingly. Many installations leave a small gap at the ceiling edge that gets covered by trim or caulked neatly.
Vertical Shiplap, Ceilings, and When You Need Furring Strips
Vertical shiplap can look amazing, but it sometimes needs extra backing depending on your wall condition and product.
Some systems call for full-length furring strips behind boards for vertical orientation, commonly spaced
around 24 inches on center (check your specific instructions).
On ceilings, you’re essentially doing the same job upside downmeasure carefully, locate joists, and consider pre-painting boards
to reduce touch-up overhead (literally).
Finishing: The Difference Between “New Build” and “DIY, But Make It Cute”
1) Fill nail holes and seams
Use wood filler (or spackle on primed boards) for nail holes. Let it dry, then sand smooth. If you’re aiming for a seamless look,
you may also fill visible seams where boards meet end-to-end.
2) Caulk edges and corners (selectively)
Caulk where shiplap meets trim, corners, or the ceiling line for a crisp finish. Use paintable caulk, and keep it neat.
Avoid caulking every horizontal seam if you want a shadow-line lookor if your wood needs room to move.
3) Prime and paint (or touch up)
- Raw wood: prime first to block tannins and improve durability, then paint.
- Pre-primed boards: you can paint directly, but still fill/sand/cut in carefully.
- Prefinished boards: follow manufacturer touch-up guidance and keep adhesive/nails where they’ll be least visible.
In moisture-prone areas, a quality bathroom-rated paint and careful sealing at edges helps keep things looking sharp longer.
Common Mistakes (So You Don’t Invent New Words)
Starting without a level line
The first board must be straight. “Close enough” becomes “why does the whole wall look tilted?” very quickly.
Skipping acclimation
Wood that hasn’t adjusted to the room can shrink or swell after install, creating gaps or buckling.
Nailing into drywall instead of studs
Fastening into studs keeps boards secure. Adhesive helps, but studs are your long-term stability.
Forgetting the outlet plan
Outlet cutouts, box extenders, and device spacing should be part of the plannot a surprise halfway through row seven.
Over-caulking a wall that needs movement
Caulk is great where surfaces meet. But wood needs to breathe and move a bitespecially in changing seasons.
Maintenance Tips
- Dust with a microfiber cloth or vacuum brush attachment (shadow lines love collecting “decorative lint”).
- Clean gently with mild soap and water when needed; avoid soaking joints.
- Touch up paint chips early to keep moisture from creeping into raw edges.
Real-World Experiences and Lessons People Learn While Installing Shiplap (About )
If you’ve never installed shiplap before, here’s the honest truth: the first hour feels like a home makeover show,
and the next hour feels like a documentary about measurement errors. This is normal.
One of the most common “aha” moments happens when you realize the wall is not flat. Not “kind of not flat.”
Not “I can ignore it.” More like “this drywall has opinions.” That’s where a bead of construction adhesive and a few well-placed
shims can turn a wavy situation into a crisp finished surface. DIYers often report that boards look perfect in the middle of the wall
and slightly rebellious near cornersuntil they start checking flatness at studs and shimming early.
The second rite of passage is the outlet cutout. People go into it confident (“I know how rectangles work”),
and come out wiser (“I now respect rectangles”). The trick is slowing down and measuring from a consistent reference pointusually the
edge of the last installed board, not a random point on the baseboard that will later be removed. Many first-timers also learn
(the slightly annoying way) that shiplap thickness changes how outlet covers sit. Adding a box extender is a clean fix,
and it’s a standard part of the process for thicker materials.
Then there’s the spacing debateflush, nickel gap, or something in between. In real projects, folks often start with “I want tiny gaps”
and end with “Actually, a consistent 1/8-inch reveal looks expensive.” Using spacers is a confidence booster because it removes guesswork.
You don’t need a fancy system; you just need consistency. The gap itself isn’t the goalthe repeatability is the goal.
It’s the difference between “intentional shadow line” and “my boards are trying their best.”
Another surprisingly emotional moment: installing the very first board. People who rush it almost always talk about spending the rest of the day
compensatingnudging boards, re-checking level every row, and doing that quiet DIY whisper: “Why won’t you just be straight?”
People who take ten extra minutes to lock in the first board tend to say the rest of the wall goes faster than expected.
Shiplap rewards patience up front.
Finally, finishing work is where many DIY installs either look like a custom feature wall… or like a practice wall.
The best experiences usually include a simple finishing routine: fill nail holes, sand smooth, caulk edges where shiplap meets trim,
then paint with two solid coats. It’s not glamorous work, but it’s the “before and after” difference-maker.
If you want your wall to look like it came with the house (in the best way), finishing is the part where you earn it.
Conclusion
Installing shiplap is part carpentry, part layout puzzle, and part learning to trust your level more than your eyeballs.
Focus on three things: acclimate your material, get the first board dead straight,
and fasten reliably into studs. From there, the project becomes a steady rhythm of cut, fit, check, nail
followed by finishing steps that make everything look crisp and intentional.
Start with an accent wall if you’re new, take your time on outlets and edges, and remember:
the goal isn’t “perfect.” The goal is “looks perfect from a normal human distance,” which is the true standard of home improvement.


