Table of Contents >> Show >> Hide
- What Is the Desolate Deep in Fisch?
- How to Get to the Desolate Deep
- Desolate Deep Route Guide: Left Path vs. Right Path
- Important Gear for the Desolate Deep
- Desolate Deep Bestiary: Fish List and Catch Tips
- How to Reach and Fish the Brine Pool
- How to Unlock the Trident Rod
- Brine Storm Event (Advanced Desolate Deep Content)
- Best Desolate Deep Farming Strategy (Fast Progression Loop)
- Common Mistakes to Avoid in the Desolate Deep
- Patch Notes, Price Differences, and Guide Accuracy Tips
- Player Experience: My Desolate Deep “Everything Went Wrong” Run (About )
- Final Thoughts
If Fisch on Roblox is a relaxing fishing trip, then the Desolate Deep is the part where the game says, “Cool, now do it underwater, in the dark, while dodging mines.” It’s one of the most memorable zones in Fisch for a reason: it mixes exploration, danger, hidden progression, and some of the most useful mid-game upgrades in the entire experience.
This guide breaks down everything you need to know about the Desolate Deep, including how to find it, what gear to bring, which path to take, how to unlock the Brine Pool and Trident Rod, and how to complete the bestiary without losing your sanity (or your C$). Whether you’re visiting for the first time or trying to 100% the area, this walkthrough will help you fish smarter and panic less.
What Is the Desolate Deep in Fisch?
The Desolate Deep is a major underwater region in Fisch, known for its dark cave system, split routes, dangerous sea mines, and valuable progression items. It’s also one of the most important locations for mid-game players because it connects to the Desolate Pocket, the Brine Pool, and the hidden Trident Rod temple.
In other words: this isn’t just “another fishing spot.” It’s a full progression hub disguised as a horror-themed scuba trip.
How to Get to the Desolate Deep
Step 1: Sail toward the buoy near Sunstone Island
The Desolate Deep entrance is marked by a buoy (often called the Point Nemo buoy in community guides) near Sunstone Island. Multiple guides place it at roughly X -791, Y 142, Z -3102 (small coordinate differences happen depending on guide/version formatting, but the location is the same).
Step 2: Bring diving gear
You need diving gear to survive the descent. Basic Diving Gear works, but it’s tight on oxygen and leaves almost no room for mistakes. Advanced Diving Gear is far more comfortable and is strongly recommended if you’re new to the area or plan to farm fish for a while.
Pro tip: if you’re attempting your first run with Basic Diving Gear, don’t stop to admire the scenery. The scenery is mostly darkness and regret anyway.
Step 3: Dive straight down and follow the trench
Once you dive at the buoy, keep heading downward until you reach the cave system. You’ll eventually hit a warning sign and a split in the route. This is where the Desolate Deep starts to feel like a test instead of a sightseeing trip.
Desolate Deep Route Guide: Left Path vs. Right Path
At the cave split, you can go left or right. Both routes matter, but they serve different goals.
Left Path: Safer setup and core shopping
The left path takes you to a merchant cave where you can fish the main Desolate Deep bestiary and buy key items, including:
- Advanced Diving Gear
- Reinforced Rod
- Crab Cage
- Flippers / Super Flippers
This is the route most players should use first, especially if you’re here to prepare for the Brine Pool or complete the Desolate Deep bestiary. It’s also the easier path to navigate when you’re still learning the area.
Right Path: Desolate Pocket, Brine Pool access, and Trident progression
The right path leads to the Desolate Pocket, which is the “deeper progression” side of the zone. It’s more dangerous because the route is lined with sea mines, and touching them can instantly kill you.
In the Desolate Pocket, you’ll find:
- A merchant (including the Glider and higher-cost travel options)
- An air pocket / safe place to reset oxygen
- Access to the Brine Pool path
- The route to the hidden Trident Rod temple
- A Magic Mirror route back toward Sunstone Island (on some versions/guides)
If you’re going right, move slowly, keep your camera angled to spot mines, and consider increasing in-game brightness. The Desolate Deep loves to hide danger in plain sight.
Important Gear for the Desolate Deep
1) Diving Gear (required)
You cannot meaningfully explore the area without diving gear. Basic Diving Gear is cheaper and gets the job done, but Advanced Diving Gear gives you a much less stressful dive and is a better long-term investment if you plan to farm the area.
2) Reinforced Rod (required for Brine Pool fishing)
The Reinforced Rod is the key to fishing in the Brine Pool’s corrosive waters. It’s sold by the Desolate Deep merchant and is one of the most important purchases tied to this area.
Why it matters:
- It can handle the Brine Pool environment
- It has infinite max weight capacity (huge quality-of-life benefit)
- It unlocks Brine Pool bestiary progress and several rare catches
Some community guides list slightly different Reinforced Rod stat values depending on when the guide was updated, so treat exact stat numbers as patch-sensitive. The important part is simple: if you want Brine Pool fish, buy the Reinforced Rod.
3) Glider (strongly recommended, often effectively required)
The Glider is used to cross broken planks and reach the Brine Pool entrance path from the Desolate Pocket. It’s inexpensive compared to the other gear, and it saves a lot of trial-and-error platforming.
4) Crab Cages (optional but useful)
Crab Cages are useful in the Desolate Deep because one of the area’s bestiary entries, the Sea Mine, is commonly listed as a rare crab cage catch. If you’re aiming for 100% bestiary completion, don’t forget to bring a few.
Desolate Deep Bestiary: Fish List and Catch Tips
The Desolate Deep bestiary is smaller than some other zones, but it’s still a real challenge because the area is dangerous and some fish require specific bait or conditions. Core catches commonly listed by the community include:
- Stalactite (trash)
- Horseshoe Crab
- Slate Tuna
- Phantom Ray
- Coral Geode
- Cockatoo Squid
- Rockstar Hermit Crab
- Banditfish
- Midnight Axolotl
- Barbed Shark
- Emperor Jellyfish
- Sea Mine (crab cage)
Quick bait strategy for faster completion
To avoid running back and forth like a confused submarine captain, bring a bait loadout for the fish that appear most often in Desolate Deep guides:
- Magnet (great for Stalactite, Coral Geode, Emperor Jellyfish)
- Insect (Banditfish, Midnight Axolotl)
- Minnow (Cockatoo Squid)
- Weird Algae (Phantom Ray)
- Fish Head (Barbed Shark)
- Super Flakes (Slate Tuna)
Condition-based catches to prioritize
If you’re trying to finish the bestiary efficiently, fish by condition instead of by rarity:
- Rainy weather: target Emperor Jellyfish
- Night: target Phantom Ray, Cockatoo Squid, Midnight Axolotl
- Fog: target Rockstar Hermit Crab (especially in summer)
- Spring: clean up Banditfish, Horseshoe Crab, Slate Tuna, Midnight Axolotl
This “condition routing” method saves time and prevents the classic mistake of using the right bait at the wrong time for 30 minutes.
How to Reach and Fish the Brine Pool
What the Brine Pool is
The Brine Pool is a sub-area connected to the Desolate Deep, famous for its toxic green water, rare fish, and “you touched the acid, didn’t you?” gameplay loop. It’s one of the coolest zones in Fisch visually, but it’s also one of the easiest places to die if you rush.
How to find the entrance
From the Desolate Pocket, follow the path indicated by the lantern-holding NPC (community guides often call out this visual cue). Climb up the rocky path and broken planks, then use your Glider to cross the gap and reach the cave entrance to the Brine Pool.
Some guides provide exact Brine Pool entrance coordinates, but practically speaking, the lantern cue + glider path is the easiest method to follow in-game.
Brine Pool rules you need to know
- You need a Reinforced Rod (or a rod with special protection in some setups) to fish there.
- The acid is lethal. Touching the brine can kill you quickly or instantly depending on the area/mechanic.
- Movement matters. The platforming and glider path are part of the challenge.
Brine Pool fish worth targeting
Brine Pool catches often listed by guides include:
- Bone (trash)
- Gazerfish
- Brine Shrimp
- Globe Jellyfish
- Dweller Catfish
- Brine Phantom (legendary, foggy autumn nights with Fish Head bait in many guides)
- Spectral Serpent (mythical)
The Brine Phantom is a fan-favorite target because it has strict conditions and feels like a real trophy catch. If you’re farming it, stack patience, Fish Heads, and a good playlist.
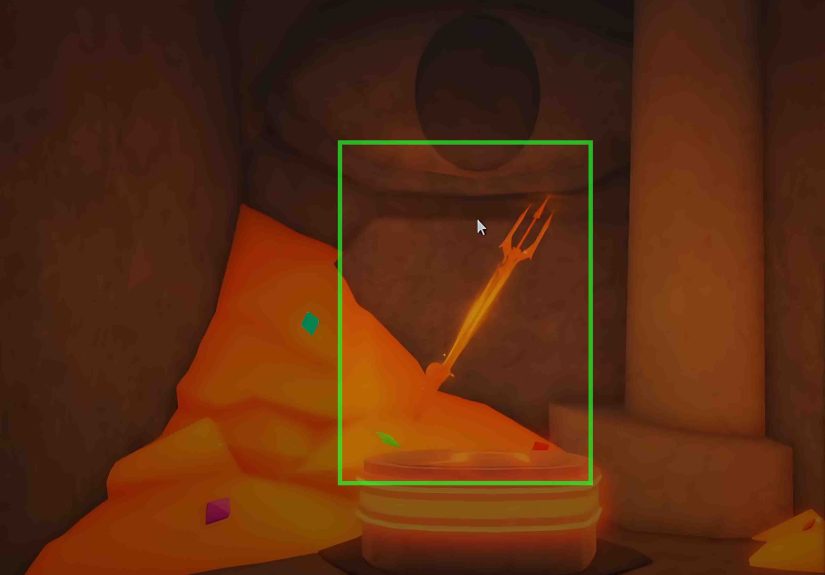
How to Unlock the Trident Rod
The Trident Rod is the big prize tied to the Desolate Deep. It’s widely considered one of the best mid-game rods because of its strong luck and useful passives, which makes it a major power spike when you unlock it.
Trident Rod requirements
- 100% Desolate Deep Bestiary completion
- 5 Enchant Relics
- 150,000 C$ to buy the rod
Most guides also point out an important detail: the temple door opening is usually server-wide once a qualified player activates it. So if you’re playing with friends (or lucky strangers), one player can open access for others.
How to find the temple
The route starts from the Desolate Pocket. You’ll dive into a hidden underwater passage, swim through a tunnel, then emerge in a chamber with pedestals and a door marked with an eye. Place the five Enchant Relics, open the door, and buy the Trident Rod.
Simple in theory. In practice, this is where half the lobby gets lost underwater and someone types “where eye door??” in chat.
Brine Storm Event (Advanced Desolate Deep Content)
If you want to go beyond the standard Desolate Deep and Brine Pool grind, keep an eye out for the Brine Storm event. Recent guides describe it as a localized Brine Pool event that only occurs during rain, with a low trigger chance and a short duration.
Why it matters:
- It spawns special event-exclusive fish
- It changes the Brine Pool’s appearance
- It applies a Lure Speed penalty while active (so your rod setup matters more)
If you’re chasing Brine Storm fish, use rain-triggering tools (if available in your progression), bring a rod setup that can tolerate the Lure Speed penalty, and camp the Brine Pool instead of wandering around the map.
Best Desolate Deep Farming Strategy (Fast Progression Loop)
Phase 1: Setup run
- Buy or equip Diving Gear
- Reach the Desolate Deep safely
- Take the left path first
- Buy Reinforced Rod and restock bait
Phase 2: Bestiary progress run
- Fish the main Desolate Deep pool using condition-based targeting
- Drop Crab Cages for Sea Mine attempts
- Track weather/time and rotate bait intentionally
Phase 3: Brine Pool unlock run
- Go right path to Desolate Pocket
- Buy Glider
- Follow lantern cue and glide route to Brine Pool
- Fish Brine Pool species with Reinforced Rod
Phase 4: Trident Rod prep
- Finish 100% Desolate Deep bestiary
- Collect or buy 5 Enchant Relics
- Bring 150,000 C$
- Open temple and buy the Trident Rod
This loop keeps your travel efficient and prevents the most common mistake: running to the Brine Pool before you’re actually ready to fish there.
Common Mistakes to Avoid in the Desolate Deep
- Bringing the wrong bait set: Desolate Deep fish are condition-heavy. Bait planning saves a ton of time.
- Rushing the right path: Mines are not decorative.
- Skipping the Reinforced Rod: You’ll reach the Brine Pool and realize you can’t fish. Pain.
- Ignoring weather and time: Some fish feel “impossible” until conditions match.
- Forgetting Crab Cages: Sea Mine progress gets delayed for no good reason.
- Assuming all guide prices are identical: Fisch gets updates, and some community pages lag behind.
Patch Notes, Price Differences, and Guide Accuracy Tips
Because Fisch updates frequently, you may notice small differences between guides (especially older ones) for item prices, coordinates formatting, or rod stats. For example, some pages list different prices for certain Desolate Pocket items, and some older Brine Pool or Reinforced Rod stat listings don’t perfectly match newer wiki pages.
The best approach is to use guides for route logic and requirements, then confirm exact shop prices in-game before buying. The route to the Desolate Deep, the need for diving gear, the Reinforced Rod requirement for Brine Pool, and the Trident Rod unlock conditions are the parts that matter most and remain consistent across reliable guides.
Player Experience: My Desolate Deep “Everything Went Wrong” Run (About )
The first time I tried the Desolate Deep, I showed up with Basic Diving Gear, two random bait types, and the confidence of someone who had definitely not read the warning sign. I found the buoy, dove straight down, and immediately learned two things: one, the Desolate Deep is darker than I expected; and two, panic-swimming is not a recognized navigation method in Fisch.
I reached the cave split and took the right path because, naturally, I wanted the “cool secret stuff” before doing any of the practical setup. That lasted about 20 seconds. I clipped a mine, exploded, and respawned with the emotional energy of a soggy paper towel. Lesson learned: the Desolate Deep is very serious about teaching patience.
On the second run, I did it properly. I went left first, found the merchant, and bought the Reinforced Rod. That one decision completely changed the experience. Suddenly, I wasn’t just wandering around underwaterI had a plan. I started catching Desolate Deep fish and realized the area has a great rhythm once you stop treating it like a speedrun. You wait for the right time of day, swap bait, and slowly watch the bestiary fill up. It’s actually pretty satisfying, especially when you land something like a Phantom Ray after a few failed attempts.
The funniest part was the Sea Mine. I spent way too long trying to catch everything with the rod before remembering that one of the entries is usually tied to a Crab Cage. I dropped a few cages, got distracted checking my bait, and then saw the Sea Mine entry pop. It felt less like “skill” and more like “accidental competence,” which is honestly a big part of the Fisch experience.
When I finally went back to the right path and reached the Desolate Pocket, the area felt much less intimidating. The lantern-holding NPC tip helped a lot. I followed the direction cue, climbed the rocks, used the Glider, and made it to the Brine Pool entrance without falling into the brine. That may not sound impressive, but in the Desolate Deep, not dying is a flex.
Fishing in the Brine Pool felt like unlocking a new level of the game. The green water, the weird atmosphere, the stricter fish conditionsit all makes the zone feel special. I spent a while trying for a Brine Phantom and missed the timing on my first foggy night window, which was deeply on-brand for me. But when I finally got the conditions lined up and landed one, it was one of those “okay, this is why people love this game” moments.
By the time I started working on the Trident Rod requirements, the Desolate Deep had gone from “that scary cave zone” to one of my favorite progression areas in Fisch. It punishes sloppy play, but it rewards planning. And once you learn the route, it becomes less of a nightmare trench and more of a reliable money-and-progression loop. Still dark, though. Very, very dark.
Final Thoughts
If you’re serious about progressing in Fisch, the Desolate Deep is a must-learn area. It teaches resource planning, condition-based fishing, route awareness, and mid-game gear progression all at once. Mastering it also unlocks some of the best content in the game, from the Brine Pool to the Trident Rod and Brine Storm event fishing.
Take it step by step: gear up, learn the cave split, buy the Reinforced Rod, finish the bestiary, and then claim your Trident Rod. Once the Desolate Deep clicks, you’ll stop seeing it as a scary place and start seeing it as your underwater promotion.