
Table of Contents >> Show >> Hide
- What Makes a Great Chocolate-Filled Donut?
- Quick Overview
- Ingredients
- Tools You’ll Want (So This Is Fun, Not Chaos)
- Step-by-Step: How to Make Chocolate-Filled Donuts
- Chocolate Filling: Whipped Ganache That Pipes Like a Dream
- How to Fill Donuts Without a Chocolate Explosion
- Donut Troubleshooting (Because Donuts Are Honest)
- Variations (Same Donut Joy, Different Personalities)
- Storage, Make-Ahead, and Reheating
- FAQ: Chocolate-Filled Donuts Recipe
- Real-World Experiences: What Actually Happens When You Make Chocolate-Filled Donuts
- Conclusion
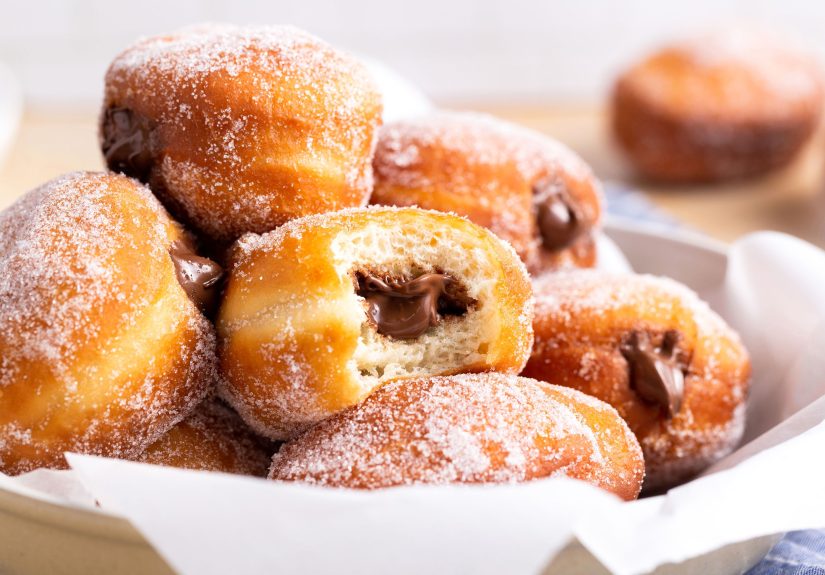
There are two kinds of mornings: the ones where you “grab a quick bite,” and the ones where you bite into a warm,
pillowy donut and suddenly believe in magic again. Today we’re making the second kindhomemade chocolate-filled donuts
with a soft yeast-raised donut dough, fried to a golden halo, then stuffed with a rich, silky chocolate filling.
It’s the bakery vibe… without the bakery line.
This guide is intentionally in-depth (because donuts deserve respect). You’ll get the exact donut frying temperature,
how to know when dough is properly proofed, and the filling strategy that keeps chocolate where it belongs: inside the donut,
not all over your shirt like a delicious crime scene.
What Makes a Great Chocolate-Filled Donut?
A great chocolate-filled donuts recipe comes down to three things:
a tender, airy crumb (thanks, yeast), a crisp exterior (hello, hot oil), and a filling that’s smooth enough to pipe,
but thick enough not to leak out the moment you look at it.
The goal is balance: develop enough gluten for structure so the donut puffs instead of collapsing, but not so much that it chews like a workout.
We’ll use warm milk for flavor, butter for richness, and a short-but-real knead to build the dough’s strength.
Quick Overview
- Style: Yeast-raised, fried, filled
- Yield: 12 donuts (plus a few donut holes if you cut them)
- Total time: About 2.5–3 hours (most of it is rising time)
- Difficulty: Medium (mostly because hot oil demands your full attention)
Ingredients
For the Yeast Donut Dough
- 3 1/4 cups (390g) all-purpose flour, plus more for rolling
- 1/3 cup (65g) granulated sugar
- 2 1/4 teaspoons (7g) active dry yeast (or instant yeast)
- 1 teaspoon fine salt
- 1/4 teaspoon ground nutmeg (optional, but very “donut shop”)
- 3/4 cup (180ml) whole milk, warmed to about 105–110°F
- 2 large eggs, room temperature
- 4 tablespoons (57g) unsalted butter, softened
- 1 teaspoon vanilla extract
For Frying + Finishing
- Neutral oil for frying (canola or vegetable), enough for 2–3 inches in a heavy pot
- Optional coating: 1/2 cup granulated sugar (or 1/4 cup sugar + 2 tablespoons cocoa powder)
- Optional dusting: powdered sugar
For the Chocolate Filling (Whipped Ganache)
- 8 ounces (225g) semisweet or bittersweet chocolate, finely chopped
- 1 cup (240ml) heavy cream
- 1 tablespoon unsalted butter (adds shine and smoothness)
- Pinch of salt
- Optional: 1/2 teaspoon espresso powder (makes the chocolate taste louder, not coffee-ish)
Ingredient note: Chocolate quality matters here. You don’t need “fancy,” but you do want chocolate you’d happily snack on.
Filling a donut with chocolate you dislike is a little like putting bad tires on a sports car.
Tools You’ll Want (So This Is Fun, Not Chaos)
- Stand mixer with dough hook (helpful) or a sturdy spoon + determination
- Rolling pin
- 3-inch round cutter (or a drinking glass with a sharp rim)
- Parchment paper (cut into squares = easiest donut transfers)
- Heavy pot or Dutch oven (steady heat = better frying)
- Clip-on thermometer or instant-read thermometer (non-negotiable for consistent results)
- Wire rack over a sheet pan (drains better than paper towels alone)
- Piping bag + long filling tip (or a zip-top bag with a corner snipped + a skewer to make the tunnel)
Step-by-Step: How to Make Chocolate-Filled Donuts
1) Wake Up the Yeast
- In a small bowl, stir the warm milk with 1 teaspoon of the sugar.
- Sprinkle the yeast over the top and let it sit 5–10 minutes until foamy.
If it doesn’t foam, your milk was too hot, too cold, or your yeast is older than the last time you cleaned out the junk drawer.
Start over with fresh yeastdonuts are kind, but not that forgiving.
2) Mix the Dough
- In a large bowl (or stand mixer bowl), whisk together flour, remaining sugar, salt, and nutmeg.
- Add the yeast-milk mixture, eggs, and vanilla.
- Mix until a shaggy dough forms, then knead 6–8 minutes until smoother.
- Add softened butter a tablespoon at a time, kneading until fully absorbed and the dough looks elastic and satiny (another 3–5 minutes).
What you’re looking for: a soft dough that’s slightly tacky but not soupy.
It should pull away from the bowl and feel springy when you press it. If it’s very sticky, add flour 1 tablespoon at a time.
Don’t dump in flour like you’re salting pasta watertoo much flour = dense donuts.
3) First Rise (Proof #1)
- Lightly oil a bowl and place the dough inside, turning once to coat.
- Cover and let rise in a warm spot until doubled, about 60–90 minutes.
Pro tip: Your kitchen doesn’t have to be tropical. If it’s cool, expect a longer rise.
Yeast works on vibes and temperature, not your schedule.
4) Roll, Cut, and Set Up for an Easy Fry
- Turn dough onto a lightly floured surface and gently pat it down (don’t punch it like it owes you money).
- Roll to about 1/2-inch thickness for thick, fluffy donuts.
- Cut 3-inch rounds. Gather scraps, rest 5 minutes, re-roll once.
- Place each round on a small square of parchment on a sheet pan.
The parchment squares are your secret weapon: you can lift the donuts into the oil without stretching or deflating them.
It’s like giving each donut its own tiny elevator ride.
5) Second Rise (Proof #2)
- Cover the tray lightly with plastic wrap or a clean towel.
- Let donuts rise until puffy and slightly jiggly, about 30–45 minutes.
The “finger test”: gently poke the dough. If the indentation springs back slowly and leaves a small dent, you’re ready.
If it springs back fast, it needs more time. If it collapses, it’s over-proofedstill fryable, but handle gently and expect slightly less height.
6) Fry Like You Mean It (But Safely)
- Fill a heavy pot with 2–3 inches of oil and heat to 350–365°F.
- Fry 2–4 donuts at a time (don’t crowd the pot) for about 1–2 minutes per side, until deep golden.
- Transfer to a wire rack over a sheet pan. Let cool at least 10 minutes before filling.
Why temperature matters: If oil is too cool, donuts soak up oil and feel heavy/greasy.
Too hot, and they brown before the centers cook. A thermometer keeps you in the golden donut zone.
Safety note: Keep kids and pets out of the kitchen while frying. Hot oil doesn’t care about your hopes and dreams.
Chocolate Filling: Whipped Ganache That Pipes Like a Dream
1) Make the Ganache
- Put chopped chocolate in a heatproof bowl with butter and salt (and espresso powder if using).
- Heat cream just until it simmers (tiny bubbles at the edges), then pour over the chocolate.
- Let sit 2 minutes, then whisk until glossy and smooth.
2) Chill, Then Whip
- Cool ganache to room temp, then refrigerate 30–60 minutes until thick like pudding.
- Whip with a hand mixer for 30–60 seconds until lighter in color and fluffy.
Whipping turns ganache into a filling that’s rich but airylike chocolate mousse’s more responsible cousin.
If you over-whip and it gets grainy, you can gently warm it a little and re-whip.
How to Fill Donuts Without a Chocolate Explosion
- Use a skewer or chopstick to poke a hole in the side of each donut and wiggle to create a cavity.
- Fit a piping bag with a long filling tip (or use a zip-top bag).
- Pipe filling until you feel resistance or see a slight “belly” formusually 2–3 tablespoons per donut.
- Roll in sugar/cocoa sugar, or dust with powdered sugar.
Classic finishing move: cocoa sugar (sugar + cocoa powder) gives a bakery-style look and makes chocolate-filled donuts feel extra intentional,
like you planned this all along.
Donut Troubleshooting (Because Donuts Are Honest)
Why are my donuts greasy?
Usually: oil was below 350°F or the pot was overcrowded. The donuts sat in lukewarm oil longer, absorbed more fat, and came out heavy.
Keep batches small and temperature steady.
Why are they raw in the middle?
Oil was too hot (browned fast) or donuts were rolled too thick. Lower the heat slightly and fry a little longer,
keeping oil in that 350–365°F range.
Why are they dense?
Common causes: too much flour, under-proofing, or not enough kneading. Dough should be soft and elastic.
Proof until truly puffy. Dense donuts are basically bread rolls in disguiseand bread rolls are not invited to this party.
Why did my filling leak?
Filling was too warm or too thin, or the donut cavity was overfilled. Chill the ganache until thick, and stop piping when you feel resistance.
Think “stuffed,” not “overpacked suitcase.”
Variations (Same Donut Joy, Different Personalities)
Boston Cream Style
Fill with vanilla pastry cream and top with a chocolate glaze. If you’re a “dessert should wear a hat” person, this is your donut.
Nutella-Filled Donuts
Warm Nutella slightly so it pipes smoothly, then fill. For extra flair, roll donuts in hazelnut sugar (sugar + finely chopped toasted hazelnuts).
Baked Option (Not the Same, Still Tasty)
If frying isn’t your thing, you can bake the cut, proofed donuts at 350°F until lightly golden (about 12–15 minutes).
You’ll lose the crisp fried exterior, but you’ll keep the fluffy interiorand your stovetop won’t smell like a county fair (some consider this a win).
Chocolate-on-Chocolate
Add 2 tablespoons cocoa powder to the dough and increase milk by 1 tablespoon if it feels dry. Fill with whipped ganache. Dust with powdered sugar.
Congratulations, you have made a donut that could get its own fan club.
Storage, Make-Ahead, and Reheating
Filled donuts are best the day they’re madethis is not a motivational quote, it’s donut physics.
That said, you have options:
- Room temp: Store in a covered container up to 1 day (cool place).
- Fridge: If filled with dairy-based cream, refrigerate and eat within 2 days. Bring to room temp for best texture.
- Make-ahead: You can make the dough, let it rise, then refrigerate overnight. In the morning, roll/cut/proof and fry.
- Reheating (unfilled): Warm in a 300°F oven for 5–7 minutes. Fill after warming for the best result.
FAQ: Chocolate-Filled Donuts Recipe
Do I need a stand mixer?
Nope. It helps, but you can knead by hand. Expect 10–12 minutes of kneading.
Consider it your pre-donut workout (which you will absolutely cancel out immediately afterward).
What’s the best oil for frying donuts?
Use a neutral oil with a higher smoke pointcanola or vegetable oil are classic choices.
Avoid strongly flavored oils unless you want your donuts to taste like “confusing.”
How do I keep donuts from deflating when transferring to the oil?
Proof on parchment squares and lower them in gently. Once the donut starts floating, peel the parchment away with tongs.
Handle the donuts like little fluffy balloonsbecause they are.
Can I freeze chocolate-filled donuts?
You can, but texture suffers. If you want freezer-friendly donuts, freeze unfilled donuts, thaw, warm briefly, then fill fresh.
Real-World Experiences: What Actually Happens When You Make Chocolate-Filled Donuts
If you’ve never made homemade chocolate-filled donuts before, here’s the honest truth: the first batch teaches you more than any recipe ever will.
Not because the recipe is wrongbut because donuts have a way of revealing your kitchen habits. They’re sweet, yes, but they’re also blunt.
A common “first-timer” moment is realizing that donut dough feels different from bread dough. It’s softer, richer, and a little clingy.
Many home bakers instinctively add extra flour to make it easier to handlethen wonder why their donuts turn out dense. The better move is to flour
the surface lightly, keep your hands moving, and trust that slightly tacky dough is the price of pillowy donuts. This is also the moment you discover
that a bench scraper is not just for professionalsit’s for people who don’t want dough glued to their counters like edible wallpaper.
Another reality: oil temperature is the main character. People often start at a perfect donut frying temperature, then get distracted,
fry too many at once, and suddenly the thermometer reads “ehh, maybe.” That’s when donuts come out greasy and a bit heavy. The fix is boring but effective:
small batches, a heavy pot, and a quick pause between rounds to let the oil climb back into the 350–365°F comfort zone. It feels slower, but it’s faster than
remaking a whole batch because the first dozen taste like regret.
Filling is where the funniest things happen. Many people pipe filling in confidently… and the donut politely accepts it… until it doesn’t.
If your ganache is too warm, it can slide right out and decorate your plate (and possibly your sleeve). Chilling the ganache until it’s thickthen whipping it
is the difference between “bakery-level” and “I have chocolate on my elbow and I don’t know how.” Also: when you poke the hole, make a real tunnel.
A shallow poke creates nowhere for the filling to go, so it will push back like a tiny chocolate geyser.
A surprisingly helpful trick many bakers adopt is doing a “test donut” before frying the whole batch. Fry one donut, cut it open, check color and doneness,
and adjust time or temperature. It feels overly cautiousuntil you realize it saves you from frying twelve donuts that are perfect on the outside and doughy in the center.
The test donut is also, conveniently, the cook’s snack. Science is delicious.
Finally, there’s the emotional experience: the first bite. Homemade filled donuts are best warm, when the crumb is tender and the filling is creamy.
People often report that the kitchen suddenly goes quietbecause everyone is chewing and rethinking their “I’ll just buy donuts” life choices.
And if the first batch isn’t perfect? That’s normal. Your second batch will be better. Your third batch will be dangerous. Your fourth batch may require you
to start giving donuts away to neighbors, coworkers, or anyone you’d like to impress. This recipe doesn’t just make donutsit makes you that person who brings donuts.


