
Table of Contents >> Show >> Hide
- Why Cinder Blocks and Cacti Are a Dream Team
- Materials and Tools
- Plan Your Layout Like a Designer (Without Becoming One)
- How to Build a Cinder Block Cacti Planter
- Should You Seal or Paint the Blocks?
- Plant Picks That Look Great and Won’t Throw a Tantrum
- Care and Troubleshooting
- Design Upgrades That Make It Look “Styled,” Not “Stacked”
- Real-World Lessons and “I Wish I Knew This Earlier” Experiences
- Wrap-Up
Some DIY projects whisper, “I’m classy.” This one confidently hollers, “I cost less than brunch and I’m still going to look fantastic.”
A cinder block cacti planter is the rare garden upgrade that’s budget-friendly, modular, and hard to killespecially
if you pair it with cacti and succulents that prefer a “water me later” lifestyle.
In this guide, you’ll learn how to plan, build, and plant a concrete block cactus planter that drains well, looks intentional (not “leftover
construction materials”), and thrives through hot afternoons and forgetful watering schedules. We’ll also cover paint and sealing options,
soil mix details, plant picks, and the little mistakes that turn into big lessons.
Why Cinder Blocks and Cacti Are a Dream Team
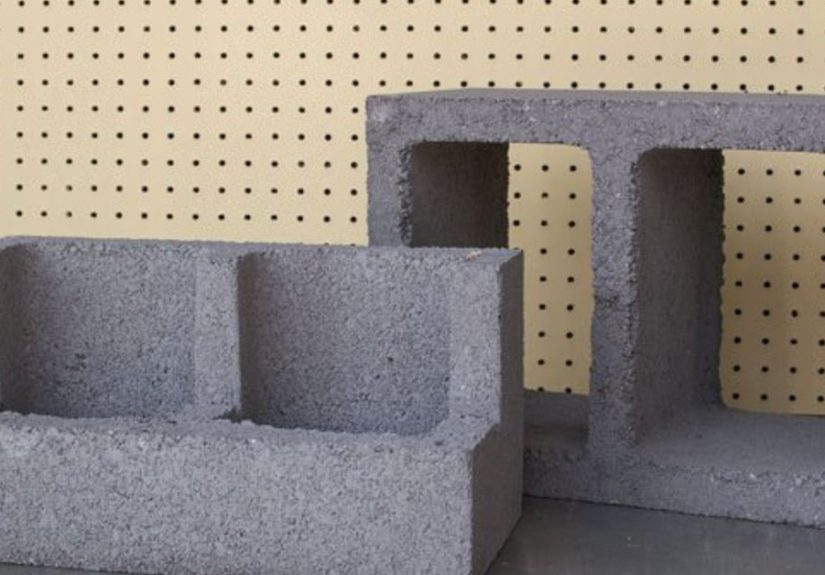
Cinder blocks (often sold as concrete masonry units) are basically grown-up LEGO for the yard. Their hollow cores create built-in planting
pockets, and the material is tough enough to handle sun, wind, and the occasional “I swear I put it down gently” moment.
- Modular design: Stack, rotate, and rearrange into walls, corners, zigzags, or a mini “plant staircase.”
- Natural drainage potential: The open cavities help excess water escapegreat for cacti and succulents that hate wet feet.
- Heat and microclimates: Warm masonry can help in cool evenings, but you’ll want to manage scorching heat in peak summer.
- Cheap materials, high-impact look: A small layout can feel like a designer statement when planted densely and finished neatly.
One important note: concrete can be alkaline, and fresh masonry can influence soil pH over time. For most cacti and many succulents, that’s
usually not a deal-breakerbut sealing the planting pockets (or using a liner) can reduce pH drift and keep minerals from leaching into the soil.
If you’re picky about soil chemistry (or just love doing things “the right way”), we’ll cover simple options below.
Materials and Tools
You can build a basic cinder block succulent planter with a surprisingly short shopping list. Here’s a solid setup that works
for most yards and patios.
Shopping list
- Cinder blocks / concrete blocks: Choose uniform blocks without crumbling edges.
- Base materials: pavers, gravel, or compacted sand for leveling (especially on soil).
- Landscape fabric or window screen: Prevents soil from washing out of the cavities.
- Cactus/succulent soil: Bagged cactus mix, or DIY mix (recipe below).
- Drainage amendments: perlite, pumice, coarse sand, or small lava rock.
- Optional finishing: masonry primer, exterior paint, and/or concrete sealer.
- Optional stability: construction adhesive rated for masonry (for permanent stacks), or rebar pins for taller builds on soil.
Tools
- Work gloves (blocks are rough and heavyyour hands deserve a union)
- Level + tape measure
- Hand tamper (helpful for soil bases)
- Trowel or scoop
- Scissors (for fabric)
- Paint brush/roller (if finishing)
Plan Your Layout Like a Designer (Without Becoming One)
Before you stack anything, decide what you’re building: a low wall, a corner tower, a stepped display, or a straight row along a fence.
The “right” layout depends on your space, sun exposure, and whether you want a statement piece or a tidy border.
Easy layout ideas
- The Low Wall: Two to four blocks high, staggered like bricks. Great for patios and along walkways.
- The Stepped Planter: A staircase shape that shows off multiple plant heights (and looks fancy for no reason).
- The Corner Column: A compact L-shape that fills an empty corner without eating the whole yard.
- The Serpentine Border: A gentle zigzag that looks intentional and improves stability by breaking up straight lines.
Safety and stability rules (aka “Don’t let your planter become a comedy video”)
- Keep it low unless you’re anchoring it. Taller stacks need reinforcement, especially on soil.
- Level the base carefully. A slightly unlevel first row becomes a dramatic problem by row three.
- Rotate blocks for strength: alternating orientations helps “lock” the shape together.
- Consider weight and drainage: wet soil is heavy. Plan a spot where water won’t pool underneath.
How to Build a Cinder Block Cacti Planter
-
Pick the right spot
Most cacti and sun-loving succulents want bright light. Outdoors, aim for strong morning sun and some afternoon protection in very hot climates.
On a patio, avoid placing the planter where roof runoff will drench it during storms. -
Create a stable, level base
On concrete: you’re already in good shapejust make sure the surface is flat and clean.
On soil: remove grass, tamp the ground, and add a thin leveling layer of compacted sand or gravel. Then dry-fit your first row and check level
in both directions. -
Dry-stack the blocks first
Stack your blocks without soil to test the shape. Rotate some blocks so the planting holes face outward (for a wall look), upward (for
pocket planters), or both. Adjust spacing until it looks balanced.If you want a more permanent build, you can add a thin bead of masonry-rated construction adhesive between blocks. For a temporary or renter-friendly
project, dry-stacking is totally finejust keep it lower. -
Line the planting pockets
Cut small squares of landscape fabric or window screen and tuck them into each cavity you’ll fill. This keeps soil from spilling out while still
allowing drainage. For side-facing holes, fabric is especially helpful after heavy rain. -
Mix a fast-draining soil (the “anti-soggy” recipe)
Cacti and succulents want a mix that drains quickly and doesn’t stay waterlogged. You can use a bagged cactus mix, but many growers improve it
by adding extra mineral drainage (like perlite or pumice).Simple DIY soil blend
- 1 part basic potting mix (or peat-based mix)
- 1 part perlite or coarse sand (or a mix of both)
- Optional boost: add a handful of pumice or small lava rock per bucket for extra aeration
Your goal: when damp, the soil should crumble rather than clump into a heavy brick. If it holds a tight mud ball, add more mineral material.
-
Fill pockets and plant
Fill each cavity, leaving about an inch of space at the top so water doesn’t immediately slosh out. Place plants so the crown (where stem meets soil)
isn’t buried too deep. For rosette succulents, keep lower leaves above the soil line to reduce rot.Finish with a thin top dressing of small gravel or decorative stone if you like the look. Think of it as the planter’s “belt”it keeps soil from splashing
onto leaves and looks tidy. (Just don’t add a thick gravel layer at the bottom of pocketsmore on that below.) -
Water once, then wait
After planting, water thoroughly until excess drains. Then let the soil dry before watering again. This is the number-one rule that keeps cactus planters
happy: deep watering, infrequently, with dry-down in between.
Should You Seal or Paint the Blocks?
You don’t have tobut it can help with appearance, longevity, and soil consistency. Unsealed blocks are porous and may dry out faster, and fresh concrete
can be alkaline. If you want a cleaner look (or you’re building a “this is definitely intentional” accent), paint and sealer are your friends.
Option 1: Leave it raw (fastest, most rustic)
Raw concrete looks modern and minimal. If you go this route, focus on neat planting and a clean base edge so it looks styled, not accidental.
Option 2: Prime and paint (best for style)
Use a bonding primer made for concrete/masonry, then topcoat with exterior paint designed for masonry. Masonry primers are formulated to handle porous surfaces
and the high pH common in new masonry. Let everything cure fully before planting.
Option 3: Seal the planting pockets (best for soil control)
A penetrating concrete sealer can reduce water absorption and help limit mineral leaching. If you seal interior planting areas, choose a product intended for
masonry and follow curing times carefully. Many sealers need periodic reapplication, especially outdoors.
Plant Picks That Look Great and Won’t Throw a Tantrum
Choose plants with similar water and light needs so your planter isn’t half thriving and half plotting revenge.
Reliable choices for a cinder block cactus planter
- Hardy succulents: sedum, hens-and-chicks (Sempervivum), echeveria, graptopetalum
- Architectural plants: small agave varieties, aloe (compact types), haworthia (better for bright shade)
- Cacti (by climate): in warm areas, small barrel or columnar cacti; in colder areas, look for hardy opuntia types
If you live where winters freeze hard, plan for seasonal protection: either use hardy species, move potted sections indoors, or treat the planter like a warm-season
showpiece and replant when it warms up.
Care and Troubleshooting
The watering rhythm that saves most plants
- Water thoroughly until it drains.
- Let soil dry before watering again.
- Adjust by season: less in winter, more in peak growth (and only if soil truly dries).
Common problems (and quick fixes)
- Mushy stems or translucent leaves: overwatering. Cut back water and improve drainage mix.
- Stretching/legginess: not enough light. Move to brighter conditions or rotate the planter.
- Sunburn patches: too much hot afternoon sun too fast. Provide shade cloth or shift to morning-sun placement.
- Mealybugs/scale: isolate affected plants and treat early (a gentle soap solution or appropriate insect control can help).
Design Upgrades That Make It Look “Styled,” Not “Stacked”
- Go monochrome: paint blocks one color and let plant shapes do the talking.
- Create a gradient: darker blocks at the bottom, lighter up top for a subtle “designer” effect.
- Mix textures: combine rosettes, spiky forms, and trailing succulents for instant visual depth.
- Add lighting: small solar stake lights or string lights nearby make the planter feel like an outdoor feature.
- Top dress consistently: matching gravel or stone makes everything look more cohesive.
Real-World Lessons and “I Wish I Knew This Earlier” Experiences
If you’re about to build your first cinder block cacti planter, here are the most common real-life experiences DIYers run intoshared in the spirit of
saving you from the classic mistakes (and the mysterious moment where you’re holding a heavy block, questioning your life choices).
1) Everyone underestimates the weight. The plan starts out adorable: “I’ll just do a small wall.” Then you carry the blocks from the driveway to the
backyard and discover that concrete blocks are basically the gym membership you forgot to use. The practical takeaway: stage materials close to the build site, wear gloves,
and don’t stack higher than you can safely manage without wobbling. If you’re building on soil, the extra weight of wet potting mix makes leveling even more important.
2) The “gravel at the bottom” habit dies hard. A lot of people instinctively add gravel at the bottom of planting pockets thinking it improves drainage.
But in containers, that can actually make drainage worse by changing how water sits in the soil profile. The better experience is switching to a gritty, fast-draining mix
throughout the pocket and using fabric/screen to keep it tidy. Once DIYers make that change, they typically report fewer rot issues and more consistent dry-down.
3) Fabric liners are a blessing… and occasionally a plot twist. Landscape fabric (or screen) is great for keeping soil from washing out, especially if holes face outward.
But some DIYers notice that certain liners hold moisture a bit longer than expectedparticularly in shaded pockets that don’t dry quickly. The fix is simple: use a lighter lining (screen),
keep the soil mix extra gritty, and group thirstier succulents in the shadier cavities while placing true desert cacti in the sunniest, driest pockets.
4) Sun is not one-size-fits-all. People often plant everything in the brightest spot and expect universal happiness. Then a few succulents get sunburned (white or brown patches)
while others look perfect. The most successful builds treat the planter like a tiny neighborhood with microclimates: top row gets blasted by sun and wind, lower cavities stay cooler, side pockets
may get reflected heat from nearby pavement. Experienced DIYers “zone” their plants: toughest sun-lovers up high, bright-shade types on the sides, and anything sensitive where it gets morning sun.
5) The first watering teaches you everything. That initial soak reveals whether your base is truly level and whether any pockets drain slower than others. Many DIYers say this is when they
notice a few cavities staying damp too longusually the ones with denser soil or less airflow. The smart move is to treat the first two weeks like a test period: water once, then wait and observe.
If a pocket stays wet, add more drainage amendment, swap that plant for a more moisture-tolerant succulent, or move it to a warmer, breezier position in the layout.
6) Painting is fununtil you skip the prep. DIYers who love the painted look also learn that masonry needs the right primer and cure time. If paint peels, it’s usually because the surface was dusty,
the block was damp, or a proper bonding primer wasn’t used. The happier experience is cleaning blocks well, letting them dry, priming for masonry, and allowing full cure before planting. The reward is a planter
that looks custom instead of “leftovers with ambition.”
7) The best part is the “instant landscape” effect. People routinely say this project feels more dramatic than the effort suggests. Once planted, a cinder block cactus planter turns a blank fence line,
boring patio edge, or sad corner into a focal pointfast. And because it’s modular, you can tweak the look seasonally: swap plants, change the top dressing, add new colors, or re-stack into a new shape when you’re
craving a refresh (or when you suddenly decide you’re an outdoor design visionary).
Wrap-Up
A cinder block cacti planter is a smart DIY: low cost, high style, and forgiving enough for beginnersespecially when you nail the three big basics:
a level base, a fast-draining soil, and watering only after the mix dries.
Start small if you want, then expand as your plant collection “mysteriously” grows. And remember: if anyone asks why you’re building with cinder blocks,
just tell them it’s a “modular xeriscape installation.” That sounds expensive, and you deserve the credit.


