
Table of Contents >> Show >> Hide
- Why Container Gardens Work (Even When Your Space Doesn’t)
- Step 1: Choose the Right Container (Because “Anything That Holds Dirt” Is Only Half True)
- Step 2: Use a Real Potting Mix (Not Garden Soil in Disguise)
- Step 3: Put Your Containers Where the Sun Actually Is
- Step 4: Water Like a Pro (Without Becoming a Full-Time Plant Butler)
- Step 5: Feed Container Plants (Because Watering Leaches Nutrients)
- Great Container Garden “Recipes” (Specific Examples You Can Copy)
- Troubleshooting Common Container Garden Problems
- Seasonal Container Garden Care
- Safety and Sustainability Notes (Especially for Edibles)
- Real-World Container Garden Experiences (500+ Words of Lessons, Wins, and “Oops” Moments)
- The Balcony Tomato That Turned Watering Into a Lifestyle
- The Temptation of “Free Dirt” (a.k.a. Garden Soil in a Pot)
- Herbs That Thrived… Until the One Weekend You Forgot
- The Great Drainage Revelation (And the Rock-Bottom Breakup)
- Self-Watering Planters: Vacation Insurance for Your Plants
- The Confidence Curve
- Conclusion
Not everyone has a backyard. Some of us have a balcony, a porch, a sunny stoop, or that one
mysterious patch of light near the driveway that feels like it was designed by an architect who
hates plants. Good news: a container garden doesn’t care.
With the right pot, the right growing mix, and a watering routine that doesn’t require you to set
alarms like you’re babysitting a cactus, you can grow herbs, flowers, and even full-on vegetables
in containers. This guide walks you through the “how,” the “why,” and the “please don’t put rocks
in the bottom of that pot” of modern container gardeningusing practical, real-world rules that work
in standard American growing conditions.
Why Container Gardens Work (Even When Your Space Doesn’t)
A container garden is basically a mini ecosystem with one big difference: the root zone is limited.
That limitation is actually a feature, not a bug. You get controlover the soil quality, the drainage,
the sunlight angle, and the ability to move your plants if the weather turns dramatic.
The trade-off is that containers dry out faster and nutrients wash out more quickly than in-ground beds.
Translation: container gardening is less “set it and forget it” and more “set it and check it.”
The payoff is huge: you can garden where you live, not where you wish you lived.
Step 1: Choose the Right Container (Because “Anything That Holds Dirt” Is Only Half True)
Size: Give Roots the Real Estate They Deserve
If container gardening had one universal rule, it would be this:
bigger pots are easier than tiny pots. Large containers hold more potting mix, which
means they hold moisture longer, buffer temperature swings, and give roots space to do their job.
Here are practical size guidelines that keep plants happy without turning your patio into a forklift job:
- Herbs and greens (basil, cilantro, lettuces): 1–3 gallons per plant or a wide bowl-style planter for a “salad bowl.”
- Medium plants (bush beans, compact flowers): 4–6 gallons is comfortable.
- Large fruiting veggies (tomatoes, peppers, eggplant, cucumbers): think 8–10+ gallons if you want less stress and better yields.
Can you grow tomatoes in a 5-gallon bucket? Yes. Will the plant behave better in a larger pot? Also yes.
When in doubt, go up a size. Your future self (and your watering can) will thank you.
Material: Plastic, Terra Cotta, Fabric, and the “Why Is This Pot So Heavy?” Category
Containers come in two main personalities: porous and non-porous.
-
Terra cotta and unglazed clay breathe and look great, but they dry out faster.
They’re perfect for drought-tolerant plants and gardeners who enjoy watering as a hobby. -
Plastic and glazed ceramic hold moisture longer and weigh less (usually), which is great
for balconies and hot climates. -
Fabric grow bags offer excellent aeration and can reduce “root circling,” but they can
dry quickly in peak summer. -
Wood planters insulate roots well, but you’ll want to pay attention to food-safety choices
if you’re growing edibles.
One underrated detail: color. Dark pots absorb more heat in full sun, which can raise
potting-mix temperatures and stress roots during summer. Light-colored containers stay cooler and can be
a quiet advantage on a blazing patio.
Drainage: The Non-Negotiable Feature
Your container must have drainage holes. Not “maybe.” Not “but it’s cute.” Drainage holes are what keep
roots supplied with oxygen and prevent that swampy, sad situation where plants decline even though you
“watered faithfully.”
If you’re using a decorative outer pot (no holes), treat it like a sleeve:
keep your plant in a nursery pot with holes and lift it out to water, letting it drain before returning it.
Your floors stay dry, and your roots stay alive. Everybody wins.
Bonus pro move: elevate big containers slightly with pot feet or small spacers so water can escape freely
instead of pooling underneath.
Step 2: Use a Real Potting Mix (Not Garden Soil in Disguise)
If you remember nothing else, remember this:
container gardens need potting mix, not garden soil. Garden soil and topsoil are dense.
In a container, that density can slow drainage, reduce air spaces, and make it harder for roots to breathe.
Roots that can’t breathe don’t grow wellkind of like humans at a crowded karaoke bar.
A quality potting mix (often “soilless”) is lightweight and designed to hold moisture while still draining well.
Many mixes include ingredients like peat moss or coir, bark fines, perlite, or vermiculite to balance water retention
and aeration.
Should You Add Compost?
Compost can improve moisture-holding and add organic matter, but it’s best used as a componentnot the whole plan.
For most containers, a moderate amount works well. Too much compost can make a mix heavier and hold more water than your
plant wants, especially in shallow planters.
The “Rocks in the Bottom” Myth (Let’s Retire It)
Putting rocks or gravel at the bottom of a pot is one of those gardening tips that survives purely on vibes.
In practice, it can create a perched water layer that keeps soil wetter around the roots. If you’re trying to
improve drainage, use the right potting mix and make sure the container has holes. The only “rock exception”:
a single piece over a drainage hole to keep mix from washing out.
Can You Reuse Potting Mix?
You can, but don’t treat last season’s potting mix like it’s a brand-new spa resort for roots.
Over time, potting mix breaks down and nutrients get depleted. If you want to reuse it, refresh it:
remove old roots, fluff the mix, and blend in some new potting mix plus a controlled-release fertilizer
(or compost if you’re careful). If last year’s plant had pests or disease, skip the reuse and start clean.
Step 3: Put Your Containers Where the Sun Actually Is
Sunlight is the currency of plant growth. Most vegetables and many flowering plants want
full sun (generally 6+ hours of direct light). Leafy greens and some herbs can tolerate
partial shade, especially in hot climates where afternoon sun can be intense.
Do a simple “sun audit” of your space:
check morning, midday, and late afternoon. A spot that looks bright at 9 a.m. can be shaded by noon.
If your containers are portable, use that to your advantagemove sun-lovers into the best light and shift
shade-tolerant plants into calmer corners.
Also consider surfaces. Containers sitting on concrete, reflective walls, or blacktop can heat up faster.
That extra warmth can speed growth in spring but can become root-stressing heat in midsummer.
Step 4: Water Like a Pro (Without Becoming a Full-Time Plant Butler)
Containers dry out faster than in-ground beds. On warm, windy days, a container can go from “fine” to “crispy”
in the time it takes to answer one email.
How to Know When to Water
The best “tool” is your finger. Press into the potting mix about an inch deep.
If it’s dry, water. If it’s still moist, wait. This beats rigid schedules because weather, pot size,
and plant size all change the game.
How to Water Correctly
When you water, water thoroughlyenough that moisture reaches the full root ball and
excess water drains out of the holes. Light sprinkles only wet the surface, encouraging
shallow roots and stressing the plant when heat hits.
How Often Will You Water?
It depends on the pot size, the plant, and the weather. In peak summer, many containers need daily watering.
Small pots can need water twice a day during heat waves. Bigger pots and self-watering planters can stretch that interval.
Make Watering Easier
- Mulch the surface (a thin layer of fine bark, straw, or even leaf mold in large containers) to reduce evaporation.
- Group containers to create a slightly more humid microclimate and reduce wind exposure.
- Use drip irrigation or a simple watering system if you have lots of pots.
- Try self-watering planters for thirstiest plantsespecially if you travel or forget things like a normal human.
Step 5: Feed Container Plants (Because Watering Leaches Nutrients)
In containers, nutrients wash out faster because water drains away instead of filtering through a large soil profile.
Even if your potting mix includes fertilizer, plants often need supplemental feeding during the seasonespecially fast
growers like tomatoes and petunias.
A Simple Fertility Strategy That Works
- Start with a quality potting mix (some include a starter charge of fertilizer).
- Add a controlled-release fertilizer at planting (optional but helpful for steady feeding).
-
Begin regular feeding after plants establishoften a few weeks after plantingusing an all-purpose fertilizer
at label directions.
Watch the plant. Yellowing lower leaves, slow growth, and weak flowering can hint that nutrients are running low.
On the other hand, too much fertilizer can cause leaf burn or lots of lush leaves with fewer flowers and fruits.
More isn’t better. Better is better.
Great Container Garden “Recipes” (Specific Examples You Can Copy)
Container gardening gets easier when you stop thinking in individual plants and start thinking in combinations
that share similar light and water needs.
1) The Salad Bowl Container
- Container: Wide, 12–18 inches across with drainage
- Plants: Loose-leaf lettuce, arugula, spinach, chives, and a few radishes
- Tip: Harvest outer leaves and let the plant keep producinglike a buffet that restocks itself.
2) The “Salsa on the Porch” Pot
- Container: 10+ gallon for tomatoes (or one big pot plus a second pot)
- Plants: 1 tomato + basil; separate pot for 1 pepper + cilantro
- Tip: Give tomatoes support early (cage or stake) so you’re not wrestling a jungle in July.
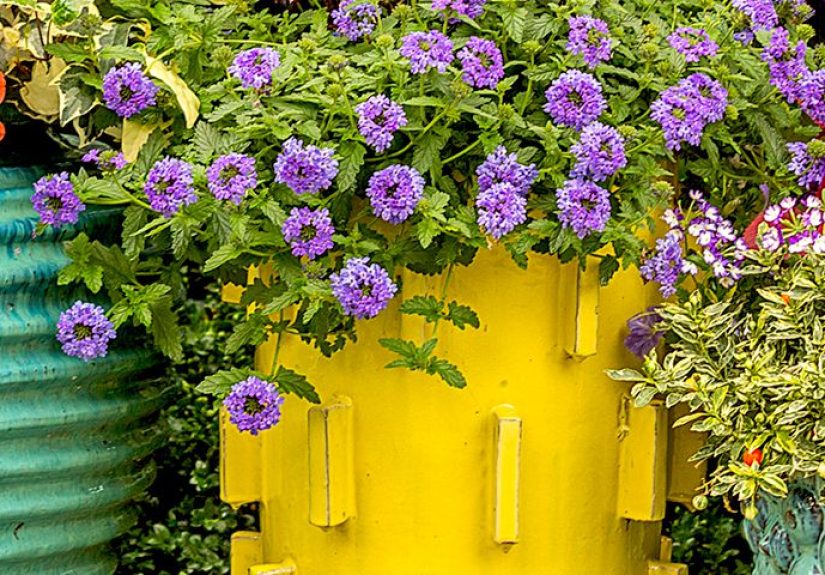
3) The Pollinator Party Planter
- Container: 16–20 inches across
- Plants: Salvia, zinnias (compact types), lantana, and a trailing plant like sweet potato vine
- Tip: Place near seating. Pollinators are fun to watchlike tiny, responsible coworkers.
4) The Shade-Friendly Balcony Mix
- Container: Any with good drainage
- Plants: Coleus, begonias, ferns, and creeping Jenny
- Tip: In low light, avoid “full sun” bloomers and lean into foliage texture and color.
Troubleshooting Common Container Garden Problems
“My Plant Wilts Every Afternoon”
Afternoon wilt can happen even when the soil is moistplants sometimes droop during peak heat and rebound later.
But if it’s wilting and staying wilted, your container may be too small, too hot, or genuinely dry.
Check the soil. If it’s dry, water deeply. If it’s moist, consider moving the pot out of harsh afternoon heat
or upgrading to a larger container.
“My Plant Looks Pale and Sad”
Pale leaves and slow growth often point to nutrient issues. Container plants commonly need regular feeding.
Make sure you’re fertilizing appropriately and not overwatering (which can also cause yellowing).
“I Watered and Now Everything Looks Worse”
Overwatering is less about frequency and more about oxygen. If your container doesn’t drain or the mix is too dense,
roots can suffocate. Make sure drainage holes are open, the mix is light, and you’re letting the top layer dry a bit
before watering again.
Pests and Disease
Containers aren’t immune to aphids, spider mites, and powdery mildew. The upside: it’s easier to inspect and treat.
Start with low-drama solutions: rinse pests off with water, remove heavily infested leaves, and improve airflow by spacing
containers. Water at the base rather than soaking leaves to reduce disease pressure.
Seasonal Container Garden Care
Spring: Start Strong
Use fresh potting mix, check containers for cracks, and clean old pots before replanting.
If you’re moving seedlings outdoors, harden them off gradually so they don’t get sunburned on day one.
Summer: Maintain and Adjust
Summer is peak watering and feeding season. As plants grow, they drink more, shade their own soil less efficiently,
and use nutrients faster. This is when mulch, bigger pots, and consistent feeding pay off.
Fall: Finish the Season Smart
Harvest what you can, pull spent plants, and decide what you’ll keep. Some perennials and herbs can overwinter depending
on your region, but containers expose roots to colder temperatures than in-ground soil. If overwintering, consider moving
pots into a sheltered spot, insulating the container, or bringing tender plants indoors.
Safety and Sustainability Notes (Especially for Edibles)
If you’re growing food in containers, choose materials thoughtfully. Avoid containers that previously held chemicals,
and be cautious with older painted materials where lead paint could be a concern. When using wood planters, consider
food-safe design choices or liners that still allow drainage.
Sustainability tip: you can reduce waste by refreshing and reusing potting mix when plants were healthybut don’t reuse
soil that supported a diseased plant. In container gardening, “clean start” often equals “better harvest.”
Real-World Container Garden Experiences (500+ Words of Lessons, Wins, and “Oops” Moments)
While every container garden is different, gardeners tend to run into the same patternsbecause physics, weather,
and thirsty plants don’t care about our optimism. Here are common experiences people report (and what they usually do next).
The Balcony Tomato That Turned Watering Into a Lifestyle
A classic first-year move is planting a tomato in a small pot because it “fits nicely” on the balcony.
For a few weeks, everything looks fine. Then summer arrives, the plant grows fast, and suddenly you’re watering
like you’re training for a hydration Olympics. The leaves droop by lunchtime, you water again, and you start
wondering if the tomato is secretly running a humidifier business.
The “aha” moment usually comes when someone upgrades to a larger container. More potting mix means more water storage,
a bigger buffer against heat, and more consistent moisture around the roots. The plant becomes less dramatic, fruit set
improves, and you can stop hovering like an anxious lifeguard.
The Temptation of “Free Dirt” (a.k.a. Garden Soil in a Pot)
Many gardeners try to save money by scooping garden soil into containers. It feels logical: soil is soil, right?
But the experience is often disappointing. The container stays wet on top, then turns brick-like, drains poorly,
and roots struggle. Plants look stalled, leaves yellow, and the pot gets heavy enough to qualify as strength training.
Gardeners who switch to a real potting mix often notice an immediate difference: the container drains better, roots grow
more freely, and plants bounce back with new growth. The lesson tends to stick because it’s visibleand because nobody
wants to haul a “free dirt” pot up the stairs twice.
Herbs That Thrived… Until the One Weekend You Forgot
Container herbs are famously rewardingsnip basil, smell rosemary, feel like a main character in a cooking show.
Then life happens: a busy weekend, a heat wave, a windy day, and suddenly the basil looks like it has existential dread.
A lot of gardeners learn the hard way that small containers dry fast and that sun + wind is the combo meal of dehydration.
The fixes are usually simple: move herbs into a slightly bigger pot, add a thin mulch layer, group containers together,
and start checking moisture by feel instead of guessing. Some people also shift delicate herbs to morning sun and afternoon
shade in the hottest weeks, which can keep leaves tender and reduce stress.
The Great Drainage Revelation (And the Rock-Bottom Breakup)
Plenty of gardeners begin with the “rocks at the bottom” advice because it sounds scientific.
The experience that changes minds is when a plant still develops root problems even though “drainage rocks” were used.
Once gardeners switch to a pot with real drainage holes and a lighter potting mix, they often see healthier roots,
fewer fungus gnats, and less of that sour, swampy smell that no one wants near their patio chair.
Self-Watering Planters: Vacation Insurance for Your Plants
Another common experience: you finally get a container garden looking amazing… right before a trip.
Friends promise to water, weather turns extra hot, and you return to a container garden that looks like it fought the sun
and lost. Gardeners who try self-watering planters or simple drip systems often describe it as “finally exhaling.”
These systems don’t remove the need to monitor, but they reduce the daily panic and smooth out moisture swingsespecially for
thirsty vegetables and flowering annuals.
The Confidence Curve
The most universal container-gardening experience is that year two is easier than year one. Once you’ve seen how fast pots dry,
which corners get the best light, and how much bigger a plant gets than the tag implied, you start designing smarter. You choose
larger containers for big crops, you feed consistently, you water deeply, and you stop treating every wilt as a personal insult.
That’s when container gardens go from “experiment” to “habit”and you start eyeing every sunny surface like it’s potential farmland.
Conclusion
Container gardens are proof that you don’t need a big yard to grow big joy. Pick a container with real drainage,
use a lightweight potting mix, size up when you can, and build a watering-and-feeding routine that matches your climate.
Add smart plant combinations, keep an eye on sunlight, and you’ll be harvesting herbs, flowers, and vegetables in spaces
that used to be “just a balcony.”
Start simple, learn fast, and remember: the plants aren’t judging you. They’re just asking for wateragain.


