
Table of Contents >> Show >> Hide
- Before You Start: Know What Kind of Leather You Have
- What You Need to Restore a Leather Jacket
- Easy Ways to Restore a Leather Jacket: 10 Steps
- Step 1: Empty the Pockets and Brush Off Dust
- Step 2: Check for Damage Before Cleaning
- Step 3: Spot Test Every Product
- Step 4: Clean the Leather Gently
- Step 5: Clean the Lining Without Soaking the Jacket
- Step 6: Condition the Leather to Restore Softness
- Step 7: Buff the Jacket Back to Life
- Step 8: Repair Light Scratches and Scuffs
- Step 9: Restore Faded Color Carefully
- Step 10: Protect and Store the Jacket Properly
- Common Leather Jacket Restoration Mistakes to Avoid
- How Often Should You Restore a Leather Jacket?
- When to Call a Professional
- Real-Life Experience: What Restoring a Leather Jacket Actually Feels Like
- Conclusion
A great leather jacket does not really get old; it gets dramatic. One day it is sleek, soft, and ready for a movie-scene entrance. The next, it looks dry, faded, scratched, and slightly offended by your closet choices. The good news? In many cases, you can restore a leather jacket at home with patience, gentle products, and the emotional maturity to not throw it into the washing machine.
Leather is natural, flexible, and surprisingly long-lasting when treated well. But it can lose moisture, collect dirt, fade from sunlight, absorb body oils, develop creases, and look tired after years of wear. Restoring it is not about making it look factory-new. It is about bringing back softness, color, shape, and character without damaging the material. Think of it as giving your jacket a spa day, minus the cucumber water.
This guide explains how to restore a leather jacket in 10 easy steps, including cleaning, conditioning, repairing scuffs, reviving faded color, fixing odors, and storing it correctly. The advice applies mainly to finished leather jackets, including many lambskin, cowhide, calfskin, and goatskin styles. Suede and nubuck need different care, so do not treat them like smooth leather unless you enjoy expensive regrets.
Before You Start: Know What Kind of Leather You Have
Before restoring your leather jacket, check the care label and inspect the surface. Smooth finished leather usually has a slight protective coating and can handle careful wiping, light conditioning, and gentle buffing. Aniline leather is softer and more absorbent, which makes it beautiful but more sensitive to water, oil, and color changes. Suede and nubuck have a velvety nap and should be cleaned with suede-specific tools, not regular leather conditioner.
Here is a simple test: place one tiny drop of water on a hidden area, such as inside the hem or under the collar. If the water beads up, the leather likely has a protective finish. If it darkens quickly and absorbs, the leather is more porous and needs extra caution. Always test cleaners, conditioners, dyes, and repair creams in a hidden spot first. Leather has trust issues, and honestly, fair enough.
What You Need to Restore a Leather Jacket
You do not need a laboratory, a professional workshop, or a mysterious uncle who “knows leather.” Start with a soft lint-free cloth, a microfiber towel, a soft brush, mild leather cleaner or a small amount of gentle soap, leather conditioner, cotton swabs, a padded hanger, and a clean workspace. For deeper restoration, you may also need leather recoloring balm, leather dye, leather repair compound, a small sponge, gloves, and leather protector spray.
Avoid bleach, ammonia, harsh detergents, alcohol-heavy cleaners, abrasive scrubbers, and too much water. These can strip natural oils, remove finish, cause cracking, or leave stains. Leather restoration is a gentle sport. If you scrub like you are cleaning a barbecue grill, the jacket will remember.
Easy Ways to Restore a Leather Jacket: 10 Steps
Step 1: Empty the Pockets and Brush Off Dust
Start by emptying every pocket. You may find old receipts, forgotten gum, emergency cash, or evidence of who you were in 2019. Then lay the jacket flat on a clean towel or hang it on a sturdy padded hanger. Use a soft brush or dry microfiber cloth to remove dust, lint, and loose dirt from the collar, seams, cuffs, zipper line, and pocket edges.
This first step matters because dirt acts like fine sandpaper. If you rub cleaner directly over dusty leather, you may grind particles into the surface and make tiny scratches worse. Work slowly, especially around stitched areas and folds where grime loves to hide like it pays rent.
Step 2: Check for Damage Before Cleaning
Inspect the jacket under good light. Look for dry patches, scratches, peeling finish, faded panels, loose stitching, broken zippers, mold spots, water stains, and oil marks. This helps you choose the right restoration method. A dry jacket needs conditioning. A faded jacket may need recoloring. A cracked jacket may need professional repair if the damage is deep.
Pay close attention to high-friction zones: elbows, cuffs, shoulders, pocket openings, and the front zipper area. These spots usually show wear first. If the leather is flaking badly, feels brittle, or has deep structural cracks, do not over-condition it and hope for magic. Conditioner can improve dryness, but it cannot rebuild destroyed leather fibers. In those cases, a leather repair specialist is the safer choice.
Step 3: Spot Test Every Product
Before applying anything to the visible surface, test it on a hidden area. Use a small amount of cleaner or conditioner and wait until it dries. Check for darkening, stickiness, color transfer, dullness, or texture changes. If the test area looks normal, continue. If the leather changes color dramatically, stop and switch to a milder product or consult a professional.
This step is especially important for vintage jackets, light-colored leather, aniline leather, and jackets with hand-painted or distressed finishes. Some jackets are designed to look worn, and aggressive restoration can erase the very character that makes them cool. You want “revived vintage,” not “accidentally laminated couch.”
Step 4: Clean the Leather Gently
To clean a leather jacket, use a leather-specific cleaner or mix a tiny amount of mild soap with lukewarm water. Dampen a soft cloth, wring it until it is barely moist, and wipe the jacket in small sections. Do not soak the leather. Use light circular motions and focus on areas with visible dirt, such as cuffs and the collar.
After cleaning each section, wipe away residue with another clean, slightly damp cloth. Then dry the surface with a soft towel. Never submerge a leather jacket in water, put it in a washing machine, or toss it into a dryer. That is not restoration; that is a leather crime documentary waiting to happen.
For greasy spots, blot first with a dry cloth. You can sprinkle a small amount of cornstarch or baking soda on fresh oil stains and let it sit for several hours to absorb the oil, then brush it off gently. Do not rub oil stains aggressively, because that can push the stain deeper into the leather.
Step 5: Clean the Lining Without Soaking the Jacket
The inside lining often carries sweat, deodorant marks, and everyday odors. Turn the jacket inside out as much as possible and hang it open. Mix a tiny drop of gentle detergent with water, dip a cloth into the solution, wring it out well, and wipe the lining carefully. Avoid wetting the leather side.
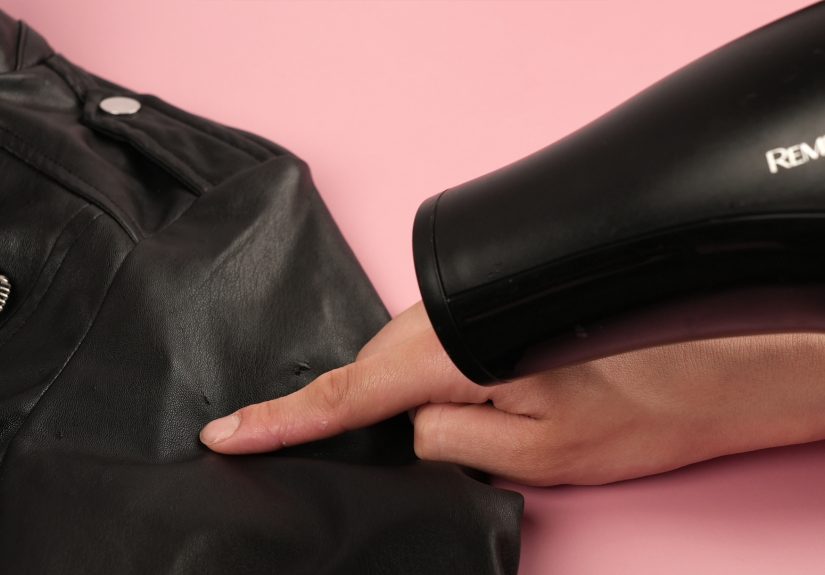
For underarm areas, use a slightly damp cloth and repeat gently rather than soaking. Let the jacket air-dry in a well-ventilated room. Do not use high heat, a hair dryer, or direct sunlight. Heat can dry leather and make it stiff. Air-drying takes longer, but leather is not a microwave burrito. Patience wins.
Step 6: Condition the Leather to Restore Softness
Once the jacket is completely dry, apply a small amount of leather conditioner to a soft cloth. Rub it into the leather using thin, even layers. Focus on dry areas but treat the whole jacket lightly so the finish looks consistent. Let the conditioner absorb according to the product directions, then buff away excess with a clean cloth.
Conditioner helps restore flexibility, reduce dryness, and bring back a subtle glow. However, more is not better. Too much conditioner can make leather sticky, greasy, or darker than expected. If your jacket feels tacky after conditioning, you probably used too much. Buff it thoroughly and let it rest for a day before adding anything else.
For regular maintenance, conditioning once or twice a year is enough for many jackets. If you live in a dry climate or wear the jacket often, you may need it slightly more. If the jacket spends most of its life in a closet waiting for your main-character moment, less frequent conditioning may be fine.
Step 7: Buff the Jacket Back to Life
After conditioning, buff the leather with a dry microfiber cloth. Use gentle, steady motions to remove leftover product and restore a natural sheen. Buffing also helps even out the finish and makes the jacket feel smooth rather than oily.
This is the part where the jacket starts looking like it has forgiven you. The surface should feel softer and look richer, but not wet or shiny like plastic. A healthy leather jacket usually has a mellow glow, not the reflective surface of a freshly waxed sports car.
Step 8: Repair Light Scratches and Scuffs
For small surface scratches, try warming the area with your fingers and gently massaging the leather. Natural oils and light pressure may help minor marks blend in. You can also apply a tiny amount of conditioner to the scratch and buff it carefully. For deeper scuffs where color has worn away, use a leather recoloring balm or repair cream that matches the jacket.
Apply color products sparingly with a small sponge or cloth. Build thin layers instead of using one heavy coat. Let each layer dry before deciding whether you need more. A common mistake is trying to cover a scuff too quickly, which can create a patch that looks darker than the rest of the jacket. Restoration should whisper, not shout.
If the jacket has tears, holes, or peeling finish, consider a leather repair kit or professional service. Small tears may be repaired with backing fabric and flexible leather compound, but visible areas are tricky. If the jacket is expensive, sentimental, or vintage, professional repair is usually worth it.
Step 9: Restore Faded Color Carefully
Sunlight, age, and friction can fade leather, especially on shoulders, sleeves, and seams. To restore color, choose a leather recoloring balm or leather dye designed for garments. Match the color as closely as possible and test it first. Clean and dry the jacket before applying any color product.
For mild fading, recoloring balm may be enough. It can revive the surface and blend worn spots while keeping the jacket’s original character. For major fading or a full color change, leather dye may be required. Dyeing a jacket is more advanced because it can permanently alter the finish, stitching, lining, and overall look. Work in a ventilated area, wear gloves, and apply thin coats. Seal or finish the leather as directed by the dye manufacturer.
Do not dye suede or delicate vintage leather unless you know exactly what you are doing. Also, avoid changing a light jacket to a dark color on a whim. That path sounds exciting until the jacket, your hands, and your furniture all become “espresso brown.”
Step 10: Protect and Store the Jacket Properly
After cleaning, conditioning, and repairing, protect your leather jacket from future damage. Apply a leather protector spray if suitable for your jacket type. This can help repel light moisture and stains, though it will not make the jacket waterproof. Leather can handle a little weather, but it does not want to become a raincoat.
Store the jacket on a wide padded hanger to preserve the shoulders. Keep it in a cool, dry place away from direct sunlight, heaters, and damp basements. Use a breathable garment bag instead of plastic, because leather needs air circulation. Plastic can trap moisture and encourage mildew.
If the jacket gets wet, blot it gently with a towel and let it dry naturally at room temperature. Once dry, condition lightly if the leather feels stiff. Good storage habits prevent many restoration problems before they start, which is both practical and annoyingly adult.
Common Leather Jacket Restoration Mistakes to Avoid
The biggest mistake is using too much water. Leather is skin, and while it can tolerate light moisture, soaking can strip oils and distort the shape. Another mistake is using household cleaners that are too harsh. Bleach, ammonia, strong degreasers, and alcohol-heavy products can damage the finish and cause discoloration.
Over-conditioning is another common problem. A dry jacket needs moisture, but a greasy jacket needs restraint. Apply conditioner in thin layers and give it time to absorb. If you keep adding product because the jacket does not instantly look new, you may end up with a sticky surface that attracts dust.
Do not ignore the care label. Some leather jackets have special finishes, mixed materials, delicate linings, or decorative treatments. When in doubt, test first or ask a leather professional. A quick check can save you from turning a beloved jacket into a cautionary tale.
How Often Should You Restore a Leather Jacket?
A full restoration is not something you need to do often. Most leather jackets only need light cleaning after heavy wear, conditioning once or twice a year, and proper storage between seasons. If you wear your jacket daily, ride a motorcycle, travel often, or live somewhere very dry, inspect it more frequently.
Think of restoration as a response to visible signs: dryness, stiffness, fading, scuffs, dullness, or odor. Maintenance is the routine that keeps those problems from getting dramatic. A five-minute wipe-down after a dusty day can save you from a two-hour restoration project later. Leather rewards small acts of care, which is more than can be said for most houseplants.
When to Call a Professional
DIY leather jacket restoration works best for surface dirt, mild dryness, light scuffs, small stains, and general dullness. Call a professional if the jacket has deep cracks, large tears, severe mold, major dye loss, expensive designer construction, delicate vintage leather, or strong odors that will not go away. Professional leather cleaners have tools and products that are safer for serious problems.
You should also get expert help if the jacket has sentimental value. If it belonged to a parent, grandparent, or someone special, the goal is preservation, not experimentation. There is a time for DIY courage and a time to hand the jacket to someone with insurance and a very calm voice.
Real-Life Experience: What Restoring a Leather Jacket Actually Feels Like
Restoring a leather jacket sounds simple when written as a tidy checklist, but the real experience is more like detective work with a cloth in your hand. You start by thinking, “This will take fifteen minutes,” and then suddenly you are inspecting collar grime like a forensic scientist. That is normal. Leather restoration is slow because leather reacts differently depending on age, finish, thickness, and how the jacket has been worn.
One of the most common experiences is discovering that the dirtiest areas are not always obvious at first. The cuffs may look fine until you wipe them and see gray residue on the cloth. The collar may hold body oils, hair products, sunscreen, or city dust. Pocket edges often look faded because hands constantly rub against them. These small zones can make the entire jacket look older than it is. Cleaning them gently can create a surprisingly big improvement.
Another lesson: conditioning changes the feel before it changes the look. When you apply a good conditioner correctly, the jacket may not instantly transform into a glossy magazine photo. Instead, it slowly becomes more flexible. Sleeves bend more naturally. Dry panels feel less papery. Creases look softer. The jacket starts to move with you again, which is the real sign of restoration.
Color repair is where patience matters most. A tiny scuff on black leather may disappear with conditioner and buffing. A larger faded patch may need recoloring balm. The trick is to build color gradually. Many beginners apply too much product because they want instant results. But thin layers almost always look better. They blend into the original finish and keep the jacket from looking painted.
Odor removal can also test your patience. Leather holds smells from smoke, sweat, storage, food, and damp closets. A light lining clean and fresh air can help, but strong odors may need repeated airing over several days. Never bury the jacket in perfume. That usually creates a new smell best described as “cologne fighting a basement.” Use breathable storage, gentle cleaning, and time.
The best part of restoring a leather jacket is that small improvements stack up. Dusting makes it cleaner. Spot cleaning makes it brighter. Conditioning makes it softer. Buffing gives it life. Repairing scuffs gives it polish. By the end, the jacket may still have wrinkles, marks, and history, but that is the point. A restored leather jacket should not look like it has never been worn. It should look like it has stories and plans for more.
If you are restoring your first jacket, go slowly and treat every step as reversible until it is tested. Do not rush into dye, heavy conditioner, or aggressive stain removal. Start with the mildest method and only move stronger if needed. Leather is durable, but it appreciates manners. Give it careful attention, and it can remain one of the best pieces in your wardrobe for years.
Conclusion
Restoring a leather jacket is not complicated, but it does require a gentle hand and a little patience. Start by identifying the leather type, brushing away dust, testing products, and cleaning the surface carefully. Then condition the leather to restore softness, buff it for a natural glow, repair light scuffs, revive faded color if needed, and protect it with smart storage habits.
The secret is to avoid extremes. Do not soak it, scrub it, over-condition it, blast it with heat, or attack it with harsh chemicals. A leather jacket is tough, stylish, and forgivingbut only up to a point. Treat it well, and it will return the favor by making even a plain T-shirt look suspiciously cool.
Note: Always test any cleaner, conditioner, dye, or repair product on a hidden area first. For suede, nubuck, luxury, vintage, or badly damaged leather jackets, professional leather care is the safest option.


