
Table of Contents >> Show >> Hide
- Why Hand-Paint a Plant Pot Instead of Buying One?
- Pick Your Pot: Terracotta, Ceramic, Concrete, or Plastic?
- Supplies You’ll Actually Use (No Craft Hoarding Required)
- Step-by-Step: How to Paint a Plant Pot Like You Meant It
- The Most Important Part: Sealing Your Hand-Painted Plant Pot
- Design Ideas That Look Fancy Without Being Hard
- Indoor vs. Outdoor: What Changes?
- Plant Health: Is a Painted Pot Safe for Plants?
- Troubleshooting: Common Problems (and Easy Fixes)
- Conclusion
There are two types of plant people: the ones who can keep a fern alive through sheer vibes, and the ones who can’t keep a cactus alive even if it comes with a user manual and a therapist. Either way, a hand-painted plant pot is a low-stakes, high-reward upgrade that makes your greenery look like it has its life togethereven if you don’t.
A painted pot isn’t just “decor.” It’s a tiny billboard that says: I have taste. It can match your living room palette, turn a basic terracotta pot into a gift-worthy moment, and even help older planters look less “college apartment” and more “grown-up who owns matching towels.” This guide covers materials, paint choices, sealing (the step everyone wants to skip, but shouldn’t), design ideas, and practical tips for indoor and outdoor use.
Why Hand-Paint a Plant Pot Instead of Buying One?
Store-bought decorative planters can be beautiful, but they can also be expensive, oddly sized, or suspiciously fragile. Hand-painting gives you three things that retail often can’t: custom color, custom vibe, and custom “I made this” bragging rights.
- Budget-friendly: One plain terracotta pot plus paint can cost less than a single trendy planter.
- Perfect fit: Paint what you already own, or match a pot to a specific plant and space.
- Giftable: A hand-painted pot with a small plant is basically a hug you can water.
- Upgradeable: Old pots (even slightly chipped ones) can look intentional with the right design.
Pick Your Pot: Terracotta, Ceramic, Concrete, or Plastic?
You can paint almost any planter, but the “best” choice depends on where it will live and how much effort you want to spend on prep.
Terracotta (Unglazed Clay)
Terracotta is the fan favorite for DIY because it’s affordable, easy to find, and loves paintwith one dramatic caveat: it’s porous. Water can migrate through the pot walls and cause paint to bubble or peel if you don’t seal properly. Terracotta also dries soil faster, which is great for succulents but not ideal for plants that like consistently moist soil.
Glazed Ceramic
Glossy glaze can be tricky because paint doesn’t naturally want to stick to shiny surfaces. It’s still doable, but you’ll need extra surface prep (light sanding and a bonding primer) for good adhesion. The upside: ceramic holds moisture better than unsealed terracotta and often looks “finished” even without paint.
Concrete
Concrete planters can look modern and sculptural. They also handle outdoor conditions well, but their texture may require more paint to get clean coverage. A primer helps a lot here.
Plastic
Plastic is lightweight, cheap, and sometimes… aggressively boring. Good news: it can be transformed. Use paints formulated for plastic or a primer designed to bond to slick surfaces, and always let coats cure fully before handling.
Supplies You’ll Actually Use (No Craft Hoarding Required)
You don’t need a studio, an easel, or a mysterious apron covered in “artistic” stains. Here’s the practical list:
- Planter: terracotta is easiest; any pot works with proper prep
- Cleaner: mild dish soap + water, or a scrub brush for dusty pots
- Sandpaper: fine grit for smoothing rough spots and improving adhesion
- Primer: optional but recommended (especially for glossy ceramic/plastic)
- Paint: acrylic craft paint, outdoor acrylic, latex paint, or spray paint (project-dependent)
- Brushes: a couple of sizes + a small detail brush
- Painter’s tape: for crisp lines and geometric designs
- Sealer: clear spray acrylic, shellac, polyurethane, or artist varnish
- Drop cloth/newspaper: unless you enjoy “abstract floor art”
- Gloves + mask (for spraying): because lungs are not washable
Step-by-Step: How to Paint a Plant Pot Like You Meant It
1) Clean the Pot (Yes, Even If It “Looks Clean”)
Dust, mineral residue, and leftover soil act like tiny paint-repelling gremlins. Wash the pot with mild soap and water, scrub as needed, and let it dry completely. If you’re reusing an older terracotta pot, give it extra attentionold pots can carry salts and residue that interfere with finishes.
2) Sand Lightly for Better Grip
For terracotta, a gentle sanding smooths rough patches and helps primer/paint go on more evenly. For glazed ceramic and some plastics, sanding is even more important because you’re creating micro-texture so the paint can hold on instead of sliding around like it’s late for a meeting.
3) Prime (Especially If You Want Bright Color)
Primer helps paint adhere and makes colors look more vibrantespecially on terracotta, which can “drink” paint due to its porous surface. For small projects, a brush-on primer or acrylic gesso works well; for speed and smooth coverage, a spray primer is popular. Let it dry fully before painting.
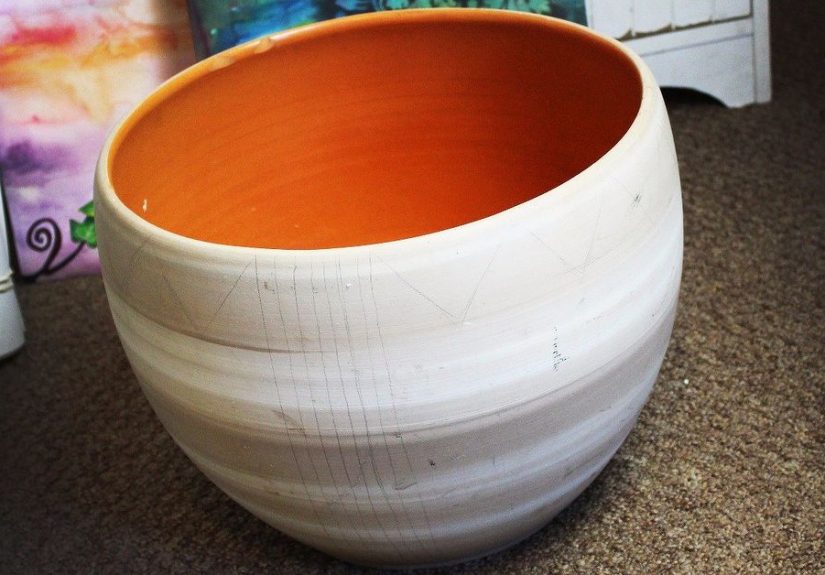
4) Plan the Design (A 2-Minute Sketch Saves 20 Minutes of Regret)
You don’t need to be “good at art.” You need a plan that matches your patience level. If you’re a beginner, pick patterns that forgive tiny mistakes: stripes, dots, color-blocking, and simple shapes. Painter’s tape is your best friend for clean lines.
5) Paint in Thin Coats
Thin coats dry better, look smoother, and reduce drips. Acrylic craft paint is a classic choice because it’s easy to control and comes in a million colors. For outdoor pots, consider exterior-grade paint or spray paint that holds up better to weather. Let each coat dry before adding the nextrushing leads to tacky fingerprints, which are the craft equivalent of leaving your keys in the fridge.
6) Protect the Drainage Hole (and the Plant’s “Water Exit Strategy”)
If your pot has a drainage hole, keep it open. You can paint around it and clear it after finishing, but don’t permanently seal it unless you’re deliberately making a cachepot (a decorative outer pot) that will hold a nursery pot inside.
The Most Important Part: Sealing Your Hand-Painted Plant Pot
If painting is the fun part, sealing is the “adulting” part. But it’s crucialespecially for terracottabecause watering can push moisture through the pot walls and damage your artwork from underneath.
Seal Inside and Out for Terracotta
With porous pots, sealing only the painted exterior is like wearing a raincoat but leaving your shoes in a puddle. For best durability, apply an even coat inside and out (including the rim and bottom), then let it cure before planting. Many people use clear spray sealers for convenience, but brush-on sealers can work toojust keep coats thin and even.
Choose the Right Finish
- Matte: modern, soft look; can show scuffs more easily
- Satin: a balanced sheen that hides minor flaws
- Gloss: bright, “glazed” look; highlights texture and color saturation
Pro Tips for a Cleaner Seal
- Work in a well-ventilated area, especially with aerosols.
- Apply multiple light coats instead of one heavy coat.
- Let paint dry thoroughly before sealing. If paint layers are thick, allow more drying time.
- Let the sealer cure fully before adding soil and wateringthis can take days depending on product and conditions.
Design Ideas That Look Fancy Without Being Hard
1) Modern “Dipped” Color Block
Tape or band off the top portion, paint the bottom a bold color, then peel tape for a crisp edge. This is the easiest way to make a pot look boutique. Try neutrals (cream + charcoal) or playful combos (sage + terracotta).
2) Stripes and Geometry
Painter’s tape turns you into a precision artist. Go vertical stripes for a taller look, horizontal stripes for a cozy vibe, or create triangles and chevrons with overlapping tape lines.
3) Terrazzo Speckles
Paint a solid base coat, then flick tiny specks with a toothbrush or stiff brush. It’s chaotic in a controlled waylike your group chat, but aesthetic.
4) Chalky “Aged” Look
Chalk paint (or chalk-style finishes) can create a soft, vintage look. Light sanding after drying can add worn edges and texture. Great for cottage, farmhouse, or “I own baskets on purpose” decor.
5) Faux-Antique Terracotta
If you love the weathered garden look, techniques like limewash-style coatings or natural aging methods can create patina. This works especially well if you want the pot to look collected, not crafted.
6) Decoupage Wrap (Bandana, Maps, or Patterned Paper)
Decoupage gives you pattern without hand-painting every detail. Wrap fabric or paper around the pot using a decoupage medium, smooth it well, then seal. It’s great for giftsespecially if you choose a pattern that matches the recipient’s style.
Indoor vs. Outdoor: What Changes?
For Indoor Pots
- Focus on aesthetics and wipe-clean finishes (satin and gloss are easiest to clean).
- If using a cachepot, you can paint freelyno soil contact, less moisture stress.
- Use felt pads or saucers to protect surfaces from water rings and scratches.
For Outdoor Pots
- Use weather-friendly paint and a durable sealer.
- Seal thoroughly to resist moisture and prevent peeling.
- Protect terracotta in freeze-thaw climates (water can expand when it freezes and crack porous pots).
- Expect some wear over timeoutdoor life is basically a full-contact sport.
Plant Health: Is a Painted Pot Safe for Plants?
In most typical DIY setups, painted pots are safe for plants once paint and sealers are fully cured. The main concerns are: avoiding heavy chemical fumes during application, allowing full cure time before planting, and not trapping moisture in a way that damages roots.
- Let everything cure: “Dry to the touch” isn’t the same as cured.
- Keep drainage working: plants hate soggy roots.
- Consider lining terracotta: if your plant needs consistent moisture, a thin plastic liner (with drainage) can slow drying.
- For edible plants: use extra caution with products and curing time, and keep coatings away from soil contact when possible.
Troubleshooting: Common Problems (and Easy Fixes)
Paint is bubbling or peeling
Likely moisture migration (common with terracotta) or painting over dust/residue. Fix by sanding back loose paint, cleaning thoroughly, resealing the pot (inside and out), then repainting and resealing.
Streaky coverage
Paint may be too thin or the pot is absorbing it unevenly. Add primer next time, and use multiple thin coats with full drying time between layers.
Tape pulled up paint
Paint wasn’t fully dry/cured, or tape was too aggressive. Use painter’s tape, press edges lightly, and remove tape slowly at an angle once paint is set.
Sealer looks cloudy
Cloudiness can happen with heavy coats, humidity, or incompatible layers. Use thin coats, seal in appropriate temperature/humidity, and test products together on a small area first.
Conclusion
A hand-painted plant pot is one of those rare projects that’s beginner-friendly, genuinely useful, and oddly satisfying. You can go minimalist with a crisp color block, lean playful with patterns and speckles, or get fancy with faux-aging and decoupage. The “secret sauce” isn’t artistic talentit’s good prep, thin coats, and sealing like you actually want your masterpiece to survive watering day.
If you remember just one thing: terracotta is thirsty. Seal it properly, let it cure, and your pot will look sharp far longer than your current streak of keeping basil alive.
Real-World Experiences (): What It’s Actually Like to Paint a Plant Pot
Here’s the part most tutorials skip: what this project feels like in real lifewhen you’re standing over a pot with paint on your fingers, tape stuck to your elbow, and the sudden realization that “freehand mandala” might have been an optimistic choice. First, there’s the confidence phase. You pick a color palette and think, “Wow, I could absolutely sell these at a fancy market.” This phase lasts about three minutes, right up until you put the first coat on raw terracotta and watch it absorb paint like it’s been training for this moment its whole life. People often describe that first coat as “kind of disappointing,” because it can look patchy and dull. The fix is simpleprimer and patiencebut the emotional journey is real.
Next comes the design phase, where you discover that painter’s tape is either your best friend or a mischievous little gremlin depending on how well you burnish the edges. Many DIYers learn (sometimes loudly) that pressing tape down firmly along the edge is what prevents paint bleed. The good news: tiny bleeds can be cleaned up with a small brush, and most patterns still look great from a normal human distance. Remember: your guests are not inspecting your pot with a jeweler’s loupe. (If they are, hand them a brush.)
Then you hit the “I’ll just do one more coat” loop. This is where you keep adding layers because the color gets better every time. It’s also where smudges happenusually because you touched a spot you were sure was dry. A common trick is to handle the pot from the inside rim or put it on an overturned cup so you’re not grabbing painted surfaces. Another real-life lesson: letting paint dry overnight solves many problems that “just a few minutes” creates.
Sealing is the moment of truth. People who skip sealing often report heartbreak later: bubbling paint, peeling sections, or weird moisture marksespecially on terracotta. People who seal properly report something else: a weird sense of power. Like, “I made art AND I understand protective coatings.” If you’re spraying, you’ll also notice that the first coat can look scary (slightly darker, slightly shiny, slightly “did I ruin it?”). That usually settles as it dries. Light coats and good ventilation make this part smoother.
Finally comes the styling payoff. The best experiences are when you place the finished pot in its spot and realize it changes the whole cornerlike adding a little personality amplifier. And because the pot is handmade, it feels warmer than something mass-produced. That’s why people keep making them: one pot leads to another, and suddenly you’re planning “themes” for plants like they’re members of a stylish tiny band. The real magic is that the project meets you where you are: quick and simple if you need it, or delightfully extra if you want it.


