
Table of Contents >> Show >> Hide
- What “Tension” Actually Means (In Normal-Human Terms)
- Before You Touch the Dial: The 60-Second “Not Actually Tension” Checklist
- The 13 Steps to Adjust Sewing Machine Tension (Without Losing Your Mind)
- Step 1: Start with a “Normal” Tension Setting
- Step 2: Use the Right Needle for the Fabric
- Step 3: Thread the Top Thread with the Presser Foot UP
- Step 4: Confirm the Bobbin Is Wound Smoothly (Not Like a Messy Cinnamon Roll)
- Step 5: Insert the Bobbin Correctly (Direction Matters)
- Step 6: Pull Both Thread Tails Under the Presser Foot and Toward the Back
- Step 7: Sew a Test Line on Scrap (Same Fabric, Same Layers)
- Step 8: Read the Stitch Like a Detective
- Step 9: Adjust Upper Tension in Tiny Increments
- Step 10: Make Sure the Presser Foot Is DOWN While You Test Sew
- Step 11: If You’re Still Fighting Loops, Clean the Tension Path
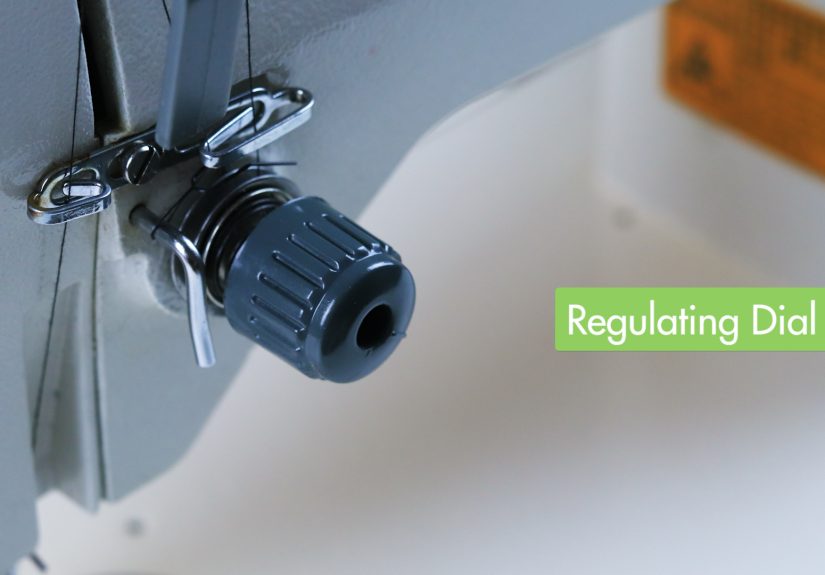
- Step 12: Only Consider Bobbin Tension After You’ve Verified Everything Else
- Step 13: Lock in Your Settings and Write Down What Worked
- Troubleshooting: Common Tension Symptoms (and What to Do Next)
- Special Cases Where Tension Needs Extra Love
- When It’s Not You (and It’s Time for Service)
- Extra: of “Yep, Been There” Experiences (From Real Sewing Rooms)
- Conclusion
Sewing machine tension is like seasoning in cooking: when it’s right, nobody talks about it. When it’s wrong,
suddenly everyone has opinionsand your fabric is wearing a sad little thread mustache. The good news? You don’t
need a degree in mechanical wizardry to get balanced stitches. You just need a calm approach, a scrap of fabric,
and the willingness to rethread (yes, again) like a responsible adult.
This guide breaks down exactly how to adjust sewing machine tension in a practical, non-mystical
way, with clear signs to look for, tiny adjustments that actually work, and the few times you should leave the
bobbin screw alone like it’s a sleeping cat.
What “Tension” Actually Means (In Normal-Human Terms)
A lockstitch (your typical straight stitch) is made when the upper thread and the
bobbin thread meet and “lock” in the middle of the fabric layers. Tension is the controlled
resistance that keeps each thread from yanking the other to the top or bottom.
- Balanced tension: The stitch “knot” lands between fabric layers.
- Upper tension too loose: Loops or “bird nesting” often show on the underside.
- Upper tension too tight: Bobbin thread may show on top, or fabric may pucker.
Here’s the twist: what looks like a “tension problem” is often a threading, needle, or lint problem
wearing a tension costume. So we’ll troubleshoot smart before we start spinning dials like a game show wheel.
Before You Touch the Dial: The 60-Second “Not Actually Tension” Checklist
Do these first. They fix a surprising number of “my machine hates me” situations.
- Raise the presser foot and rethread the top thread from scratch.
- Confirm the take-up lever is threaded (missing this is a classic chaos trigger).
- Replace the needle (wrong type, dull, bent, or incorrectly inserted = tension illusions).
- Check the bobbin: correct type, wound smoothly, inserted in the correct direction.
- Clean lint from the bobbin area and under the needle plate.
If you do only one thing today, do this: thread with the presser foot UP. This opens the tension
discs so the thread seats correctly. Threading with the presser foot down can create “zero tension,” which is
basically your machine politely agreeing to sew nonsense.
The 13 Steps to Adjust Sewing Machine Tension (Without Losing Your Mind)
Grab the same thread you’ll use on your project, plus a scrap of the same fabric
(and the same number of layers). Tension tuned on quilting cotton can fall apart on knit jersey like a sandcastle
at high tide.
-
Step 1: Start with a “Normal” Tension Setting
Most machines have a default upper tension around 3–5 (often 4). If someone
“helpfully” set it to 9 during a dramatic moment, bring it back to center. -
Step 2: Use the Right Needle for the Fabric
A universal needle is fine for many wovens, but knits often need a ballpoint/stretch needle, and thick denim
wants a denim/jeans needle. Wrong needle = skipped stitches, puckering, and tension-looking weirdness. -
Step 3: Thread the Top Thread with the Presser Foot UP
Presser foot up = tension discs open = thread seats properly. Make sure you follow every guide and hit the
take-up lever. This is the number-one fix for looping and bunching. -
Step 4: Confirm the Bobbin Is Wound Smoothly (Not Like a Messy Cinnamon Roll)
A bobbin should be evenly woundno soft spots, no lumpy ridges, no thread crossing like it’s playing hopscotch.
If it’s uneven, rewind it. Use the correct bobbin and wind at a steady speed per your machine’s guidance. -
Step 5: Insert the Bobbin Correctly (Direction Matters)
Different machines want the bobbin thread to unwind clockwise or counterclockwise. Check your manual diagram
or the icon near the bobbin area. Incorrect direction can mimic tension issues fast. -
Step 6: Pull Both Thread Tails Under the Presser Foot and Toward the Back
Before you sew, place both thread tails under the presser foot and to the rear. This helps prevent “thread
spaghetti” at the beginning of a seam. -
Step 7: Sew a Test Line on Scrap (Same Fabric, Same Layers)
Stitch 6–8 inches. Look at both sides. Don’t judge tension from one sad inch near the edgegive it a fair trial.
-
Step 8: Read the Stitch Like a Detective
Use this quick decoder:
- Loops on the underside: upper tension too loose, or top threading isn’t seated correctly.
- Bobbin thread showing on top: upper tension too tight (or bobbin tension too loose, less common).
- Puckering: tension too tight, stitch length too short, needle/thread mismatch, or fabric feeding issues.
-
Step 9: Adjust Upper Tension in Tiny Increments
Turn the tension dial one number at a time (or less if your machine is sensitive). Then retest.
Tension isn’t a microwave timeryou don’t jump from 4 to 9 and hope for magic.General rule:
- Loops underneath? Increase upper tension slightly.
- Bobbin thread on top? Decrease upper tension slightly.
-
Step 10: Make Sure the Presser Foot Is DOWN While You Test Sew
Presser foot down engages the tension system correctly during stitching. If you test with the presser foot up,
the results will be… imaginative. -
Step 11: If You’re Still Fighting Loops, Clean the Tension Path
Lint can wedge itself where thread needs to glide. Clean the bobbin area. If your machine allows safe access,
remove lint under the needle plate. If the tension assembly is internal, a professional service may be the best move. -
Step 12: Only Consider Bobbin Tension After You’ve Verified Everything Else
Most home sewers never need to adjust bobbin tension for regular sewing. It’s usually factory-set, and
the upper dial is designed to do the daily work. But if you’re using specialty techniques (like bobbinwork),
heavy threads, or you’ve confirmed the top tension is correct yet the stitch balance won’t cooperate, bobbin
tension may be relevant.If your machine has a removable bobbin case with a tiny screw, adjustments should be very small
(think: a few degrees, not a full turn). Mark your starting position so you can return to baseline. -
Step 13: Lock in Your Settings and Write Down What Worked
Once your stitch looks balanced, jot down:
fabric type, needle type/size, thread brand/weight, and tension setting. Future-you will be
grateful, and future-you deserves nice things.
Troubleshooting: Common Tension Symptoms (and What to Do Next)
Symptom: Big Loops on the Underside
Usually caused by top thread not seated between the tension discs (often from threading with presser foot down),
missing the take-up lever, or upper tension set too low. Rethread with presser foot up, then slightly increase
upper tension and retest.
Symptom: Bobbin Thread Showing on Top
Often indicates upper tension is too tight. Lower the upper tension a bit. If you’re using a very fine bobbin
thread with a heavier top thread (or vice versa), aim for a compatible pairing or adjust accordingly.
Symptom: Puckered Seams
Reduce upper tension slightly, increase stitch length, and confirm needle/thread match. Lightweight fabrics may
need a finer needle and thread, plus gentler tension.
Symptom: “Bird Nest” Tangling Under the Fabric
This is commonly top-threading trouble rather than a bobbin rebellion. Rethread completely, check the bobbin is
seated correctly, hold thread tails at the start, and clean lint from the bobbin area.
Symptom: Tension Dial Changes Nothing
If changing upper tension doesn’t affect stitches, suspect threading errors (thread not in discs), lint in the
tension area, or a tension mechanism issue. Rethread carefully, clean, and consider service if the problem persists.
Special Cases Where Tension Needs Extra Love
Knits and Stretch Fabrics
Use a stretch/ballpoint needle, and test on scraps. If the seam looks wavy, it may be tension, but it can also be
presser foot pressure, stitch choice, or feeding. A narrow zigzag or stretch stitch can help depending on the project.
Thick Thread, Topstitching, and Denim
Thick thread increases friction through the tension path. You may need to lower upper tension or
use a larger needle so the thread flows smoothly. Always testtopstitching is where “almost balanced” becomes very obvious.
Metallic Thread
Metallic thread can be fussy. Slow down, use a metallic needle if possible, and consider loosening upper tension.
A thread net and proper spool cap can also reduce snags.
Quilting
Quilting makes tension more visible because the stitch lock ideally hides inside the quilt sandwich. Use contrasting
thread colors on a test sandwich to spot imbalances quickly.
When It’s Not You (and It’s Time for Service)
If you’ve rethreaded, replaced the needle, verified the bobbin, cleaned lint, and the machine still produces
inconsistent tension, you may be dealing with:
- A damaged or sticky tension assembly
- A nicked bobbin case or burr in the hook area
- Timing issues (especially after a needle strike)
At that point, a qualified technician can save you from spending three hours adjusting a screw that was never the
real problem. Your sanity is allowed to have a budget.
Extra: of “Yep, Been There” Experiences (From Real Sewing Rooms)
Ask a room full of sewists about tension, and you’ll see the same facial expression you get when someone mentions
“group projects” in school. Almost everyone has a story that starts with, “I was just trying to do one simple seam…”
and ends with a tangled knot the size of a small hamster.
One of the most common experiences is the false tension panic. You glance under the fabric and see
loops, and your brain immediately shouts, “BOBBIN TENSION!” But then you rethread with the presser foot up andpoof
the loops vanish like a magician’s assistant. That moment teaches an important lesson: threading mistakes can look
dramatic, and tension dials can’t fix thread that never entered the tension discs in the first place.
Another classic is the new spool, new chaos moment. You switch thread brands or move from all-purpose
thread to topstitching thread, and suddenly your “perfect settings” feel like a betrayal. This isn’t your machine
turning against youit’s physics. Different thread weights and finishes behave differently under pressure, and your
machine may need a small tension tweak plus a needle size change. The best habit you can build is a quick “test strip”
ritual: stitch, inspect, adjust, repeat. It feels slow until you realize it prevents you from unpicking 40 inches of seam.
Then there’s the bobbin winding reality check. A loosely wound bobbin can create inconsistent stitches
that mimic tension problems. Many people discover this after adjusting the top tension for twenty minutes, only to
re-wind the bobbin and fix the issue in thirty seconds. If your stitches look fine and then randomly go weird halfway
through a seam, it’s worth checking whether the bobbin is evenly wound, seated correctly, and the right type for your
machine.
And let’s talk about the “why is it nesting only at the beginning?” experience. You start sewing, and
the machine creates a tiny thread volcano underneath. Half the time, this is solved by holding both thread tails for the
first few stitches and keeping them under the presser foot and toward the back. It’s a small move that feels sillyuntil
it works consistently, and you wonder why nobody put it on a billboard.
Finally, the most satisfying experience: the moment you learn to read the stitch. When you can look at
the top and bottom and confidently say, “Okay, upper tension is a touch tight,” you stop feeling like tension is a mystery.
You start treating it like tuning a guitar: tiny turns, quick tests, and the calm knowledge that you can always return to
the default setting. That’s when sewing gets fun againbecause the machine stops being a drama queen and goes back to being a tool.


