
Table of Contents >> Show >> Hide
- What Is Angle Iron?
- Before You Bend: Plan the Job Like a Fabricator
- Tools and Safety Gear You May Need
- Method 1: Cold Bending Angle Iron
- Method 2: Hot Bending Angle Iron
- Method 3: Notch and Bend for a 90-Degree Corner
- Method 4: Bend Angle Iron With a Hydraulic Press
- Method 5: Roll Angle Iron Into a Curve or Ring
- How to Avoid Common Angle Iron Bending Problems
- Practical Example: Making a Simple Angle Iron Frame
- When Should You Hire a Professional?
- Extra Shop Experience: Lessons Learned From Bending Angle Iron
- Conclusion
Bending angle iron sounds simple until the steel looks back at you and says, “Cute plan.” Unlike flat bar, angle iron has two legs joined at a 90-degree corner, which gives it strength, stiffness, and a charming talent for twisting when you bend it incorrectly. Whether you are building a trailer frame, a garden gate, a bracket, a workbench, or a curved metal ring, learning how to bend angle iron the right way can save you wasted steel, crooked parts, and several words your neighbors do not need to hear.
The good news is that angle iron can be bent successfully with the right method. The best technique depends on the size of the steel angle, the radius or angle you need, the equipment you have, and whether the finished piece must be structural, decorative, or simply “good enough for the lawn mower shed.” This guide explains the main ways to bend angle iron, including cold bending, hot bending, notching, hydraulic press bending, and rolling. You will also learn how to plan the bend, avoid cracking, control springback, and work safely.
What Is Angle Iron?
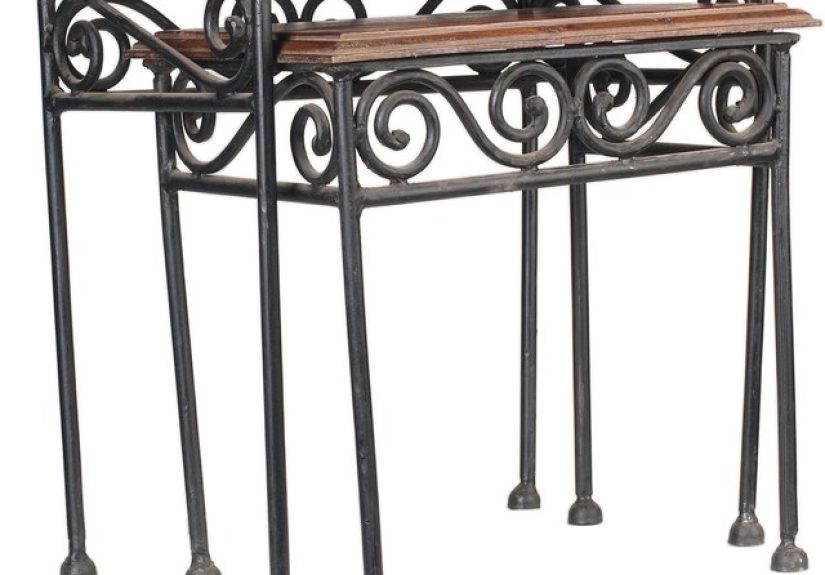
Angle iron, also called steel angle, angle bar, or L-angle, is a structural metal shape with two legs that meet at a right angle. Most common angle iron is made from mild carbon steel, often ASTM A36, a popular hot-rolled steel used in fabrication, repair, construction, trailers, brackets, machinery supports, and general shop projects.
The L-shape is the reason angle iron is so useful. The two legs create stiffness in more than one direction, making the material stronger than a flat strip of similar thickness. That same strength is also why bending it takes planning. You are not just bending one flat piece of steel; you are asking an L-shaped profile to deform without twisting, wrinkling, stretching too far, or developing a crack at the inside corner.
Before You Bend: Plan the Job Like a Fabricator
Good bends begin before the torch, press, grinder, or vise comes out. Start by answering four questions:
1. What angle or radius do you need?
A sharp 90-degree corner for a frame is very different from a smooth curve for a ring or arch. For a square frame, notching and bending may be the cleanest method. For a gradual curve, rolling is usually better. For a small adjustment, cold bending or heat bending may work.
2. Is the piece structural?
If the angle iron will carry serious loads, such as a trailer, platform, stair support, lifting fixture, or building component, do not guess. Bending can change strength, and cutting notches can create weak points. Structural work should follow engineered plans or be handled by a qualified fabricator.
3. What size is the angle iron?
Small 1-inch by 1-inch by 1/8-inch angle can often be bent with a vise, clamps, a torch, or a compact press. Larger 3-inch by 3-inch by 1/4-inch angle may require a hydraulic press, ironworker, heat, or professional rolling equipment. The thicker the material, the more force it takes and the more important bend radius becomes.
4. Which way is the angle being bent?
Angle iron can be bent with the legs in different orientations: leg-in, leg-out, heel-in, or heel-out. This matters because the steel will stretch and compress differently depending on which part of the angle is inside the curve. If the orientation is wrong, your part may twist like a metal potato chip.
Tools and Safety Gear You May Need
The exact tool list depends on the bending method, but common equipment includes a bench vise, clamps, angle grinder, cutoff wheel, oxy-fuel torch or heating torch, hydraulic press, bending dies, press brake attachment, welding machine, square, tape measure, soapstone or marker, protractor, and a sturdy workbench.
For safety, use eye protection, hearing protection, gloves, flame-resistant clothing when heating or welding, closed-toe leather boots, and proper ventilation. Keep flammable materials away from the work area. Hot steel does not always glow brightly in a lit shop, so treat every recently heated piece as if it wants to autograph your hand.
Method 1: Cold Bending Angle Iron
Cold bending means shaping the angle iron without heating it. This method works best on small, thin mild steel angle or when only a slight bend is required. It is cleaner than hot bending because there is no scale, flame, or heat-affected zone. However, it also requires more force, and tight bends can crack the steel if the radius is too small.
How to Cold Bend Angle Iron
First, mark the bend line clearly on both legs. Clamp the angle iron securely in a heavy vise or fixture, placing the bend line exactly where the force will be applied. Use a long pipe, bending bar, press, or controlled hammering to pull the angle to the desired position. For better accuracy, bend slightly past the final angle because steel tends to spring back after pressure is released.
Cold bending is best for light-duty brackets, decorative projects, minor corrections, and smaller steel angles. It is not ideal for thick material, sharp bends, or parts that must remain perfectly straight along both legs.
Method 2: Hot Bending Angle Iron
Hot bending uses heat to soften the steel at the bend area. This reduces the force needed and helps make tighter bends possible. For many DIY and farm-shop projects, heating the bend line with an oxy-fuel torch or rosebud tip is the most practical approach.
How to Hot Bend Angle Iron
Mark the bend location. Secure the angle iron so it cannot shift. Heat the bend area evenly, focusing on the zone where the metal needs to move. For mild steel, fabricators often heat until the steel reaches a dull red to cherry red color, depending on the work and lighting. Once the bend area is hot enough, apply steady pressure using a bending bar, vise, press, or fixture.
Do not overheat the steel into a sparking or melting condition. That is not “extra soft”; that is “congratulations, you are now making scrap.” Bend gradually, check the angle often, and allow for springback. After bending, let the part cool naturally unless your project requires a specific heat-treatment procedure. Quenching mild steel may not make it dramatically harder, but it can introduce stress and distortion.
Method 3: Notch and Bend for a 90-Degree Corner
For making clean rectangular frames, the notch-and-bend method is one of the most useful techniques. Instead of cutting separate pieces and welding every corner, you cut a V-shaped notch in one leg of the angle iron, bend the remaining metal, and weld the joint. This creates a tidy corner and helps keep the frame aligned.
Step-by-Step Notch and Bend
Measure and mark the corner location. On the leg that will fold, mark a V-notch. For a 90-degree bend, the removed section is often close to a 90-degree V, but the exact layout depends on the angle size, thickness, bend direction, and how tight you want the outside corner. Cut the notch carefully with a saw, plasma cutter, or cutoff wheel. Leave the opposite leg intact enough to act as the hinge.
Clamp the piece securely and bend it until the two cut edges meet. Check the corner with a framing square. Tack weld the joint, confirm the frame is still square, then finish weld. Grind only if appearance matters; do not grind away weld strength on a load-bearing part just because you want it to look like it came from a catalog.
Method 4: Bend Angle Iron With a Hydraulic Press
A hydraulic press is a powerful option for bending heavier angle iron. It uses controlled force rather than muscle, which is excellent news for your shoulders. The key is using the right dies and supports so the steel bends where you want it instead of collapsing, twisting, or launching itself into a dramatic shop story.
Basic Press Bending Process
Set up a bottom die or V-block wide enough for the material. Place the angle iron in the correct orientation. Align the press ram with the bend line. Apply pressure slowly and evenly. Stop, release, and check the bend angle. Repeat until the final angle is reached.
For angle iron, support is everything. Because of the L-shaped profile, one leg may want to move differently from the other. Custom dies, guide blocks, or fixtures may be needed to prevent twisting. Always stand clear of pinch points, and never exceed the capacity of the press or tooling.
Method 5: Roll Angle Iron Into a Curve or Ring
If you need a smooth curve, arch, hoop, or flange ring, rolling is usually the best method. Angle rolling machines use multiple rollers to gradually bend the profile into a controlled radius. This is how many circular angle rings for ductwork, tanks, fan housings, guards, and industrial frames are made.
Angle iron can be rolled in several orientations. “Leg-in” means the leg points toward the center of the curve. “Leg-out” means the leg points away from the center. “Heel-in” and “heel-out” refer to the outside corner, or heel, facing inward or outward. These details matter, especially with unequal-leg angle, because the finished part must match the design and bolt pattern.
Rolling angle iron is often more difficult than rolling flat bar because the profile can twist. Professional shops use guide rollers and specialized tooling to control distortion. For a one-time DIY job, hiring a local metal rolling shop may be cheaper than buying equipment, wasting material, and inventing new forms of disappointment.
How to Avoid Common Angle Iron Bending Problems
Problem: The Angle Twists
Twisting usually happens when the force is not balanced across the L-shape. Use a better fixture, guide blocks, or rolling equipment designed for angle profiles. Check orientation before bending.
Problem: The Bend Cracks
Cracking can happen when the bend radius is too tight, the steel is too hard or brittle, or the material is bent cold beyond its limits. Use a larger radius, apply heat, or choose a more ductile material.
Problem: The Final Angle Is Not Accurate
Springback is the usual suspect. Steel relaxes slightly after bending, so you often need to overbend a little. Make test bends on scrap from the same material before bending the final piece.
Problem: The Corner Looks Ugly
Poor layout, rough cutting, and rushing the weld are common causes. Use clean marks, accurate cuts, solid clamping, and tack welds before final welding. Measure twice, cut once, then measure again because steel has a suspicious sense of humor.
Practical Example: Making a Simple Angle Iron Frame
Suppose you want to make a rectangular frame from 1-1/2-inch by 1-1/2-inch by 1/8-inch mild steel angle. The notch-and-bend method can work well. Lay out the frame dimensions along one continuous piece of angle iron. Mark each corner. Cut V-notches at the bend points, leaving the outside leg as the hinge. Clamp the first corner, bend it to 90 degrees, and tack weld. Repeat for the other corners.
Once all corners are tacked, measure the diagonals. If both diagonals match, the frame is square. If not, persuade it gently with clamps before final welding. Finish weld each corner in short sections to reduce distortion. Let the frame cool naturally, then clean the welds and apply primer or paint.
When Should You Hire a Professional?
Hire a professional fabricator when the angle iron is large, the bend radius must be precise, the part is structural, multiple identical pieces are needed, or the job requires rolling into a smooth circle. Professional shops have angle rolls, ironworkers, press brakes, dies, fixtures, and experience. That experience matters because bending angle iron is partly science and partly knowing when the steel is about to behave badly.
Extra Shop Experience: Lessons Learned From Bending Angle Iron
One of the biggest lessons in bending angle iron is that the first piece is often a teacher, not a finished part. Scrap tests are not wasted time. They show how much the steel springs back, how the legs move, and whether your bend line is in the right place. If you have only one expensive piece of steel and no spare material, cut a small sample from the same stock if possible. A five-minute test can prevent a fifty-dollar mistake.
Another practical habit is to mark more than you think you need. Mark the bend line, the waste side, the inside of the bend, and the orientation of the legs. Angle iron can look obvious on the bench, then suddenly become confusing after you flip it, clamp it, heat it, and answer a phone call. Clear layout marks keep the project from turning into a metal puzzle.
Clamping is also more important than beginners expect. A loose setup gives ugly bends. The steel shifts, the bend starts in the wrong place, and the result looks like it was fabricated during an earthquake. Use heavy clamps, a solid vise, and stops whenever possible. If you are making several matching parts, build a simple jig. A jig does not have to be fancy; even a few welded stops on a scrap plate can improve repeatability.
Heat control is another skill that improves with practice. When hot bending, beginners often heat too small an area, which creates a sharp kink, or too large an area, which makes the bend wander. Heat the zone that needs to move, and keep the heat even across the bend area. Move slowly. Steel gives you feedback if you pay attention: resistance, color, scale, and movement all tell you what is happening.
For 90-degree frame corners, the notch shape matters. If you remove too little material, the joint will not close cleanly. If you remove too much, you create a gap that must be filled with weld. A small gap is manageable; a canyon is annoying. Cut carefully and sneak up on the final fit. A grinder can remove more steel, but it cannot put it back, unless you count welding, grinding, and muttering as a restoration process.
Welding after bending should be done with patience. Tack first, check alignment, then weld. Long continuous welds can pull the frame out of square as they cool. Short welds placed in a balanced sequence help control distortion. After welding, check the part again before painting or installing it. Paint has many talents, but fixing geometry is not one of them.
Finally, know when not to bend angle iron yourself. If the project involves a vehicle frame, lifting equipment, stairs, railings, structural supports, or anything where failure could hurt someone, get qualified help. DIY fabrication is satisfying, but safety beats pride every time. For decorative brackets, garden projects, shop carts, and light-duty frames, bending angle iron is a useful skill. For critical structures, professional engineering and fabrication are worth every penny.
Conclusion
Learning how to bend angle iron is really learning how to control force, heat, layout, and patience. Small bends can often be made cold with a vise or press. Tighter bends may need heat. Clean 90-degree frame corners are often best made with a notch-and-bend technique. Smooth curves and rings usually call for angle rolling equipment. Whatever method you choose, plan the bend, support the steel properly, expect springback, and test on scrap before committing to the final part.
Angle iron is strong because of its shape, and that shape is exactly what makes it tricky to bend. Respect the material, use the right tools, and do not rush the setup. Do that, and your finished part will look less like a wrestling match and more like fabrication.


