
Table of Contents >> Show >> Hide
- What Is Safe Mode on Windows 11?
- Method 1: Boot Into Safe Mode from Settings
- Method 2: Use Shift + Restart from the Start Menu or Sign-In Screen
- Method 3: Enter Safe Mode When Windows 11 Will Not Boot
- Important Tip: BitLocker May Ask for a Recovery Key
- What to Do Once You Are in Safe Mode
- How to Exit Safe Mode on Windows 11
- Common Mistakes to Avoid
- Which of the 3 Methods Should You Use?
- Practical Experiences: What Safe Mode Troubleshooting Often Looks Like in Real Life
- Conclusion
- SEO Tags
Windows 11 is usually calm, polished, and fairly cooperative. Then a driver update misbehaves, a startup app throws a tantrum, or your PC boots into a black screen and suddenly the mood changes. That is when Safe Mode becomes the quiet, reliable friend who shows up with a flashlight and says, “Let’s figure this out without all the drama.”
If you need to troubleshoot crashes, remove a stubborn app, scan for malware, or figure out whether Windows itself is broken or some extra software is causing trouble, Safe Mode is one of the best places to start. It loads Windows 11 with only the essentials, which makes it easier to spot the real problem without twenty startup apps waving their hands and shouting for attention.
In this guide, you will learn exactly how to boot into Safe Mode on Windows 11 using three easy methods. You will also learn which Safe Mode option to choose, what to do once you get there, how to get out of Safe Mode, and which mistakes to avoid if you do not want a simple fix to turn into an accidental side quest.
What Is Safe Mode on Windows 11?
Safe Mode is a stripped-down startup environment in Windows 11. Instead of loading your full collection of drivers, startup apps, extras, and digital baggage, it starts with a minimal set of files and services. That matters because if your computer works in Safe Mode but not during a normal startup, the problem is often caused by a driver, startup item, recent update, or third-party software rather than Windows core files alone.
Think of it like testing a car with everything unnecessary removed. If the engine runs fine without the decorative spoilers, mystery dashboard accessories, and ten dangling air fresheners, you know the issue is probably not the engine itself.
The 3 Safe Mode Options Explained
- Safe Mode: Loads only the basics. This is the best starting point for most troubleshooting jobs.
- Safe Mode with Networking: Adds network drivers and services so you can access the internet or other devices on your network. Useful when you need to download a driver, run an online malware scan, or look up a fix.
- Safe Mode with Command Prompt: Opens a command-line interface instead of the usual desktop. This is more useful for advanced troubleshooting than everyday users.
On the Startup Settings screen, these usually appear as:
- 4 or F4 for Safe Mode
- 5 or F5 for Safe Mode with Networking
- 6 or F6 for Safe Mode with Command Prompt
Method 1: Boot Into Safe Mode from Settings
This is the easiest method when your Windows 11 desktop still works well enough for you to open Settings. If the system is unstable but still responsive, this is usually the cleanest route.
- Click Start and open Settings.
- Select System.
- Click Recovery.
- Under Advanced startup, click Restart now.
- After your PC restarts into the recovery menu, choose Troubleshoot.
- Select Advanced options.
- Click Startup Settings.
- Select Restart.
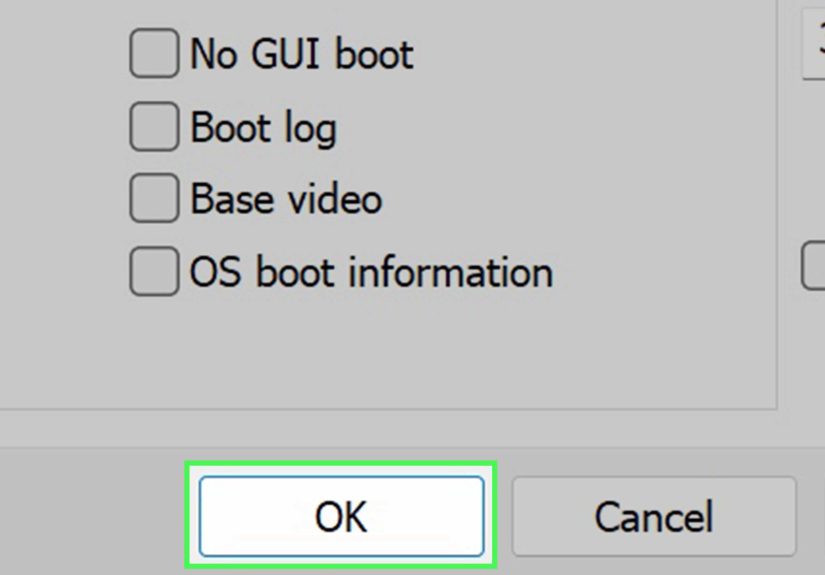
- When the Startup Settings screen appears, press 4 or F4 for Safe Mode, 5 or F5 for Safe Mode with Networking, or 6 or F6 for Safe Mode with Command Prompt.
Best for: PCs that still reach the desktop, users who want the most straightforward route, and anyone who prefers not to play startup-menu roulette.
Good example: Let’s say you installed a fresh graphics driver and now Windows 11 keeps freezing every few minutes. If you can still get into the desktop long enough to open Settings, this method gets you into Safe Mode quickly so you can roll back the driver or uninstall it.
Why This Method Works So Well
Using Settings is simple because it sends you directly into the Windows Recovery Environment, also called WinRE. From there, Windows gives you the Startup Settings menu where Safe Mode lives. No guesswork, no frantic key mashing, and no hoping your laptop manufacturer assigned some secret recovery key combination known only to ancient technicians and one forum post from 2017.
Method 2: Use Shift + Restart from the Start Menu or Sign-In Screen
If Windows is acting weird, if the desktop is only half-working, or if you can reach the sign-in screen but not much else, Shift + Restart is a great option. It is also one of the fastest ways to enter Safe Mode without digging through several menus first.
- Open the Start menu, click Power, then press and hold the Shift key while selecting Restart.
- If you cannot reach the desktop, use the same trick from the sign-in screen: click the power icon, hold Shift, and select Restart.
- Your PC will restart to the recovery screen.
- Choose Troubleshoot.
- Select Advanced options.
- Click Startup Settings.
- Select Restart.
- Press 4/F4, 5/F5, or 6/F6 depending on the Safe Mode version you need.
Best for: Systems that are unstable, users stuck at the sign-in screen, and situations where Settings either will not open or opens with the emotional stability of a wet paper towel.
Good example: Imagine your PC boots to the login screen, but as soon as you sign in, the taskbar crashes, the desktop flickers, and nothing stays open. In that case, Shift + Restart from the sign-in screen is often the easiest escape hatch.
When to Pick Safe Mode with Networking
Choose Safe Mode with Networking if you need internet access for a driver download, an antivirus update, cloud backup access, or online troubleshooting. If you do not need the internet, plain Safe Mode is often the cleaner option because it removes one more moving part from the equation.
Method 3: Enter Safe Mode When Windows 11 Will Not Boot
This is the method that matters when your PC refuses to load Windows normally. If you cannot reach Settings, the Start menu, or the sign-in screen reliably, you can force Windows 11 into the recovery environment and enter Safe Mode from there.
Option A: Trigger Automatic Repair by Interrupting Startup
- Turn on your PC.
- As soon as the Windows logo appears, press and hold the power button until the PC turns off.
- Repeat this process two times.
- On the third startup, Windows should enter Automatic Repair or the Windows Recovery Environment.
- Select Advanced options.
- Choose Troubleshoot > Advanced options > Startup Settings > Restart.
- Press 4/F4, 5/F5, or 6/F6 to choose your Safe Mode option.
Option B: Use a Windows 11 Installation USB or Recovery Drive
If your PC will not trigger Automatic Repair properly, a bootable Windows installation USB or recovery drive can also get you into WinRE. Start the computer from the recovery media, choose your language if prompted, then select Repair your PC instead of installing Windows. After that, go to Troubleshoot, Advanced options, Startup Settings, and then Restart.
Best for: Black screens, endless boot loops, repeated crashes before login, and systems that behave like they have signed a firm contract refusing to open Windows normally.
Good example: You install a bad update or faulty driver, and the PC now restarts every time the Windows logo appears. This method lets you break that loop and enter Safe Mode so you can remove the update, uninstall the driver, or run repair tools.
Important Tip: BitLocker May Ask for a Recovery Key
If your Windows 11 device is encrypted, especially with BitLocker, you may be asked for a recovery key when changing startup behavior or using certain recovery tools. That is normal, but it can catch people off guard. Before doing serious startup troubleshooting, make sure you know where your BitLocker recovery key is stored. Future-you will be grateful, and present-you will avoid a lot of unnecessary sighing.
What to Do Once You Are in Safe Mode
Getting into Safe Mode is step one. Step two is actually fixing the problem. Here are the most useful things to do once you are there:
- Uninstall recent apps or drivers if the issue began after a fresh installation.
- Roll back a driver, especially for graphics, audio, storage, or networking hardware.
- Run a malware scan if you suspect malicious software.
- Use System Restore if you have restore points and the issue started recently.
- Open Device Manager to disable or inspect problematic hardware.
- Use Startup Repair from WinRE if the system cannot boot properly.
- Check startup programs and disable anything suspicious or unnecessary.
A lot of Windows 11 problems come down to driver conflicts, broken startup items, or software that starts with Windows and immediately causes trouble. Safe Mode strips away enough clutter that the real culprit often becomes obvious pretty fast.
How to Exit Safe Mode on Windows 11
Usually, leaving Safe Mode is as simple as restarting your computer normally. If you entered it through Settings or Shift + Restart, a regular reboot often does the job.
But if your PC keeps booting into Safe Mode, do this:
- Press Windows + R.
- Type msconfig and click OK.
- Open the Boot tab.
- Under Boot options, clear the Safe boot checkbox.
- Click Apply, then OK.
- Restart your PC.
This is one of the most common “whoops” moments in Windows troubleshooting. Someone uses System Configuration to force Safe Mode, forgets to turn it off, and then wonders why the computer keeps returning to the same stripped-down screen like it is stuck in a time loop.
Common Mistakes to Avoid
1. Picking the Wrong Safe Mode Option
If you need internet access, plain Safe Mode will feel annoyingly incomplete. Pick Safe Mode with Networking instead. If you just need to remove a bad driver or app, standard Safe Mode is usually enough.
2. Forgetting to Save Work Before Restarting
Booting into Safe Mode involves a restart, and Windows is not sentimental about unsaved files. Save everything first.
3. Using msconfig Without Planning the Exit
If you use System Configuration to alter boot behavior, remember that you may need to undo those changes later. Otherwise, Safe Mode can become less of a troubleshooting tool and more of an unexpected roommate.
4. Assuming Safe Mode Means Something Is Permanently Broken
Not at all. Safe Mode is diagnostic. It helps separate Windows core behavior from third-party chaos. A PC booting into Safe Mode successfully is often a good sign because it means the machine still has a workable path for repair.
Which of the 3 Methods Should You Use?
- Use Method 1 if Windows still works and you can open Settings.
- Use Method 2 if the desktop is unstable or you are stuck at the sign-in screen.
- Use Method 3 if Windows 11 will not boot normally at all.
If you are not sure, start with the least invasive option. There is no trophy for making recovery harder than it needs to be.
Practical Experiences: What Safe Mode Troubleshooting Often Looks Like in Real Life
In real-world Windows 11 troubleshooting, Safe Mode usually enters the story at exactly the moment when patience leaves the room. One common experience happens after a driver update. A user installs a fresh graphics driver because a game stutters or a second monitor is acting strange. The restart seems normal at first, then the screen flickers, the taskbar stops responding, and opening Settings feels like asking a sleepy cat to do your taxes. In that situation, Safe Mode becomes a reality check. If the PC behaves normally there, it strongly suggests the update or driver is the troublemaker, not the entire operating system.
Another common experience is the “everything was fine until startup got crowded” scenario. Over time, laptops collect background apps the way kitchen drawers collect mystery cables. Cloud sync tools, utility suites, RGB software, update assistants, browser helpers, and ten other little extras all pile onto startup. Then one day the PC takes forever to load, freezes after sign-in, or loops between a half-loaded desktop and a spinning cursor. Booting into Safe Mode can feel surprisingly peaceful because all that extra baggage is missing. Users often describe it as the moment they realize Windows itself is not the villain; it is the startup clutter throwing the party.
Safe Mode is also a familiar rescue route after malware or unwanted software sneaks in. Maybe a fake optimizer was installed, maybe the browser keeps redirecting, maybe security software refuses to uninstall normally. In these cases, Safe Mode reduces interference so scans and cleanup tools have a better chance of working. It is not magic, but it is a much better environment for repairs than normal startup when unwanted processes are actively trying to stay alive.
There is also the experience of simple relief. A PC that will not boot normally can feel disastrous, especially if school files, work projects, or family photos are on it. When users finally reach the blue recovery screen and see that Safe Mode is still available, the mood often changes from panic to problem-solving. Safe Mode does not guarantee an instant fix, but it gives you control again, and that matters. On Windows 11, that small bit of control can be the difference between a quick driver rollback and a full afternoon of reinstalling everything while questioning your life choices.
Conclusion
Knowing how to boot into Safe Mode on Windows 11 is one of those skills that feels boring right up until the exact moment it becomes incredibly useful. Whether you use Settings, Shift + Restart, or the recovery environment after a failed boot, the goal is the same: get Windows running with fewer variables so you can diagnose the actual issue faster.
If your PC still works, start with Settings. If the desktop is unstable, use Shift + Restart. If Windows 11 refuses to boot, force your way into recovery and launch Safe Mode from there. Once inside, remove recent changes, scan for problems, and restart normally when you are done. Calm beats chaos, and Safe Mode is Windows 11’s built-in reminder of that.


