
Table of Contents >> Show >> Hide
- What Makes a Platform Bed “Good” (and Not “Regrettable”)
- Before You Start: Choose Your Platform Bed Style
- Tools and Materials (General Checklist)
- The Golden Rule of Mattress Fit
- The 14 Steps to Build a Platform Bed
- Step 1: Measure your mattress and decide the final look
- Step 2: Pick your support system (slats vs. deck)
- Step 3: Choose materials that match your skill level
- Step 4: Plan the frame dimensions (and include real-world clearance)
- Step 5: Sketch your design (yes, even if you “don’t sketch”)
- Step 6: Create a cut plan and label everything
- Step 7: Build the outer frame (rails first)
- Step 8: Add the center support (the unsung hero)
- Step 9: Install leg supports or a recessed base
- Step 10: Add ledgers/cleats for slats (if using slats)
- Step 11: Fit and secure the slats (or deck panels)
- Step 12: Sand everything that a human might touch (future-you will applaud)
- Step 13: Finish the wood (and let it cure properly)
- Step 14: Final assembly check (and the squeak prevention pass)
- Optional Upgrades That Make Your Bed Look Store-Bought
- Common Mistakes (and How to Avoid Them)
- Conclusion
- Real-World Build Experiences and Lessons (What DIYers Commonly Discover)
A platform bed is basically the MVP of bedroom furniture: it supports your mattress without a box spring, it can look clean and modern, and it’s sturdy enough to survive the nightly “flop test” (you know the one). Even better: building one lets you control the height, style, and storageso you’re not stuck paying extra for a bed frame that squeaks like a haunted floorboard.
Safety note: Building a platform bed often involves power tools, sharp blades, and heavy materials. If you’re new to toolsor you’re not old enough to safely use themwork with a skilled adult, follow every tool manual, and wear proper safety gear. This guide focuses on smart planning and build concepts so you can get a strong, quiet bed frame without risky shortcuts.
What Makes a Platform Bed “Good” (and Not “Regrettable”)
A great DIY platform bed does four things well:
- Fits the mattress correctly (no sliding, no wedging, no mysterious gaps).
- Supports weight evenly (mattress, people, pets, and that pile of laundry you swear is “temporary”).
- Stays quiet (no squeaks, creaks, or late-night sound effects).
- Looks intentional (clean lines, consistent overhangs, and a finish you don’t regret in daylight).
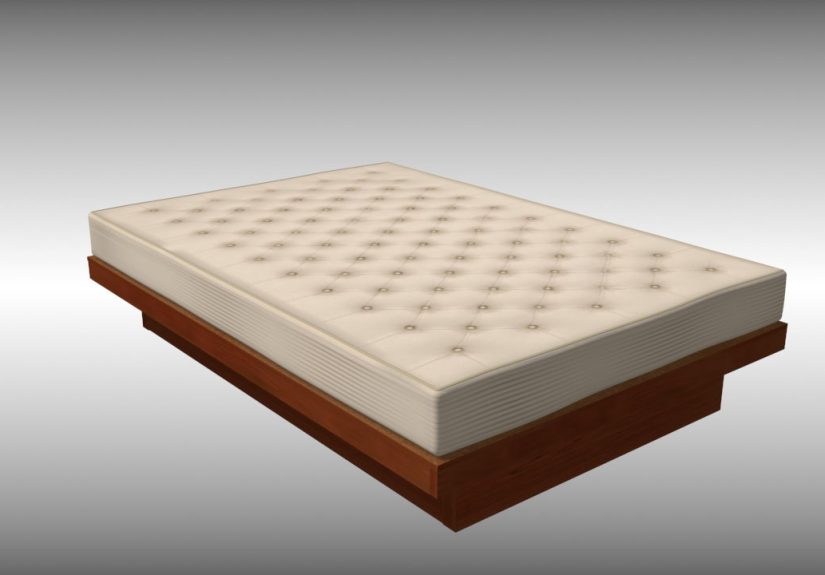
Before You Start: Choose Your Platform Bed Style
1) Simple rail-and-slat platform
This is the classic DIY build: an outer frame (“rails”), a center support, and evenly spaced slats. It’s strong, adaptable to most mattress types, and easy to repair later.
2) Plywood deck platform
A sheet (or two) of plywood makes a continuous surface under the mattress. It’s straightforward and sturdy, but it can trap moisture if your mattress needs airflow. If you go this route, check your mattress warranty requirements and consider ventilation.
3) Storage platform bed
If you want drawers or cubbies, you’re building furniture plus furniture. Totally doablebut plan for extra time, extra measuring, and extra “wait… where did that screw go?” moments.
Tools and Materials (General Checklist)
The exact list depends on your design, but most platform beds use the same categories of supplies.
Common materials
- Dimensional lumber (for rails, supports, and legs) or plywood (for deck/storage structures)
- Wood screws suited for structural use (and the right length for your wood thickness)
- Wood glue (optional but helpful for stiffness)
- Slat material (boards sized for your design) or plywood panels
- Sandpaper and a finish (paint, stain + clear coat, or hardwax oil)
- Optional: corner brackets, bed rail hardware, felt pads, and anti-squeak tape
Common tools
- Measuring tape, pencil, speed square
- Level (or at least a straightedge)
- Drill/driver and bits
- Clamps (more than you think you need)
- Sander (optional, but your hands will thank you)
- A saw appropriate for the cuts (used according to manufacturer instructions)
The Golden Rule of Mattress Fit
Your platform bed should be built around your mattress’s actual measurements, not what the label claims. Mattresses can vary slightly. Measure width, length, and thickness. For example, a standard queen is commonly around 60 inches by 80 inches, but verify yours before building a frame that’s “close enough.”
The 14 Steps to Build a Platform Bed
Step 1: Measure your mattress and decide the final look
Write down the mattress width, length, and thickness. Then choose:
bed height (low modern vs. higher with storage),
overhang (flush or slightly wider than the mattress),
and whether you want a headboard now or “someday” (which becomes “never” unless you plan for it).
Step 2: Pick your support system (slats vs. deck)
Slats are common because they’re strong, lighter, and allow airflow. Many mattress makers prefer slats that are
closely spaced (often a few inches apart) to prevent sagging and protect warranty coverageespecially for foam and latex. A plywood deck can work too, but double-check mattress requirements and consider ventilation.
Step 3: Choose materials that match your skill level
Construction lumber can be budget-friendly and strong, but it may need extra selection time to avoid warps and twists.
Furniture-grade lumber can look amazing but costs more. Plywood can be efficient for boxy, modern designs and storage builds.
Whatever you choose, prioritize straightness and consistency.
Step 4: Plan the frame dimensions (and include real-world clearance)
You typically want an inner opening that fits the mattress without forcing it. Add a tiny amount of clearance so the mattress can drop in without a wrestling matchbut not so much that it slides around. If you’re using a mattress cover, topper, or thick bedding, keep that in mind too.
Step 5: Sketch your design (yes, even if you “don’t sketch”)
A quick drawing prevents expensive oops moments. Include:
outer rails, head/foot rails, center support, slat ledges, slat spacing plan, and leg placement.
If you’re building a larger bed (like queen or king), plan for a center support (or even two) so the middle doesn’t become a trampoline.
Step 6: Create a cut plan and label everything
Whether you cut the pieces yourself or have them cut, make a list and label parts as you go:
“left rail,” “right rail,” “center beam,” “slat,” and so on. This is the difference between “organized builder”
and “person holding two identical boards asking the universe for guidance.”
Step 7: Build the outer frame (rails first)
Assemble the rectangular outer frame so it’s square and sturdy. A common approach is joining side rails to head and foot rails using strong fasteners and tight joints. Keep corners aligned, check for square, and correct earlybecause a slightly-out-of-square frame becomes a very noticeable mattress problem later.
Step 8: Add the center support (the unsung hero)
For most adult-size beds, a center support beam dramatically improves strength and reduces sagging. It also helps eliminate squeaks by distributing load. If you’re building a queen or king, center support is usually not optional if you want long-term durability.
Step 9: Install leg supports or a recessed base
You can support the bed using:
corner legs,
a continuous base (like a perimeter plinth),
or a recessed base to create a “floating” look.
The key is stability: make sure the supports land on solid floor contact points and won’t rack side-to-side.
Step 10: Add ledgers/cleats for slats (if using slats)
Slats typically rest on narrow support strips attached to the inside of the rails (often called ledgers or cleats).
Install them so slats sit level and provide a flat plane. A level mattress surface isn’t “nice to have”it’s the whole point.
Step 11: Fit and secure the slats (or deck panels)
Lay out your slats with consistent spacing (based on your mattress guidance) and secure them so they don’t shift over time.
If using plywood panels, ensure the seams land on supports so the deck doesn’t flex. Either way, aim for
even support across the entire mattress area.
Step 12: Sand everything that a human might touch (future-you will applaud)
Sand edges and corners, especially around rails and legs. If you want a clean look, soften sharp corners slightly.
This prevents splinters, protects bedding, and keeps shins safer during late-night “why is the nightstand so far away?” trips.
Step 13: Finish the wood (and let it cure properly)
Choose a finish that matches your style and patience level:
paint for bold coverage, stain for grain, or hardwax oil for a natural look.
The biggest mistake here is rushing cure time. A finish that’s dry-to-touch is not always ready for a mattress to sit on.
Follow product instructions and ventilate the space.
Step 14: Final assembly check (and the squeak prevention pass)
Before moving the mattress in, check:
joints are tight, slats are secure, the frame is level, and nothing rocks.
Add felt pads where wood meets wood, and consider anti-squeak tape at contact points.
Then do a careful test: apply pressure in different areas and listen. The goal is “solid,” not “spooky house soundtrack.”
Optional Upgrades That Make Your Bed Look Store-Bought
- Add a headboard (attached to the frame or wall-mounted for a cleaner look).
- Hide the base with a recessed plinth for a floating effect.
- Build in storage using drawers or cubbiesperfect for small bedrooms.
- Use bed rail hardware if you want easy disassembly for moving.
- Upgrade slats for heavier mattresses or higher weight loads.
Common Mistakes (and How to Avoid Them)
Skipping straight-board selection
Warped boards make wavy frames. Take time to choose straighter lumberyour assembly will be faster and cleaner.
Ignoring mattress warranty rules
Many mattresses require specific support spacing or center support. Confirm those details to avoid sagging and warranty issues.
Forgetting floor realities
Floors aren’t always level. Small adjustmentspads, shims, or improved base designcan prevent rocking and noise.
Rushing the finish
A rushed finish can stay tacky, smell strong, or dent easily. Give it time to cure so the bed looks good for years, not days.
Conclusion
Building a platform bed is one of those DIY projects that pays you back every night: better support, a cleaner look, and the satisfaction of sleeping on something you created (without paying “designer bed” prices). If you focus on accurate measuring, solid support, and squeak prevention, you’ll end up with a bed frame that feels quiet, sturdy, and genuinely custom.
Real-World Build Experiences and Lessons (What DIYers Commonly Discover)
People who build platform beds for the first time often expect the “hard part” to be assembly. In practice, the real challenge is usually
planning and patiencebecause beds are large, very visible, and unforgiving when something is slightly off. A common experience is
realizing that a frame can be “technically correct” and still feel wrong if it’s not square. Even a small twist can show up later as a mattress
that creeps to one side, slats that don’t sit evenly, or a frame that rubs and squeaks. The best fix is early: builders who check for square
during frame assembly and re-check after adding a center support tend to end up with a quieter, more solid result.
Another frequent lesson is that lumber selection matters more than people think. Many DIYers buy boards based on price and leave the store
quicklythen spend hours at home fighting warps, cups, and twists. The “real-world” approach is slower at the store but faster in the workshop:
sight down boards, pick straighter pieces, and keep similar boards together for rails so they behave consistently. People also learn that construction
lumber can look surprisingly polished once it’s sanded well and finished thoughtfully, especially when corners are slightly softened and screw holes
are placed neatly.
Squeaks are another classic rite of passage. In many builds, squeaks don’t come from “weakness,” but from movement at contact points:
wood-on-wood rubbing, slats shifting slightly, or fasteners that aren’t snug after the wood settles. DIYers often fix this by adding thin felt
pads, anti-squeak tape where slats meet supports, or by re-tightening hardware after a week or two of use. A surprisingly common “aha” moment:
the bed can feel rock-solid when empty, then reveal tiny noises once weight is added. Testing under load (carefully) before the mattress goes on
can save a lot of frustration.
Many builders also underestimate how much the finish process affects the final vibe. A great design can still look “homemade” if the
surface prep is rushed. People who take time to sand progressively, remove dust, and apply finish evenly get a result that looks far more expensive.
And almost everyone learns the same finishing truth: “dry” isn’t the same as “cured.” Letting the finish fully cure prevents odors, tackiness, and
marks from mattress weight.
Finally, DIYers often discover that platform bed design is really about lifestyle. Some realize they should’ve built it slightly higher for easier
getting in and out of bed; others fall in love with a low modern look but wish they’d planned for under-bed storage. The best “experience-based” tip
is to think through your daily routine: Do you want storage bins underneath? Do you use a thick mattress and want a lower frame? Do you move often and
need disassembly-friendly hardware? Answering those questions before building turns a simple woodworking project into a bed that fits your lifenot
just your mattress.


