
Table of Contents >> Show >> Hide
- What You’re Actually Doing (In Plain English)
- Tools & Materials Checklist
- Step-by-Step: Change a Boob Light to a Pendant
- Step 1: Choose the Right Pendant (Before You Touch a Screw)
- Step 2: Turn Off Power (And Prove It’s Off)
- Step 3: Remove the Boob Light Shade and Base
- Step 4: Disconnect the Old Wiring (Like a Calm, Organized Person)
- Step 5: Inspect the Ceiling Box and Support (The Most Ignored Step)
- Step 6: Prep the Pendant (Adjust Height Before Wiring)
- Step 7: Connect the Wires (The Classic Three Connections)
- Step 8: Mount the Pendant and Attach the Canopy
- Step 9: Install Bulb, Restore Power, and Test
- Common Problems (And How to Fix Them Without Crying)
- Design Tips: Hang It Like You Meant It
- When to Call a Pro (No Shame in It)
- Real-World Experiences: What DIYers Learn After the First Swap (About )
- Conclusion
You know the one: the dome light with the little center knob that looks like a ceiling “nipple.”
It’s in hallways, bedrooms, rentals, and probably at least one place in your house where you whisper,
“One day… I will defeat you.”
The good news: swapping a dated flush-mount “boob light” for a pendant is often a straightforward DIY
if your ceiling box is solid, your wiring is typical, and you’re comfortable working carefully around electricity.
The even better news: the result can make a room feel taller, warmer, and more intentionallike you hired a designer,
but really you just learned what a “canopy” is.
Safety note (not optional): If anything about your wiring looks confusing, damaged, aluminum, or ancient (knob-and-tube vibes),
or if the ceiling box feels loose, stop and call a licensed electrician. Electricity is not the place to “freestyle.”
What You’re Actually Doing (In Plain English)
A boob light is usually a flush-mount fixture attached to an electrical ceiling box (also called a junction box or outlet box).
A pendant is a hanging fixture that still connects to that same ceiling boxbut it hangs down via a rod, chain, or cord
and is covered at the ceiling by a canopy.
Most conversions are a simple “remove old fixture, install new fixture” swap. The main gotchas are:
(1) making sure the box can support the new fixture’s weight, (2) wiring correctly,
and (3) choosing a canopy that hides the old paint line or footprint.
Tools & Materials Checklist
- Non-contact voltage tester (and ideally a multimeter)
- Screwdrivers (Phillips and flathead)
- Wire strippers/cutters
- Needle-nose pliers
- Wire connectors (wire nuts) sized for your wires
- Electrical tape (optional but handy)
- Step ladder
- Your new pendant light kit (mounting bracket/crossbar + canopy + fixture)
- Appropriate light bulbs (LED recommended)
- Optional: ceiling medallion or paint for touch-ups
- Optional: fan-rated/fixture-rated ceiling box or retrofit brace kit (if needed)
Pro tip: set up a small tray or cup for screws. Otherwise they will teleport into another dimension
and reappear only when you move out.
Step-by-Step: Change a Boob Light to a Pendant
Step 1: Choose the Right Pendant (Before You Touch a Screw)
A pendant that looks great online can still be the wrong choice for your ceiling. Check these first:
- Weight: Heavier fixtures may require a box specifically rated/marked for fixture (or fan) support.
- Canopy size: If the old boob light left a “tan line” on the ceiling, a larger canopy or a ceiling medallion helps hide it.
- Mount type: Chain pendants are easiest to adjust. Downrod pendants can look cleaner but may need cutting for perfect height.
- Room rating: Use damp/wet-rated fixtures for bathrooms, porches, or anywhere moisture is a thing.
- Dimmers: If you’re using a dimmer, make sure the bulb and fixture are compatible to avoid buzzing or flicker.
Step 2: Turn Off Power (And Prove It’s Off)
- Switch the light off at the wall (yes, still do this).
- Turn off the correct circuit breaker.
- Use a non-contact voltage tester at the fixture to confirm there’s no power.
If your tester says there’s still voltage, you’re on the wrong breakeror your wiring has a surprise for you.
Keep flipping breakers until the tester stays silent. No silence, no work.
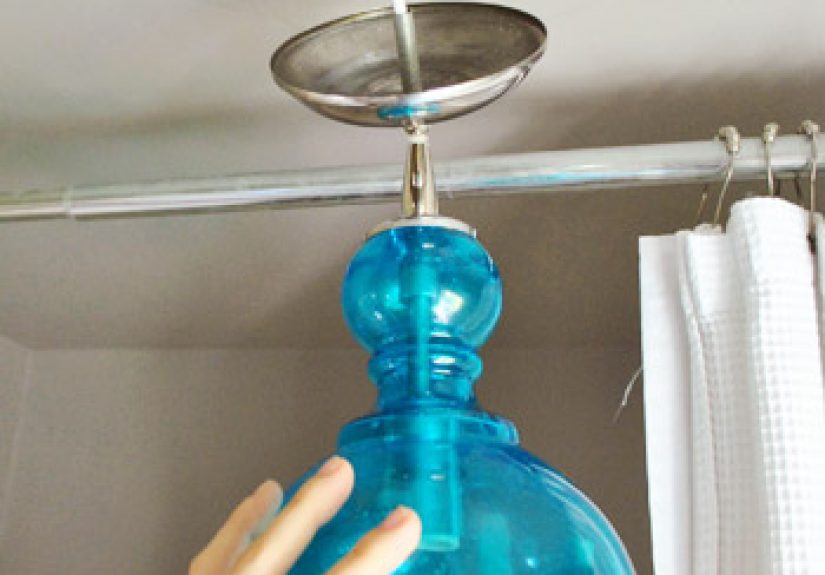
Step 3: Remove the Boob Light Shade and Base
- Unscrew the center finial/knob and remove the glass dome.
- Remove bulbs (let them cool first if they were on recently).
- Unscrew the fixture base from the ceiling mounting strap/crossbar.
- Let the base hang gently while you locate the wire connectionsdon’t yank on wires.
Take a quick photo of the wiring before disconnecting anything. Future-you will thank present-you.
Step 4: Disconnect the Old Wiring (Like a Calm, Organized Person)
- Confirm again with the tester that wires are not energized.
- Unscrew wire connectors (wire nuts) connecting the house wires to the fixture wires.
- Separate wires and straighten them slightly for visibility.
Typical modern wiring is:
black = hot, white = neutral, bare/green = ground.
Older homes can differ, so trust testing and labeling more than vibes.
Step 5: Inspect the Ceiling Box and Support (The Most Ignored Step)
A pendant pulls down on the box differently than a flush-mount, and some pendants are simply heavier.
Do a quick support check:
- Wiggle test: The box should not wobble. Any movement = fix the support before hanging a new fixture.
- Look for markings: Some boxes are marked/listed for fixture or fan support.
- Check mounting: Ideally the box is attached to a joist or a rated brace between joists.
- Weight reality: If your new fixture is heavy (especially approaching “two-handed lift” territory), upgrade the box/brace.
If the existing box is a lightweight plastic “old work” box or feels insecure, this is your cue to install a properly rated box/brace
(or call an electrician). Don’t let your dining room become a lesson in gravity.
Step 6: Prep the Pendant (Adjust Height Before Wiring)
Do the “fiddly parts” on the ground whenever possible:
- Chain pendant: Remove links to your desired length (leave enough wire slack per the instructions).
- Downrod pendant: Assemble rods to achieve your height (some require cutting; follow manufacturer guidance).
- Cord pendant: Use the cord grip/strain relief properly so the cord doesn’t bear electrical stress.
- Mounting bracket: Attach the new crossbar/mounting strap to the ceiling box (typically using 8-32 screws).
Many kits include a ground screw on the crossbar. Don’t ignore itgrounding is not decorative.
Step 7: Connect the Wires (The Classic Three Connections)
With the power still OFF, connect:
- Neutral to neutral: white fixture wire to white house wire
- Hot to hot: black fixture wire to black (or switched hot) house wire
- Ground to ground: green/bare fixture wire to bare/green house wire (and/or to the ground screw on the bracket)
Use appropriately sized wire nuts and give each connection a gentle tug test.
If a wire pulls out, redo it. Secure connections are the whole point of wire nuts.
Carefully tuck the wires into the box (no pinching), leaving wire nuts accessible and not forced.
The canopy should sit flush without “wrestling” the wiring into submission.
Step 8: Mount the Pendant and Attach the Canopy
- Lift the pendant into position and secure it to the mounting bracket.
- Slide the canopy up to the ceiling and tighten canopy screws/finial per instructions.
- Make sure the fixture hangs straight and the canopy covers the box opening cleanly.
If you’re working solo, a temporary hook, painter’s tape assist, or a patient friend can make this step way less dramatic.
Step 9: Install Bulb, Restore Power, and Test
- Install the correct bulb wattage/type (LED is cooler and efficient).
- Turn the breaker back on.
- Test the switch. Test the dimmer if you have one.
If it doesn’t turn on, don’t panicmost issues are a loose connection, a tripped breaker, or a hot/neutral mix-up.
Common Problems (And How to Fix Them Without Crying)
“I have two black wires and one white… now what?”
That can happen with switch loops or multi-circuit setups. The “extra black” might not be a second hot for the fixture
it might be carrying power to/from a switch. If you’re not 100% sure, stop and get help. The fix can be simple,
but guessing is how breakers trip (or worse).
No ground wire
Some older homes don’t have a ground conductor in the box. You may have a grounded metal box via conduit,
or you may not. This is a “know, don’t assume” situationan electrician can verify grounding and recommend a safe path forward.
The canopy doesn’t cover the old ceiling mark
Options: touch-up paint, a larger canopy, or a ceiling medallion. Medallions are basically cheat codes for ceiling scars.
Pendant sways or looks crooked
Ensure the mounting bracket is tight, the canopy is seated, and the chain/cord isn’t twisted.
For long pendants in high-traffic areas, consider a subtle swag hook to stabilize the drop.
Flicker or buzz on a dimmer
Usually this is a compatibility issue. Use dimmable LEDs, confirm the dimmer is rated for LED loads,
and avoid mixing random bulb brands/types on the same dimmer when possible.
Design Tips: Hang It Like You Meant It
How high should the pendant hang?
- Over a kitchen island: a common guideline is 30–36 inches from the bottom of the pendant to the countertop.
- Over a dining table: often 30–36 inches from the bottom of the pendant to the tabletop (adjust for ceiling height and fixture size).
If your ceiling is taller than 8 feet, a typical rule of thumb is adding a couple inches of drop per extra foot of ceiling height,
so the fixture doesn’t look like it’s floating in the stratosphere.
Spacing for multiple pendants
For two or three pendants over an island, a common starting point is 24–30 inches apart (center to center),
then adjust based on the pendant diameter so they don’t feel crowded.
Scale and proportion
In dining spaces, a helpful guideline is selecting a fixture diameter that’s roughly half to two-thirds the width of the table,
so it feels balanced without overwhelming the room.
When to Call a Pro (No Shame in It)
- The ceiling box is loose, cracked, or not securely mounted
- The new fixture is heavy and you can’t confirm the box is rated for it
- Wiring colors don’t match expectations or you see damaged insulation
- You have aluminum wiring, knob-and-tube, or other older electrical systems
- You want to move the fixture location (requires new wiring/support)
Think of an electrician like a stunt coordinator: you could do the jump, but it’s nice to keep all your bones and your insurance premiums.
Real-World Experiences: What DIYers Learn After the First Swap (About )
If you’ve never changed a ceiling light before, your first boob-light-to-pendant swap tends to come with a few universal experiences.
Not “scary movie” experiencesmore like “why is this screw made of cursed butter?” experiences.
1) The “Breaker Bingo” moment
Almost everyone starts by flipping what they think is the right breaker… and then the light still works.
You flip another. And another. Eventually you discover your panel labels were written by someone who hated accuracy.
The lesson: a voltage tester is your best friend, and relabeling breakers after the project is the most heroic “future-you” gift you can give.
2) The “ceiling tan line” surprise
You remove the boob light and feel prouduntil you see the outline: a slightly darker circle where dust never dared to land.
Suddenly your simple swap becomes a mini design decision.
Some DIYers grab ceiling paint and feather it out. Others use a larger canopy. The most smug among us install a ceiling medallion and pretend
it was always part of the plan. (Honestly? Medallions are the lighting equivalent of sunglasses: they make everything look intentional.)
3) The “this box feels… not confident” realization
A common moment is touching the ceiling box and realizing it wiggles like it’s trying to escape responsibility.
That’s when smart DIYers pause. Sometimes it’s just loose screws.
Sometimes it’s a flimsy old-work box that was fine for a light plastic dome but is not thrilled about supporting a heavier pendant.
This is the point where many people either upgrade to a properly rated brace/box or call an electricianand both choices count as a win.
The goal isn’t to prove you’re fearless; it’s to make sure the pendant stays on the ceiling instead of becoming a surprise floor lamp.
4) The “why won’t the canopy sit flat?” puzzle
DIYers often discover that wires don’t magically fold themselves into a neat little package. If the canopy won’t sit flush,
it usually means the wire nuts are bulky, the wires are jammed, or the bracket isn’t aligned. The fix is rarely force.
The fix is patience: remake the connections neatly, tuck wires in a gentle accordion fold, and ensure the bracket is snug and centered.
This is also when people learn a new DIY truth: gravity is helpful, but it’s not a substitute for organization.
5) The “wow, the room just changed” payoff
The best experience comes at the end. You flip the switch, the pendant glows, and suddenly the space feels taller and more “finished.”
A boob light usually spreads light broadly but blandly; a pendant can add shape, shadow, and a focal point.
DIYers often report that this one small project kickstarts other upgrades: swapping yellow bulbs for warm LEDs, adding a dimmer,
or updating switch plates that haven’t been touched since flip phones were cool.
In short, changing a boob light to a pendant is one of those rare projects that’s relatively affordable, visually dramatic,
and deeply satisfying. Just respect the wiring, respect the box support, and remember: your ceiling deserves better than a nipple lamp.


