
Table of Contents >> Show >> Hide
- What “Well Water Filter” Are We Talking About?
- Signs It’s Time to Replace Your Well Water Filter
- Tools & Supplies Checklist
- Step-by-Step: How to Change a Well Water Filter Cartridge
- Step 1: Locate the shutoff and (if you have one) the bypass
- Step 2: Turn off the water supply (and protect yourself from pressure)
- Step 3: Relieve pressure (the step that prevents surprise showers)
- Step 4: Put a bucket under the housing and unscrew the sump
- Step 5: Remove the old cartridge and inspect what it caught
- Step 6: Clean the housing (and don’t ignore the O-ring)
- Step 7: Install the new cartridge the right way
- Step 8: Reattach the sumphand-tight first, then snug
- Step 9: Turn water back on slowly and purge air
- Step 10: Check for leaks (then check again in 10 minutes)
- Common Mistakes (So You Don’t Join the “Oops” Club)
- Troubleshooting Cheat Sheet
- How Often Should You Change a Well Water Filter?
- Don’t Forget the Bigger Picture: Well Water Testing & System Health
- Pro Tips to Make Future Filter Changes Ridiculously Easier
- When to Call a Pro (No Shame, Just Wisdom)
- Conclusion
- Real-World Experiences: What People Commonly Run Into (and How They Handle It)
If your home runs on a private well, your water filter is basically your “bouncer”it decides what gets in and what gets turned away at the door.
And like any bouncer, it eventually gets tired, clogged, and a little grumpy. The good news: changing a well water filter is usually a
straightforward DIY job (especially for cartridge-style whole-house filters). The better news: once you’ve done it once, you’ll wonder why it ever
felt intimidating.
This guide walks you through changing a typical whole-house well water filter (sediment or carbon cartridge in a housing), explains what to watch for
with pressure tanks and bypass valves, and helps you avoid the classic “why is my basement suddenly a water park?” mistakes. If you’re a first-timer
(or you’re under 18), it’s smart to have a parent/guardian or another adult nearbypressurized plumbing can be surprisingly dramatic.
What “Well Water Filter” Are We Talking About?
Well systems can have multiple “filters,” and they don’t all change the same way. Before you grab a wrench and confidence, identify what you have:
- Cartridge-style whole-house filter housing (most common DIY swap): a clear/blue/white canister with a sump you unscrew and a replaceable cartridge inside.
- Spin-down sediment filter: a reusable screen you rinse, not a cartridge you toss.
- Backwashing tank systems (iron filter, softener, carbon media tank): media is not swapped like a cartridge; maintenance is different.
- Point-of-use filters (under-sink, countertop, fridge): smaller cartridges, different shutoffs, different instructions.
This article focuses on the cartridge-style whole-house filter commonly installed on well systems to catch sand, silt, rust, and
general “mystery grit.” These housings often sit near where water enters the housefrequently after the pressure tankso the home sees steady
pressure and your pump doesn’t get stressed by a clogged filter.
Signs It’s Time to Replace Your Well Water Filter
Some filters have indicator lights, but most rely on old-fashioned clues:
- Water pressure drops at multiple fixtures (showers feel like a sad mist setting).
- Visible sediment in toilet tanks or faucet aerators.
- Water looks cloudy right after heavy rain or seasonal changes (common with wells).
- It’s been 3–12 months depending on the cartridge type and your water quality.
- You changed something upstream (new well pump, plumbing work, well service) and want a fresh filter afterward.
A practical rule: if you notice a meaningful flow drop, your filter is probably loaded. Many extension/public health resources also note
that clogged sediment stages cause pressure drop and need replacement/cleaning as they load up.
Tools & Supplies Checklist
Gather everything first so you’re not sprinting around mid-drip:
- Correct replacement cartridge (model number, size, and micron rating matter)
- Filter housing wrench (often comes with the housing)
- Bucket or shallow pan + towels/rags
- Non-slip gloves (optional, but helpful when the housing is “over it”)
- Food-grade silicone grease for the O-ring (not petroleum jelly)
- Clean sponge/soft brush + mild dish soap
- Flashlight (because leaks love dark corners)
- Optional: replacement O-ring (cheap insurance if yours is flattened or nicked)
Quick note on cartridges & micron ratings
Micron rating controls how fine the filtration is. A 20-micron sediment filter catches larger grit and tends to clog slower.
A 5-micron filter catches finer sediment but may clog faster if your well produces lots of silt. If you’re constantly changing filters,
you might need a different micron rating or an added prefilter stage.
Step-by-Step: How to Change a Well Water Filter Cartridge
Step 1: Locate the shutoff and (if you have one) the bypass
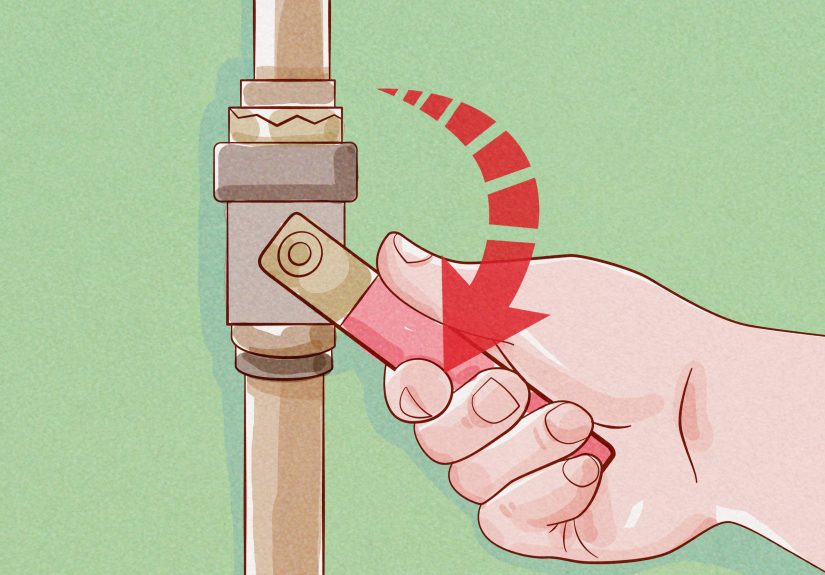
Look around your filter housing for valves. Common setups include:
- Inlet and outlet valves on either side of the housing
- A 3-valve bypass loop (two valves isolate the filter, one valve routes water around it)
- A single bypass valve built into a manifold (nice when you have it)
If you have a bypass, you can keep water to the house while you work (though you’ll temporarily have unfiltered water). If you don’t have a bypass,
you’ll shut off the main and accept your brief “pioneer era” moment.
Step 2: Turn off the water supply (and protect yourself from pressure)
Shut off the water feeding the filter. On well systems, that may mean:
- Closing the valves before and after the filter, or
- Turning off the main house shutoff, and sometimes
- Switching off the well pump at the breaker if your setup keeps repressurizing
Step 3: Relieve pressure (the step that prevents surprise showers)
Open a cold-water faucet in the house to bleed off pressure until the flow slows or stops. If your filter housing has a
pressure relief button on top, press it to release trapped air/pressure before loosening the sump.
Why this matters: a pressurized housing is harder to open and can spray water when you crack the seal.
Depressurizing makes the job cleaner and safer (and keeps your language more family-friendly).
Step 4: Put a bucket under the housing and unscrew the sump
Place a bucket/towels under the filter housing. Use the housing wrench to loosen the sump (usually counterclockwise when looking up at it).
Support the sump as you unscrew itthe water inside adds weight, and gravity has zero sympathy.
Step 5: Remove the old cartridge and inspect what it caught
Pull out the used cartridge and take a look. Dark sludge, orange staining, or gritty buildup usually means it was doing its job.
If it looks barely used but you still have pressure problems, you may have another restriction (like a clogged screen, a valve issue,
or sediment elsewhere).
Step 6: Clean the housing (and don’t ignore the O-ring)
Wash the sump with warm water and mild dish soap. Rinse wellno one wants “lemon-fresh faucet water.”
Next, find the O-ring (usually seated in a groove near the top of the sump or housing head).
- Wipe the O-ring and groove clean.
- Check for cracks, flattening, or nicks.
- If it’s damaged, replace it. If it’s fine, apply a thin layer of food-grade silicone grease.
This tiny rubber ring is the difference between “nice job” and “why is there a drip that only happens at 2 a.m.?”
Step 7: Install the new cartridge the right way
Insert the replacement cartridge into the sump (or onto the standpipe in the housing head, depending on design).
Make sure it seats fully and sits straight. If the cartridge has an arrow, follow the flow direction.
Step 8: Reattach the sumphand-tight first, then snug
Screw the sump back on carefully to avoid cross-threading. Hand-tighten until it’s firmly seated.
Use the wrench only to snug itover-tightening can warp the O-ring, crack the housing, or make the next change a wrestling match.
Step 9: Turn water back on slowly and purge air
This part is all about patience. Open the inlet valve slowly so the housing fills gradually. If your housing has a pressure relief button,
use it to release trapped air. Then open the outlet valve slowly.
Keep a nearby faucet slightly open (cold side) to help purge air from the lines until the sputtering stops and flow becomes steady.
Step 10: Check for leaks (then check again in 10 minutes)
Dry the housing with a towel so you can see new moisture. Look around:
- The seam where the sump meets the housing head
- Inlet/outlet fittings
- Any bypass valve connections
If you see a drip, don’t panicmost leaks are O-ring related. Shut water off, relieve pressure, reseat/clean/lube the O-ring, and reassemble.
Common Mistakes (So You Don’t Join the “Oops” Club)
1) Using the wrong cartridge size or style
“Close enough” is great for horseshoes, not filter cartridges. Match model number, length (10" vs 20"), diameter (standard vs big blue),
and end-cap style.
2) Skipping pressure relief
A pressurized housing is harder to loosen and more likely to dump water suddenly. Bleed pressure at a faucet and use the relief button if available.
3) Forgetting the O-ring (or lubricating it with the wrong stuff)
Dry, dirty, twisted, or damaged O-rings leak. Use food-grade silicone grease and keep the groove clean.
4) Cranking it down like you’re closing a submarine hatch
Over-tightening can cause leaks later (because it distorts the O-ring) and can damage plastic housings. Snug is the goal.
Troubleshooting Cheat Sheet
The housing won’t open
- Confirm water is off and pressure is relieved at a faucet.
- Press the pressure relief button if present.
- Use the correct housing wrench, and make sure you’re turning the right direction.
- If it’s still stuck, stop before you crack the housinggetting help is cheaper than replacing a flooded ceiling.
It leaks after reassembly
- Most likely: O-ring is dirty, dry, pinched, or not seated.
- Inspect for hairline cracks in the sump (especially if it’s older or has been over-tightened).
- Make sure the threads started straight (cross-threading creates gaps).
Pressure is still low after a new filter
- Double-check you didn’t install an ultra-fine micron filter that’s too restrictive for your well’s sediment load.
- Look for clogged faucet aerators/showerheads (sediment can move downstream).
- Consider whether another device (softener, iron filter, pressure regulator) needs service.
How Often Should You Change a Well Water Filter?
The honest answer: it dependson your well yield, sediment load, cartridge type, and household water use.
Many manufacturers recommend replacement on a schedule (often every 6–12 months for many cartridge systems), and many public/extension resources
emphasize swapping when you notice a meaningful flow drop. A good approach is to combine both:
- Baseline schedule: replace on the manufacturer’s interval (or at least 1–2 times per year).
- Reality check: replace sooner if pressure drops, water looks gritty, or you’ve had heavy rain/flood events.
- Track it: write the date on the housing with a marker or keep a simple maintenance log.
Don’t Forget the Bigger Picture: Well Water Testing & System Health
Filters are helpful, but they’re not magic. Different filters do different things, and no single cartridge fixes every contaminant.
For private wells, routine testing is a big dealpublic health guidance commonly recommends at least annual testing for key indicators like coliform
bacteria and nitrates, and adding tests based on local risks (like arsenic, iron, manganese, radon, or VOCs).
If your water is microbiologically unsafe or you don’t know its quality, filtration alone may not be enough. In those cases, work with a certified lab
and a qualified well/water-treatment professional to choose the right treatment train (sediment + carbon + disinfection/UV, for example).
Pro Tips to Make Future Filter Changes Ridiculously Easier
Label the valves
A piece of tape that says “INLET,” “OUTLET,” and “BYPASS” turns future-you into a calm, competent plumbing wizard.
Keep a spare cartridge (and O-ring) on hand
Filters always clog on a holiday weekend. It’s like they can read calendars.
Upgrade the setup if you’re constantly fighting it
- Add a bypass if you don’t have one.
- Add a spin-down prefilter before the cartridge if you have heavy sediment.
- Install a pressure gauge before/after the filter to see clogging coming.
When to Call a Pro (No Shame, Just Wisdom)
- You see cracks, recurring leaks, or damaged fittings.
- Your filter setup is tied into other treatment tanks and you’re not sure what to shut off.
- Your well pump keeps cycling while you’re trying to depressurize.
- You suspect contamination (odor changes, sudden cloudiness that doesn’t flush, positive bacteria tests).
Conclusion
Changing a well water filter is one of those home skills that feels “advanced” until you do it, and then it becomes a 15–30 minute routine:
shut water off, relieve pressure, swap cartridge, clean/lube the O-ring, and bring the system back online slowly while you watch for leaks.
Do it on schedule, replace sooner if flow drops, and pair filter maintenance with sensible well testing so you’re not just filtering wateryou’re
managing it.
Real-World Experiences: What People Commonly Run Into (and How They Handle It)
The internet makes filter changes look like a two-minute montage with upbeat music and zero dripping. Real life is a little more… damp.
Here are common “been there” moments homeowners shareso you can recognize them fast and keep your cool.
The “Stuck Housing” Saga
A lot of first-timers meet their match when the housing refuses to budge. The usual story: the last cartridge went in months (or years) ago,
the housing was tightened like it was holding back the ocean, and the pressure never got fully relieved before someone tried to open it.
The fix is almost always less about strength and more about procedure: shut off the right valves, open a faucet until pressure drops,
and use the pressure relief button if your housing has one. People who rush this step end up fighting the housing, slipping the wrench,
and inventing brand-new words. People who slow down usually win… with less drama and fewer scraped knuckles.
The Mystery Drip That Only Appears After You “Finish”
Another classic experience: everything looks perfect, you clean up, you feel proudand then you notice one slow drip forming at the seam.
In many cases, it’s the O-ring doing what O-rings do when they’re dry, twisted, or sitting on a tiny grain of grit. Homeowners often learn
that wiping the groove clean and adding a thin layer of silicone grease is not “extra,” it’s the whole secret. Some people keep a spare O-ring
next to their cartridges because they’ve learned the hard way that a 50-cent part can ruin an entire afternoon.
The “Why Is My Water Cloudy?” Moment
Right after a cartridge change, it’s common to see spurting, air bubbles, or slightly cloudy water as air gets purged from the lines.
Homeowners describe it like “soda water for a minute.” Letting a cold faucet run briefly, purging air using the relief button (if present),
and slowly opening valves usually clears it up. If cloudiness persists much longeror you see sediment chunkspeople often discover
they accidentally disturbed built-up sediment during the change, or they need a coarser prefilter stage to catch heavier grit before it
hits the finer cartridge.
Choosing the Wrong Micron Rating (The Pressure Drop Surprise)
A surprisingly common experience is upgrading to a “better” (finer) filter and then wondering why the shower feels weak.
Many well owners learn that “finer” isn’t always “better” for a whole-house setupespecially if the well has a lot of silt.
The real win is matching the micron rating to your water: a coarser sediment stage first, then a finer stage later (or at the point of use)
if you truly need it. People who keep notescartridge type, micron rating, how long it lastedtend to dial in the perfect setup within a couple cycles.
The “I Didn’t Realize How Gross That Filter Was” Wake-Up Call
Many homeowners report the same reaction when they pull a used cartridge: “Oh wow… that was going into my house?”
Orange iron staining, brown sediment, or black gunk can be startling, but it’s also proof the filter is doing its job.
A common takeaway is motivation: once people see what’s being captured, they get more consistent about replacement schedules.
Some even add a pressure gauge or set a calendar reminder, because it’s easier than guessingand it prevents that slow, sneaky pressure drop
that you only notice once you’re suddenly taking the world’s least satisfying shower.
The “I Should Probably Test My Well Water” Realization
Finally, many people say changing the filter is what nudges them into better overall well care. They start wondering:
“What else is in here?” That often leads to annual testing, keeping a maintenance log, and choosing cartridges based on actual results
(instead of vibes and a sale display). In other words, the filter change becomes the gateway to a smarter, calmer relationship with well water
one where you’re not reacting to problems, you’re staying ahead of them.


