
Table of Contents >> Show >> Hide
- Why Front Load Washers Get Mildew So Easily
- Before You Start: Safety and Cleaning Do’s & Don’ts
- Step-by-Step: How to Deep Clean a Front Load Washer
- How to Remove Stubborn Mildew Stains from the Gasket
- How to Prevent Mildew from Coming Back
- Natural vs. Chemical Cleaners: What Actually Works?
- Real-Life Experiences: What Actually Helps in Day-to-Day Use
- The Bottom Line
If your laundry room smells like a forgotten gym bag, your front load washer is probably the villain.
That sleek, high-efficiency machine is great at saving waterbut it’s also surprisingly good at growing mildew.
The good news? You don’t need a new washer (or a hazmat suit). With the right routine, you can deep clean a front load washer,
kick mildew to the curb, and keep it from coming back.
Below is a complete, step-by-step guide on how to clean your front load washer, remove mildew from the gasket and drum,
and prevent that musty odor for good.
Why Front Load Washers Get Mildew So Easily
Front load washers are basically a perfect little spa for mildew: warm, damp, and often shut tight in between loads.
The rubber door gasket that keeps water in also traps moisture, detergent residue, lint, and the occasional sock.
Over time, that mix turns into slimy buildup and black or gray mildew spots.
A few habits make the problem worse:
- Closing the door right after a cycle: Moisture stays trapped, and mildew thrives.
- Using too much detergent or the wrong kind: Extra suds and residue cling to the drum, gasket, and hoses.
- Constant low-temperature washes: Warm, not hot, water doesn’t always dissolve detergents fully or kill odor-causing microbes.
- Skipping maintenance cycles: If you never run a hot “clean washer” cycle, buildup just keeps layering on.
The result: a washer that looks fine on the outside but smells like it’s storing wet towels from 2009 on the inside.
Before You Start: Safety and Cleaning Do’s & Don’ts
A few quick safety notes before you go full cleaning ninja on your machine:
- Unplug the washer (or switch off the breaker) if you’ll be touching internal parts like the drain pump filter.
- Ventilate the room if you’re using bleach or strong cleaners.
- Wear gloves to protect your skin from bleach and grime.
- Never mix bleach and vinegar or other acids. That combo can create dangerous chlorine gas.
Also, be smart with vinegar. It’s a popular DIY cleaner for washers, but it’s acidic. Used occasionally and correctly,
it can help remove residue. Used aggressively or very often, it may be harsh on rubber parts over time.
When in doubt, follow your manufacturer’s recommendations and lean on dedicated washing machine cleaners or bleach cycles.
Step-by-Step: How to Deep Clean a Front Load Washer
Plan about an hour (plus machine run time) for a thorough deep clean. You don’t have to do this weeklyonce a month or every
few months, depending on usage, is usually enough. Here’s your playbook.
Step 1: Empty the Washer and Do a Quick Inspection
Take everything out of the drumyes, even that one lonely sock clinging to the back. Spin the drum by hand and check for:
- Loose coins, hairpins, or small items.
- Visible slime or dark spots on the drum or glass.
- Standing water or obvious puddles in the gasket folds.
Wipe out any loose debris with a dry cloth or paper towel before you move on to the wet cleaning steps.
Step 2: Clean the Rubber Door Gasket (Seal)
This is usually “mildew central” in a front load washer.
Gently pull back the folds of the rubber gasket and prepare yourself for whatever linty, slimy secrets your washer has been hiding.
You can use one of these cleaning solutions:
- Mild option: Warm water with a few drops of dish soap.
- Disinfecting option: 1 cup of bleach mixed into 1 gallon of water.
- More natural approach: Half vinegar, half warm water (use sparingly and not if your manufacturer warns against it).
Dip a microfiber cloth or sponge into your solution and:
- Wipe all the way around the visible part of the gasket.
- Gently pull back the inner folds and clean insidethis is where the worst gunk hides.
- Use an old toothbrush for tight crevices and stubborn spots.
If you see black or dark gray mildew stains that won’t budge easily, don’t panic. We’ll cover heavy-duty stain removal in a moment.
For now, remove as much residue as you can and wipe the gasket dry with a clean towel.
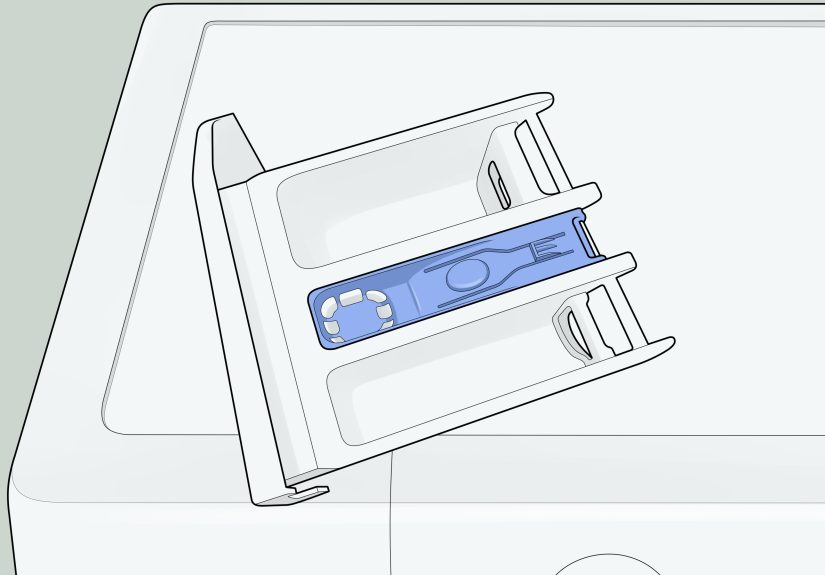
Step 3: Clean the Detergent Drawer and Dispensers
If your detergent drawer looks like a science experiment, it’s absolutely contributing to odors. Detergent and fabric softener
residue builds up, grows mildew, and gets flushed back into your washer every time you run a load.
- Pull out the detergent drawer. Many models let you press a tab to remove it completely.
- Soak it in warm, soapy water for 10–15 minutes.
- Use a small brush or old toothbrush to scrub away residue.
- Rinse well and dry with a towel.
- Before reinserting, wipe the cavity where the drawer slides inthis area often hides mold and sludge.
Reinstall the drawer once everything is clean and dry.
Step 4: Run a Cleaning Cycle for the Drum
Now it’s time to tackle the inside of the washer drum and internal plumbing.
Check your owner’s manual firstmany front load washers have a special “Clean Washer” or “Tub Clean” cycle.
If yours does, follow the instructions for that cycle. Typically, you’ll:
- Run the machine empty.
- Use either a washing machine cleaner tablet or a measured dose of bleach (often about one cup in the detergent dispenser).
- Select the hottest, longest cycle available.
If your washer doesn’t have a special cleaning cycle, choose a regular cycle with hot water and no laundry, add a cup of bleach
to the dispenser, and let it run. Afterward, run an extra rinse to make sure any bleach residue is completely cleared.
Prefer to skip bleach? You can use a commercial “washer cleaner” product designed for front load machines. Some people also use
a combo of baking soda and vinegar, but again, check your manual and avoid overdoing acidic cleaners, especially if your washer
manufacturer warns against them.
Step 5: Clean the Drain Pump Filter (If Your Washer Has One)
Not every front load washer has an accessible drain pump filter, but many dooften behind a small door near the bottom front of the machine.
This filter catches coins, hair, and other debris and can definitely be a source of bad smells.
- Unplug the washer.
- Place a shallow pan, tray, or old baking dish under the access panel.
- Open the panel and, if there’s a small drain hose, pull the cap and let the water drain into your tray.
- Unscrew or pull out the filter (check your manual for the exact method).
- Remove lint, hair, and debris, then rinse the filter in warm, soapy water.
- Wipe inside the filter housing with a cloth.
- Reinstall the filter snugly and close the panel.
This step alone has rescued many “mystery odor” washers. Don’t skip it if you have access to the filter.
Step 6: Wipe Everything Dry and Air It Out
When your cleaning cycle is finished:
- Wipe the inside of the drum with a clean cloth.
- Dry the gasket thoroughlyget into the folds again.
- Wipe the inside of the door glass.
Then leave both the washer door and detergent drawer slightly open so the interior can fully dry.
This single habit is one of the best defenses against future mildew.
How to Remove Stubborn Mildew Stains from the Gasket
Sometimes the smell goes away, but the black stains on the gasket hang around like permanent eyeliner.
They might not be actively moldy anymore, but they’re not exactly cute.
For stubborn stains, you can use a more concentrated treatment:
- Mix a paste of baking soda and a small amount of bleach (think thick toothpaste consistency, mostly baking soda).
- With gloves on, apply the paste directly to stained areas of the gasket.
- Let it sit for 10–15 minutes so it can work on the stains.
- Use an old toothbrush or cloth to gently scrub the area.
- Wipe away the paste with a cloth dipped in clean water or mild bleach solution.
- Run a short rinse cycle afterward to wash away any leftover residue.
Note: Deep, permanent staining may never go away completely, even after thorough cleaning. As long as the surface is clean,
the smell is gone, and the gasket is in good condition (no cracks or tears), the machine can still work just fine.
If the gasket is badly degraded or mold has eaten into the rubber, it may be time to replace it.
How to Prevent Mildew from Coming Back
Cleaning a front load washer isn’t hardbut doing it over and over because mildew keeps returning is frustrating.
The key is building a few simple habits into your laundry routine.
1. Leave the Door Slightly Open Between Loads
This is the number-one tip from appliance pros and everyday users alike. When the wash is done,
wipe off any visible moisture on the glass and gasket, then leave the door ajar.
Airflow helps the interior dry out instead of staying swampy.
2. Wipe the Gasket Regularly
Once every week or two, do a quick wipe:
- Run your hand around the gasket and pull out any lint or debris.
- Wipe it with a damp cloth and a drop of dish soap or a mild cleaner.
- Dry it thoroughly with a small towel.
It takes less than a minute and prevents the heavy buildup you just worked so hard to remove.
3. Use the Right Detergentand the Right Amount
Front load washers are designed to work with HE (high efficiency) detergent.
Regular detergent can create too many suds, leaving residue in the drum, hoses, and gasket.
Even with HE detergent, more is not better. Too much soap = more residue = more mildew food.
Follow the measuring lines, consider your load size, and cut back if you have soft water or lightly soiled laundry.
4. Run a Hot Maintenance Cycle Monthly
Once a month (or more often if your washer gets heavy use), run an empty cycle with:
- A washing machine cleaner tablet, or
- 1 cup of bleach in the dispenser, followed by an extra rinse, or
- A manufacturer-approved cleaning solution for your model.
Pair this with a quick gasket wipe and a detergent drawer check, and you’ve just given your washer a mini spa day.
5. Remove Wet Clothes Promptly
We’ve all forgotten a load overnight. Try not to make it a habit.
The longer damp clothes sit inside the drum, the more you feed mildew and odor-causing bacteria.
If you do forget a load and it smells off, run it again with a bit of detergent and, if safe for the fabrics, warm or hot water.
6. Don’t Ignore Hidden Spots
Besides the drum and gasket, give some love to:
- The detergent drawer cavity.
- The drain pump filter (every few weeks to every couple of months).
- The rubber hoses and the area behind/under the machine, where dust and lint collect.
A quick vacuum or dusting around the machine helps reduce lint that can eventually work its way into seals and vents.
Natural vs. Chemical Cleaners: What Actually Works?
You’ll see a lot of advice online about cleaning front load washers with only “natural” productsusually baking soda,
vinegar, and sometimes hydrogen peroxide. You’ll also see recommendations for bleach and commercial cleaners.
Here’s a balanced way to think about it:
- Baking soda: Great for deodorizing and mild scrubbing. Safe for most washers.
- Vinegar: Good for dissolving mineral and detergent residue in moderation, but it’s acidic.
Avoid using it constantly or against manufacturer recommendations. - Bleach: Very effective at killing mold and mildew when used correctly and rinsed thoroughly afterward.
- Washer cleaner tablets/liquids: Designed to break down residue and safe for machine parts when used as directed.
For stubborn mildew and deep cleaning, a combination of bleach (or a machine cleaner) and regular maintenance
tends to be the most reliable and manufacturer-friendly solution. Baking soda and occasional vinegar can support that routine,
especially for odor control and light buildup.
Real-Life Experiences: What Actually Helps in Day-to-Day Use
Beyond official manuals and expert advice, front load owners share a lot of practical, “this actually worked for me” tips.
Here are some common experiences and what they teach us.
“I thought my washer was dying. Turns out it was the gasket.”
Many people first notice a musty smell on freshly washed clothes. They try switching detergents,
using scented beads, or overloading fabric softeneronly to find that the smell gets worse.
The real culprit is often the gasket, which can be full of slimy-gray residue and black mildew spots.
Once they finally pull back the rubber seal and clean inside the folds, the smell dramatically improves.
One thorough gasket cleaning plus a hot cleaning cycle often does more than months of perfumed laundry products.
“Leaving the door open changed everything.”
Users who battled recurring mildew for years often report that one small habit made a huge difference:
leaving the washer door cracked open between loads. Just that little bit of airflow allows the drum and gasket to dry,
cutting down the damp environment mildew loves. Pairing that with wiping the gasket dry after the last load of the day
keeps odors from returning.
Families with small children sometimes worry about leaving the door open. A common workaround is:
- Leaving the door open only when adults are present.
- Using the washer’s child-lock feature, if available.
- Leaving the detergent drawer open instead, to add airflow.
“Too much detergent was secretly my problem.”
It’s very common to assume: “More soap = cleaner clothes.” In reality, more soap often means more residue.
People who cut their detergent amount in halfespecially in soft water areasfrequently notice:
- Cleaner-smelling clothes.
- Less slime in the gasket and detergent drawer.
- Reduced need for deep cleaning.
Some even find that very dirty loads come out better with a pre-soak or extra rinse rather than pouring in extra detergent.
“The drain filter was a horror show.”
Many front load owners don’t know their washer even has a drain pump filteruntil the machine starts smelling awful
or throwing error codes. When they finally open the filter, they often find coins, hair ties, lint,
and a swamp-scented sludge that has definitely been part of the odor problem.
Once the filter is cleaned and the area wiped out, not only do odors improve, but the washer may drain better and run more quietly.
Some people now schedule “filter day” once a month, right along with their deep clean cycle.
“Regular small habits beat rare big cleanups.”
A common pattern: someone ignores their washer maintenance for years, then spends an entire afternoon scrubbing, soaking,
and running multiple cycles to get rid of a horrible smell. They vow “never again”but life gets busy, and mildew creeps back in.
People who successfully keep mildew away long-term usually follow a simpler, more realistic routine:
- Wipe the gasket once a week.
- Leave the door and drawer cracked open after laundry day.
- Run one hot cleaning cycle a month.
- Use the correct amount of HE detergent every time.
These small actions take just a few minutes but save you from repeat deep-clean marathons and expensive repairs down the road.
The Bottom Line
Mildew in a front load washer is annoying, but it isn’t a life sentence.
With a good deep cleangasket, drum, detergent drawer, and drain filterplus a few simple daily and monthly habits,
you can keep your machine smelling fresh and your clothes truly clean.
Think of your washer like any other hardworking appliance: it doesn’t just clean your stuff; it also needs a little cleaning itself.
Give it that care, and it will last longer, smell better, and make your laundry routine a lot less frustrating.


