
Table of Contents >> Show >> Hide
- Before You Fry: The Rules That Make or Break Fried Chicken
- Ingredients and Equipment for Perfect Fried Chicken
- How to Fry Chicken, Step-by-Step
- Step 1: Season or brine the chicken
- Step 2: Let the chicken lose the fridge chill
- Step 3: Build a seasoned dredge
- Step 4: Dredge the chicken properly
- Step 5: Rest the coated chicken
- Step 6: Heat the oil to the right temperature
- Step 7: Fry in batches (seriously, in batches)
- Step 8: Check doneness with a thermometer
- Step 9: Drain and rest the chicken
- Step 10: Keep batches warm without ruining the crust
- Common Fried Chicken Problems and How to Fix Them
- Experience-Based Tips From Real Home Kitchens
- Final Thoughts
- SEO Tags
Fried chicken is one of those dishes that looks simple until your kitchen turns into a crime scene of flour, splatter, and disappointment. One batch comes out pale and soggy. The next is gorgeous on the outside and suspiciously pink near the bone. And then there’s the classic heartbreak: a crust so crunchy it deserves a standing ovation… attached to dry chicken.
The good news? Perfect fried chicken is not a secret society. It’s a process. Once you understand the order of operationsseasoning, coating, resting, frying temperature, batch control, and doneness checksyou can make fried chicken that’s crisp, juicy, and deeply flavorful without guessing your way through it.
This guide breaks everything down step by step, using a home-kitchen method that works whether you’re frying in a cast-iron skillet or a heavy pot. You’ll also get practical timing tips, common mistakes to avoid, and a troubleshooting section for the usual “why is my breading falling off?” panic. Let’s make fried chicken that tastes like you know exactly what you’re doing (even if this is your first rodeo).
Before You Fry: The Rules That Make or Break Fried Chicken
1) Start with safe food handling
Before we talk crunch, we need to talk food safety. Raw chicken should be kept cold, handled carefully, and cooked fully. Don’t wash raw chickenthis can spread bacteria around your sink and counters. Use separate cutting boards or thoroughly clean surfaces, and keep raw chicken away from ready-to-eat foods like salad ingredients or bread.
Most importantly, use a thermometer. The safe internal temperature for chicken is 165°F (74°C). That’s not a “looks done” situationthat’s a measured temperature. Fried chicken can brown fast, so color alone is not a reliable indicator.
2) Bring strategy, not chaos
Great fried chicken is all about control. You’re managing three things at once:
- Oil temperature (too low = greasy; too high = burnt crust, undercooked center)
- Piece size (uneven pieces cook unevenly)
- Batching (crowding drops the oil temp and wrecks crispiness)
If you remember nothing else, remember this: fried chicken rewards patience. It’s not a race. It’s a crispy little project.
3) Give yourself room to win
Set up your station before heating the oil. Put your seasoned chicken, dredge, wet mixture (if using one), tray or rack, tongs, thermometer, and draining rack in place. Once the oil is hot, the kitchen moves fast. This is not the moment to start looking for paprika or wondering where your clean sheet pan went.
Ingredients and Equipment for Perfect Fried Chicken
Chicken cuts
You can fry a whole cut-up chicken or use assorted pieces. A mix of thighs, drumsticks, wings, and halved breasts gives variety and cooks more predictably than giant whole breasts. If your chicken breasts are very large, cut them in half crosswise so they finish around the same time as the dark meat.
Basic ingredients
- Chicken: 3 1/2 to 4 pounds, cut into pieces
- Salt: for seasoning or brining
- Buttermilk: for tenderness and flavor (optional but highly recommended)
- Flour: all-purpose works well
- Cornstarch: helps create a lighter, crisper crust
- Seasonings: black pepper, paprika, garlic powder, onion powder, cayenne (optional)
- Neutral oil: peanut or vegetable oil are classic choices
Helpful tools (these are worth it)
- Heavy skillet or Dutch oven: Cast iron is a favorite because it holds heat well
- Deep-fry or clip-on thermometer: For oil temp control
- Instant-read thermometer: For checking chicken doneness
- Wire rack + sheet pan: For resting coated chicken and draining fried chicken
- Tongs: For safe turning and lifting
Could you fry chicken without thermometers? Technically yes. Should you? Only if you enjoy mystery endings.
How to Fry Chicken, Step-by-Step
Step 1: Season or brine the chicken
You have two good options here, and both improve flavor and juiciness:
- Dry brine: Salt the chicken and refrigerate it on a rack for several hours or overnight.
- Buttermilk brine: Soak the chicken in buttermilk with salt (and optional spices) for at least 4 hours, up to overnight.
Why this matters: the salt seasons the meat more deeply and helps it hold moisture. Buttermilk adds tenderness and a little tang, which makes the finished chicken taste richer and more “fried chicken shop” than “Tuesday experiment.”
Example buttermilk marinade: 2 cups buttermilk, 1 1/2 tablespoons kosher salt, 1 teaspoon black pepper, 1 teaspoon paprika, and a pinch of cayenne. Add chicken, cover, and refrigerate.
Step 2: Let the chicken lose the fridge chill
Take the chicken out of the refrigerator before frying so it’s not ice-cold when it hits the oil. Cold chicken drops the oil temperature quickly and can cause uneven cooking. You don’t need to leave it out foreverjust enough to take the chill off while you prep the dredging station.
If you’re working with food safety in mind (and you should be), don’t leave raw chicken sitting out for long periods. Set up efficiently and keep the process moving.
Step 3: Build a seasoned dredge
Plain flour is the fastest route to bland fried chicken. Season the flour generously, because the crust carries a lot of the flavor.
Good starting dredge:
- 3 cups all-purpose flour
- 1/2 to 2/3 cup cornstarch
- 2 tablespoons kosher salt (adjust to your taste and how salty your brine was)
- 1 tablespoon black pepper
- 1 tablespoon paprika
- 1 tablespoon garlic powder
- 1 tablespoon onion powder
- 1/2 teaspoon cayenne (optional)
Crunch boost: Add a little baking powder (about 1 teaspoon) to help the crust fry up a bit lighter and craggier. Another popular trick is to drizzle a few tablespoons of buttermilk into the flour and rub it in with your fingers until you get tiny clumps. Those clumps fry into the bumpy, crunchy bits everyone fights over.
Step 4: Dredge the chicken properly
There are several ways to coat fried chicken, but a reliable method is:
- Remove chicken from the marinade and let excess drip off.
- Coat in seasoned flour.
- Dip briefly in buttermilk (or egg + buttermilk mixture) if you want a thicker crust.
- Coat again in seasoned flour, pressing the flour onto the surface.
Pressing the flour matters. Don’t just toss and hope. You want that coating to hug the chicken like it owes you money.
Step 5: Rest the coated chicken
This is the step many people skip, and then they wonder why the crust floats off in the oil. After dredging, place the coated pieces on a wire rack and let them rest for 15 to 30 minutes (or refrigerate briefly if needed). This helps the coating hydrate and adhere better.
It feels like nothing is happening, but this rest is one of the biggest upgrades for crust stability and texture.
Step 6: Heat the oil to the right temperature
Pour oil into a heavy skillet or pot to about halfway up the chicken pieces (for shallow frying) or deeper if using a pot. Heat the oil and monitor it with a thermometer.
Target temperatures:
- Preheat: around 350°F
- During frying: maintain roughly 300°F to 325°F for many home setups, or 325°F to 350°F depending on depth and batch size
Here’s why the numbers vary: when chicken goes in, the oil temperature drops. A shallow skillet can drop faster than a deep pot. The goal is steady fryingnot one exact magic number on the dial.
If your crust is browning too quickly before the inside is cooked, your oil is too hot. If the chicken looks pale and oily after several minutes, your oil is too cool.
Step 7: Fry in batches (seriously, in batches)
Add the chicken carefully, placing pieces in the oil away from you to minimize splatter. Start skin-side down for skin-on pieces. Do not crowd the pan.
A good rule: leave enough room to turn each piece easily. If the pan is packed, the temperature drops, steam gets trapped, and your crust turns soggy instead of crisp.
Typical batch timing (varies by size):
- Wings: about 8 minutes
- Drumsticks/legs: about 10 minutes
- Thighs and halved breasts: about 12 minutes
- Larger breasts: 15 to 18 minutes
Turn the chicken occasionally so it browns evenly. Don’t fuss with it constantly. Fried chicken likes confidence, not micromanagement.
Step 8: Check doneness with a thermometer
Remove a piece and check the thickest part without touching bone. The safe target is 165°F. That’s your non-negotiable baseline.
Some experienced cooks prefer dark meat (thighs/drumsticks) to go a little higher for tenderness, while still keeping breasts juicy. That’s a texture choicebut safety still starts at 165°F.
If one batch is browning before it’s done inside, lower the heat slightly and keep frying in smaller batches. A thermometer turns this from guesswork into a repeatable method.
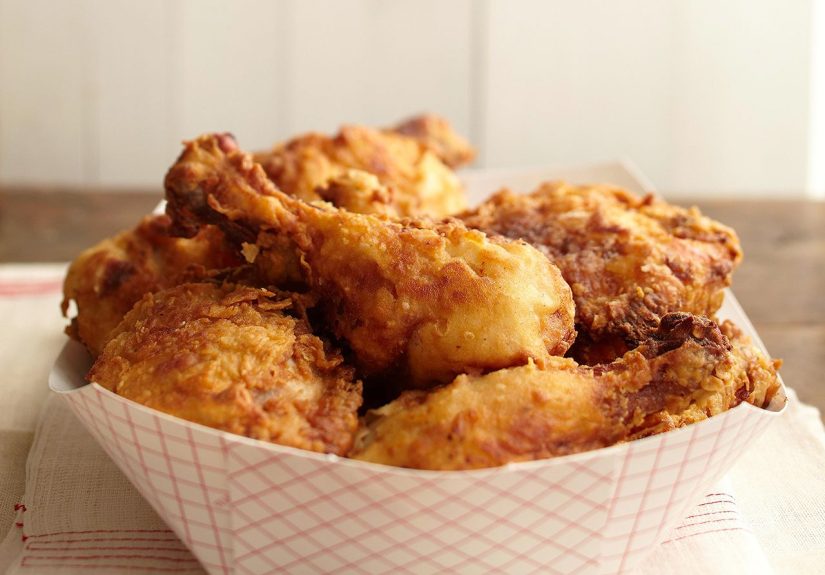
Step 9: Drain and rest the chicken
Transfer fried chicken to a wire rack set over a sheet pan (or paper towels under a rack). A wire rack is better than stacking pieces directly on paper towels because air can circulate and the crust stays crisper.
While the chicken is still hot, sprinkle a little extra salt if needed. Then let it rest a few minutes before serving. That short rest helps the juices settle and saves your mouth from the “lava crust” problem.
Step 10: Keep batches warm without ruining the crust
If you’re frying multiple batches, hold finished chicken in a low oven (around 200°F) on a rack. Don’t cover it tightlysteam softens the crust.
By the time the final batch is done, the first batch will still be hot and crisp, and you will look like a person who definitely planned this on purpose.
Common Fried Chicken Problems and How to Fix Them
Problem: The coating falls off
- Rest the dredged chicken before frying
- Press the flour onto the chicken firmly
- Don’t move the chicken too early in the pan
- Avoid overcrowding (pieces bumping into each other can knock coating loose)
Problem: It’s greasy, not crispy
- Oil temperature is too low
- You crowded the pan
- You drained on a flat plate instead of a rack
Problem: Dark crust, undercooked inside
- Oil temperature is too high
- Pieces are too large (especially breasts)
- Try halving breasts or finishing thicker pieces in the oven
Problem: Bland flavor
- Brine or dry-brine the chicken
- Season the flour more assertively
- Salt the chicken lightly while hot after frying
Problem: Uneven cooking
- Sort pieces by size
- Fry similar cuts together (wings with wings, thighs with thighs)
- Use a thermometer instead of relying on timing alone
Experience-Based Tips From Real Home Kitchens
Fried chicken teaches people fast. The first lesson is usually humility. Many home cooks start with confidence, a giant bowl of flour, and a pan that’s far too crowded. Five minutes later, they’re staring at pale chicken that looks more steamed than fried. It’s a rite of passage. The oil cools down, the coating starts shedding, and suddenly everyone in the kitchen is pretending they “meant to make a rustic version.”
One of the most common experiences is discovering that batch size matters more than expected. A cook might put six pieces into the pan to “save time,” only to spend the next ten minutes fighting oil splatter and soggy crust. The next round, they try three pieces insteadand everything changes. The oil holds steady, the chicken browns evenly, and the crust sets before it has a chance to get greasy. That moment is usually when people realize fried chicken is less about secret spices and more about temperature management.
Another frequent lesson: a thermometer feels optional until the first undercooked piece. Plenty of cooks grew up hearing “just cook it until the juices run clear,” but fried chicken can be deceptive. A drumstick can look beautifully golden and still need more time near the bone. Once someone starts using an instant-read thermometer, the results get much more consistent. The stress level also drops. Instead of cutting into the biggest piece and squinting at it like a detective, they check the temp and move on.
There’s also the “I skipped the rest because I was hungry” experience. This one happens all the time. A cook dredges the chicken and drops it straight into the oil without letting the coating rest. The crust slips, flakes, or separates in patches. The next attempt, they rest the coated chicken on a rack for 20 minutes, and suddenly the breading clings like it has a personal grudge against that chicken. Same ingredients, better process, better outcome.
Many home cooks report that switching from paper towels to a wire rack is a surprisingly big upgrade. Paper towels do absorb extra oil, but they also trap steam under the chicken, which softens the bottom crust. A rack lets air circulate all around the piece, so the crust stays crisp longer. It’s a small change that makes the batch taste more “restaurant-style,” especially if the chicken sits for a few minutes before serving.
Seasoning is another area where experience changes habits. First-time batches are often underseasoned, especially the flour. The chicken itself may be fine, but the crust tastes flat. After one bland batch, cooks usually get braver with salt, pepper, paprika, garlic powder, and a little cayenne. They also learn to taste-test the seasoning logic on a tiny pinch of flour (not the raw chicken, obviously). The best home fried chicken usually comes from that second or third attempt, when the cook stops treating seasoning like a legal risk.
People also learn that different cuts behave differently. Wings and drumsticks cook quickly and forgive a lot. Breasts are the divas. They go from juicy to dry if the heat is too high or the piece is too large. Experienced home cooks often halve big breasts or fry dark and white meat in separate batches. That one habit alone can turn a “pretty good” batch into a truly balanced one.
And finally, there’s the confidence phase. Once a cook nails the basics, fried chicken gets fun. They start tweaking the flour blend with cornstarch for extra crunch, adding a little hot sauce to the buttermilk, or trying a dry brine overnight. They stop panicking over splatter and start listening for the steady sizzle that means the oil is where it should be. That’s when fried chicken stops feeling like a gamble and starts feeling like a repeatable skill.
In other words: if your first batch isn’t perfect, welcome to the club. Fried chicken is one of the most rewarding “learn by doing” recipes in a home kitchen. Every batch teaches you something, and the next one almost always comes out better.
Final Thoughts
If you want perfect fried chicken, the secret is not one miracle ingredientit’s a sequence. Season the chicken well, build a flavorful coating, rest the dredge, control the oil temperature, fry in batches, and check doneness with a thermometer. Do those things consistently, and you’ll get the crispy crust and juicy meat people actually remember.
Once you’ve got the base method down, you can customize endlessly: spicy fried chicken, extra-peppery crust, pickle-brined chicken, sandwich cutlets, or classic Sunday skillet pieces. But the core process stays the same, and that’s the beauty of it.
Now go make a batch. Just maybe wear an apron. Fried chicken has excellent taste and terrible aim.


