
Table of Contents >> Show >> Hide
- What You’ll Learn
- Why Toothbrushes Get Gross (and Why That’s Not Automatically Scary)
- The 5 Rules That Keep a Toothbrush Clean
- Daily Toothbrush Cleaning: The Simple Routine That Works
- Optional Deep Cleaning: When You Want Extra Peace of Mind
- What NOT to Do (a.k.a. Toothbrush Horror Movies)
- How to Clean a Toothbrush Holder (Because It’s Often Dirtier Than the Toilet)
- When to Replace Your Toothbrush (and Why It Matters)
- Special Situations: How to Keep Toothbrushes Clean in Real Life
- FAQs
- Real-Life Experiences: What Actually Works in Busy Bathrooms (Extra ~)
- Conclusion
Your toothbrush is supposed to fight plaque, not join a bacteria book club. The good news: keeping it clean
doesn’t require a lab coat, a UV spaceship, or boiling water like you’re cooking toothbrush soup.
With a few simple habits, you can clean your toothbrush properly and keep it fresh between brushings.
Why Toothbrushes Get Gross (and Why That’s Not Automatically Scary)
A toothbrush meets three things bacteria love: moisture, tiny nooks between bristles, and a steady schedule.
After you brush, the bristles can hold leftover toothpaste, food particles, and microbes from your mouth.
That sounds dramatic, but here’s the plot twist: there’s no solid evidence that the “normal” bacteria
living on a toothbrush routinely cause health problems in healthy people.
The bigger issue is letting moisture linger and inviting the wrong germs to set up camp
(think: moldy holders, closed travel cases, or brushes jammed together like bristly sardines). So the goal isn’t
to “sterilize” your toothbrush into a pristine museum artifact. The goal is to keep it clean, dry, and used the way
it was designed: effectively and safely.
The 5 Rules That Keep a Toothbrush Clean
- Rinse thoroughly after every use to remove toothpaste and debris.
- Shake off water and store upright so it can air-dry.
- Don’t trap moisture (closed containers + wet bristles = microbial spa day).
- Keep brushes separated so bristles don’t touch and swap germs.
- Replace regularlyworn bristles clean poorly, even if the brush “looks fine-ish.”
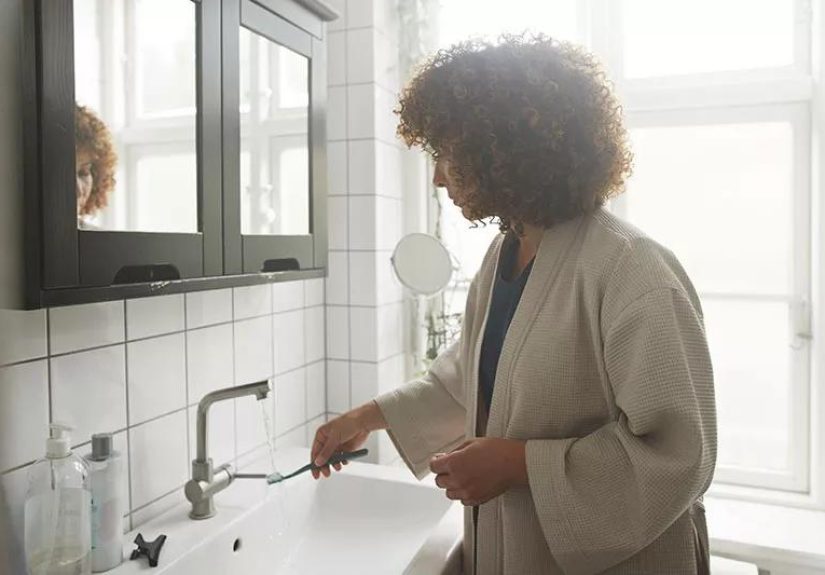
Daily Toothbrush Cleaning: The Simple Routine That Works
This is the basic, dentist-approved way to clean a toothbrush and keep it clean. It takes about the same time as
scrolling one meme… which you were going to do anyway.
Step-by-step: after every brushing
-
Rinse the bristles thoroughly under tap water.
Use your thumb to gently rub the bristles as water runs through themthis helps dislodge paste and gunk. - Shake off excess water (yes, like a tiny toothbrush dog shaking off a bath).
-
Store upright in open air so it can dry completely between uses.
A holder is fineas long as it’s clean and lets air circulate. -
Keep it away from bathroom chaos:
Don’t toss it in a drawer while wet. Don’t cap it wet. And if your toothbrush lives near a toilet,
close the lid before flushing and store the brush as far from the toilet as reasonably possible. -
Don’t let brushes touch if multiple people share a sink area.
Contact between bristles is an easy way to share germs unintentionally.
What “good storage” looks like
- Upright, open to air, and able to dry fast
- Not shoved into a cup that stays damp or grimy
- Not covered until fully dry (and ideally not routinely covered at all)
- Not touching other toothbrushes
Optional Deep Cleaning: When You Want Extra Peace of Mind
Most people don’t need to sanitize a toothbrush beyond rinsing and air-drying. Still, some situations call for
a little extra effortlike if someone in the home is immunocompromised, you’ve had a recent oral infection, your brush
accidentally fell into a questionable place (we won’t ask), or you simply want a “reset.”
Pick one method (don’t mix, don’t overdo it)
-
3% hydrogen peroxide soak (short and simple)
Pour a small amount of 3% hydrogen peroxide (the common pharmacy kind) into a clean cup.
Soak the bristles for about 5–10 minutes. Then rinse thoroughly with water and let the brush air-dry upright.
Tip: Use fresh solution each time; don’t “save it for later.” -
Antibacterial mouthwash soak
Place the bristles in a small amount of mouthwash for about 2 minutes, then rinse well and air-dry.
Note: frequent soaking may wear out bristles faster, so treat this as occasional, not a daily ritual. -
Denture-cleaning tablet soak
If you have denture tablets, dissolve one as directed and soak the bristles for about 1–5 minutes
(follow tablet instructions), then rinse thoroughly and air-dry.
How often should you deep clean?
For most households, occasional is enoughthink weekly at most, or only when there’s a reason.
If your brush is visibly funky (odor, discoloration, buildup), it may be more sensible to replace it rather than
“rescue” it.
What NOT to Do (a.k.a. Toothbrush Horror Movies)
- Don’t microwave your toothbrush. Heat can warp plastic and damage bristles.
- Don’t run your toothbrush through a dishwasher unless the manufacturer specifically says it’s safe (many do not).
- Don’t boil it. High heat can deform the brush and isn’t necessary for routine hygiene.
- Don’t use bleach or harsh household disinfectants on a toothbrush you’ll put in your mouth.
- Don’t store it wet in a closed case (especially overnight). That’s how you invite mold and unwanted bacteria.
- Don’t share toothbrushes. Ever. Not even “just once.” Not even with someone you like.
How to Clean a Toothbrush Holder (Because It’s Often Dirtier Than the Toilet)
Toothbrush holders can collect water drips, toothpaste sludge, and whatever floats around a bathroom. Some household germ studies have found
toothbrush holders are among the germiest bathroom itemsmostly because they’re damp and rarely cleaned.
Easy holder-cleaning routine (1–2 times per week)
- Empty it (yes, actually remove the brushes).
- Wash with hot soapy water and scrub crevices. Toothpaste likes to hide like it pays rent.
- Rinse and dry completely. Drying matters as much as washing.
- If it’s dishwasher-safe, run it through a sanitizing cycle instead (check manufacturer guidance).
Also: wipe the sink area where the holder sits. A clean holder placed on a grimy puddle is like putting clean socks on a muddy floor.
When to Replace Your Toothbrush (and Why It Matters)
A toothbrush isn’t a family heirloom. Bristles wear down, splay outward, and become less effective at removing plaque.
Most dental guidance recommends replacing a toothbrush (or electric brush head) about every 3–4 months,
or sooner if the bristles are frayed, matted, or permanently bent.
Replace your toothbrush sooner if:
- The bristles are splayed beyond the base or feel unusually soft
- It has visible buildup, discoloration, or a persistent odor
- You dropped it somewhere that made you whisper, “No. No. No.”
- It was shared (replace itcleaning won’t undo the swap)
Should you replace your toothbrush after being sick?
You’ll hear different advice here. Some dental professionals recommend replacing your brush after illnesses (especially after strep throat,
oral infections, or when a child has been sick), largely as a simple precaution. Other guidance notes that most healthy people
aren’t likely to reinfect themselves from their toothbrush.
A practical, low-stress approach:
- If you’re immunocompromised, have frequent infections, or had a significant throat/oral infection: replacing the brush is sensible.
- If you’re generally healthy: replacing is optional, but it’s a cheap peace-of-mind moveespecially if your brush is already near the 3-month mark.
Special Situations: How to Keep Toothbrushes Clean in Real Life
Shared bathrooms (roommates, dorms, busy families)
- Separate the bristles. Give each brush its own space. Touching bristles = cross-contamination.
- Label brushes if multiple people use similar handles (morning brain is not a reliable witness).
- Use an open-air holder, not a cup that traps water at the bottom.
- Close the toilet lid before flushing and keep brushes as far away as practical.
Travel (where toothbrushes go to get suspicious)
- Let it dry before you pack it whenever possible. Even 10–15 minutes of air time helps.
- Use a ventilated case if you cansolid sealed tubes hold moisture.
- When you arrive, remove it from the case and let it dry upright.
- Consider a spare brush for longer trips, especially if drying time is limited.
Electric toothbrushes
- Detach the head (if removable) and rinse both the head and the connection point.
- Shake and air-dry the head upright.
- Wipe the handle occasionally with a damp cloth, especially around buttons and where toothpaste collects.
- Replace heads about every 3 months (or sooner if worn).
Kids’ toothbrushes
- Adult supervision helps with rinsing and storage (kids are creative… and not always hygienic).
- Replace after illness is a common pediatric dentistry recommendation, especially after colds or strep.
- Watch for “chewed bristles.” If the brush looks like it survived a tiny dinosaur attack, replace it.
FAQs
- Is rinsing with hot water really enough?
-
For most people, yesespecially if you rinse thoroughly and let the brush air-dry completely. Drying is a major factor
in slowing microbial growth. - Should I keep my toothbrush in a cap or cover?
-
Not routinely. Covers can trap moisture and encourage unwanted growth. If you must use a cover (like for travel),
let the brush dry first and take it out to air-dry as soon as you can. - Can I sanitize a toothbrush with vinegar?
-
You’ll see it suggested online, but it’s not a go-to recommendation from major dental organizations for routine toothbrush care.
If you want an occasional deep clean, stick with simpler, better-supported options like a brief hydrogen peroxide or mouthwash soak,
followed by thorough rinsing and air-drying. - What if my toothbrush fell on the bathroom floor?
-
If it fell bristles-down, landed in a wet area, or picked up visible grime, replacing it is often the simplest choice.
If you keep it, do a deep clean (one method only), rinse thoroughly, and let it fully dry. Then seriously consider a new brush soon anyway. - Do UV toothbrush sanitizers work?
-
Some studies suggest UV devices can reduce microbes, but they’re not necessary for most people. If you use one, follow the manufacturer’s instructions
and still rinse and air-dry your brush, because storage habits matter more than gadgets. - How do I know my toothbrush is “too old” if it looks okay?
-
Bristles can wear down in ways you don’t notice at a glance. A good rule is every 3–4 months, sooner if bristles are splayed or soft.
If you brush hard, you may need to replace more often.
Real-Life Experiences: What Actually Works in Busy Bathrooms (Extra ~)
People usually don’t set out to create a “gross toothbrush situation.” It happens the way most chaos happens: slowly, quietly,
and during weekday mornings when everyone is late. The most common story goes like this: the toothbrush starts out stored upright,
bristles proudly pointing at the ceiling like it’s winning at hygiene. Then someone buys a cute little cap. Then the cap stays on
because it looks tidy. Then the brush never fully dries. Then the bristles smell faintly like a damp towel that forgot it had dreams.
In shared bathroomsthink dorms, roommates, or a family of fourbrushes often end up clumped together in one cup. It’s convenient,
sure, but bristles touching bristles is basically a handshake no one asked for. A small change (separating brushes by even a couple inches,
or using a holder with individual slots) tends to solve most of the “why does my toothbrush look sad?” problem. People are often surprised
how quickly the brush looks and smells cleaner when it’s allowed to dry properly.
Another classic experience: travel. A toothbrush gets used, capped immediately, tossed into a toiletry bag, and then spends eight hours
in a dark, humid pocket universe next to a shampoo bottle. By the time it comes out, the bristles have the vibe of a forgotten sponge.
The travelers who feel most “on top of it” aren’t the ones doing complicated sanitizing routines; they’re the ones who do one simple thing:
as soon as they arrive, they take the brush out of the case and let it dry in open air. Some even pack a small ventilated case or a spare brush
so they’re not stuck reusing a perpetually damp one.
Families with kids often run into a different problem: toothbrushes that have been “sampled” like chew toys. The bristles flare out,
the brush frays early, and cleaning power drops fast. The households that keep things easiest tend to follow a predictable rhythm:
replace kid brushes more often, rinse and store upright, and clean the holder weekly. It’s boring in the best waybecause boring routines
are how you avoid exciting problems.
And then there’s the toothbrush holder itself. People clean their sinks, they wipe counters, they scrub toilets… but the holder sits there
quietly collecting drips like it’s building a tiny swamp. Once someone starts washing the holder once a week (hot soapy water, rinse, dry),
the whole sink area smells fresher and looks cleaner. The toothbrush benefits, too, because it’s not living above a puddle of old toothpaste.
The overall pattern is consistent: the “winning” bathrooms aren’t the ones with the fanciest products. They’re the ones where toothbrushes are rinsed,
allowed to dry, stored with a little breathing room, and replaced before they look like they’ve been through a breakup.
Conclusion
If you want the simplest path to a clean toothbrush: rinse thoroughly, shake off water, store upright in open air, keep brushes from touching,
and clean the holder regularly. Optional deep cleaning can help in special situations, but for most people, drying and smart storage do the heavy lifting.
And when bristles fray or months pass, replacing the brush is often the most effective “cleaning” move of all.


