
Table of Contents >> Show >> Hide
- Step 1: Know What Kind of Stove Grates You Have
- Step 2: Do a Quick Daily or Weekly Clean (Light Messes)
- Step 3: Deep-Clean Method #1 – Hot, Soapy Soak
- Step 4: Deep-Clean Method #2 – Baking Soda (and Friends)
- Step 5: Deep-Clean Method #3 – Ammonia Overnight (for Heavy Buildup)
- Step 6: Using Commercial Degreasers Safely
- Step 7: Special Care for Cast-Iron Stove Grates
- How Often Should You Clean Stove Grates?
- Common Stove Grate Cleaning Mistakes to Avoid
- Real-Life Experiences: What Actually Works When Cleaning Stove Grates
If your gas stove grates look like they’ve survived a small kitchen explosion, you’re not alone. Between bubbling pasta water, runaway cheese, and the occasional “oops” moment with tomato sauce, those sturdy grates take a beating. The good news? With the right methods (and a little patience), you can get them looking surprisingly close to newwithout destroying the finish or your will to live.
This guide walks you through how to clean stove grates step by step, from quick daily wipe-downs to heavy-duty deep cleaning. We’ll cover different grate materials, safe cleaning products, how to deal with rust, and what not to do if you want your grates to last.
Step 1: Know What Kind of Stove Grates You Have
Before you start scrubbing, it’s important to know what you’re cleaning. Different stove grates need different levels of care.
Cast-iron stove grates
Many gas ranges use heavy cast-iron grates because they’re tough and hold heat well. Some are bare cast iron that’s seasoned (like a skillet), while others are coated with enamel. Bare cast iron is more sensitive to soaking and harsh chemicals and can rust if you leave it wet. Enamel-coated cast iron is a bit more forgiving but can still chip or dull if you use abrasive tools.
Porcelain or enamel-coated grates
Porcelain or enamel-coated grates are usually dark and glossy. They’re often labeled “dishwasher safe” in the owner’s manual, and many brands say you can wash them in the dishwasher or soak them in warm, soapy water. However, using steel wool or very harsh abrasives can scratch the coating and make it more prone to staining.
When in doubt, check the manual
Appliance makers like Whirlpool, GE, and Frigidaire provide specific instructions for their gratessome even allow you to clean certain models in the self-cleaning oven, while others strongly say “do not.” Always check your manual or brand’s support page for any special rules before you bring out the heavy-duty cleaners.
Step 2: Do a Quick Daily or Weekly Clean (Light Messes)
You can avoid scary, baked-on grime by doing occasional quick cleans. Think of this as the “maintenance mode” for your stove grates.
- Turn everything off and let it cool. Make sure the burners are completely off and the grates are cool to the touch before you start.
- Remove dry crumbs and loose debris. Shake or tap the grates over the trash, then use a paper towel or small brush to knock off anything loose.
- Wipe with warm, soapy water. Mix a few drops of dish soap with warm water. Brands and cleaning experts consistently recommend mild dish soap as a first line of defense.
- Use a soft sponge or cloth. Wipe down the grates, focusing on greasy spots. For enamel-coated grates, use a non-abrasive sponge to protect the finish.
- Rinse and dry thoroughly. Rinse with clean water and dry right away with a towel to help prevent rust on cast iron.
Done regularly, this quick routine can prevent the kind of build-up that requires a full-on cleaning saga later.
Step 3: Deep-Clean Method #1 – Hot, Soapy Soak
If you’re facing a layer of grease and light burnt-on food, a simple soak in hot, soapy water can work wondersespecially for coated grates.
How to soak your stove grates
- Fill a sink or tub with very hot water. Add a generous squirt of dish soap. Many appliance brands recommend soaking grates in hot, soapy water for at least 20 minutes.
- Submerge the grates. Place the grates in the water, making sure they’re fully covered. Important: Don’t soak bare (uncoated) cast-iron grates unless your manufacturer specifically says it’s okay.
- Let them soak 20–30 minutes (or longer). Stubborn grease may need more time, but start with 20–30 minutes.
- Scrub gently. Use a nylon scrub brush or non-scratch pad to loosen softened gunk. Pay extra attention to corners and edges where grease likes to hide.
- Rinse and dry completely. Rinse with clean water and dry thoroughly with a towelespecially for cast iron, which should not air-dry.
For porcelain or enamel-coated grates, many manufacturers say you can also run them through the dishwasher, then lightly oil any unfinished spots to prevent rust.
Step 4: Deep-Clean Method #2 – Baking Soda (and Friends)
For tougher messes, baking soda is the star of the “natural cleaning” show. It’s mildly abrasive, absorbs grease, and plays well with other pantry items like vinegar and dish soap.
Baking soda paste
- Make a paste. Mix baking soda with a small amount of water (roughly 3 parts baking soda to 1 part water) until it forms a spreadable paste.
- Spread it on the grates. Coat greasy or stained areas generously. You can use a spoon or gloved hands to spread the paste.
- Let it sit 20–30 minutes. This gives the baking soda time to break down grease and stuck-on food.
- Scrub gently. Use a non-scratch pad or brush to work the paste into tough spots.
- Rinse, inspect, and repeat if needed. Rinse thoroughly and dry. Reapply on especially stubborn spots.
Baking soda + vinegar combo
Some people like to add white vinegar to the mix. You can sprinkle baking soda on the grates, then spray white vinegar over it and let the fizz help loosen grime. Kitchen pros recommend letting it sit for about 20 minutes before scrubbing and rinsing.
Baking soda for rust spots
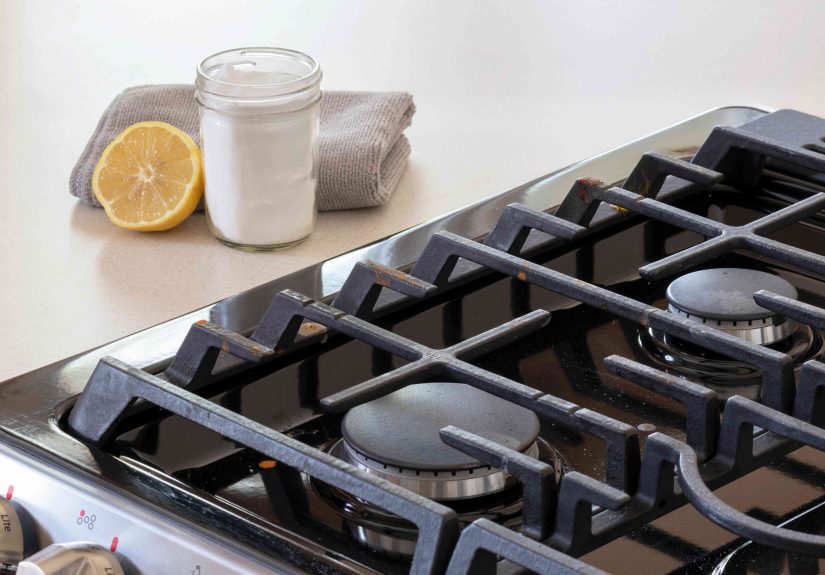
If cast-iron grates develop small rust spots, you can use a paste made with baking soda and a bit of lemon juice, let it sit, then scrub and rinse. After rust removal, dry and reseason the grates with a thin coat of oil baked in the oven.
Step 5: Deep-Clean Method #3 – Ammonia Overnight (for Heavy Buildup)
When grease has turned into a black, crusty layer, ammonia can help dissolve it without endless scrubbingif you handle it safely.
How the ammonia-in-a-bag method works
- Work in a well-ventilated area. Ammonia fumes are strongopen windows, use a fan, and avoid mixing with any other cleaners.
- Place grates in a sturdy plastic bag or covered container. GE Appliances, for example, suggests sealing grates with a small amount of ammonia to loosen baked-on grime.
- Add about 1/4 cup of ammonia. You don’t need to submerge the grates; the fumes do the heavy lifting.
- Seal and let sit for several hours or overnight. This gives the ammonia time to soften old grease and carbon.
- Rinse and scrub. Wearing gloves, remove the grates, rinse well, and scrub with a non-scratch pad to remove loosened residue.
- Rinse thoroughly and dry. Make sure there’s no ammonia smell left before using the stove.
If you prefer to skip strong chemicals, you can generally achieve similar results with repeated baking soda treatments, hot soaks, and a bit more elbow greasebut ammonia is undeniably effective for decades-old buildup.
Step 6: Using Commercial Degreasers Safely
For seriously greasy grates, a store-bought degreaser can speed things up. Products designed for stove tops, ovens, and grills use stronger surfactants to break down baked-on oils.
- Choose the right product. Look for cleaners labeled for stoves, ovens, or grills. Brands that sell heavy-duty stove and oven cleaners or citrus-based degreasers are often recommended by cleaning pros and homeowners alike.
- Test a small area first. On enamel or painted surfaces, test the product on a hidden area to make sure it doesn’t dull or discolor the finish.
- Follow dwell time instructions. Many products work best if you spray, wait 10–15 minutes, then wipe and rinse thoroughly.
- Never mix chemicals. Don’t combine degreasers with ammonia, bleach, or other cleaners.
Commercial degreasers are great when natural methods aren’t cutting it, but they must always be used according to label directions.
Step 7: Special Care for Cast-Iron Stove Grates
Cast-iron grates can last for years if you treat them a bit like cast-iron cookware.
Dry immediately
After cleaning with mild soap and water, dry cast-iron grates right away with an absorbent towel. Leaving water sitting on cast iron is one of the fastest paths to rust.
Lightly oil and bake (optional seasoning)
Some manufacturers and cleaning experts recommend applying a thin coat of neutral cooking oil to clean, dry cast-iron grates and baking them in the oven (around 350–400°F for 30–60 minutes) to restore a protective layer. This can help prevent rust and make future cleaning easier.
Dealing with rust
If rust does appear, you can scour it off with warm, soapy water and a scrubby pad, or use a baking soda paste and a stiff brush. Once the rust is removed, dry, oil, and bake the grates to reseal the surface.
How Often Should You Clean Stove Grates?
There’s no single schedule that fits everyoneif you cook every day, your grates will get dirty faster than someone who mostly orders takeout. But here are some general guidelines based on cleaning experts:
- Daily or every use: Wipe spills from the stovetop and grates once they’re cool.
- Weekly (in busy kitchens): Do a hot, soapy soak or baking soda clean on high-use grates to stay ahead of buildup.
- Monthly (for light use): A deeper clean is usually enough if you don’t cook that often.
- As-needed: Anytime there’s a big boil-over or spill, spot-clean that day so it doesn’t bake on later.
Common Stove Grate Cleaning Mistakes to Avoid
- Using steel wool on enamel. Steel wool or heavy-duty abrasives can scratch porcelain or enamel coatings, making them harder to clean and more prone to rust underneath.
- Soaking bare cast iron for hours. Extended soaking can invite rust. If you must soak, keep it brief and dry thoroughly.
- Mixing cleaning chemicals. Never mix bleach, ammonia, or multiple strong cleanersit can create dangerous fumes.
- Skipping the rinse step. Always rinse away cleaners fully so residue doesn’t burn off and create odors the next time you cook.
- Putting “non-dishwasher-safe” grates in the dishwasher. If your manual says no dishwasher, believe it. High heat and strong detergent can damage the finish.
Real-Life Experiences: What Actually Works When Cleaning Stove Grates
Cleaning stove grates isn’t just about techniquesit’s about what fits your real life. Here are some lessons, routines, and “wish I’d known earlier” moments that many home cooks discover the hard way.
The “I’ll clean it later” trap
One of the most common experiences is letting spills sit “just this once” until tomorrow… and then tomorrow becomes next week. By that point, the splatter from last Sunday’s lasagna has officially fused with your grate and entered a new geological era. People who keep their stoves presentable almost always have one habit in common: they deal with at least the worst of the mess within 24 hours.
A practical approach: after dinner, once the stove is cool, remove the grates, knock off loose crumbs, and give them a quick soapy wipe. This doesn’t have to be a deep cleanthink of it like brushing your teeth. It takes two to three minutes and saves you from a marathon cleaning session later.
Finding your “default” method
Most people eventually land on one go-to method that works for 80–90% of their messes. For some, that’s a hot, soapy soak and a nylon brush. For others, it’s a baking soda paste. If you’re someone who likes low-odor, low-chemical solutions, the baking soda route will probably feel more comfortable. If you’d rather spend less time scrubbing and don’t mind stronger products, a well-chosen degreaser can be a game changer.
It can be helpful to keep a “cleaning kit” under the sink specifically for the stove: dish soap, a container of baking soda, white vinegar, a non-scratch scrub pad, and a small stiff brush. When everything is in one place, it’s much easier to actually do the quick clean you promised yourself you would do.
What people say about ammonia (and why it’s not for everyone)
Talk to anyone who has inherited a truly grimy stove, and you’ll often hear about the ammonia-in-a-bag trick. The feedback is usually the same: “It works, but wow, the smell.” If you live in a small apartment with limited ventilation, or if anyone in the home is sensitive to strong odors, this method can feel like too much.
Many home cooks compromise by saving ammonia for rare, “emergency” deep cleanslike moving into a place with a neglected stove or dealing with years of baked-on grease. The rest of the time, they lean on baking soda, dish soap, and the occasional commercial degreaser that has a milder scent.
The cast-iron surprise: rust and seasoning
New owners of gas ranges with cast-iron grates are often surprised the first time they see a bit of rust. It usually happens after grates have been left wet overnight or after a long soak. The good news is that minor rust spots are rarely the end of the world. A firm scrub, thorough drying, and a light oil-and-bake session can usually bring the grates back.
Some people even treat their stove grates like cast-iron pans: once or twice a year, they clean them thoroughly, rub them with a small amount of oil, and bake them in the oven to refresh the protective layer. The difference in how easily grease wipes off afterwards can be surprisingly noticeable.
Living with roommates or family: setting expectations
In shared kitchens, stove grates can become a major pain point. One person is meticulous, another is “allergic” to cleaning, and suddenly resentment is baked on thicker than the food splatter. A simple solution that works in many households is a rotating “stove duty” schedulewhoever is on duty that week does a light wipe every couple of days and a deeper clean if there’s a big spill.
Another trick is visibility: leaving a small cleaning caddy on the counter near the stove for a while. When dish soap, a sponge, and a towel are right there, people are more likely to do a quick swipe after cooking. The easier you make it, the less nagging is required.
Finding your “good enough” line
Not every grate needs to look brand new to be clean and safe. A little discoloration on cast iron is normal, and some light staining on enamel doesn’t affect performance. Trying to scrub every spot until it looks factory-fresh can burn you out. Most people eventually decide on a standard that feels realistic: remove the greasy film, eliminate burnt-on chunks, deal with rust, and keep odors down. If the grates look clean at a quick glance and don’t smoke or smell when you cook, that’s usually a solid win.
In short, the best stove grate cleaning routine is the one you’ll actually stick with. Start with simple daily or weekly habits, keep the right tools handy, and reserve the heavy-duty methods for when you really need them. Your future selfstanding over a clean stove instead of a sticky disasterwill thank you.


